Pin It

Showing posts with label 2022 Sale-a-Bration. Show all posts

Friday, August 26, 2022

Hippest Hippos, Art Gallery, Caroling Mice, Birthday Card, Stampin' Up!

I had a lot of fun making this card. I should have had more colors in it but it is what it is! I love playing with the "Hippest Hippos" set, there's three adorable hippos in it.

The base of my card is a folded half-sheet of Basic White card stock. I cut a 3-3/4" x 5" piece of Basic White card stock for the top layer.

The circles are Basic White and Smoky Slate and were die cut using the largest stitched circle die from the "Stylish Circles" die set. They are both the same size, I just offset them a bit. I cut the circles in half and them taped them together.

The ribbon tag is also from the "Stylish Circles" die set. I used the largest one and then I cut a 3/4" Basic White strip for inside that piece since there were no dies that were that size. I set the stitched one on top of the Basic White strip and traced the end so they would match. I fussy cut the end on the Basic White piece. 

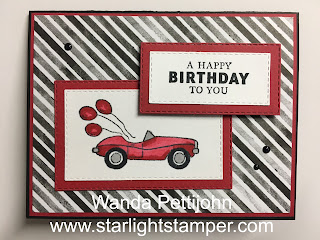
The words are from the "Art Gallery" set and were stamped on a 1/2" x 3" piece of Smoky Slate card stock using black Memento ink. I snipped the right end so it had that ribbon end look.

The hippo is from the "Hippest Hippos" set and were stamped using black Memento ink. Then I colored it in using my light Smoky Slate and Granite Gray Blends pens. I also used dark Granny Apple Green and Poppy Parade for the flower. The nostrils were colored in using the light Flirty Flamingo and the eye was colored in using the dark Balmy Blue pen.

The dots in the background are from the "Caroling Mice" set. I stamped them and then colored them in using my Smoky Slate marker. I didn't have a splat or splash stamp image so this one had to work and it did!

Once the dots were colored I assembled the card. I took a 1/4" strip of Smoky Slate card stock and taped it to the back of the half circles at the top. I trimmed the ends to be flush with the half circles.

I tied a piece of white Baker's Twine around the half-circles. I wrapped it twice and then tied a bow to the left.

The circles were then taped down. The two tone ribbon piece was then added. The words were place on top of that piece, lining it up on the left side. Then the hippo was put in place. I used Dimensionals on the upper part and tape on the bottom.  And that was it, the card was done. 

This card was fun, quick, and easy to make. But I think I should have stamped the dots on the background using maybe Poppy Parade or even Flirty Flamingo. Something to pull the colors together. But I still like it the way it is. I think I like the layout more than anything.

Thank you SO much for taking your time to stop by and see today's birthday card,
Wanda

Wednesday, August 24, 2022

Hippest Hippos, Peaceful Moments, Thank You Card, Stampin' Up!

I still had my "Hippest Hippos" set sitting out so I thought I'd play with it again today. I found this card on the internet. You can see the original here. I pretty much copied it exact, except for the words.

The base of the card is a folded half-sheet of Basic White card stock. This card opens at the bottom and the fold is at the top.

I cut a 1" x 5-1/2" piece of Designer Series Paper (DSP) from the Brights Collection 6" x 6" stack. There's a lot of papers in those stacks in each color group. I taped the DSP to the bottom of the card.

Next I stamped the hippo from the "Hippest Hippos" set and die cut it with the matching die. Then I colored it in using my Blends pens. I used light Gray Granit for the face, belly and toe nails. The head and body were colored in using the light Smoky Slate. The nostrils were done with a touch of light Flirty Flamingo. The flower is light Poppy Parade, and the leaf and stem are light Granny Apple Green. I added Dimensionals to the back and set it aside.

I die cut a 2-1/8" Basic White circle from the "Layering Circles" die set. Then I die cut a 2-7/16" scalloped circle from the same set using Pacific Point card stock. I took the Basic White circle and my blending brush and I scrubbed on some Gray Granite ink. I think something in the blue field would have been prettier.  The two circles were then taped together and Dimensionals were added to the back. I placed the circles on top of the card to see how much room I had for the words. The words are from the "Peaceful Moments" set and were stamped using black Memento ink.

Next the circle was set in place on the the front and then the hippo was added to the circle. I did add a little "Wink of Stella" to the flower but it didn't show up on the photo, but trust me, it's there and it's pretty! And that was it.

This was a fun, quick, and easy card to make. This would also make a great Birthday, Mother's Day, Get Well, or Thinking of You card.

I thank you SO very much for taking your time to stop by and see today's thank you card,
Wanda

Tuesday, August 23, 2022

Hippest Hippos, Birthday Card, Stampin' Up!

In just a few short days the "Hippest Hippos" set is going to be retiring. It was a very fun Sale-a-Bration set. I've played with it quite a bit and have had a lot of fun with it. I found this card on Pinterest and thought I'd give it a try with the materials I had. You can see the original card here

The base of the card is a folded half-sheet of Pacific Point card stock.  It picked up the splotches of Pacific Point in the Designer Series Paper (DSP), well, it was supposed to. To me it looks out of place I should have just stuck with Night of Navy!

I cut a piece of DSP from the "Pretty Prints" 12" x 12" package. It measured 5-1/2" x 2-1/8".  I made it 1/8" wider than I needed to but I wanted my Basic White piece to lay on top and not be butted up against the edge. I taped this to the right side of the card.

Then I cut a piece of Basic White card stock that measured 5-1/2" x 2".  I set it aside. 

The hippo is from the "Hippest Hippos" set and was stamped using black Memento ink. I colored him in using my Blends pens. I used light Gray Granite for the face, belly, and toenails. Then I used light Smoky Slate for the body and head. A little light Flirty Flamingo was dues for the nose and mouth. And light Balmy Blue was used for the eyes. He was die cut using the matching dies in the bundle. I added Dimensionals to the back and set him aside.

I still had my balloon punch so I punched out a balloon using the same DSP as is on the right side of the card. I added a couple of Dimensionals behind it and set it aside.

The hippo and balloon were set on top of the Basic White strip so I could see where to scrub on some Balmy Blue ink with my blending brush. Then I set the two pieces back on top of the card stock to see where the words would go. 

The words are from the "Peaceful Moments" set. It's such a fun word set and the fonts in it are wonderful. I stamped the words using Nigh of Navy ink. I taped the strip to the front of the card about 1/4" from the folded edge.

Now I was ready to set the hippo and balloon in place. After they were on the strip I drew in the lines for the balloon string. A 4" x 5-1/4" piece of Basic White card stock was added to the inside of the card and the card was done.

This was a very fun card to make. I just love these adorable hippos and will be sad to see them go. But then maybe I can play with some of the other sets I bought and maybe even start our Christmas cards!!  Maybe!!! LOL  I think this could be a card for adults and kids alike!

Thank you SO very much for taking your time to stop by and see today's birthday card,
Wanda

Thursday, August 04, 2022

Hippest Hippos, Lovely & Lasting, Thinking of You Card, Stampin' Up!

I found today's card on Pinterest. I thought it was just too cute to pass up. You can see the original card here.  

The base of the card is a folded half-sheet of Basic White card stock. This card opens on the bottom and the fold is on the top.

I die cut the Mango Melody scalloped circle using the die from the "Layering Circles" set. I also cut a Basic White circle that was just a little bit smaller than the scalloped circle. I textured that circle using the "Pretty Flowers" embossing folder. I didn't have the same folder that was used on the original card but I just figured as long as the background had texture it would look just fine, and it does. Before I taped those two circles together, I die cut the flowers and star like flower from the inside area of that scalloped circle. Or you can use the scrap pieces around the edges where the circle was die cut from. The circles were glued together. I used glue because of the texture doesn't always make great contact and glue does! Then I taped that circle to the center of the front of the card.

I stamped the hippo from the "Hippest Hippos" set and I sued the matching die to cut it out. I colored it in using markers and a Blender Pen. I used Melon Mambo, Granny Apple Green, Smoky Slate, and Blushing Bride. I did color straight from the Melon Mambo and Granny Apple Green markers on the flower and leaf. I added Dimensionals to the back of the hippo and I set it aside.

The words are from the "Lovely & Lasting" set and were stamped using black Memento ink. I die cut them using the third smallest stitched circle die from the "Stylish Dies" set. Dimensionals were added to the back. I set the circle and the hippo on the large circle for placement. When I saw where they looked the best, I removed the backing from the Dimensionals and set them in place. I added a tiny Melon Mambo heart to the word piece. 

I added dots of liquid glue to affix the die cut Melon Mambo and Mango Melody flowers. I colored in some small crystal rhinestones and added them to the flowers and a couple outside the flowered area.

This was a fun card to make. It kind of has a 60's look to it! This card can be used for several other occasions as well. 

Thank you SO very much for taking your time to stop by and see today's thinking of you card,
Wanda


Friday, July 15, 2022

Wonderful World, Pansy Patch, Birthday Card, Stampin' Up! Fall Sale-a-Bration

Today's card is a pretty simple one. It was easy and fun to make too.

The base of my card is a folded half-sheet of Basic White card stock. I cut a 4" x 5-1/4" piece of Melon Mambo card stock for the layer. On top of that is a 3-3/4" x 5" piece of Designer Series Paper (DSP) from the "Wonderful World" 12" x 12" package. I taped it to the Melon Mambo piece. Then that was taped to the front of the card. 

Next I took a 5" x 1" strip of Basic White card stock and textured it using the "Pretty Flowers" embossing folder. I cut a 5" x 1-1/4" piece of Melon Mambo card stock for the layer. I taped the two pieces together and then taped them on top of the DSP. I centered the strip as much as I could without measuring.

The flower is from the "Wonderful World" set and I used markers to color it in. Melon Mambo for the flower and Garden Green for the leaves and stem. I die cut it using the 2-1/8" round die from the "Layering Circle" die set. I also die cut a scalloped circle for the layer using the 2-9/16" die. For a short cut here, I used the 4th largest circle die and the 3rd largest scalloped die. I could have cut the scallop from the larger layer but I had some scraps to use up or I would have. 

The words are from the "Pansy Patch" set and were stamped using black Memento ink. I punched them using the "Double Oval" punch. I punched the scalloped oval using the same punch and a scrap piece of Melon Mambo card stock. I taped those two layers together. 

Before I affixed the circle and oval with Dimensionals, I added some gold cord to the card for a bit of color and texture. I didn't quite get the cord even on both sides but when I do stuff like that I just say, "it's a handmade card" and leave it at that!!  Once the cord was down I set the large circle in place and then the oval one. I used both tape and Dimensionals on that one.  I had an enamel dot that matched so I added that to the flower piece. And the card was done.

I told you it was a quick and easy card to make.

Thank you SO very much for taking your time to stop by and see today's birthday card,
Wanda

Monday, February 28, 2022

Driving By, Wildflower Path, Birthday Card, 2022 Stampin' Up! Spring Mini Catalog

I found a fun layout on Pinterest and I thought I'd give it a try. I didn't have the Designer Series Paper (DSP) that was used on the original card so I made the card with what I had.  You can see the original card here

The base of my card is a folded half-sheet of Basic White card stock. This card opens on the bottom and the fold is on the top.

I cut a 1-3/8" x 5-1/2" strip of DSP from the "Friendly Hello" 12" x 12" package.  I also cut a 3" x 3" square of DSP from the same package. I centered the striped DSP on the front of the card and for the 3" x 3" piece, I lined up the left point to the center of the card and made sure the top and bottom points touched the edges. 

I stamped the card from the "Driving By" set using black Memento ink. I colored the car in using my light Pumpkin Pie Blends pen. The wheels were colored in using my light Smoky Slate Blends pen. I colored the two outer parts of the wheel with it. Then I colored the outer part of the wheel with my Light Gray Granite Blends pen. I wanted the outer part to be bit darker but not black. I had colored them black on another card and if you don't color perfectly the tires don't looks so round! I also colored in the bumpers with my light Smoky Slate Blends pen.

The balloons were colored in using my dark Pool Party Blends pen and the windshield was colored in using my light Pool Party Blends pen.  

I used the third smallest die from the "Rectangle Stitched" Framelets die set. It's the third one in the grouping of 8 dies in the package. I added Dimensionals to the back and set it aside.

The words are from the "Wildflower Path" set and were stamped using black Memento ink.

The car was set in place and the card was done. I didn't add any additional bling, I liked the simplicity of the card.

This was a fun and easy card to make and I REALLY like the layout. It's that 3" x 3" square that caught my attention. 

Thank you SO very much for taking your time to stop by and see today's birthday card,
Wanda

Sunday, February 27, 2022

Special Moments, Friendship Card, 2022 Stampin' Up! Sale-a-Bration

I was looking on Pinterest to find a card that used a lot of Designer Series Paper (DSP) and I ran across this one.  It was perfect. Quick and easy, plus it used quite the DSP covers quite a bit of the card base. 

The base of the card is a folded half-sheet of Basic White card stock. This card opens on the right and the fold is on the left.

I cut 4" x 5-1/4" piece of DSP from the "Flowering Fields" 12" x 12" package. I taped it to the card base.

Then I cut a 1-1/2" x 4" strip. The flowers in the strip are actually the backside of the larger piece of DSP.  I cut a 1-3/4" x 4" piece of Pumpkin Pie card stock for the layer and I taped the two pieces together. 

A Daffodil Delight piece of ribbon was cut at 6" and the ends were taped to the back using scotch tape. My ribbon is retired and I just ended up using what I had on hand. Whatever works, right? Then the piece was taped down on top of the large DSP piece about 1-1/4" from the bottom edge of the card base. 

The words are from the "Special Moments" set and were stamped using black Memento ink. I die cut them using the 1-7/8" die from the "Layering Circles" die set. And a Pumpkin Pie scalloped die from the same set. I taped those two pieces together and set them in place on top of the card using Dimensionals.

I tied a knot of ribbon off to the side and the card was done.

This was a super quick and easy card to make. Plus it used a nice chunk of DSP, which was my goal!  And I also needed a card for a friend! This card can be used for many other occasions too. I may whip up a Mother's Day or Easter card using this layout and DSP.

Thank you SO very much for taking your time to stop by and see today's friendship card,
Wanda

Saturday, February 26, 2022

Special Moments, Let's Set Sail, Thinking of You Card, 2022 Stampin' Up! Spring Mini Catalog

Here's a fun card I found on the internet. I liked the panels and it was easy to make too. You can see the original card here. I made a few minor changes but for the most part it looks a lot like the original card. There was no link to any instructions, so here's how I made it.

The base of the card is a folded half-sheet of Basic White card stock. I cut a 4" x 5-1/4" piece for the top piece.

I took a piece of Designer Series Paper (DSP) from the "New Horizons" 6" x 6" stack and I die cut three stitched rectangles from it using the "Rectangle Stitched" framelet dies set. I used the smallest one in the grouping of 8 dies. I die cut three pieces from the DSP for the front of the card. I taped along the edge of the middle piece and stuck it to the back piece. This was done on my worksurface, not on the front of the card.  Dimensionals were added to the top piece and I remove the backing all except for the bottom ones and stuck it to the other two rectangles. 

I set the rectangles on top of the 4" x 5-1/4" piece of card stock to see where to stamp the words and birds. The words are from the "Special Moments" Sale-a-Bration set and the birds are form the "Let's Set Sail" set. I stamped both at the same time. I did add few more birds to the top and I masked off the top two before stamping them. I had used black Memento ink to stamp the birds and words.

I textured the piece using the "Tasteful Textiles" embossing folder.

The die cut strips were set in place using glue on the back two and I removed the backing from the Dimensionals and set the piece in place lining up the top and bottom equally and the sides equally.

Dimensionals were added to the back of the 4" x 5-1/4" textured piece and set it in place on the front of the card base.  And the card was done.

This was a very fun, quick, and easy card to make. I was very pleased at how it turned out and even more pleased at how quick and easy it was to make.  It was a fun find!

Thank you SO very much for taking your time to stop by and see today's thinking of you card,
Wanda

Monday, February 21, 2022

Friendly Hello, Friendship Card, 2022 Stampin' Up! Sale-a-Bration

I was looking for a quick and easy friendship card to make and I ran across this one on Pinterest. You can see the original card here.  I liked how the words went over the stamped flowers and how simple this card is yet it has a lot of movement.

The base of the card is a folded half-sheet of Fresh Freesia. This card opens on the right and the fold is on the left. The original card opens on the bottom and the fold is on the top. I changed it only because the piece of card stock I had was already cut in half so I used what was there.

The Designer Series Paper (DSP) is from the "Friendly Hello" 12" x 12" package. I love it that the DSP had the same name as the stamp set. Sometimes with all of these pretty flower papers it's hard to remember what DSP went with what stamp sets.  I hope this is a new trend for Stampin' Up! because I approve!! This piece of DSP was cut at 2-1/2" x 4-3/4".  I taped it to the front of the card making sure that the top, left and bottom of the DSP is spaced the same distance apart.

The Basic Black Strip was cut at 1/2" x 3-1/2". I taped it to the front of the card about 1-3/4" from the top edge of the card.

The Basic White focal piece was cut at 2-3/4" x 2-3/4".  I stamped the flowers first using black Memento ink and then the words were stamped, also using black Memento ink.

The flowers were colored in using a Blender Pen and Fresh Freesia ink. I didn't have the marker or Blends pen so I just used what I had.  I also colored the center of the flowers using my Daffodil Delight marker. And that was it for the coloring.  I added Dimensionals to the back and set the piece in place over the Basic Black strip, trying to center it on top of that strip as much as possible. 

A 4" x 5-1/4" piece of Basic White was added to the inside of the card and the card was done.

This was a fun card to make and oh SO quick. I love the soft subtle look it has. A perfect female friendship card!

Thank you SO much for taking your time to stop in and see today's quick and easy friendship card,
Wanda

Wednesday, February 16, 2022

Calming Camellia, Special Moments, Friendship or Thinking of You Card, 2022 Stampin' Up! Sale-a-Bration

I found this wonderful card on Pinterest. I clicked through the link and didn't get a lot of information, but just enough so I could figure out the rest. You can see the original card here.  There were several colors of cards posted but I chose this one because of the richness.

The base of this card is a half-sheet of Crumb Cake card stock. I did not fold it in half right away because the stamping went on the backside too. I stamped the flower image on the back and then added the swirl image and the leaves image, all using Crumb Cake ink. See the photo below. I didn't get all the images the way they were on the original card, but I really don't think it matters. It's pretty however you get them on there!

Next I die cut the scalloped rectangle. It's from the "Scalloped Contours" set. I used the second one in the set. 

Then I cut a 3-3/8" x 4-3/4" piece of Blackberry Bliss card stock for the layer. And I also cut a 4" x 5-1/4" piece of Basic White for the inside.

I stamped the flower from the "Calming Camellia" set using Blackberry Bliss ink. I added a swirl using Crumb Cake ink. And the words are from the "Special Moments" set and were stamped using Blackberry Bliss ink. 

Now here comes the fun part. I was a bit apprehensive to try this. I don't like ruining my cards.  But it's SO easy. I took my Blender pen and refilled it. I wanted it very juicy.  If you don't have the recipe for the refill, just click here. I posted it many years ago. There's even instructions on how to take your pen apart.  I took a clear stamping block and added a drop of White ink. The drop was about the size of half a pea. You don't need much. Dip the tip of your Blender pen in the ink and then color the flowers in. Start on the top where they are the whitest a color towards the center of the flower.  And that's all you do. The Blackberry Bliss ink bleeds and does it's own thing.  You can go over the tips again later if you want them whiter. It takes a little while for this to dry but it's SO worth it.  I would recommend die cutting the scalloped piece first and then stamping the flower, swirl, words, and then color it. Then you can take care of the rest of the elements of the card while the ink is drying. 

I did color in the leaves with my Old Olive light Blends pen. They turned more purple but it's pretty too! I don't think you can ruin this card. I thought I was going to have problems with it but once I started coloring I saw the beauty and loved the technique.

After the ink dried I taped the scalloped piece to the Blackberry Bliss piece and that was taped to the front of the folded card. My card opens on the right and the fold is on the left.

I added the piece of Basic White inside and the card was done.  Isn't it pretty?  I think I want to make another one using Pacific Point or Evening Evergreen. 

Thank you SO very much for taking your time to stop by and see today's friendship card,
Wanda


Tuesday, February 15, 2022

Artistic Dies, Special Moments, 2022 Stampin' Up! Sale-a-Bration

Today I found this fun card at "Heartwarmers from Vicki". I thought it was a great card because when you are done, you have two cards! I love monochromatic cards. You can see Vicki's cards here. She posted both of them.  Take a look at her blog, she's got a lot of fun cards posted there!

The base of the card is a folded half-sheet of Basic White card stock. This card was cut on the short side so it measured 4-1/4" x 11". It opens at the bottom and the fold is at the top.

I cut a 4" x 5-1/4" piece of Basic Black card stock for the layer.

The top piece is a 2-5/8" x 3-7/8" piece of Basic White card stock.

I die cut the flowers using the "Artistic" dies that are a part of the "Artistically Inked" bundle. I die cut one using Basic Black card stock and the other using Basic White card stock. I did use the double sided sticky paper for these. I wanted to make it as quick and simple as possible.  

The flowers were cut in half. Make sure you cut them both on the same line so you can match them up easily.  I set the Basic Black part of the flower on top of the Basic White rectangle piece so I could see where the wording would go. The words are from the "Special Moments" Sale-a-Bration set and were stamped using black Memento ink.

Once the words were stamped I taped the Basic White rectangle piece in place on the upper part of the card. Then the Basic Black flower half was set in place. And the Basic White flower half was lined up and pressed in place.  And that was it. One down and one to go. 

This was a very quick card to make but it did take a few minutes to get all the pieces out of the flowers and leaves. But it wasn't bad, I didn't whine at all! LOL

Thank you SO very much for taking your time to stop in and see today's sympathy card,
Wanda

Monday, February 14, 2022

Friendly Hello, Sweet Ice Cream, Birthday Card, 2022 Stampin' Up! Sale-a-Bration

Today thought I'd play around with texture and my scoring board. I really had no idea where I was going with this card, I only knew I wanted the scored background.

The base of my card is a folded half-sheet of Basic White card stock. This card opens on the right and the fold is on the left.

I cut a 4" x 5-1/4" piece of Daffodil Delight for the layer and for the focal piece I cut a 3-7/8" x 5-1/8" piece of Basic White. I thought the score lines on the top were a bit tricky.  But I managed to work around it. On the short side I scored the right score line first at 2-5/8" and then I flipped the card 180 degrees and scored the piece again at the same 2-5/8".  This is as about as equal as I could get top lines. For the long side, I scored it at 1-3/4" and 3-1/2".  I now had my nice scored background grid.

Next I took my blending brush and scrubbed in some Daffodil Delight.  I also added some Daffodil Delight dots to the area around the and on the edges of the scrubbed area.

The flowers are from the "Friendly Hello" set and were stamped using black Memento ink on a piece of Basic White card stock. I stamped that image twice and I stamped 5 leaves. I fussy cut them all out.  I colored the flowers using both light and dark Flirty Flamingo Blends pens. And the center was colored in using Daffodil Delight Blends, light first and then I dotted on some dark.  For the leaves I colored them in using both light and dark Granny Apple Green Blends pens. I colored over the flowers with my Wink of Stella pen. I thought it could use a bit of sparkle.

The words are from the "Sweet Ice Cream" set and were stamped on a 1" x 3-1/4" piece of Basic White card stock using black Memento ink. I cut a 1-1/8" x 3-3/8" piece of Daffodil Delight card stock for the layer. I taped the two layers together and added Dimensionals to the back. Without removing the backing on the Dimensionals, I set the piece in place so I could see where the flowers needed to go. I taped the flowers and leaves in place and then added some linen thread to the center area. 

The taped the focal layer to the Daffodil Delight layer and that was then taped to the card base. The words were set in place and the card was done.

I do like how this card turned out. A lot better than what was in my head. Usually it's the other way around! LOL

Thank you SO very much for taking your time to stop by and see today's birthday card,
Wanda

Sunday, February 13, 2022

Friendly Hello, Birthday Card, 20211 Stampin' Up! Sale-a-Bration

I was looking for a card that used the "Friendly Hello" set from the Stampin' Up! 2022 Sale-a-Bration set. I was actually looking for one that had the bird image on it but when I saw this one I decided to give it a try, even though I don't have all of the items used on the original card

The base of my card is a folded half-sheet of Basic White card stock. I cut the card stock in half on the short side of the full sheet so measured 4-1/4" x 11".  I folded it in half. This card opens at the bottom and the fold is at the top.

I cut a 4-1/8" x 5-3/8" piece of Basic Black card stock. You can die cut the Basic Black layer behind the word piece if you want to from this piece. No one will see the piece missing in the middle. I cut that piece in half and set it aside. Then I cut a 4" x 5-1/4" piece of Designer Series Paper (DSP) From the "Friendly Hello" 12" x 12" package. I taped the DSP to the Basic Black and then I taped that to the card base.

I stamped the double flowers, the small flower and three leaves using black Memento ink on Basic White card stock. I fussy cut them out.

I colored the flowers using my Blender Pen and a drop of Fresh Freesia ink. I didn't have matching markers or Blends Pens so I used what I had. I colored the leaves in using my Granny Apple Green Blends Pen. I colored them all in but the original card only colored the center areas like the flowers. I didn't pay attention when I started coloring. I could have stamped and cut new leaves but I just thought I'd leave them as they were.

I punched out some Granny Apple Green leaves from the new "Bough" punch and some Basic Black buds from the same punch. I punched one more of each than on the original card. 

The words are from the same "Friendly Hello" set and were stamped using black Memento ink on a piece of Basic White card stock. I die cut them using the die from the "Tasteful Labels" set. I cut the words a little higher on the piece, not quite center. Then I took the Basic Black piece I had die cut and cut it in half. Half for the upper part of the word piece and the other half for the bottom. I taped those two pieces to the Basic White piece.  I set that piece in place on the front of the card using Dimensionals.

Then I added the large flowers and tucked leaves in and around them. The top flower was set in place with a Dimensional. I added a leaf set behind it.

On the right side is where I added the extra leaf and bud piece. I needed to hide the pace where the black layered pieces didn't meet. 

I tied a black piece of Baker's Twine into a bow and used a glue dot to hold it in place. Then I tied a Fresh Freesia ribbon bow and set it in place over the black bow. I few rhinestones were added to the Basic White piece and the card was done.

This was a fun card to make. I love the colors. When I first saw it I thought the DSP was stamped with the flower image from the "Friendly Hello" set but it was already printed on it. YAY!!   This would make a great card for many occasions, it's so versatile.

Thank you SO very much for taking your time to stop in and see today's birthday card,
Wanda


Saturday, February 12, 2022

Calming Camellia, Birthday Card, 2022 Stampin' Up! Sale-a-Bration Catalog

I found this fun and interesting card on Pinterest. There is a link to a video for this colored flower but I did like the brighter pink one better. I followed along with the video so I could figure out how to make it but next time I play with the "Calming Camellia" set I will probably do the pink one. I think the color is Melon Mambo. Not sure, but mine will be! You can see the original card here

The base of the card is a folded half-sheet of Smoky Slate card stock. This card opens on the right and the fold is on the left.

I didn't have the same Designer Series Paper (DSP) that was used on the original card so I found some that looked like it would blend in. It's some type of nautical card stock. I'm not sure where it came from. I don't think it's a retired Stampin' Up! DSP. But it looked good and it's what I had to work with. I'm sure I could have come up with something for the background that would work but I didn't have time and I really wanted to get going on this card. SO if you have that pretty wood look paper, you're fortunate and you can copy the original card. But I am using what I have and this is going to have to be for today. The DSP was cut at 3-5/8" x 4-7/8".  I cut a Basic Black layer it that measures 3-3/4" x 5".  I taped the two pieces together.

Then I die cut the scalloped rectangle from the "Scalloped Contours" Die set. I used the middle die in that set. I cut a 1-7/8" x 3-1/4" piece of Smoky Slate card stock for inside that scalloped piece.

The flower from the "Calming Camellia" set was stamped on a piece of Basic White card stock using black Memento ink. I also stamped the image on the Smoky Slate piece.  I fussy cut the flower that was stamped on the Basic White piece. Then I colored the leaves in using my Blends pens. Granny Apple Green light and dark. The flowers were colored in using the dark So Saffron and light Mango Melody pens. And that was it for the coloring.  The flower piece was then taped to the Smoky Slate piece, matching up the image. Then the piece was taped to the scalloped rectangle piece.

The words are from the "Calming Camellia" set and were stamped using Versa Mark and heat set with white embossing powder. I die cut them using the die from the  "Ornate Frames" die set. I set the piece in place on top of the scalloped piece, adding Dimensionals on the bottom edge and one on the right side.

I tied a white ribbon and affixed it to the flower.  A 4" x 5-1/4" piece of Basic White was added to the inside and the card was done.

This was a very fun card to make, even with the fussy cutting. I do like the look of it but I think I would like it better if it were more colorful.

Thank you SO very much for taking your time to stop by and see today's birthday card,
Wanda


Friday, February 11, 2022

Catching Butterflies, Friendship Card, 2022 Stampin' Up! Sale-a-Bration Catalog

Today I wanted to play with the "Catching Butterflies" set but I needed some inspiration. I found this card on Pinterest. You can see the original card here. I clicked through the link to the blog where it was posted but there wasn't a lot of info on how the card was made, so here's how I made it. 

The base of my card is a folded half-sheet of basic White card stock. This card opens on the right and the fold is on the left.

I cut a 3-7/8" x 5-1/8" piece of Designer Series Paper (DSP) from the "Sunshine & Rainbows" 6" x 6" stack in the Sale-a-Bration catalog. 

Next I die cut a Basic White piece using the third largest "Stitched Rectangles" dies. I think the original card used the second largest but I found that because of they way I had to cut my DSP that I needed to try to work with the third die. I saved the end of the DSP that I had cut off and I flipped it over and die cut it with the same die. This piece is going to be taped to the top of my stitched rectangle later. 

Then I stamped the girl from the "Catching Butterflies" set. I used black Memento ink. I colored her in using my Blends pens. I used light Smoky Slate for the net and the shadow under her foot. The dress was colored in both light and dark Pool Party. Her face, hands and legs were colored in using light Petal Pink and the cheeks were colored in using the dark Petal Pink pen. I colored her hair in using the Bronze pen. The butterflies were colored in using yellow for the outer edges and yellow for the tiny butterflies. And light Flirty Flamingo for the insides of the butterflies and a little bit of dark Flirty Flamingo for the highlights on the wings.  I fussy cut two butterflies because part of them were stamped and cut off on the edge. So I thought I'd just cut them, color them and set them in place with the tiniest dot of glue. 

Now it was time to tape that Pool Party heart printed piece at the top. I wrapped a piece of linen thread around it twice and tied a bow. Then I set the piece in place on the front of the card using Dimensionals. I made sure I got a bit of a Dimensional under each butterfly that I fussy cut out. 

The words are from the same "Catching Butterflies" set and were stamped on a 5/8" x 2-1/4" piece of Pale Papaya card stock. This piece was set in place with Dimensionals. I made sure I staggered them on the back so they didn't land on the linen thread. 

I put a dot of glue (not Tombow Mono glue) on the bow to hold it. The Mono glue stays sticky and I didn't want it sticking to the inside of the envelope or anything else. I used some tacky glue and that did the trick.  I just felt that the thread seemed like it would come untied easily and I wanted to make sure it wasn't going to be going anywhere.  And the card was done.

This was a very fun card to make. It's got such a happy feel to it. It's a nice friendship card or it could also be used as a thank you card. 

Thank you SO very much for taking your time to stop by and see today's Friendship card,
Wanda

Sunday, January 30, 2022

Friendly Hello, Happiest of Birthdays, Birthday Card, 2022 Stampin' Up! Sale-A-Bration

I really liked yesterday's card layout so I thought I'd try it again with a more feminine spin on it. So here's what I came up with.

The base of my card is a folded half-sheet of Basic White card stock. This card opens on the right and the fold is on the left. 

I cut a 4" x 5-1/4" piece of Fresh Freesia card stock and taped it to the front of the card base.

The Designer Series Paper (DSP) from the "Friendly Hello" 12" x 12" package was cut at 3-7/8" x 5-1/8". The DSP is from the Sale-A-Bration book.  I taped it to the Fresh Freesia piece.

The words are from the "Happiest of Birthdays" set and were stamped using Fresh Freesia ink. I cut it out using the largest "Stitched So Sweetly" die set.  I taped this piece in place on top of the DSP.

The flowers are from the "Friendly Hello" set that was in the 2022 Stampin' Up! Sale-a-Bration book. I stamped them using black Memento ink and then fussy cut them.  Next I colored the centers with my dark Daffodil Delight Blends pen. The petals were colored in using the light Balmy Blue Blends pen. Then the dark Balmy Blue Blends pen was used to add some detail. I colored the center area of the flowers in using my Wink of Stella pen. I added Dimensionals, removed the backing and set it aside.

The leaves are from the "Bough" punch that I got in the 2022 Spring catalog.  I love having a leaf punch to add little leaves to my flowers. This was a perfect touch. I used Just Jade card stock for the leaves. I cut it into pieces and added the leaves to the back of the flower, making sure the leaves touched the Dimensional so it would stick. Then I set the flower in place on the front of the card. And the card was done.

This was a very fun, quick and easy card to make. I love the blue flowers at the bottom. 

Thank you SO very much for taking your time to stop in and see today's birthday card,
Wanda

Saturday, January 29, 2022

Driving By, Happiest of Birthdays, Birthday Card, 2022 Stampin' Up! Sale-a-Bration Catalog

I found this cute card on Pinterest and just had to give it a try. I think it was the blue colors that caught my eye. What ever it was, I knew I had to make it. You can see the original card here

The base of the card is a folded half-sheet of Basic White card stock. This card opens on the right and the fold is on the left.

I cut a 4" x 5-1/4" piece of Balmy Blue card stock for the layer.

Then a 3-7/8" x 5-1/8" piece of Designer Series Paper (DSP) from the "You're a Peach" 12" x 12" package was cut and taped to the Balmy Blue piece.

The words are from the "Happiest of Birthdays" and were stamped using Balmy Blue ink on Basic White card stock. I die cut them with the largest "Stitched So Sweetly" scalloped rectangle die.  I taped the word piece to the DSP and then I taped all of those to the card base.

The car was stamped using black Memento ink on a scrap piece of Basic White card stock. I colored the windows and above the tires using the light Balmy Blue Blends pen. Then the van was colored in using the dark Balmy Blue Blends pen. I colored over some areas again with the same pen just to make it darker. 

The wheels were colored in using the Basic Black Blends pen. I used my light one because it's darker than the dark one. The hubs were colored in using Smoky Slate Blends pen as well as the bumpers and headlights, tail lights and exhaust pipe. Then I fussy cut the car out.

Wink of Stella was used on the bumpers and the windows.

Dimensionals were added to the back of the van and it was set in place on the front of the card.

I colored some crystal rhinestones using my dark Balmy Blue Blends pen and I set them in place on the words and the wheels.

And that was it. This was a very fun and easy card to make. I really like how this looks. I still don't know what it is about this card but I'm really drawn to it.

Thank you SO very much for taking your time to stop by and see today's birthday card, 
Wanda

Wednesday, January 26, 2022

Driving By, Handsomely Suited, Masculine Birthday Card, 2022 Stampin' Up! Sale-a-Bration

Today I found a card on Pinterest that used the "Driving By" set with the red and black theme.  I wanted to make one but I did change mine a little. You can see the original card here

The base of the card is a folded half-sheet of Basic Black card stock. This card opens on the bottom and the fold is on the top.  

I cut a 4-1/8 x 5-3/8" piece of Real Red card stock for the layer and I set it aside. 

The striped Designer Series Paper (DSP) is from the "Abstract Beauty" 4" x 6" stack. I cut it at 4" x 5-1/4" and I set it aside.

The car is from the "Driving By" Sale-a-Bration set and was stamped using black Memento ink on a piece of Basic White card stock. I die cut it using the "Rectangle Stitched" dies.  In the package of dies, this one was the third smallest in the grouping of 8.  The Real Red layer behind it was cut with the next larger die and I used the Real Red layer piece. Plus I cut the second smallest die at the same time. I kept them close to the center of the Real Red piece so no one would know there's card stock missing in the middle!   I colored the car using my light and dark Real Red Blends pens and my light Smoky Slate Blends pen. and light Basic Black Blends pen. I found that my light Basic Black pen is darker than my dark one. SO odd. And now I have to remember that because I usually start out with the lighter color and then go darker.  I see future mistakes happening!!!  Anyway, once the coloring was done, I taped the Basic White piece to the Real Red piece.  

The words are from the "Handsomely Suited" set and were stamped using back Memento ink. I die cut them using the smallest "Stitched Rectangle" die. Then I taped them to the next largest Real Red piece that I had cut out when I cut out the layer for the car.  

And I was now ready to assemble.  I taped the largest Real Red piece to the Basic Black card base. Then the DSP was taped on top of that.

The card layers were taped to the bottom left of the front of the card and the words were set in place using Dimensionals.  I added a few enamel dots that I colored with my Basic Black Blends pen (I used my light one that colored dark!). A 4" x 5-1/4" piece of Basic White was added to the inside of the card and the card was done.

This was a fun and quick card to make. And it's a super nice masculine card too!

Thank you SO very much for taking your time to stop in and see today's masculine birthday card,
Wanda

Tuesday, January 25, 2022

Calming Camellia, Eden's Garden, Friendship Card, 2022 Stampin' Up! Spring Mini Catalog

Now I'm not sure if this would be a friendship card, a sympathy card or a get well card. I guess with the wording it could be all of the above.  I would love to make more of this design but changing the wording to Mother's Day or birthday.  It's such a pretty image. I found it on Pinterest and just had to make one. You can see the original card here.

The base of my card is a folded half-sheet of Gorgeous Grape card stock. I cut a 4-1/8" x 5-3/8" piece for the layer. I stamped the large flower image from the "Calming Camellia" set all around the edges using Gorgeous Grape ink. I didn't need to stamp in the middle because it was going to be hidden. I set the piece aside.

I took a 3-1/8" x 3-5/8" piece of Basic White card stock and stamped the flower using Gorgeous Grape ink. Then I cut a 3-1/4" x 5-3/4" piece of gold foil card stock.  I die cut the 2" scalloped circle from the "Layering Circle" dies from the center of the gold foil piece.  Then I glued the stamped image piece to the gold foil. I chose glue because I've had bad luck with the tape not sticking well to the foil. 

The words are from "Eden's Garden" set and were stamped on a scrap piece of Basic White card stock using black Memento ink. I die cut them with the round scalloped and stitched circle die from the "Tasteful Labels" dies.  I die cut the words closer to the bottom because I wanted to add something to the top of the circle.  Then I glued the circles together.

I glued the layers to the front of the card. And I added three gold "Metallic Pearls" to the upper part of the circle. I added a 4" x 5-1/4" piece of Basic White to the inside of the card and that was it. 

This was a very quick and easy card to make. It's SO elegant looking. I'd love to make more for Mother's Day and Birthdays.   

Thank you SO much for taking your time to stop by and see today's friendship card,
Wanda


Sunday, January 23, 2022

Friendly Hello, Special Moments, Thank You Card, 2022 Stampin' Up! Spring Mini Catalog

I had my "Abstract Beauty" 4" x 6" Designer Series Paper (DSP) stack still sitting out.  If you know me, you'd have been surprised if the DSP had been put away!!! LOL Anyway, I thought I'd challenge myself today and see if I could use a piece of one of the more difficult looking designs.  I thought the one I had chosen would be a really good test! So here's what I came up with. 

This is one of my favorite layouts because it allows you to really highlight and focus on smaller images in stamp sets. This card is much prettier in real life, the gold that looks like dark mustard here is a gold foil and the light catches it so nicely.  But in the pic it looks like blah splotches.  If you have this DSP you'll see how pretty the gold is.

The base of my card is a half-sheet of Balmy Blue card stock. The full sheet was cut on the 8-1/2" side so after it was cut the piece measured 4-1/4" x 11". I scored it at 5-1/2" and folded it. I used my bone folder to make a nice sharp fold.

Next I cut a Basic White piece that measured 3-1/2" x 4-5/8".

I cut a piece of Highland Heather card stock to measure 3" x 4-1/8" and I cut the DSP to measure 2-7/8" x 4".

I added a little bit of tape on the area where I thought the hole would be punched out. I set the DSP and the Highland Heather pieces together, making sure they lined up nicely.  I took my 1-1/4" circle punch and punched the two pieces together.

Next I took the DSP piece and my 1-3/8" circle punch and with a piece of scrap card stock behind the DSP, I punched out a small thin ring. I tried to line the piece up so the ring was equal on all sides. Then I taped the DSP to the Highland Heather piece. 

I stamped the flower image from the "Friendly Hello" set using black Memento ink on a scrap piece of Basic White card stock. I colored in the leaves using my dark Mint Macaron Blends pen. The flower center was colored in using the light Daffodil Delight blends pen and the flower was colored in using my Blushing Bride marker. I could have used markers for all of them but as I was coloring I didn't pay attention that I didn't have a Blushing Bride Blends pen. I don't think Stampin' Up! makes one.  And if they do, I will need to order them!  Anyway, after I was done coloring I added some Dimensionals around the circle on the backside, centered the flower and set it in place. Then I added more Dimensionals around the rest of the piece and some double-sided tape to the backside of the Basic White stamped piece. If you add Dimensionals there your card will have a big bulge in the center.  And no, I have not done that (yet) to speak from experience.  I'm sure a day will come when I do make that mistake. But at least it will be on the back so when the unnecessary Dimensionals are removed it won't show.  So, I set this piece in place on top of the 3-1/2" x 4-5/8" piece of Basic White.  Tape was added to the back of the Basic White piece and I taped that in place on the front of the card. 

The words are from the "Special Moments" set and were stamped on a 3/8" x 1-1/8" piece of Basic White card stock. I am not really fond of the word "thanks". It doesn't sound as sincere as the full "thank you" does. But I needed something small and this is what I could find.  I think something better could have been used there. Something wider maybe? But this is what was in my head and this is what it looks like on paper!  Not exactly what I was thinking but it's close!  

I cut a 4" x 5-1/4" piece of Basic White card stock for the inside and the card was done. On other cards I've made using this layout,  I had wrapped a ribbon around the word area and tied a knot. I mostly do that when there are words inside the circle.  I've never done both, but I'm sure that would work if you place the ribbon a bit higher and the words right under it.  I'll have to give that a try sometime. 

So that is it. This card didn't take long at all to make and I was able to use a piece of DSP that I thought was rather challenging. 

Thank you SO very much for taking your time to see today's thank you card,
Wanda