Pin It

Showing posts with label 2023 Spring Mini Catalog. Show all posts

Wednesday, January 03, 2024

Cheerful Daisies, Birthday Card, Stampin' Up!

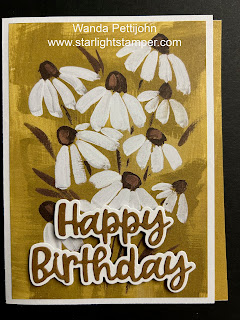
Hello and welcome to my blog. Today I have a bright and cheery birthday card to share with you. I found it on the internet and I made a few changes, some by accident and some on purpose! The original card is on the header of the blog, click here to see it. Please read on to see how the card was made.

The base of the card is a folded half-sheet of Basic White card stock. I cut a 3" x 4" piece of Berry Burst card stock and textured it using the "Distressed Tile" folder.  The Designer Series Paper is from the "Brights" 6" x 6" stack. It measures 2-1/2" x 4".  I cut it a bit longer than the card stock so there'd be no issues with any background showing. I taped the DSP down first and then I glued the card stock on top.

The flowers are from the "Cheerful Daisies" bundle and were stamped using Berry Burst ink. I die cut them with the matching dies in the bundle. The centers were done by stamping off once using Crumb Cake ink. I uses some Wink of Stella on the centers for a bit of sparkle. 

The leaves were stamped using Granny Apple Green ink and die cut using the matching die. The branch piece was die cut using Granny Apple Green card stock. 

Berry Burst ink was used to stamp the words and the matching die in the bundle was used to cut them out. 

To assemble the piece I added Dimenisonals to all the flowers and the word piece. I set the word piece in place first. Then the large flower was added but I didn't press down on it. I slipped the Granny Apple Green branch under it and then I pressed down in that area. 

Next the leaves were glued under the large flower. 

The left flower and leaves were added next and then the top flower.  And that was it.

This was a quick, easy and fun card to make. I love the brightness of the Berry Burst color.

Thank you SO very much for taking your time to stop in and see today's birthday card,
Wanda


Monday, January 01, 2024

Dainty Delight, Day's to Remember, Birthday Card, Stampin' Up!

Hello and welcome to my blog. First I'd like to say "Happy New Year" to you all. I hope it's a wonderful year for each and every one of you, filled with much happiness and good health.

Today I have a card to share with you that I found on Pinterest. You can see the original card here. I did click through but there wasn't much information on how the card was made, so please read on to see how I made it.

The base of the card is a folded half-sheet of Basic White card stock. It opens on the right and the fold is on the left. I cut a 3-3/4" x 5" piece of Basic White for the top layer.

On that top layer I used one of the masks in the "Artistic Mix" set. Using a Blending Brush I scrubbed on some Granny Apple Green ink in the center area of the piece.

Next I stamped the floral image from the "Dainty Delight" set using black Memento ink. The leaves were colored in with my Old Olive marker and the flowers were colored in using the Daffodil Delight marker with a little Calypso Coral for highlights. I taped this piece to the front of the card.

The words are from the "Days to Remember" set and were stamped using black Memento ink. I punched it out using the "Double Oval" punch. I also used the same punch to punch out the scalloped Old Olive card stock. I taped the two pieces together. Dimensionals were added to the back and the piece was set in place on the front of the card.

I tied a double linen bow and glued it to the front of the card, snugging it up to the scalloped oval. And that was it, the card was done. One thing fun about this card is, it's versatile. You can use it for a get well, Mother's Day, thinking of you, friendship or thank you card.

This was a fun and quick card to make. I really like the look of the masking on the background.

Thank you SO very much for taking your time to stop in and see today's birthday card,
Wanda

Sunday, December 31, 2023

Dainty Delight, Days to Remember, Birthday Card, Stampin' Up!

Hello and welcome to my blog. It's the last day of the year, can you believe it? For some it's a most welcome day and others sit in dismay. 2023 was not an ugly year so I'm not welcoming the last day with glee. I thought it was a busy year and it went by too quickly. I'm in the dismay category, the days are just flying by. And here I am making a card on New Year's Eve. But then again, I make a card every day so there's that! LOL  I found today's card on Pinterest and you can see the original card here.  There were no instructions when I clicked the link so I had to wing it. Please read on to see how I made today's card.

The base of the card is a folded half-sheet of Basic White card stock. It opens on the right and the fold is on the left.

I cut a 4" x 5-1/4" piece of Basic White for the layer and for the top layer I cut a 3-3/4" x 5" piece of Basic White card stock for the top piece.

On the top piece I stamped the floral image from the "Dainty Delight" bundle using black Memento ink. I colored it in using the following light Blends pens, Old Olive, Highland Heather, and Balmy Blue. For the larger flowers I used my Bubble Bath and Fresh Freesia markers because I didn't have those colors in Blends. 

After coloring I used the 3rd largest stitched square from the "Stylish Shapes" set. After cutting it I realized I should have moved the image over to the right more before stamping. But it is what it is and I ran with it. Once the square was cut out I added the strip of ribbon, taping the ends on the back. Then I slipped the ribbon under the strip of ribbon and tied a knot and cut the ribbon from the spool. Dimensionals were added to the back and the piece was set in place on top of the first layer I cut. I should have stamped the words before added the Dimensionals but I forgot but knew I could add them later. Anyway, I took the two layers and taped them to the card base.

The words are from the "Days to Remember" set and were stamped using Highland Heather ink. I punched them out using the "Double Oval" punch. I set them in place using Dimensionals and the card was done. I do like how the words are popped up compared to them being flat on the card. It added a bit more dimension to the card. Imagine that, using Dimensionals adds dimension! LOL 

This was a very fun, quick and easy card to make and I thank you for stopping in to see it today,
Wanda

Saturday, October 07, 2023

Throughout the Year, Around the Bend, Sentimental Park, Birthday Card, Stampin' Up!

Hello and welcome to my blog. Today I have a very quick and easy birthday card to share with you. Please read on to see how the card was made.

The base of the card is a folded half-sheet of Basic White card stock. It opens on the right and the fold is on the left.

I took a 4" x 3-1/2" piece of Designer Series Paper (DSP) from the "Fresh as a Daisy" 12" x 12" package and I taped it to a 4" x 5-1/4" piece of Basic White card stock. When I cut the Basic White piece, I cut it just a hair shorter so no white would show through on the edges after taping the DSP down.

Then I took another piece of DSP from the same package and taped it to the bottom. It was cut at 4" x 2".  A 4" x 1/2" strip of Copper Clay card stock was cut for the strip and it was taped in place between the two pieces of DSP.

Next I stamped the words from the "Throughout the Year" set using Copper Clay ink. I die cut them using the die from the "Sentimental Park" bundle.

The flower is from the "Around the Bend" bundle. I die cut two larger ones and one smaller one for the center. I took a little makeup applicator (tiny spongy thing on a plastic stick) and brushed on some Copper Clay ink on the petals. I also scrubbed a little in the center of one of the larger flowers. 

Then I took some Moody Mauve ink and rubbed some over the little flower for the center. I added a dot of glue to the two larger flowers. I lined them up first (usually I'm doing that while to glue is drying and by the time I figure it out the glue is too dry).  Dimensionals were added to the back and the piece was set in place on the front of the card. The flower cluster was added using a little bit of tape on the left side and a Dimensional on the lower side. And that was it, the card was done.

It is a very quick and easy card, isn't it?  

Thank you SO very much for taking your time to stop in and see today's birthday card,
Wanda

Sunday, October 01, 2023

Wanted to Say, Fresh as a Daisy, Birthday Card, Stampin' Up!

Hello and welcome to my blog. Today I have a super quick birthday card to share with you. Please read on to see how I made the card.

The base of my card is a folded half-sheet of Basic White card stock. It opens on the right and the fold is on the left.

I cut the Designer Series Paper (DSP) from the "Fresh as a Daisy" 12" x 12" package. There is a couple of pages in the package that you cut apart to have ready to tape pieces. This is the last one of those in my package. I wasn't saving it, I just didn't know what I was going to do with it because of the color. It's not a color I'm fond of but now that fall is here that color has come into play and is more pleasing now. The only problem with this piece is the measurement. It was cut at 3-3/4" x 5-1/4".  I suppose I could have cut a little off the top and bottom to get it to measure more equally around the card front. But I didn't want that much white showing so what I ended up doing was taking another piece of DSP from the same package and add it to the inside of the card. I cut a strip 3/8" x 5-1/2" and taped the strip to the right edge on the inside of the card.

The words are from the "Wanted to Say" die set. I used Basic White and Pecan Pie card stock.  I used double sided tape for the words so I could make them into a sticker and make it easier to add to the background piece. I really like these dies and plan to use them more (because I remembered I have them!!). I set the words in place using Dimensionals and the card was done.

There's no stamping on this card. Nice, huh?  I'm happy with the way it turned out and even more thrilled that I had used up 100% of two sheets of DSP in that package!!

Thank you SO very much for taking your time to stop in and see today's birthday card,
Wanda

Thursday, May 11, 2023

Dainty Delights, Thank You Card, Stampin' Up!

Hello! I'm happy you are here today. I found a pretty card on Pinterest that I thought I'd try to recreate and then share with you.  You can see the original card here

The base of the card is a folded half-sheet of Polished Pink card stock. This card opens on the bottom and the fold is on the top.

I cut two 4" x 5-1/4" pieces of Basic White card stock. One I taped to the inside and the other I textured using the "Painted Texture" embossing folder and then I glued it to the front of the card.

Next I die cut two of the arched leaves using the die cut in the "Dainty Delights" bundle. Pear Pizzazz card stock was used for that. I added a little dot of glue to each leaf and then set them in place on the front of the card. Before I glued them I did set them in place and then used a pencil to make a light dot just under where the piece would lay. I could have made it on the outside of where it would go but I didn't want to do any erasing. It was just easier to cover it up than to erase it. 

The flowers were die cut using the die in the same package. I used Polished Pink, Petal Pink, Calypso Coral for the flowers and So Saffron for the flower centers. 

I glued the centers to the flowers. I liked the half flower on the right and there's a fun center to go with it. They flowers were glued in place except for the two Petal Pink ones, they were set in place using Dimensionals.

The words are from the same set and were stamped using Polished Pink ink on a 1" x 3-3/4" piece of Basic White card stock. I snipped the ends and set it in place on the front of the card using Dimensionals.

I added a few rhinestones to the front and the card was done.

Isn't it pretty?  See why I wanted to make one? It was fun and easy to make too.

Thank you SO very much for taking your time to stop in and see today's thank you card,
Wanda

Saturday, May 06, 2023

Framed Florets, Birthday Card, Stampin' Up!

Hello! I'm glad to see you here. I have a quick and easy card for you to see and give a try. It's an easy layout so grab some of your favorite Designer Series Paper (DSP) and let's get going!

The base of the card is a folded half-sheet of Basic White card tock.  This card opens on the bottom and the fold is on the top. 

A 4" x 5-1/4" piece of Basic White card stock was cut for the top layer.  I took a scrap piece of DSP from the "Awash in Beauty" 12" x 12" package and I trimmed it to 5-1/4" x 1-1/2".  I taped it to the Basic White piece I just cut.

Then I took a strip of the DSP from the same package that measured 5/8" x 5-1/4" and I taped it just above the floral DSP, the pieces butted up to each other. I added Dimensionals to the back and set the piece in place on the card base. 

The words are from the "Framed Florets" and were stamped using Rich Razzleberry ink. Both the "Framed Florets" bundle and Rich Razzleberry ink are retired. But I'm playing with them now until the new stuff arrives.  The wait is awful!! LOL   I stamped the words on a piece of Basic White card stock. I die cut them using the 3rd larges stitched circle die from the "Stylish Dies" set.

The scalloped Rich Razzleberry layer was made by using the die cut from the "Layering Circles" die set. I taped the two layers together. I added Dimensionals to the back and set it in place on the front of the card.

Several crystal rhinestones were added to the upper part of the card and one on the circle and the card was done.

I look forward to using up some other DSP that I have sitting around here working with this layout. I may make that strip a little thinner though, I think this one was a bit too wide. But it is still nice and I'm not complaining (much!).

Thank you SO very much for taking your time to stop in and see today's birthday card,
Wanda

Friday, May 05, 2023

Celebrating You, Dainty Delights, Mother's Day Card, Stampin' Up!

Hello! I have a fun card technique to share with you today. I don't know what it's called but I've done it before and I liked it. I found this card on the Internet and you can see the original card here. If you click through there is a video (sped up) so you can see how it was done. Please read on to see how I did the technique.

Let's begin with the base of the card. I chose Mango Melody because it's retired and I have some left so I will be playing with these until the new stuff arrives. I used a half-sheet that was folded in half. This card opens on the bottom and the fold is on the top.

Next I cut 2 pieces of Basic White card stock that measured 4" x 5-1/4" each.  One for the front and one for the inside. I taped the inside piece in place.

Then I cut the Basic White pieces for the front. They measure 3-1/4" x 3" and 2" x 2-3/4".  I also cut the Basic Black layers at 3-1/2" x 3-1/4" and 2-1/4" x 3".

I used some repositionable tape on the back of my three white pieces. I set the pieces in place as I would like to see them on my card.  Then I stamped the flowers from the "Dainty Delight" using black Memento ink. Then I colored the flowers in using my light Mango Melody Blends pen and the leaves were colored in using the light Granny Apple Green Blends pen. 

The words are from the "Celebrating You" set and were stamped using black Memento ink.

Once the coloring was done I layered the pieces with the Basic Black card stock. 

To assemble the card I taped the 4" x 5-1/4" Basic White piece to the front of the card.  Then I added the larger Basic White piece. The smaller Basic White piece has Dimensionals added to the back and it was set in place on the front of the card.  You do need to line up the images to match the stems so it looks like the pieces were cut from the first piece.  Fun isn't it?  I like this technique.

This "Dainty Delights" set is very fun to play with. It's got lots of possibilities, plus it's very versatile too! Oh and this set is in the new catalog too!!  YAY!

Thank you SO very much for taking your time to stop in and see today's Mother's Day card,
Wanda

Thursday, May 04, 2023

Dainty Delight, Dainty Flowers, Thank You Card, Stampin' Up!

Hello! Come on in and see what I've been up to today.  I found this pretty card on Pinterest and there's a bonus with it.  It's SUPER quick! The Designer Series Paper (DSP) is printed and ready for you to cut. What more can you ask for? You can see the original card here.  Please read on to see how I made mine.

The base of the card is a folded half-sheet of Blushing Bride (now retired) card stock. This card opens on the bottom and the fold is on the top.

I cut a 4" x 5-1/4" piece of Starry Sky card stock. On top of that is the DSP from the "Dainty Flowers" (retired) 12" x 12" package.  There is a sheet of 6 of these floral ovals so you can whip up 6 cards in no time at all. I may take the remaining 5 and make some more cards for other occasions.  I'd love to use up the DSP.  That piece of DSP was cut at 5" x 3-3/4", I didn't want to forget to add that. 

The words are from the "Dainty Delight" set and were stamped using Starry Sky ink. I taped the DSP to the Starry Sky card stock. Dimensionals were added to the back and the piece was set in place on top of the Blushing Bride card stock.

A rhinestone was added to the DSP, a 4" x 5-1/4" piece of Basic White card stock was added to the inside and the card was done. 

Wasn't that quick? I think it took me longer to type this up than it did to make it!

Thank you SO very much for taking your time to stop in and see today's thank you card,
Wanda

Wednesday, May 03, 2023

Dainty Delight, Framed Florets, Birthday or Wedding Card, Stampin' Up!

Hello! I'm happy you are here to see today's card. I'm not sure if it's a wedding card or a birthday card but I'm leaning towards a birthday card because of the words "special person".  Person meaning one and a wedding might read "couple".  Anyway, it's such a pretty card and with the right words could be used for a number of occasions. I found this card on the internet. You can see the original card here. Please read on to see how the card was made.

The base of the card is a folded half-sheet of Balmy Blue card stock. After cutting the piece measured 4-1/4" x 11", it opens on the bottom and the fold is on the top.

I cut two pieces of Basic White at 4" x 5-1/4", one for the inside and one for the outside. 

The Designer Series Paper (DSP) is from the "Country Floral Lane" 12" x 12" package and was cut at 3-7/8" x 5-1/8".  I taped the DSP to the Basic White piece.

Next I die cut the pieces using the dies in the "Dainty Delight" bundle.  I used Mossy Meadow, Petal Pink, Daffodil Delight, Mint Macaron, Sweet Sorbet, and Basic White card stock.

The Basic White piece was die cut using the third largest stitched circle in the "Stylish Shapes" die set. 

The words are from the "Framed Florets" set and were stamped on the Basic White circle using black Memento ink. 

To put the piece together, I taped the circle in place first. Then the long arched Mossy Meadow leaves piece.

Then the Mint Macaron tiny flowers on a stem were added. The Sweet Sorbet flowers were added next  and then the Daisies were added using small Dimensionals. I colored the Daffodil Delight centers using my Wink of Stella pen. The tiny leave were glued in place under the Sweet Sorbet flowers.

I added some blue gems I had in my stash and the card was done.

This was such a pretty card and I was glad I ran across it. I'm looking for some fun things to make while I'm waiting for my order to arrive. I just ordered yesterday but it feels like it's going to take forever. LOL

Thank you SO very much for taking your time to stop in and see today's card,
Wanda

Tuesday, May 02, 2023

Best Family Ever, Painted Poppies, Thinking of You Card, Stampin' Up!

Hello! I'm so happy you are here to see today's card that I found on Pinterest. I was looking for something a little different to make and I ran across this card. You can see the original card here. I am struggling with the stamp sets I have because the new catalog was active today and I ordered some new stuff and now I have to play with my old stuff.  Which is really sad because a few days ago, my "old stuff" was just fine!  LOL  I'm just anxiously waiting for my order to come but in the meantime I will be playing with my old stuff and be happy with it!! LOL So with that said, please read on to see how I made today's card.

The base of the card is a folded half-sheet of Basic White card stock. The sheet was cut in half on the short side so after cutting it measured 4-1/4" x 11".   This card opens at the bottom and the fold is on the top.

I took a piece of Gray Granite (a color I don't use very often) and stamped the flower from the "Painted Poppies" on it using Gray Granite ink. I taped this piece to the card base.

Next I took a 2-1/8" x 4" piece of Basic White card stock and stamped the poppies on it from the "Painted Poppies" set using Basic Black ink. I colored them in using both the light and dark Poppy Parade Blends pens.

I didn't have the pretty ribbon that was used on the original card but I did have some "Braided Linen Trim" close enough in color. I wrapped the trim around the bottom of the piece and glued the ends to the back. Normally I use tape but this trim is kind of thick and I knew glue would hold. I added Dimensionals to the back and set the piece aside. I tied a bow and set that aside.

I took the poppy piece and just set it on top of the card front to see where the words should go. I made a light pencil mark and set the piece aside again. I stamped the words from the "Best Family Ever" set using black Memento ink. Then I set the poppy piece in place. I glued the bow in place and the card was done.

This is a sweet looking card that can be used for several other occasions as well. I LOVE versatile stamp sets.

Thank you SO very much for taking your time to stop in and see today's thinking of you card,
Wanda

Monday, May 01, 2023

Dainty Delight, Artistically Inked, Friendship Card, Stampin' Up!


Hello! I'm glad you found your way here to see today's card I made to share with you. It's a fun card with lots of fun pieces. I saw a card on Pinterest and I thought I'd give it a try with what I have and guessing at the measurements. Please read on to see how it was made.

The base of my card is a folded half-sheet of Basic White card stock. This card opens on the right and the fold is on the left.

I cut two 4" x 5-1/4" pieces of Basic White card stock, one for the inside and one for the outside. On the outside piece I added some dots by flicking my Crumb Cake and Balmy Blue markers onto the paper, one at a time. I don't think you can do it with both at the same time!

Then I taped that to the outside of the card and I taped the other Basic White piece to the inside.

Next I cut some Designer Series Paper (DSP) from the "Country Floral Lane" 12" x 12" package from the spring mini catalog. Those two pieces measure 1" x 2-1/2" each. 

I had a piece of Basic White card stock that was textured using the "Painted Texture" embossing folder. It was just sitting on my worktable so I cut it to measure 2-1/4" x 3". I taped the DSP to this piece. The DSP is about 1/4" on the bottom and 3/8" on the side. Flip it over and repeat for the other side. Then the piece was taped in place on top of the card front. 

A Basic White ring was made using two circle dies at the same time. I would have liked it a bit thinner but it is what it is. I kept the center, that is where the words were stamped. Though I thought it might have been easier to stamp the words and then set up the two circle dies, but I always manage to do things the hard way!  LOL

The "hello" is from the "Artistically Inked" set and was stamped using Crumb Cake ink. 

The little flowers were die cut using Blushing Bride card stock scrap and the die from the "Dainty Delight" bundle.  The daisy is also from the same die set. I die cut two and glued the two pieces together. 

The little leaves are from the same "Dainty Delight" bundle and were die cut using Old Olive card stock scraps. The leaves come two in a set so I was able to cut the four at one time. 

The flowers bundle is from the "Dainty Delight" set and was stamped using black Memento ink. Then colored in using the Balmy Blue marker. 

To assemble the rest of the card, I glued the ring in place first. Then the word piece was added next using Dimensionals. The blue flower piece was set in place using Dimensionals.

The little pink flowers were added with a small Dimensional each with the leaf being tucked under the Dimensional.

Then the Daisy was set in place with a Dimensional and the leaves were glued to the back of the petals.

I colored some crystal rhinestones using my dark Mango Melody Blends pen and those were set in place on the card and the card was done.

I think I would love to use this design again sometime, though I think I would raise the textured piece up on Dimensionals, it looks a bit too flat there but it's still nice and I am happy with the way it turned out. This card could be used for a number of occasions. I'm looking forward to seeing what I can make using a Christmas theme later in the year. 

Thank you ever SO much for taking your time to stop in and see today's friendship card,
Wanda

Sunday, April 30, 2023

Forever Fern, Best Day, Birthday Card, Stampin' Up!

Hi there. I'm so happy you found you way to this page. I have a fun and easy card to share with you. Plus it's very versatile. You could use this card for a number of other occasions. I found a card on Pinterest and I thought I would give it a try with the materials I had. You can see the original card by clicking here. Please read on to see how I made this card.

The base of the card is a folded half-sheet of Basic White card stock.  I took a 5" x 3-3/4"piece of Basic White card stock and textured it using the "Painted Texture" embossing folder. I glued the piece to the front of the card base, centering it as much as I could by eyeing it.

Next I stamped the flowers from the "Forever Fern" set using Blushing Bride, Merry Merlot, and Melon Mambo ink.  I die cut each one using the die from the "Forever Fern" bundle. Then I colored them in using my Wink of Stella pen.

The words are from the "Best Day" set and were stamped using Merry Merlot ink. I die cut them using the third smallest stitched die from the "Stylish Shapes" die set. And the scalloped layer behind it was made using the 2" scalloped circle die from the "Layering Circles" die set. I set the word piece on top of the scalloped piece using Dimensionals. Then I glued that to the front of the card.

After clipping the ends on the stamped pieces, I added a bit of glue to the bottom area of each piece and slipped them between the two circles.

I added a few rhinestones to the front of the card and the card was done.

It was a fun card and I could see myself making one for a wedding or anniversary as well as a thinking of you or get well.  Even a Mother's Day card!  It's very versatile.

Thank you SO very much for taking your time to stop in and see today's card,
Wanda

Saturday, April 29, 2023

Forever Fern, Go To Greetings, Framed Florets, Thinking of You Card, Stampin' Up!

Hello. I'm glad you found your way here. I have a fun and quick card to share with you. I found it on Pinterest. You can see the original card here. Please read on to see how you can make one yourself!

The base of the card is a folded half-sheet of Starry Sky card stock. This card opens on the right and the fold is on the left, 

I took a 4-3/4" x 3-1/2" piece of Orchid Oasis card stock for the top layer. The Basic White piece on top of that measures 4-5/8" x 3-3/8".  I textured it using the "Painted Texture" embossing folder. I glued it to the Orchid Oasis piece.

Next I stamped the images from the "Forever Fern" set using Starry Night in on the larger image and Orchid Oasis on the smaller one. It's kind of hard to tell the difference in the colors but they are a little different.  These were stamped on a piece of Basic White card stock that measured 3-3/4" x 4".  I die cut them using the oval from the "Framed Florets" bundle. 

Then I die cut another oval on a 3-3/4" x 4" piece of Basic White card stock so I could have the frame.  If you're really good at stamping you could die cut this piece first and then stamp on the oval and not have to use a second piece of Basic White card stock.  

The words are from the "Go To Greetings" and were stamped using Starry Sky ink on a 1/2" x 3"piece of Basic White card stock.  I trimmed the piece on each end. 

A 3/8" x 3" piece of silver foil card stock was cut for the layer under the words. I glued the words to the silver piece and then trimmed the ends. I added Dimensionals and set the piece in place on the front of the card.

I tied a bow and glued it to the bottom part of the words. Then I added a few crystal rhinestones to the front.  A 4" x 5-1/4"piece of Basic White card stock was added to the inside and the card was done.

This was a very fun, quick and easy card to make. I really liked this set and I'm sad it's going to be retiring.  I will probably hang onto it for a while longer, until I realize I don't use it at all anymore and then I'll remove it from my shelves.

Thank you SO very much for taking your time to stop in and see today's thinking of you card,
Wanda

Friday, April 28, 2023

Best Day, Dainty Delights, Birthday Card, Stampin' Up!

 Hello! Today I have a quick and easy card for you to make that will work for a number of occasions.  Pick the occasion you need and let's begin!

The base of my card is a folded half-sheet of Basic White card stock. This card opens on the right and the fold is on the left.

I cut a 5-1/8" x 3-7/8" piece of Rich Razzleberry card stock for the layer. Then I cut a 5" x 3-3/4" of Basic White card stock and textured it using the "Painted Texture" embossing folder. 

A 5-3/4" x 2-5/8" piece of "Dainty Delights" Designer Series Paper (DSP) was cut and glued to the bottom of the textured Basic White piece.

I found a strip of Rich Razzleberry card stock in my recycling so I took it for a divider piece. It is 1/4" wide and trimmed to 3-3/4" long. Though I trimmed it after I glued it in place on the textured piece. Once the glue was set I glued the piece to the large Rich Razzleberry piece and then I taped that to the card base.

The words are from the "Best Day" set and were stamped using Rich Razzleberry ink. I die cut them with the 3rd smallest stitched circle from the "Stylish Shapes" die set. And I die cut a circle using a die from the "Layering Circle" set that was just a bit larger than the stitched circle. I taped the two circles together. Dimensionals were added to the back and the piece was set in place on the front of the card. 

I added a few gold rhinestones to the card and it was finished. I just thought the upper part of the card needed something more than just texture.

This was a fun, quick and easy card to make and you can make it for almost any occasion you need, Mother's Day, Get Well, Thinking of You, Thank you, and Sympathy.  It's very versatile.

Thank you SO very much for taking your time to stop in and see today's birthday card,
Wanda


Thursday, April 27, 2023

Go To Greetings, Dainty Delights, Dainty Flowers, Thank You Card, Stampin' Up!

Welcome back! I have something SO fun to share with you today. This is one of my most favorite layout and I use it a lot when I have tiny images. Please read on to see how I made this card.

The base of my card is a folded half-sheet of Fresh Freesia card stock. It opens on the right and the fold is on the left.

The layers from the bottom up go as follows. The Basic White piece was cut at 3-1/2" x 4-5/8". The Rich Razzleberry piece was cut at 3" x 4-1/8".  And the Designer Series Paper (DSP) from the "Dainty Delight" 12" x 12" package was cut at 2-7/8" x 4".  

I took the DSP and the Rich Razzleberry piece and added a tiny bit of tape to the area where I think the circle is going to go. I needed make sure the two pieces aren't going to shift. Then I took a 1-1/4" circle punch and dropping the piece into the punch as far as it will go, centering it as well as I can by eyeing it and then punching through both pieces.  Then I took a 1-3/8" circle punch and the punched piece of DSP and before punching a ring from the circle of the DSP, I added a piece of scrap copier paper for stability and I punched out the ring. If you don't add the copier paper your DSP will get pinched in the punch and ruin the outer edge of the DSP. And that won't be very pretty! Trust me on that! Been there, done that.  And now you can tape the DSP to the Rich Razzleberry pieces together.

Dimensionals were added around the circle and then I took another piece of DSP from the same "Dainty Delights" package, the dotted piece that measured about 2" x 2" and I set it in place on the Dimensionals. 

Next the piece was added to the Basic White piece using Dimensionals and a little bit of tape on the back of the 2-1/2" x 2-1/2" piece of DSP. Then that piece was added to the card base.

The words are from the "Go To Greetings" set using Mossy Meadow ink. I punched it out using the "Double Oval" punch. I took a scrap piece of Rich Razzleberry card stock and punched out the scalloped oval using the same punch. I was going to try to punch the piece from the Rich Razzleberry layer but the space on the punch between the oval and the scalloped oval is questionable and I may have ruined the piece because you have to try to get it up so I opted to play it safe, plus I had some scraps in my tote. I taped the word oval to the scalloped oval. Dimensionals were added to the back and the piece was set in place on the front of the card.

The cute little flower is from the "Dainty Delight" bundle. I die cut two flowers and I glued them together at the center. I added a small Dimensional to the back and set it in place inside the circle. I had an embellishment from one of the kits I had gotten at Terri's Stamp-a-Stack and I set it in place on the center of the flower. I colored it using my light Rich Razzleberry Blends pen. The dark pen might have been better but I just left it as it was because it was already on the flower.

I cut a 4" x 5-1/4" piece of Basic White card stock and taped it to the inside of the card and the card was done.

Isn't it a fun card? Don't you just love it that you can feature smaller images using this layout? I sure do!

Thank you SO very much for taking your time to stop in and see today's thank you card,
Wanda

Wednesday, April 26, 2023

Two-Tone Flora, Go To Greetings, Birthday Card

Hello! I'm happy you are here to see today's card. I found it on Pinterest and I thought it was so pretty that I'd give it a try myself. I thought it would be quick and easy too.  I ended up making it more difficult than it needed to be.  I found the card here.  It's a sped up video but there is a link to see the whole process. Please read on to see how I made this card.

The base of the card is a folded half-sheet of Basic White card stock. I cut a 4" x 5-1/4" piece of Basic White card stock and textured it using the "Painted Texture" embossing folder and then I glued that to the front of the card base. 

Next I stamped the flowers from the "Two-Tone Flora" set using Highland Heather for the solid part and Gorgeous Grape for the details.  And the other flower is the one I struggled with, I stamped the detailed image using Flirty Flamingo ink and then the sold part with the same color and the details got lost. I tried a couple of times but no luck. Then I thought I'd do the detail again and then stamp with Blushing Bride ink. ICK! I didn't like the color combo. So I ended up stamping off on the solid part once and then over the detailed image and I was much happier with it.  

The leaves were stamped using Granny Apple Green and all the pieces were die cut using the matching dies in the "Two-Tone Flora" bundle.

The words are from the "Go To Greetings" using Highland Heather ink.  I cut them out on the paper cutter. The piece was 5/8" wide and 2-1/4" long.

To assemble the piece. I glued the leaves down first. Then the Highland Heather flower and then the Flirty Flamingo flower. The words were slipped in and then glued in place. And that was it. So if you don't have any color issues like I did, your card should go together pretty fast.

This was a fun card to make and even with the color issue, I did have fun making it.

Thank you SO very much for taking your time to stop in and see today's birthday card,
Wanda


Tuesday, April 25, 2023

Dainty Delight, Lovely & Lasting, Thinking of You Card, Stampin' Up!

Hello there! I'm so happy you are here to see today's fun and easy card. I found it on Pinterest. You can see the original card here. There are no instructions on how it was made so I had to wing it. Please read on to see how I made this card, with a few changes. 

The base of the card is a folded half-sheet of Basic White card stock.  The card opens on the right and the fold is on the left.

I cut a 4" x 5-1/4" piece of Basic White and I textured it using the "Painted Texture" embossing folder. I glued that to the front of the card.

Next I stamped the flowers image from the "Dainty Delight" set using black Memento ink. I die cut them with the matching die. Then I colored them in with my markers. I used Real Red, Garden Green, Granny Apple Green (on the stems) and So Saffron.  After coloring I added Dimensionals to the back but I didn't set it in place yet.

The words are from the "Lovely & Lasting" set (soon to retire) and they were stamped using black Memento ink. I die cut them with the third smallest stitched die in the "Stylish Shapes" die set. I added Dimensionals to the back.

The stitched rectangle was die cut from a piece of Basic White card stock, I had used the third largest in the "Rectangle Stitched Framelits" die set. I glued this piece to the embossed piece. I was going to stamp my words on it first but they were too large so that is why I die cut them.

Next I set the words on top of the card along with the flowers for placement. When I had them where I thought they looked best, I removed the backing from the Dimensionals and I set the two in place on the front of the card. 

I tied a white bow (because that was the only color I had that would work) and I glued it to the bottom of the flower stems. And the card was done.

Even with the changes, I think it turned out well. I do like how it looks. This card can be used for a number of occasions. I LOVE versatile stamps!

Thank you SO very much for taking your time to stop in and see today's thinking of you card,
Wanda

Monday, April 24, 2023

Forever Fern, Go To Greetings, Fancy Flora, Friendship Card, Floating Circle Technique, Stampin' Up!

Hello! I'm happy you are here to see today's interesting card. I've wanted to play with the "Floating Circle" technique for a while now. I did a floating circle before but never like this one. You can see the one I made a while back by clicking here. Please read on to see how I made this card.

The base of the card is a folded half-sheet of Basic White card stock. The card opens on the right and the fold is on the left.

I cut a piece of Basic White card stock to measure 5" x 3-3/4".  And I cut the Starry Sky layer at 5-1/8" x 3-7/8".  I set these two pieces aside.

You will need a window sheet for this technique. I die cut it using the 2-11/16" die from the "Layering Circles" die set. It's the second largest one in the set.

Next I cut strips of Designer Series Paper (DSP) from the "Fancy Flora" 6" x 6" package at 1/4" each. I just randomly picked up the strips and set them in place on the circle using mono glue. I started in the center and worked my way out. To keep the spaces even between the strips, I set a toothpick down and butted the edge of the glued strip next to it. I waited a few seconds for the glue to set and then continued with the strips until the circle was filled.  Then I took a scissors and trimmed around the circle, cutting off the ends of the strips. Small Dimensionals were added to the back where the strips were so they wouldn't show through the window sheet. I set the piece aside.

Then I took a piece of Basic White card stock and die cut the leaves from the "Forever Fern" bundle. I trimmed off the bottom two leaf clusters because the piece was way to large. I glued the piece to the circle and I set it aside to set up.

The words are from the "Go To Greetings" set and were stamped using black Memento ink. I did set the circle on the piece for placement to see where the words would go.

Once the words were stamped I set the circle in place. The Basic White piece was taped to the Starry Sky piece and that was taped to the card base and the card was done.

This was a fun technique and a whole lot easier to do than the previous one. I like this technique much better.

Thank you SO very much for taking your time to stop in and see today's friendship card,
Wanda

Sunday, April 23, 2023

Petal Park, Go To Greetings, Thank You Card, Stampin' Up!

Hello! Today I am going to share with you a quick card (quicker if you have the dies). It's an easy one to make. Please read on to see how you can make it yourself.

The base of the card is a folded half-sheet of Mango Melody card stock. This card stock will be retiring soon. I did like the color but my ink pad kept getting thick and had a funny color on top of the crust it formed. Same with my Rich Razzleberry, maybe that's why they are retiring that color too.  Anyway, I have lots of card stock to use up but this layout will work with any of your Designer Series Paper (DSP) and matching inks, so what's stopping you from making it?  The "Petal Park" stamp set?  Well, there's lots of other flowered sets you could use. You must have one in your inventory!! Anyway, my card opens on the right and the fold is on the left.

Two pieces of Basic White card stock were cut at 4" x 5-1/4", one for the front and one for the inside.  I taped the inside piece in place. I like to do that right away so when I'm done with the front I'm done with the card. Not that it's a lot of effort to tape the piece to the inside after working on the front, it's just nice to have it done when you're done with the front.

I took a 1-1/4" x 5-1/4" piece of DSP from the "Dandy Designs" package I got during this year's Sale-a-Brations and I taped it to the other piece of Basic White card stock.

I took a scrap piece of Basic White card stock and I stamped the flowers using Mango Melody ink. Then I used black Memento ink and stamped the detailed images. I made two sets of flowers. The flowers come with three of them on one stamp, which is kind of nice, though it does go with the big leaf background image in the set. Then I fussy cut the flowers. The leaves were stamped using Granny Apple Green ink and black Memento for the details. I fussy cut them too. 

Next I punched out the scalloped oval using a scrap piece of Mango Melody and the "Double Oval" punch.

The words are from the "Go to Greetings" set and were stamped on a scrap piece of Basic White card stock using black Memento ink. I punched them out with the same punch. It's a "double" punch so you get both ovals.  Nice, huh? I taped the ovals together, Dimensionals were added to the back and the piece was set in place on the Basic White piece with the DSP on the right.  I didn't press down on the Dimensionals, I needed to have them loose for when I slipped the flowers under, I wanted to make sure they would go under.  Then I added the two leaves. After the leaves were added I pressed down on the oval to make sure it was set in place.

Dimensionals were added to the Basic White piece and it was set in place on the top of the card base and the card was done.

As I look at it, I think the center of the flowers could use something, so I may add some pearls or other embellishments I find. I was trying to keep it simple and mailable with a single stamp. Adding firm embellishments will cause the card to be non-machinable and cost more to send. So I will be searching for something that is not thick or higher than the word piece.

This was a fun card to make and I think it could be used for a number of occasions.

Thank you SO very much for taking your time to stop in and see today's thank you card,
Wanda

I took the flowers and added a bit of tape to the back and slipped them under the oval.