Pin It

Friday, December 31, 2010

Northern Flurry with an Elegant Thank You!

You can still use the Northern Frost embossing folder! As long as there is snow on the ground here in Minnesota, I'll be using it. Though the way it rained yesterday I wasn't sure there would be much snow left at all. But not to fret, new snow is on it's way with colder temps!!! Ahhh, Minnesota weather! LOL Though I do LOVE winter (except for the ice).

Anyway, onto my fun card. I love these types of embossing folders that leave you room to stamp on it too. I am in need of some thank you cards for Christmas gifts and I thought it would be fun to use the snowflakes. But what to use for the wording. The "Teeny Tiny Wishes" thank you was just too small. Then I remembered the "Elegant Thank You" stamp. It fit perfectly but I really should have done the words in Bashful Blue instead of black. I have more than one to make so I'll give the blue a try and see if it shows up dark enough. I do like this card but the black just pops out a bit too much. I will get them finished later in the day but they won't go out in the mail before the new year but that is ok. I'm close to getting them out so I'm happy with that!!!

Don't forget to check back tomorrow for the FUN Blog Candy! I will try to post earlier in the day so you can enter to win. Be sure to check back, I don't think FeedBlitz sends out the email until later in the evening/night.
Thank you SO much for visiting today,
Wanda

Thursday, December 30, 2010

Baby Bundle Baby Card (Another one!)

Is there a baby boom going on?? I know of so many gals who are either pregnant or have recently had a baby. Or maybe I it's just the group of people I know. SO then the question is, is it a good thing to know me or not!!! LOL Anyway, I am in need of another baby card. This time it's a boy. But I bet you figured that out by the color of the card!!!

Once again I used the "Baby Bundle" stamp set for this card. I was going to originally have the card set in landscape instead of portrait. And I had the circles at the top with the center one being higher than the two on the sides. But as I was playing with it I thought I'd like the circles to be on the long side. I had already put the scallop on which made the circles on that side a tight fit. I did manage to get them in there without them looking too crowded. Using Dimensionals behind them did help with that a lot!

This was a very easy card to make. I stamped the images with StazOn ink. Then I punched them out using the 1-1/4" circle punch. I punched the next layer out using Marina Mist card stock and the 1-3/8" circle punch. I then punched the scalloped circle out using Bashful Blue card stock. I taped them all together and then I played with them on the card front for a while to see what I liked.

Next I colored in the images with markers. But on the teddy bear I did use the Crumb Cake marker and a blender pen. The color was just too dark to use it directly from the marker.

I wanted to add a Bashful Blue 5/8" ribbon on top of the card and looking through the catalog I found that there is not one piece of Bashful Blue ribbon in there! SO I had to dye the white ribbon using the Bashful Blue inker. This is the part that took the longest on the card. It doesn't take long to dye the ribbon, it's the drying of the ribbon that takes the longest. SO if you want a certain ribbon on your card make sure you take care of that first so you don't have to wait so long to finish your card. I suppose I could have ironed the ribbon to speed up the drying but I didn't want to take the chance of burning it. And the same with the heat embossing tool, I was afraid I'd burn or melt the ribbon. SO I hung it to dry and waited it out. Not that I didn't have a million other things to do in the meantime! Anyone care to come over and help organize my workroom? It's such a disaster.
Anyway, here you have it. A sweet little boy baby card. Now I'm off to finish a fun bracelet I started yesterday. I would have finished it last night but this cold I'm fighting made me extremely tired so it was off to bed for me! I'll show you the bracelet when I get it done. I have a piece on it that needs a little thought and design work to it but I should be able to finish it up sometime today.

Be sure to stop in on New Year's Day to see the fun Blog Candy I will be putting up. And as usual I will have a question for you to answer too!!! Nothing is really free, is it? LOL

Thank you SO much for visiting today,
Wanda

Wednesday, December 29, 2010

Greeting Card Kids Sketch Challenge

I couldn't believe it! I almost missed this weeks Sketch Challenge at SplitCoastStampers. I'm usually on the computer on Tuesday night when the challenge is posted and last night I was on the couch trying to get warmed up! I'm fighting a not so fun cold and I have the chills. SO needless to say, being on the computer was not on my mind at all last night. Though the laptop might have helped warm my legs!!!

This is the card I made for this weeks Sketch Challenge. I LOVE this layout and I can see myself using it on other cards in the upcoming year. I think I'm going to have to purchase a new album to keep these sketches in! When I first started doing the sketches I printed them out and put them in a small photo album. I had gotten extra pages for it just in case it filled up. Well, I have been filling the empty pages and I really don't think I can refill the album. I really don't want to buy a new one but I guess I'll have to if I want to keep collecting the sketches. They are SO handy to have around. I need to make a card and I don't know where to go with it, I just pull out the album and see what layout fits the image I want to work with and off I go! It sure takes the guesswork out of the layout! Sometimes I alter them a bit to fit what I'm doing or whatever embellishment I want to add to it. They are SO flexible to work with too!

SO onto today's Sketch Challenge. I used the Decorative paper from the "Love Impressions" paper pack. These little hearts came from a thick page that also has the tiny dots at the top and on the other side of these hearts it reads "All You Need Is Love." I'm not sure what I'm going to do with that piece of the paper yet but I'm sure I will come up with something!

I used Pretty in Pink, Regal Rose and Pirouette Pink for my card stock colors. The little girl is from the "Greeting Card Kids" set and she was stamped using Black StazOn ink and Whisper White card stock. I cut her out and set her on the circle using Dimensionals. I also used Dimensionals on the punched scalloped circle layers.

The words are from the "Teeny Tiny Wishes" set. A set I find myself using a lot lately!

I colored in the girl using markers. For the heart she is holding, I wanted it very dark so I just colored it in with Regal Rose and I colored over it about 3 times. I wanted it red but there was no other red in the card to tie it in so I had to keep things in the pink!

This was a fun sketch and if you have time give it a try!

Thank you SO much for visiting today,
Wanda

Tuesday, December 28, 2010

Baby Bundle Baby Card

One of my fellow demonstrators had a baby girl earlier this month and I had not gotten a card out to her and her hubby. It was just such a busy month with Christmas decorating, Christmas cards, shopping, wrapping gifts, baking and a birthday the day after Christmas to deal with too! I had every intention of getting a card out with the Christmas cards but it just didn't happen. I did get the envelope addressed in hopes of whipping up a card. I don't like to "whip up" a card. I do like to take a little time and put some thought or research into it. For this one it was the research. I searched SplitCoastStampers and found a card very similar to this one, it was done by jillastamps. I liked what I saw and modified it just a little bit. You can see the original one here. I just thought this card had a clean look to it and a bit of simplicity to it too! It was easy enough to make but not "simple." You can't call a card simple when you use 4 different punches on it, right??? It was easy to do. I just love that little teddy bear in the circle.

Thank you SO much for visiting today,
Wanda

Monday, December 27, 2010

Greeting Card Kids Notebook

I am SO sorry that I forgot to post something yesterday. That is a first in all of these years of blogging. Our Christmas is always so busy and crazy. I try to post a couple of days in advance (secret is out now!!!) so I can tend to the holiday things and not have the blogging on my mind or my long list of things to do. We have a busy Christmas eve with going to extended family stuff. Then we have Christmas day here with the gifts and dinner which always follows dishes and messes! And then the 26th is hubby's birthday so there is more celebrating too. So today is my day to recoup, regroup and supposedly relaxing. My plans for the day (which began at 4:30 am because I could not sleep! - great way to start the day!!!) are to pick up the living room for starters. It's such a mess with bits of wrapping paper, boxes and gifts all over the place. A load of laundry must be done or I'll get behind on that. But remember I LOVE to do laundry because that means I get to be in my workroom until it's done!!! Nothing like being sent to your room to escape and have fun while doing the laundry! Then there's dishes and cooking (UGH!). I need to clean up my workroom. Someone sure made a mess in here! I'm such a messy stamper! I REALLY want to finish a bracelet I started and I'll share that with you when it's done, it's SO cool!!! And the last thing I would like to accomplish today is a graduation card. My niece graduated from college on the 23rd and I had to take a card from my stash. On a normal occasion that wouldn't be such a big deal but it was the only graduation card I had on hand!! SO I do need to make some new samples and put them in the samples drawer. Wish me luck on completing all of those tasks. Oh and the Christmas celebrating isn't over yet. We still have one more Christmas party/get together to attend. Then maybe we can relax and enjoy the remainder of the holiday season! I do LOVE seeing the Christmas tree in the living room and all of the decorations and wonderful red and green colors. The living room always looks so drab once we put all of the Christmas stuff away! And the living room sure looks a lot bigger too!!!

But for now I want to show you a fun notebook I created using my Zutter punch binding machine, the "Greeting Card Kids" set and the new "Love Impressions" decorative papers. I LOVE notebooks and I LOVE to alter notebooks too. It was actually fun to create the notebook from the ground up! I am going to be selling my Zutter punch machine. I have only used it twice so if you are interested in the details please email me.
I started out with some really firm cardboard. I think it came on the back of my watercolor paper tablet. It's very thick and firm. I cut it 6" x 6". Don't ask why, I have no idea why I wanted to work with a square. I'm not a big fan of squares as it is!!!

On the front piece of cardboard I glued a piece of Real Red card stock. While that was drying I cut some copier paper to fit the notebook.

Next I decorated the front of the notebook by adding a layer of Basic Gray card stock. Then I added the soft pink dotted decorative paper from the "Love Impressions" pack. On top of that I added the heart border strip and another piece of decorative paper from the pack. After I got those pieces in place I stamped and colored the little girl and worked the layers to fit.

The words came from a custom made rubber stamp. I punched it out with the oval stamp, added a larger oval layer behind it and then the scalloped oval layer. Then I punched the cover and back. I added the paper and then the wire binder.

This was a very fun notebook to create and personally, I think I like creating them from the ground up as opposed to altering an already made one.
Don't forget the annual New Year's Day Blog Candy!!! It will be extra special this year because I am celebrating a belated Blogoversary, the New Year and my birthday!! We won't discuss how many candles but I'll give you a clue - the fire extinguisher is a good thing to have on hand with that many candles!!!! LOL

Thank you for visiting today,
Wanda

Holiday Hoopla!

Yup, it was a busy holiday! I missed a posting but I do have one I will be putting on a bit later so please stop back!

Hope your Christmas was a special one!
Wanda

Saturday, December 25, 2010

Merry Christmas!

Just a quick post here and a wonderful photo to share with you.

I hope you have a wonderful Christmas! I took this photo one night last week when we were driving around looking at the lights on people's homes. I loved the vibrant lights on this cute little tree and begged hubby to stop so I could take a picture. Because it was night the shutter speed was very slow and I didn't get a real crisp photo. I'd have to take the tripod out and set it up to get a nice picture. I don't think the home owner's would care for that. So this photo will have to do. It has a wonderful stillness to it, a peacefulness to it and a very Christmas look to it! I hope you can see the beauty in this much as I did. I think you maybe able to click on it to get a closer view. I hope so, it's SO pretty.

Merry Christmas to you all!
Wanda

Friday, December 24, 2010

Christmas Cards


Can you believe tomorrow is Christmas day? It sure came quickly. I just got my gifts wrapped yesterday and some baking done. I didn’t bake as much as I usually do mostly due to lack of time. But that’s ok too, we don’t need all of that stuff around here anyway.

Today I have a few cards to share with you. They are all made by my friend and fellow demonstrator Denise W! She's an excellent stamper. I love the clean look of all of her cards. It is kind of funny, after you do a few swaps you can begin to tell who made what card by the style. We all have our own style and after a while you can tell who made what card! Anyway, I hope you enjoy the cards!


Have a Merry Christmas,
Wanda

Thursday, December 23, 2010

Santa Christmas Card

I almost forgot to get this post done for the blog!!! I was SO into wrapping gifts, cleaning and baking that I almost forgot about my blog!! Oh and I went out shopping. Yup! Me! I never do that and the sad thing was I really didn't need anything. Just hadn't been out shopping much this week and I guess I needed my spending fix! I did find some clear Christmas bulbs on sale so I can do some beading around them. I had beaded a bulb last week and I forgot to take a photo of it before I wrapped it up. SO forgetful. But it's not like I'm not going to be making anymore.

Anyway, onto this beautiful card. This card was made by Leah. She's a fabulous stamper and don't let her tell you any different. This card does not have any stamping on it! It's all done with decorative papers and stickers. I LOVE this whole concept. Sometimes you just need to step away from the stamps and ink and do something different. And see what a beauty the "different" is? I think it's absolutely gorgeous. The colors are so pretty. Oh and there is a lot of thought and planning that goes into a card like this too. You do need to cut the layers proportionately! Plus I love how she did the ribbons here too. You tie the two colors together in the center and then tape them in the back. Isn't it just adorable??? It adds SO much to the card.
Thank you Leah for letting me share your fabulous card with everyone!

And thank you for taking the time to visit today during this busy season!!!
Wanda

Wednesday, December 22, 2010

Wednesday Sketch ChallengeCreate a Cupcake

I had to take a break from wrapping Christmas presents to play with today's Sketch Challenge. I totally forgot about it. I have lost track of the days!!! I was SO into wrapping gifts and I really did want to get them done this afternoon but it didn't happen I have 5 more to wrap and I'll finish them when I get done posting this. Then clean up all the wrapping paper and paper scraps on the floor. Then the fun part of cleaning the house for Christmas begins. I have 2 things left to bake so that will be done too. Maybe I'll do the baking later tonight. I baked last night until almost 1 am. I'm SO far behind on everything this year and I don't like to add stress to my holidays!!
Ok, onto the stress-free card. I LOVE doing the Wednesday Sketch Challenge and really only find it a challenge when they throw in a square card!!! Though I have gotten better at them too! This card is not square. It had a nice quick and simple layout so I could whip the card up quickly. I needed a birthday card so this worked out nicely.

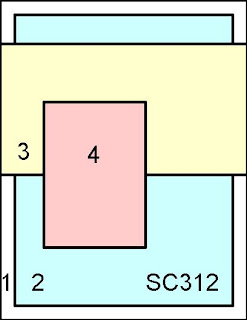
The base of my card is Real Red. The layer #2 is a piece of decorative paper from the "Love Impressions" pack. the #3 layer is a piece of Real Red card stock that was run through the Big Kick using the Dotted Swiss embossing folder. And the #4 layer is a piece of Pirouette Pink card stock. I used the "Create a Cupcake" set and the "Build a Cupcake" punch to put the card together. I did add a piece of black ribbon to the #3 layer. I wanted to use Basic gray ribbon but I was surprised that I didn't have any so I looked it up to order it and there is none to order. Bummer!! So I had to use black.

This was a very fun sketch and if you have time (take a break and make some time for you), play with the sketch too!

I was informed that I had my blogoversary last month and I totally missed it. I began blogging on here in November of 2006!!! WOW, that is a very long time. SO for the Blog Candy I will be combining it with the New Year's Day Blog Candy and make it a VERY nice gift!! SO be sure to pop in on New Year's Day to see what I have for the drawing!

Thank you SO much for visiting today,
Wanda

Tuesday, December 21, 2010

Candy Cane Christmas Decorative Paper Box

I am SO into making these fun little stocking stuffers. As the days get closer to Christmas I am finding myself getting more creative. Why is that? Where was this creativity a few weeks ago? I think I work better under stress!!! LOL

I had picked up this cute little snowman nail polish at the grocery store a couple of weeks back. I thought my niece would love it. It did come in lots of colors but I chose this silver one because it seemed like it would be something my niece would like.

But I didn't want to just give her the polish as is. I HAD to make a box for it. And of course I had to use the Candy Cane decorative paper (I printed it out from the download that I had purchased). I cut the box, folded it, added a window and glued it all together.

The box was cut 6-1/4" x 5-1/4". On the long side I scored it every 1-1/2". There is 1/4" left, that is for the flap that is glued shut. In the short side score it at 1-1/2", flip it and score the other side the same. I punched a circle for the window, added a piece of Window Sheet and glued it in place. I then glued the 1/4" piece followed by the bottom flaps. I added the nail polish and glued the top shut. I added the cute snowflake, a pearl and then tied a ribbon at the top.

It's SO dressed up now and a lot cuter than just adding it to the stocking as it was!!! Gotta make them work for the gift ya know!!! LOL

Thank you SO much for visiting today,
Wanda

Monday, December 20, 2010

Jolly Bingo Bits Box Weekend Project

Can you believe it's only 5 days until Christmas? I've still got some baking to do an gifts to wrap. PLUS I have to clean the house too!! I love Christmas, I just wish it didn't come with all those extra time consuming things!!! Ok, enough of my whining, on with the project for today!

This was a very fun box to make. I used the Sizzix die Box #2 to make the box. It cuts it out and scores it all in one step. I cut my box out of Whisper White card stock. Then I stamped the cute peppermint candy from the "Jolly Bingo Bits" set on using Real Red ink.

Before I put the box together I cut the hole out in the center. The hole was too big to use a scallop die punched out for an edge around the circle so I just colored around it using the Real Red marker. You can decorate the box any way you like.

Before I put my box together I did add a piece of Window Sheet to the circle. The peppermint soap is wrapped in cellophane but I just like using those Window Sheets. It gives those openings a nicer look. They have more of a quality look to them. Plus I've made some items without the Window Sheet and I find when I pick them up my thumb tends to "fall" into the opening. And without them I think they have a cheaper look to them. SO I take a whole two minutes to cut a piece of Window Sheet and glue it in. It's SO worth the time.

After the Window Sheet was put on I glued the box together. Actually with this box you only glue the one side seam. The bottom and top fold shut. I inserted the soap and closed up the box. I tied a red ribbon around the box and liked the way it looked. It's got a nice sweet clean and simple look to it. Another item for the stocking. Can you get enough stocking stuffers??? LOL

Thank you SO much for visiting today,
Wanda

Sunday, December 19, 2010

Peaceful Season Christmas Card

This is one of the cards I had put together at the Diva Day Shoe Box swap! This card was designed by Sue L. Our glorious leader!! I love the clean and simple look to this card. I don't know if you can see it or not but the berries on the card are colored in with red and then Crystal Effects was put over it to give it some dimension. It's such a pretty card, isn't it?
What is SO cool about this set is that the fancy words come with it!!! I really liked the wording on this set.

The colors used here are Cherry Cobbler, Whisper White and Garden Green. They are the most perfect Christmas colors!
I almost forgot to mention, this card was VERY quick to make too!

Thank you Sue for such a beautiful and fun card!
Tomorrow I have another Weekend Project gift item for you to see!

Thank you SO much for visiting today,
Wanda

Saturday, December 18, 2010

Scallop Trim Border Punch Box Weekend Project

When I was out Christmas shopping I found this cute little "Twinkle" Santa sucker. It's a red gum drop with icing on it to look like a Santa. I thought it was absolutely adorable!! I did cut the sucker stick down a LOT, almost 9 inches!!! The sticks on those kinds of suckers are REALLY long. I have purchased these in other shapes too. I had gotten orange slices, ones with apple shapes in the center, I even found them in the shapes of a baby carriage!!! How cute is that?

For this box I cut the card stock 4-1/4" x 6". On the short side I scored it at 1", 2", 3" and 4". Then I turned it and scored each end at 1". I cut the score lines in one inch and then cut away that little tiny rectangle piece on the two corners. You don't need them. If you forget to cut them you'll know, the flap will be too big.

After scoring and clipping the score lines I folded all of the score lines. Pre-folding them makes it easier to put the box together. I decided I wanted to use a circle punch for my window but I didn't have a small enough punch to make a nice size viewing window so I took the 1-3/8" circle punch and punched the hole on a fold. It makes the window look bigger and you can view more of what is inside doing a corner window!! I discovered that a few projects ago and LOVE it. I've done corner windows before out of necessity but never realized how much more you could see the stuff on the inside! After making the window I cut a piece of Window Sheet and glued it in place over the punched circle opening. I did pre-score the sheet first. I glued it in place and set it aside to dry.

In the meantime I glued the box together and decorated the outside of it. I added the Santa and sealed the box shut. It's now a GREAT stocking stuffer from Santa!! I've added a link to my other stocking stuffer items.

There's not a lot to these and they are pretty quick to make too!
After seeing this posted I was thinking that I should have made that box look like a chimney!!!

Thank you SO much for visiting today,
Wanda

Friday, December 17, 2010

Jolly Bingo Bits Card

I am SO bad at lining things up without the Stamp-a-ma-jig! I bet you never would have guessed that by looking this card?

This card was made by Amy for the Diva Day shoe box swap using the "Jolly Bingo Bits" set. Now on Amy's card the candies were in a nice line and she didn't use the Stamp-a-ma-jig! She thought we all could stamp straight and even!!! I may have gotten it straighter had I stamped the center candy first instead of stamping from left to right!!! Oh well!!! Like I tell everyone, it's handmade card!!!

I just thought it was cute and those little candies are just adorable. I love the color too (Real Red) the whole card has such a Christmas look to it! And it was a CAS (clean and simple) card to make too. If you are not into the candies, that set has a bunch of other images that are just as fun to use.

Thank you Amy for such a fun card to make. I'm SO fortunate to be among such great stampers!!! Our group is a very fun one too. Lots of nice gals and a great leader (Sue!!!). She spoils us rotten!! And we LOVE it!!

I have another fun "weekend project" for you tomorrow so be sure to stop back and see!

I thank you SO much for visiting today!
Wanda

Thursday, December 16, 2010

Northern Flurry Snowflake Pick Weekend Project

Ok, as I promised!!! Here is the gift I had made for my dear friend Ann for her birthday! It's a candy bouquet. A blue candy bouquet!!
The first thing I did was tried to buy all the wrapped blue candy I could!! I found Dove, Tootsie Rolls, Toffee and Lindt round chocolate candies.
Next I cut various lengths of wire. I plugged in my glue gun and as it was heating I took my glass container and lined it with a piece of silver Mylar (like tissue paper but made of Mylar). Once I got it centered I removed it, put some hot glue in the bottom of the container and added the Mylar. Next I glued in place a piece of Styrofoam.
Then I took the wire pieces and glued the candies to the wire. I added some iridescent shreds on top of the Styrofoam and then I placed the candies in the Styrofoam and kept adding until it looked full and fairly even around the container.
I used the Stampin' Up! "Northern Flurry" die and cut out a few snowflakes. I glued them to the wire and stuck them in the bouquet along with a few silver colored "greens". It was a very fun gift to make and I can see myself making some for Valentine's day and for other occasions too!!! Can you see this as a baby shower center piece??? Lots of possibilities here! As long as there are colored candies to use as your theme you can pretty much cover any holiday or event!! Have fun making these!

Thank you SO much for visiting today,
Wanda

Wednesday, December 15, 2010

Bold Blossom Sketch Challenge Card

This is the card I made for this weeks sketch challenge at SplitCoastStampers. I especially liked it because it was a simple one and this week I sure can use "simple" in my life!!! It's just crazy here and with Christmas coming up next weekend (10 days, but who's counting?? LOL) I'm trying to scramble to get things done. I took a break to stamp and I stamp some while the gals are here with me. I LOVE having the ladies come over to stamp. It's a time to unwind, regroup, chat and have fun!! Then when they leave it's back to the old grind!!! UGH

Ok, enough about that. Here is my card. I just followed the sketch and cut out the pieces accordingly. I wasn't sure what set to use and my mini pre-order arrived yesterday and the stamp sets were just piled on the counter so I thought I'd dig through the and see which one would work with this layout. "Bold Blossom" won!!! I needed a birthday card and this was just perfect. The only thing I didn't really like about doing this was, it looks like a spring card and there is no way that I am ready for spring. Yes, even with the frigid temps we have right now, I am not ready for spring. I need some warmer winter, just enough to get the snow to stick together. NOT this sub zero stuff. BRRR. My fingers are cold down here in my workroom!! But I still am not done with winter!
SO this spring card is the last you'll see until after Christmas (though I can't promise!!! I did purchase a few other ones in my pre-order!).

If you have time, play with this sketch. There's lots of stamps that will fit in that image space!

Pop back tomorrow to see the FUN gift I made for my dear friend Ann!!!

Thank you SO much for visiting today,
Wanda

Tuesday, December 14, 2010

Tag Alongs Birthday Card

This Stampin' Up! "Tag Along" set is a very fun one. In the center of this cupcake was a "to and from" but I omitted it. I did the Direct to Rubber technique. I only colored in the outline of the bottom of the cupcake and the top.

I like the layout of this card too because it's so different. Only thing I don't like about the layout is you can't be long winded when you are writing on the inside or it will show at the bottom!!
The "Happy Birthday" came from the "Teeny Tiny Wishes" set. One set I use a LOT!!
This a fun card to make for a couple of reasons. It was easy enough to put together plus it was for my very special friend Ann! I also made her birthday gift and I will show you what it was tomorrow. No, better make it Thursday. Tomorrow is the SplitCoast Sketch Challenge!! I had a LOT of fun making that too! I won't give it away but I think you're going to want to make some!!! Tune in Thursday to see what it is!!
Thank you SO much for visiting today,
Wanda

Monday, December 13, 2010

Candy Cane Christmas Decorative Paper Pixi Stix Holder Weekend Project

Today I have for you a fun little project. It's a perfect way to stretch out that bag of candy and make fun gifts for a lot of people! I was going to type "kids" but even the bigger kids like Pixie Stix!!! This would also be a fun Make n Take or even a great Stamp Camp project.

Wanna know how to make this?? Of course you do! Read on and I'll tell you!

Take a piece of card stock (mine design was printed out on Whisper White card stock) and cut it 7-3/16" x 4-3/4". On the short side score the card stock at 3/8", 3/4", 2-5/8", 3" and 4-7/8".

On the long side score at 3/8". Turn and score at 3/8" on the other end. Looking at the ends you will see a tiny square in each corner. Cut it away. Clip the other score lines on the short side up to the score lines. You will only be clipping into the card stock 3/8". These are the flaps for the bottom and top of the box.

Fold all the score lines. Make a window in the box now if you wish to have one in your box. Add your window sheet now if you want that on your box too. Tape or glue the long side flap, I used glue because I knew it wouldn't come lose like tape might.

Next glue one end of the box shut. Fold in the small flaps first and then the two long ones.

Fill the box with the Pixie Stix and glue the other flaps. Decorate the box as desired. It's now ready for gift giving!! It's a fun and easy little project with very little cutting.

Thank you SO much for visiting today,
Wanda

Sunday, December 12, 2010

This card is from the Diva Day shoe box swap. It was designed by Juliann. She always comes up with such fun cards. Now for me this card was a challenge. To make it I had to take the snowflake stamps and work them into a circle without any guidelines. Yup, nothing to go on but working in a circle from north to south and then east to west. I did manage to make the circle. It's not so straight but it is there and it looks like a wreath!
It was fun to do and it was fun to meet the challenge! I love the colors of this card, it is definitely a Christmas card! No mistaking it for anything else!
I don't know the name of the stamp set that was used. Obviously I don't own it!
Stay tuned this week, I have a couple of fun projects for you to see and if you like to make for yourself. I will post measurements!!

Thank you SO much for visiting today,
Wanda

Saturday, December 11, 2010

Santa Theme Gift Card Holder

I had gotten an email from one of the local stamping supply stores and in it was this adorable Santa themed gift card holder. I just had to recreate it. Though theirs was a little different. The belt part was actually stickers or some type of rub on. On mine I cut out the card stock for the belt and buckle.

This was very simple to make too! I know you want to know how so here it goes:
I took a piece of Real Red card stock and cut it 4-1/2" x 4-1/4" and I folded it in half so it measured 4-1/4" x 2-1/4". Now here is where you can adjust the size for your size gift card. Some gift cards run a bit bigger or smaller and you want it to fit nicely in the holder.
After folding it took the 1-1/4" circle punch and punched a half circle on the front edge. I eyed it to get it close enough to center. You can measure and find the center if you like. Then I glued the two side pieces together and set it aside.
For the belt I cut a piece of Whisper White card stock 3/4" wide by 4-1/4" long and taped it in place in the center of the holder. Then I cut a piece of Basic Black card stock and cut it 1/2" wide by 4-1/4" long. I also cut a little piece of white and rounded the edge on it for the shadow part of the belt. I rounded the piece of black card stock too. I took a small hole paper punch and punched in the notches on the belt. I taped the pieces in place. And then I made the buckle. I punched a small square hole in some brushed gold card stock and then punched a larger square over it, centering it as much as I could. I also cut a little piece for the buckle to glue on top. I hand cut the end round so it looked more like that part of the buckle.

This was a very simple gift card holder and it's SO cute. I also have other Santa Theme items for you to see and make, just click here.
Thank you SO much for visiting today,
Wanda

Friday, December 10, 2010

Four the Holidays Christmas Card

Today I'm going to share with you one of the cards from the DIVA Day Shoe Box Swap! This card was made by Sue A. There are SO many fun elements to it. Sue is a very talented stamper and I honestly have to say that I have never seen a card made by here that was not fabulous!!!

The decorative paper is from the "Deck the Halls" designer package. Now what I found fascinating here is the colors of the paper she used. These two were on my "not so favorite" list. I liked the other side of the paper much better. Well, now it's a different story!! Why is it that it takes just one sample to change your mind?? LOL

The base of the card is a piece of Crumb Cake card stock. The edges are sponged in Chocolate Chip.

"The Merry Christmas" is from the "Four the Holidays" set. A set I have and have not used much at all. That "Merry Christmas" is so elegant looking and then to do it on top of Cherry Cobbler card stock and emboss it in gold, well...need I say more?

The next layer is the piece of decorative paper that was embossed in gold on the edges. Such an elegant and beautiful touch! On top of that is another piece of decorative paper that was set on with Dimensionals.

On top of that is the scalloped circle. After punching it out it was sponged using Cherry Cobbler ink.

It's a little difficult to see but on top of that layer is a punched snowflake that was embossed in gold. SO darn pretty! On top of the snowflake is the gathered lace ribbon and the button! I just love this card.

Oh, I almost forgot. Between the layers of decorative paper we tied a piece of seam binding ribbon and set it in place with tape. The ribbon on the left side got a bit bent when I put it in the pile of cards. I'll just put it on the bottom of the pile and it will straighten out! And if that doesn't do it, a little dot of tape will take care of it.

Isn't this just the most elegant card? It's SO beautiful! Thank you Sue for your fabulous creation!
We have a HUGE snowstorm heading our way. I've heard talk of 6" to 16", cold (single digit temps) and winds. I think that constitutes a blizzard but no one has said that word yet! SO I got a lot of my running around done today and got my hair cut and highlighted too!!! Glad to get that out of the way! Just wish I were done Christmas shopping! But if I'm stuck indoors tomorrow (which doesn't usually bother me unless I know I can't or shouldn't go out!! LOL) then I want to have some stuff to do. So I'm going t wrap what gifts I have purchased and hopefully finish our Christmas cards. Those things should have been done the first part of November. Each year they get later and later. I should just make New Year's cards instead!!! LOL I need to get my workroom cleaned up and I have a few movies I want to watch too! Crank the heat up and make the most of it! I'll let you know the total snow count when it's over!

Thank you SO much for visiting today,
Wanda

Thursday, December 09, 2010

Candy Cane Christmas Decorative Paper Candy Box

It's always more fun to give candy to your friends, relatives or co-workers when it's wrapped up so sweetly!!!

I had purchased the Candy Cane Lane Digital kit so I can print out the decorative paper as I need it. To print it out for using as background paper, I highly recommend you use 28# or 30# copier paper. It gives it that feel of quality decorative paper. Plus it's easier to work with and the ink absorbs better.

For this project I used Whisper White card stock. I wanted my box to be a very sturdy once since I was putting a window in it.

To make the box you cut the printed card stock 7-1/8" x 7-3/4". Score on the short side at 1-5/8" four times across. Turn and score each end (on the long side). Now looking at the score lines you will see two that have formed small rectangles. Clip them away at the ends only. The center part is where you will be gluing or taping the box together.

On the short side, clip between the score marks. You will be clipping only 1-5/8" into the side of the box. You will stop at the score line. These are the ends of the box.

This is when you will add a window to your box if you want one. I used a 2" circle punch and punched through two layers of card stock. I did punch a circle out of scrap copier paper and folded it in half. I set it over the area I wanted the window to be and traced the half circle. I punched it out and added a piece of Window Sheet for the window. I did glue it in place. But be sure to score it before you glue it in place.

Next I glued that little flap to the box. Then glue or tape one end closed. I added the Ferrero Rocher candy and you can glue or tape the other end closed. Then you can decorate with ribbons, snowflakes, or whatever you wish to add to your box! I kpet mine simple. I just added a scallop around the window and I added a couple of snowflakes from the Northern Frost die. It was a fun project and it really didn't take long to do at all. If you use colored card stock you can add decorative paper to jazz it up more too. Use your imagination and have fun!

Thank you SO much for visiting today,
Wanda

Wednesday, December 08, 2010

Northern Flurry Snowman Card

I have had this little snowman set for some time now and have never played with it. When this sketch came out I took a look at my stamps to see what would fit in the 3-a space.
This snowman really didn't fit there until I added the snowballs in the air!

I stamped the snowman using black StazOn ink. I actually stamped him twice, once on the focal piece and again on a scrap piece. I cut the one piece out and using Dimensionals I set it in place on top of the first snowman.

I stamped a hat and cut that out too. I colored all the pieces and added the hat on top of the snowman's head. On the hat I added a tiny white pompom for a little different texture on the card.

The background was done using pieces of the snowflake paper from the Candy Cane Decorative paper pack. I sponged the edges with Marina Mist.


I added a few rhinestones to the center of the stamped and die cut snowflakes.

The larger snowflakes at the top were made using the "Northern Frost" die. I used Smooch Spray on them to give them a little bit of glimmer. I taped them in place and then added the rhinestone. It was just enough twinkle to be eye catching!

And that is about it. There wasn't a lot to making this card. The pieces were simple and they were also quick to do. I would have to say the part that took me the longest to do was the cutting out of the snowman and hat. It may have gone quickly in reality but for me, I hate to cut out pieces and I thought it took a long time. Though it did take a while for the Smooch spray to dry. You get the feeling of watching wet paint dry! I suppose I could have heat set it to speed up the process. I always think of those things when the card is all done!!! LOL

Anyway, I like this card. Of course I would, it's got a snowman on it!!!

If you have time give this layout a try. It's got a LOT of potential and I do seeing myself using it again sometime!

Thank you SO much for visiting today,
Wanda

Tuesday, December 07, 2010

Just for the Fun of it Christmas Card

I started my day off running and I haven't stopped since! I'm exhausted. First of all I had to wrap 6 gifts for a charity "thing." Now mind you, I did buy these gifts about 2 weeks ago and I knew I needed them this morning! SO I'm wrapping them up carefully and neatly with an every watchful eye on the clock. I got them done and bagged up. Packed them in the car, grabbed my purse and coffee and off I went. I had an appointment and after that it was time to wait in line at the post office. Tis the season for longs lines everywhere!!! But it was ok, I was able to catch up on my emails on my iPhone. I knew I'd be waiting in line so I put off going on the computer this morning. Then from the post office it was off to the bank and the grocery store. Fortunately they are both in the same building! Next it was home to put the perishable stuff away and head out again. But I needed to be back home to sign for a package hubby was expecting. Got home in time and started putting away the rest of the groceries. I finally got around to making the bed, emptying the dishwasher and getting the counter cleaned off. Finally I got the vacuum out and cleaned the Roomba so it could do the living room for me while I did the steps and foyer! I LOVE that little machine! I touched up the bathroom (washed my hands) and began to make dinner and do a couple of loads of laundry! I'm just exhausted and I think tomorrow will be much like today but without the presents and groceries!! I SO love Christmas but I don't like all the extra things that come along with it. When am I going to have some time to do some baking???
Anyway, the wrapping is what inspired this card. I wrapped 6 gifts and each box had a different snowman paper on it!!! Imagine that! I LOVE snowmen but I didn't realize that all of my wrapping paper has them on it too! Can you say "obsessed??" LOL

This paper had a bunch of cute snowmen on it and I cut one out to see if it would fit on a card and it did!!! I thought it was such a sweet looking snowman that it really did need to be made into a Christmas card. Don't you think so??? And there was no stamping on this card either. The words were done on the computer a long time ago. I print out a full sheet of them and punch them out as I need them. Just TOO cute. SO don't toss away that last little bit of paper, it could be your next Christmas card!!!

Thank you SO much for visiting today (I'm off to relax and regroup here!),
Wanda

Monday, December 06, 2010

Greeting Card Kids Christmas Card

Yesterday was the DIVA Day event and Shoe Box swap! It's always such a fun day. It was held at Sandy's place this month. You should have seen her walls. They were painted in such beautiful Stampin' Up! colors!! It made me want to paint my walls here. With I had the time for it!

Anyway, this was the card I made for the swap. I did get a few of the layers put together before the swap so the gals wouldn't run out of tape making it!!! I struggled to find a card to make and when I figured one out I realized that it had WAY too many pieces to it. That was why I put a few of them together at home. I have a few cards left to put together and I may just make some holiday notebooks with them. I am SO into converting cards into notebooks! I LOVE to repurpose things!!

This was our last DIVA Day for the year. Next time we meet there will be some new faces as more have joined our fun group! It's always nice to meet new people and make new friends!! I'm excited for the new year!
I suppose I should tell you about my card! I used the Stampin' Up! decorative papers
Candy Cane Christmas" on the first two small layers. The girl is from the "Greeting Card Kids" stamp set. The snowflake is from the Northern Frost Die. On the snowflake I sprayed it with the Smooch spray and added a rhinestone to the center of it. With no wording on the card I can easily make it into a notebook!

Thank you SO much for visiting today,
Wanda

Sunday, December 05, 2010

Candy Cane Decorative Paper Snowman Carton

I think this is a combination of three things here. I have the milk carton die box. The Candy Cane decorative paper and the snowflake from the Northern Frost snowflake die. But wait there's more. There's the pearl in the middle of the snowflake. PLUS the snow and snowman parts inside.

I started with the milk carton. Now I don't have a lot of the cute snowflake decorative paper left so I printed my own. I had purchased the download for the decorative papers and now I can print them out whenever I need them. I printed it out on Whisper White card stock. Before I put it together I punched the hole using the 1-1/4"' circle punch. I do regret not putting a piece of Window Sheet in side. I don't like the hole to be open. I don't think the baggies on the inside will fall out but I do think the window does look nicer with the acetate over it.

I filled the box with some fun instant snow. It's such cool stuff. You just add water and it looks like snow. Once you add the water from the carton, then you set the hat, carrot and "coal" on top so it looks like a melted snowman! It's SO cute. I should have taken a photo of one all "melted." Anyway, once I got the stuff in the box (including the instructions and choking hazard warnings), I glued the box shut and set it aside.

I next made the snowflake and glued it on top as you see in the photo. I set a pearl in the center and the box was done. It is a quick little project to make and I think I will be making some for next years craft fairs? Should I make some to sell in my web store now? I am wondering if it would sell this late in the season? Season? Snow here lasts way into March and sometimes even April! I guess a snowman is ok any time, right?

I just thought this was a fun little project to make. I'm such a snowman lover, even the poor melted ones!!

Thank you SO much for visiting today,
Wanda

Saturday, December 04, 2010

Candy Wrapper Die Santa Box

Once I figured out how to fold this box shut properly I LOVED it even more. You can view a tutorial on how to fold it here. It's one of those things you really only need to watch once and you can do these in your sleep! I still have a little trouble getting the end to twist but I think it's because I'm treating it like it's glass!!! I need to hold it more firmly and be a bit more aggressive on the twist and I think I will have perfected this wrapper!
I made this Santa wrapper for my sister. It will have mixed emotions with it. She will think it's adorable but be disappointed that there are only two of the Lindor Truffles inside. She LOVES those things. Sorry but the wrapper could hardly hold the two of them!

I thought these would also be a great little teacher's gift or something to set on your co-worker's desks.
On mine I did use some small doll buttons I had but you could use punched out pieces of card stock too. Either way it would be cute.
The belt is a piece of black card stock. The buckle is a piece of brushed gold card stock with a square hole punched in the middle. I did punch the hole first and then cut the edges to fit. I didn't get it quite even on the top and bottom of the buckle but that's ok. If it happens, just remember to put the bigger part on the bottom. The inside of the buckle looks a bit odd because I used glue to set it in place and some oozed out and it wasn't dry when I took the photo. Oops!
I am thinking of making these for some upcoming classes I have. What a fun thing to give away and (depending on what you put inside) it could be very inexpensive too! And who says you have to put candy in it? I wouldn't mind opening up one with money in it!!!
Use your imagination with these. You can use them for lots of events!
Under the "label" for this I put it in the "Santa Theme." I have LOTS more items you can make using the "Santa Theme." Just click here to view them!

Thank you for visiting today,
Wanda

Friday, December 03, 2010

Santa Pants Card


Ok, the minute I saw this at Joanne's blog "Sleepy in Seattle" I knew I had to make one!!! (the clip on the bottom is one of those card holder stand things. I put it on the card to take the photo)

Isn't it just the cutest? I laughed when I saw the inside of the card!!! And what is SO cool about it is you don't affix the pants at the top so you can slip in a gift card or money. Though I'm not sure I would do the money part. It just seems wrong!!! LOL

And it this card also answers the question some of you may have had on your mind. Boxers or Briefs? Now we know!!! LOL

There were LOTS of parts to this card. Some I wasn't to fond of making. I really don't like to do the paper piercing. I never have. I do like the effect but I think it takes too long. I am always anxious to get the end of it and be done with it! I NEVER do them in a swap or on our Christmas cards. Once in a GREAT while I will do it on a card but not very often at all. But this card had to have it on it and I am glad I did it. But I did only make one of these!

I didn't have any red buttons so I punched out black circles. The red circles I punched out didn't look good on the front. But I don't think the black ones look so good either! But I still like the card so I'm leaving it the way it is.

If I were to ever make another one I think I would print out the words on card stock from my printer and then cut it to fit the card. I don't have very nice writing and I was a bit disappointed in that. But again, I still like the card!

I also should have made the belt a bit longer so it hangs over the other side of the card more.

It's a fun card and I have someone special in mind to give it to! I'll let you know their reaction!!! LOL

Thank you SO much for visiting today,
Wanda

Thursday, December 02, 2010

Paisley Prints Card Repurposed

Is "repurposed" a word? My spell checker didn't like it so I am assuming it isn't. But today is is!! Anyway...... a few weeks ago I posted a card that a fellow demonstrator Amy did. It's such a pretty card and she used my favorite card stock Marina Mist.

Well, I usually don't keep the cards that I don't have the stamp sets too. The gals who come here to stamp see them and want to make them but I don't have all the items to make the card.

As I looked at this card I kept thinking how cool it would be on the cover of a notebook.
I removed the wording that was at the bottom part where I have "notes" at now. I also had to pull the top layers back on the card so it would slide under the punch machine. That was all there really was to making this.

I cut some copier paper to fit the size of the card. The back of the card is on the back of the notebook. I just cut the card in half and was able to use both pieces. It's such a pretty notebook. It makes me think that I should start going through my cards that are made with retired stamps or colors and make notebooks with them. They sell well at craft fairs and they are WONDERFUL for gifts!

Thank you SO much for visiting today,
Wanda

Wednesday, December 01, 2010

Dasher, Wednesday Sketch Challenge

Can you believe it's December 1st already? And Christmas eve is only 23 days away!! I have not put the tree up, finished my Christmas cards nor have I been Christmas shopping!!!
I think SplitCoastStampers was trying to test me to see if I really was over my fear of square cards!

This was a very fun card. The actual layout is 5-1/2" x 5-1/2" but I made mine 4-1/4" x 4-1/4" because I wanted to be able to mail it and I knew I didn't have any envelopes that would accommodate the larger card.

And this was a very simple card to do too! The cardstock was cut 4-1/4" x 8-1/2" and folded in half. Then I cut the layer #1 4-1/8" x 4-1/8". After I cut it I used the "Petals a Plenty" embossing folder. The next layer is just a plain piece of white card stock cut 2-7/8" x 2-7/8" and the black piece is cut 3" x 3". And the top layer is cut 2-1/2" x 2-1/2" on the black piece and the white piece was cut 2-3/8" x 2-3/8".

I stamped the image using black StazOn. I did have to color in the area a little with a black marker because I wanted it to be solid. I added some fun rhinestones, added a bow and the words, which came from the "Teeny Tiny Wishes" set.

Like I said, it was a very fun and easy card to make! I once again proved I could make square card and not run from it! LOL
If you have time, play with the layout! It's a very fun one!

Thank you SO much for visiting today,
Wanda