Pin It

Showing posts with label Weekend Project. Show all posts

Friday, July 11, 2025

Extraordinary Flora, Party Favors, Weekend Project, Stampin' Up!

Hello and welcome to my blog. Today I have a fun weekend project to share with you. It's great for birthday parties, weddings, anniversaries or whatever party you have in mind. It's simple to do. Please read on to see how to make these.

I took Pearson's Peppermint Patties for the candy. You can use other covered round candies too. I just like the mints because the are great for after eating at a party.

Using the smallest circle die in the "Stylish Shapes" set I cut 3 using Basic White card stock. I stuck them to the backs of the patties using tear and tape. You want something pretty sticky for this. Do NOT use hot glue or even school glue. It's best to stick with the double sided tape. Glue dots would work too.

Next I took a panel of my "Extraordinary Flora" washi tape and placed it on Basic White card stock. Then I cut them out using the matching die. Using mono glue I glued two of the flowers down. On the melon colored one I added a tiny flower using a Dimensional.

On the purple one, I glued one flower over the flower that was already on the image and I used Dimensionals on the other two flowers.

And for the third one I just added a few small Dimensionals to the back of it and set it in place on the circle.  And that was it.

If you need to make a lot of these, a roll of the washi tape should do it, there's 66 sets per roll.  33 of the melon and 33 of the purple.  These make great party favors! I thought they went together rather quickly. It would be a lot quicker if you had a circle punch instead of a die. As long as it covers the back of the mint without going over the edges it will work. A 1-3/8" is about as big as you'd want to go.

Thank you SO very much for taking your time to stop in and see today's party favors,
Wanda


Monday, June 02, 2025

Extraordinary Flora, Gifts, Weekend Project, Stampin' Up!

Hello and welcome to my blog. Today I have a fun 3D project to share with you. This is a fun and super quick gift to make. Please read on to see how it was made. 

Terri has a great tutorial on how to cut out the "Extraordinary Flora" Washi tape using parchment paper. You can see her fantastic video here. Subscribe to her channel, it's free and it's FULL of wonderful cards and techniques. You can see that video here

After cutting out my flowers I affixed them to a clean Oui yogurt jar. Make sure you wipe it down with ribbing alcohol and let it dry before you add the flowers. 

Arrange the flowers to your liking. Rub them down with your fingers and that's it. 

Put a battery operated tea light inside and enjoy the beauty of the flowers showing through. It's SO much prettier in real life and with a candle "glowing" on the inside.

This would make a great gift or just keep it for yourself!

Thank you SO much for taking your time to see my quick and easy weekend project,
Wanda

Thursday, May 01, 2025

May Calendar Page, Layered Florals, Weekend Project, Stampin' Up!

Hello and welcome to my blog. It's the first of the month so that means it's time for the May calendar page. I got the PDF file for these from Lynette's blog. You can get yours by clicking here. It will take you to her blog and just under the title of her blog is the file. 

I decided to go with a flower since last month was April showers it's only fitting that May would have flowers.

I ran across a partially finished quarter sheet. I think the technique is called "Blackout". What you do is take an embossing folder and run it through your machine with Basic White card stock.  Then you turn it over so you have the texture on the bottom. You are going to color in the images with whatever you like to use. I used Blends pens here. Once done you will take your black ink pad and drag it over the backside and the ink will only go on the flat surface, leaving the colored surface to show through. It's a pretty easy technique and SO pretty.  I forgot to add that the embossing folder is called "Layered Florals".  It's retiring soon.

I trimmed mine so it was just 1/8" shorter than the area it was set on. I used Dimensionals to set mine in place because once the month is over I take that image and make a card with it. So in a couple of days or so I'll be making a card with that bunny I used for my April card.

I look forward to making these every month. But sometimes I struggle with what I'm going to put on the upper part. But I manage to come up with something!

Thank you SO much for taking your time to see this month's calendar page,
Wanda

Saturday, February 01, 2025

Bee Mine, Calendar Page, Weekend Project, Stampin' Up!

Hello and welcome to my blog. Today I have the February calendar page to share with you. It's fun making these and they go together so much quicker than a card. I figured I would use the image later on a card. I'm planning on doing that with my January calendar. You can see that one here. I got the template for the calendar months at "My Stamping Addiction". The download for the calendar is just under the title of her blog. She has a lot of beautiful cards there too, so if you stop in have a look a round.  Please read on to see how the card was made. 

I trimmed my piece to 4-7/8" x 3-3/8". The top part measures a hair shy of 2-1/2 from the top of the month to the top edge.  

I cut a piece of Designer Series Paper (DSP) from the "Bee Mine" 12" x 12" package and taped it to the top part of the calendar page. 

Next I cut three bees from another sheet of DSP. I set them in place using Dimensionals. I even cut out a tiny little heart and covered the 14.  And that was it.

This was so quick and simple and yet here I am waiting till the last minute to get it made!

Thank you SO much for taking your time to stop in and see today's calendar page,
Wanda

Monday, November 20, 2023

Sending Cheer, Matchbook Candy Holder, Teacher Gift, Weekend Projects, Stampin' Up!

Hello and welcome to my blog. Today I have a fun stocking stuffer for you to make. You can add these to your Christmas stockings or give them out to your mail carrier, co-workers, friends, etc.  They are easy to make and are fun to give. I believe this layout is called a "Matchbook Holder" Please read on to see how I made today's project.

You can make these for any candy you have. I chose the M & M's because my granddaughters like them. All you need to do to change the holder is to measure.  I will provide measurements for this M & M package. 

My M & M package measures 2-3/4" x 4".  Add 1/8" to 1/4" to the 2-3/4" end to equal 2-7/8" or 3".  Now you take the 4" and multiply it by two, one for the front and one for the back.  I also add a little for the top, I don't like the piece to just bulge. This part will vary depending on how thick your candy is. There now that you know the basics of the piece I will give you the measurement for the M & M project pictured here.

The card stock for this was cut at 9-1/2" x 2-7/8".  I scored it as follows: 3/4", 1-1/2". 5-1/2", 5-3/4". I like to have the front piece thicker, that's why I have two 3/4" scores there. Now go score your piece and come back!

Fold all score lined inward. I stapled the front piece down. I stamped it about 1/8" from the fold. And I stapled it backwards, meaning that the bumps from the staple are on the front. Doing it this way makes the back smooth and the bumps will be covered by your Designer Series Paper (DSP).

Next you will want to decorate the front.  The (DSP) is from the "Joy of Christmas" 12" x 12" package. I cut the top piece at 3-3/4" x 2-7/8" and a 2-1/8" x 2-7/8" piece for the lower part. Score this piece at 3/4" and 7/8" I glued both pieces in place. The bottom piece is larger than needed but that was planned. Glue it from the bottom edge and then roll it over the fold towards the inside. I prefer to use glue because the piece bends a bit and I know glue isn't going to release. Tape will work, it's up to you which you prefer to use.

Once I got the DSP on I stamped the Gingerbread man from the "Sending Cheer" bundle. I used Pecan Pie ink to stamp him. The hearts were stamped using Real Red and the face was stamped using black Memento ink. Then I die cut him using the matching die. I cut off the loop on the top, it's used for making him into an ornament or tag and it's not needed here. Dimensionals were added to the back and it was set in place on the front of the holder. 

The words are from the same set and were stamped using Real Red ink on a scrap piece of Basic White card stock. I used the "Double Oval" punch on them. I added a little glue to the bottom of the oval and attached it to the upper edge of the bottom section. 

I tucked the upper part to the inside and the piece was done, all closed up and ready to give! 

Wasn't it fun? It's pretty quick and easy too. Even easier if you have some DSP that has characters on it that you can just die cut and affix! I just kept mine simple but you can add some bling too. 

Thank you SO very much for taking your time to stop in and see today's Stocking Stuffer/gift,
Wanda


Saturday, April 08, 2023

Playing in the Rain, Rain or Shine, Matchbook Easter Candy Holder, Stampin' Up! Weekend Project

Hello!  I'm glad you are here to see today's matchbook candy holder. I have made a lot of these in my time. They make great little gifts so read on to see how this one was made.

The base of the matchbook is a 2" x 6-1/2" Basic White piece. I scored it on the long side at 1/2", 3-1/4" and 3-1/2".  All scored fold inward.

Next I cut some Designer Series Paper (DSP) from the "Rain or Shine" 12" x 12" package. The long front piece measures 3" x 2" and is scored 1/4" at the top. I glued it to the front of the holder. Make sure you get the sky at the top!! Yup, you're right, I didn't pay attention (as usual!). And the bottom piece was cut at 1/2" x 2".  Don't glue it down yet.  It is recommended you use glue here because tape could cause the DSP to lift off at the top. 

The bunny candy is made by the Ghiradelli company and the bottom of it is placed inside the holder, all the way down to the fold. Then I stapled the matchbook flap at the bottom with the candy in between. When stapling, make sure you staple backwards. Meaning, make the bumps of the staples in the front and the smooth part on the back. This makes it so it has a nicer look plus you don't have to concern yourself if the staple should come loose and the end could possible poke someone or get caught on clothing. Now with the bumps in the front you will take that 1/2" x 2" piece and glue it over those bumps. 

Tuck the top part of the matchbook cover into the bottom where the staple is.

I typed the "Happy Easter" on my computer using the BlacklightD font at size 16. I trimmed it on my paper trimmer and glued it in place on the bottom of the holder. 

The bunny is from the same "Rain or Shine" DSP package and was fussy cut out. I set him in place using Dimensionals and the holder is done. You can embellish it with more items such as ribbons or pearls, buttons or whatever you think looks fun.  These are great to give out at any season or occasion. As long as you can find a candy in a wrapper like this you can make it into a matchbook candy holder.

Thank you SO very much for taking your time to stop in and see today's Easter candy holder,
Wanda


Wednesday, March 22, 2023

Art Gallery, Dainty Flowers, Ghirardelli Treat Holder Gift Box, Weekend Project, Stampin' Up!

Hello there. I'm happy you are here today so I can share with you a fun find!  Did you ever find something on the internet (mostly Pinterest) that you wanted to make and then quite a few days later you get around to making it?  I have a lot of those. And some of them just get put into a folder and I forget all about them.  But I knew I wanted to make one of these when I saw it on Kadies "Kards by Kadie" blog. I follow her because she's got lots of fun things to share. Now she posted hers about 4 days ago and I think I did well to make it before a week went by! I just thought this holder was adorable. Plus it's easy to make too. You can see Kadie's by clicking here.  Read on to see how I made mine.

The piece was made by cutting a piece of Fresh Freesia card stock at 4" x 6".  On the 4" side you score at 1/2" on each end. I like to score on the left side and then turn my piece 180 degrees and score on the other end. It just works best for me to do it that way.  Plus if there's any discrepancies in the measurements I know the ends are always the same size! Next the scoring on the 6" side went as follows, score at 1", 1-1/2" and 3-3/4".  And that's it for the scoring.  I've included a photo of how the piece was cut out. In the photo I showed how one side was cut out.  And yes, I did use pencil on my piece but I have an art gum/kneadable eraser and it removed graphite without ruining the surface of any paper.  It's a must have in my craft room.  I have even removed the eraser from my mechanical pencils and kneaded up pieces of the eraser to fit in the spot. I just love this type of eraser. Oh and there's no bits of eraser to wipe of onto the table or floor either!!  So once I got my pencil lines erased I was ready to start assembling.  First I glued the top section down. It's pretty long and once folded it makes the back wall pretty strong and stable. And then I set it aside. I also snipped the little tabs so they fold in a little better. I also marked the piece at 2-1/2" from the bottom piece (on each side) to cut the angle equally.  

Next I cut the Designer Series Paper (DSP) from the "Dainty Flowers" 12" x 12" package to measure 2-7/8" x 2-1/8" for the back wall of the holder.  And the front strip measured 2-7/8" x 7/8".  I glued those two pieces in place. 

The box was glued together. I glued the side back piece to the small flap on each side and then I glued the front piece to the back side piece. You want to do it in this order or you will have raw edges on the front of your holder.

Once the box was glued I tied a ribbon around it. My ribbon is Fresh Freesia, I still had some left. I think I have enough left to make one or two more cards and then it's gone. I'm happy it will be gone but sad because it's so pretty.  But at least I will finally have used something up in my workroom!!

Now I was making this with a certain friend in mind whom I will be having lunch with tomorrow. She's going to love it and these words are perfect for her. She is a lovely lady and I'm so happy she is in my life.  The words are from the "Art Gallery" set and were stamped using black Memento ink. I die cut them with the smallest die from the "Tailor Made Tags" die set (that I forgot I bought a long time ago). It's still current and I hope it's in the next catalog because I need to play with it. You might be seeing it on some upcoming cards so I can feel better about the purchase!!

The word piece was slipped under the ribbon and glued in place. 

I added two Ghirardelli pieces of candy in the holder and the piece was done.  Isn't it cute?  I can see making these at Christmas for special friends or stocking stuffers. Let's hope I remember that I want to make these then!! I even thought about changing the measurements to make it a bit wider so it will accommodate a gift card. It's tall enough but not wide enough. It wouldn't take much to add 3/8" to the width.  

Oh and I think these would be great teacher gifts. A little bit of card stock, ribbon and DSP plus some candy and you've got a nice little gift for a teacher at Christmas or for the last day of school. 

This was fun. It's a very quick and easy holder to make and I can see myself making more of them in the future! Really!!!

Thank you SO very much for taking your time to stop in and see today's treat holder,
Wanda

Monday, February 06, 2023

Adorable Owls. Candy Bar Holder, Weekend Project, Stampin' Up!

Hello. I'm so happy you could make it here today to see the candy bar holder. I found it on Pinterest (while looking for something else) and I thought I'd give it a try. The problem was it wasn't in English, it was done in metric and they had a larger candy bar! So I had to do math and I figured it out so you can make one (or a bunch) too! You can see the original video here.

This is made for a standard Hershey candy bar. So to start out, I took a piece of Gorgeous Grape card stock that measured 5-3/4" x 6-3/4".  With the 5-3/4" side on the top part of your scoring board, score at 3/8". Then turn the card stock so the 6-3/4" side is on the top part of your scoring board and score at 2-3/8", 2-3/4", 5-1/8" and 5-1/2". Fold all of the score lines in, including the 3/8" one on the sort end. Glue the piece together on the side. Then snip the ends to make flaps that will be folded in. Before folding them in, trim the ends at an angle so the long flaps are easier to close. Glue the end shut. 

For the top piece I used Designer Series Paper (DSP) from the "Dandy Designs" 12" x 12" package. I cut that piece 5-3/4" x 6". You will be scoring this at the same marks as the Gorgeous Grape.

See the photo for cutting the angle on the DSP. You will be measuring 1" and making a slice between the 3/8" score lines that are to be the side of the holder. Then you will be cutting the angle from the top corner to the slice (I marked them with a pencil so you can see where you need to cut. Then the right side in the photo was cut from that center slice to the next score. You will also be scoring the bottom edge at 3/8".  Glue the side shut. There will be a piece that is sticking up that you need to trim. You'll see it once you glue the piece. Then snip and glue the bottom as you did for the Gorgeous Grape piece. There you have it a fun box.

The owl is from the "Adorable Owls" set and was stamped using black Memento ink and then colored in with Blends pens. I used light Crumb Cake, light Soft Suede, light Balmy Blue and light Pumpkin Pie. Once the owl was colored I die cut a 2-1/8" Basic White circle and a Gorgeous Grape scalloped circle that was a bit larger from the "Layering Circles" die set. The circles were taped together and Dimensionals were added to the back.

I took some ribbon (retired) that I had and folded the 6" piece in half. I taped it down and then set the circle piece on top. I didn't press down firmly because I wanted to make sure the word piece could go under it or if it would be stopped by a Dimensional. The words are from the same "Adorable Owls" set and were stamped using Gorgeous Grape ink. Then I die cut them using the smallest stitched rectangle die from the "Rectangle Stitched" framelits set. I added a bit of glue to 3/4 of the back and slipped it under the circle. I was right about the Dimensional being in the way, so I lifted the circle up a bit, slipped the word piece under and then pressed down on the circle.

The owl was set in place with Dimensionals and the piece was finished. The original piece has some butterflies added to the right side. I didn't have any so I just left it as it was. If I were to make another one, I might texture that piece, though I think it could make it weak.  Or maybe stamp some background image on it. Or better yet, find some embellishment that would work!!  Bottom line is that i wouldn't leave plain.

The photo of the candy bar sticking out is for reference. The candy bar actually fits entirely inside the holder. 

This was a very fun candy bar holder to make and I'm going to bookmark it for future reference. 

Thank you SO very much for taking your time to stop in and see today's candy bar holder,
Wanda

Saturday, October 08, 2022

Scary Cute, Halloween Treat Holder, Weekend Project, Stampin' Up! 2022 Fall Mini Catalog

I found this fun coffin treat holder on Pinterest and I clicked through the link to see if there were any instructions.  I did find them but I also found them hard to follow.  It could be that I was just too tired to think straight but I tried a couple of times and then just figured it out on my own. You can see the original instructions here

Here's how I made it. The Basic Gray card stock was cut at 8-1/2" x 2-3/4".  This piece was scored at 4", 4-1/4" and 4-1/2". It was folded in half for the cutting part.

On the top edge I marked both left and right at 3/4". On each side, one inch down I placed a mark. And on the bottom I marked each side (on the fold) 1/2". I cut the top corners off first, following the side and top markings. Then I cut the bottom one using the same side marking to the bottom marking on the fold. Now it looks like a coffin, right?  


Next is the inside piece that holds the treat. I could not for the life of me figure out how the piece was made. So here's how I made mine. I took a 4-1/4" x 2-1/2" piece of Basic Gray card stock. I scored it on the short side at 3/8" on the left and the right. I turned the piece to the long side and I scored it at 1-7/8" and 2-3/8".  I clipped the small side pieces and snipped the edges to allow for the piece to fold in nicely. Did you notice I fell off the track scoring?  It's easy to hide, just make sure you cover that part or put it to the back! Once the pieces were cut I stamped them using the dotted image from the "Color & Contour" set because I didn't have any other spotted looking image. It did the job. I stamped it with Basic Gray ink.

Now to assemble, I glued the sides of the treat holder together and then I glued it to the inside of the coffin. Glue was added to the bottom and the back.


I die cut the haunted house from the "Scary Cute" bundle using Basic Black card stock and I glued it on the front of the holder. I added a Crushed Curry moon too.

For the front I stamped the little Frankenstein boy from the same set using black Memento ink on Basic White card stock. I fussy cut him out. Then I die cut a stitched circle, it was the 3rd smallest in the "Stitched Shapes" die set. I took my Blending brush and scrubbed on some Night of Navy ink. The Basic Black circle behind it was the 4th smallest in the "Layering Circles" die set. I taped the two circles together. I set it in place on the front of the treat holder using Dimensionals.

The words are from the same set and were stamped on a scrap piece of Basic White using black Memento ink. I die cut them with the cute die from the same "Scary Cute" bundle. I set them in place using Dimensionals.  

I added a few Basic Black card stock bats that are also part of that bundle.  Those I glued in place.  And the treat holder was done.

This was fun and pretty easy to do once I figured out how to make the holder part. 

I apologize for how this post looks. Blogger must have been having issues. I had a lot of problems downloading the phots.  I've never encountered this before and this is what I ended up with. I had to run with it because I needed to get this posted.  I hope they fix the problem soon.

Thank you SO very much for taking your time to stop by and see today's Halloween treat holder,
Wanda

Saturday, October 01, 2022

Scary Cute, Halloween Fry Box Treat Holder, Weekend Project, 2022 Stampin' Up! Fall Mini Catalog

I have not made a fry box in a long time and after making that cute Halloween box on Thursday, I thought I'd try another type of candy/treat holder.  I found my fry box here. You just copy it over to your computer and set it up in your word processing program and print it out. First I printed one out on copier paper to see if I liked the size. That pattern is designed to resize to what fits your needs. My fry box measured 2" across the bottom front. It was the perfect size for my project. You can get a copy of the fry box here

I ended up tracing my fry box onto a piece of Basic White card stock. Once I printed one on copier paper, I realized those score lines would show and I didn't want that. And I thought about making a Basic Black fry box but you can't print it out because you won't be able to see the lines.  So I used the copier paper one as a template.  After tracing the box, I cut it out and then scored the side lines using my ruler and stylus on a piece of thick Fun Foam. You need a foam backing to score or you won't get a nice score and the piece will be harder to put together.  Be careful not to push too hard or you could poke through the card stock. And no, I didn't poke through mine.  Not this time anyway!  LOL  I did trace over the line a few times to leave a deep mark on my card stock. Once the scoring was done, I folded the box but didn't glue it.

I set the front of the box on my worksurface with some scrap copier paper under it. I cut a couple of strips of copier paper and taped it down over the front sides on my worksurface. I also made a template for the bottom part of the box. I traced over the arched score line on a piece of scrap paper and I taped that over the bottom part of the box.  Now I was ready to scrub on some color! I used my Blending Brush to do that.

The first color I used was Daffodil Delight. I covered the whole area with it. Then I added some Crushed Curry. The next color I added was Cajun Craze. I tried to keep this color above the Crushed Curry color. The ground was next, I took Old Olive ink scrubbed a bit in the grassy area. Then I added some Mossy Meadow to the very bottom part. And for the upper part of the sky I used Night of Navy.  And the front was ready to be decorated.

The haunted house from the "Scary Cute" bundle was die cut along with the bats, using a scrap piece of Basic Black card stock.

Then I die cut the moon using a scrap piece of Crushed Curry. 

The pieces were glued in place and then the fry box was glued on the sides. The bottom of my fry box didn't line up nicely, it hung over the base a bit so I just snipped it off when the glue set up. When you glue the sides, glue the front to the back, it gives it a nicer look. 

I added a little package of Oreo cookies (2 cookies in this package) and the box is ready to give to someone. I got the little pack of cookies at The Dollar Tree. There are 4 little packets in one package. 

This was a fun and quick little project to do. I am going to keep this in mind for December!! 

I hope you have fun making this project.

I thank you ever so much for taking your time to stop by and see today's Halloween gift fry box,
Wanda

Thursday, February 10, 2022

Sweet Talk, Valentine's Day Bag, Weekend Project, 2022 Stampin' Up! Spring Catalog

I don't often make many cards or gifty items for Valentine's Day. It's a one day thing and it's over. It's not like you decorate all month for it or prepare for weeks for it. You give a card, maybe some candy or a token of your love and that's it. Done. So I usually make one or two cards and sometimes a 3-D item. In my email today I got a "Treat Box" tutorial from Split Coast Stampers.  It was called a "Shaped Window Treat Box". Though it seems more of a bag to me than a box.  But I played along because I thought it was cute and would be fun.

The Designer Series Paper (DSP) is from the "Sweet Talk" 12" x 12" package and it was cut at 6-3/4" x 11-1/4".  The instructions for scoring and cutting on their site. I gave the size so you know what size piece of DSP you would need should you decide to make one. So if you've the a piece of DSP large enough, head on over there and take a look at the instructions. There's also a video. I just used the written instructions. Here's a link to the instructions, though I think you need to sign up to get them. They don't bug you or sell your info so your email won't be bombarded by a ton of junk mail.  I signed up many years ago and was a member for quite a few years but quit when the shop I worked at closed and I no longer had a job to help pay for fun things. There's a lot of techniques on their site plus TONS of card sketches (card layouts).  Every week there's something new. 

I added some birdseed to the bag and stapled the bag shut. I didn't like the squeezing of the sides to get the bag to close. If I were to make this again, I would add some score lines at the side pieces about 1" down from the top edge to make that "pinch" a bit easier and crisper.

I opted to do my bird Valentine's.  I hadn't done them in a few years. I think they are fun and school kids should give these out instead of cards and candy or whatever they give out now a days!  

The words are as follows:

I gave a hundred Valentine’s

A hundred, did I say?

I gave a thousand Valentine’s

One cold and wintry day.

I didn’t put my name on them

Or any other words

Because my Valentine’s were seeds

For February Birds!


I just printed them out and die cut them with a "Tasteful Labels" die. I lined up the die so the words were close to the bottom and folded the top edge over the top edge of the bag. I had stapled the bag shut and I glued the words on top. I added a bow and the bag was done. I can see making these for Easter!! Probably with candy this time!  LOL

This was a fun project and there's going to be some happy birds out there!

Thank you SO very much for taking your time to stop by and see today's Valentine's Day gift bag,
Wanda

Thursday, December 30, 2021

Forever Fern, 2022 Monthly Calendar, Weekend Project

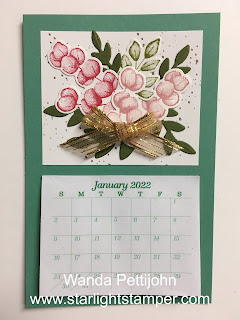
Just before Christmas I was at the Dollar Tree. Not the one by my house. It's hit or miss if they are open but the one about 6 miles from me. I was there to pick up some things my mom had asked for and while I was looking around I saw this fun notepad with a 2022 calendar on it. I had not made a calendar for my workroom in a long time. Last year I just printed out a 4" x 5" 12 month sheet and stuck it on the wall next to my computer. I did refer to it a lot. I'm used to having a small calendar there. So when I saw this I thought it would be fun to make one, plus I get a note pad to write on too! Such a deal. 

I took the calendar off the backing and when I looked at it I thought it looked rather thick. There were three of each month in it.  So I took it apart and made three piles of calendars. I took one pile and jogged the pieces until they were even on all sides and I took some tacky glue on my finger and ran it across the top edge. My sister works in a print shop and she says that is how they make scratch pads there.  Good to know for future reference. Glad I remembered how it was done. Not like it's hard to do!  Then I took three binder clips and clipped the pieces across the top to hold them while the glue dried. I repeated that for the other two calendars too. Not sure what I'm going to do with them, I only need one calendar.

So today I thought I would make the calendar for my wall. I cut a piece of Just Jade at 3-1/2" x 5-1/2".  I chose Just Jade because it seemed to match the calendar the best. 

Then I took a 2-1/2" x 3" piece of Basic White card stock for the top part. I stamped some dots on it using Granit Grey ink, stamping once with full ink and then stamping again before reinking. I covered the piece with dots. The dots are from the "Forever Fern" set.

The leaves were stamped using Old Olive ink and then die cut. I had those on hand in the stamp set. There was a lot of extra pieces in that case. 

The rounded leaves are stamped using Real Red and Blushing Bride ink. They were die cut and set aside. 

There's a bigger leaf die in the set and I had cut it using Mossy Meadow card stock. I clipped off pieces to use on the calendar top.

To assemble, I added some Tombow glue in the middle and started setting pieces on. I lightly set the Real Red and Blushing Bride pieces and then started tucking other pieces in here and there. I tucked them in enough so they got some glue on them so they didn't move.  When I got everything where I thought it looked okay, I glued them down.

The ribbon was left over from a card I made a few days ago. There was a piece of ribbon left and at the time I wondered if it was enough to make a bow. So I made a bow and set it aside for another day. Today was that day!  I used a glue dot to set it in place and all I have to do is punch the hole to hang it.  

As I was looking at the calendar in the photo I realized that I need to glue a piece of thin shirt board behind it. Shirt board is the same stuff that is used on tissue and cereal boxes.  If you don't have any, glue a couple piece of card stock together and then glue the Just Jade piece to that. Use Tombow glue so it doesn't warp.  I'll be hanging mine up tomorrow. I'm going to put the piece under a few punches to weigh it down and in the morning I'll be adding the hole and hanging it up.  

This was fun and I am happy to have a larger calendar on my wall for 2022!  And the price was right too!

Thank you SO very much for taking your time to stop by and see my 2022 calendar,
Wanda

Wednesday, December 22, 2021

Penguin Place, Gift Tags, 2021 Stampin' Up! Holiday Catalog

I was in need of a couple of gift tags. I didn't want to run out to the store and buy more. Like I'd find any this late in the month anyway.  I could have gone online and found some to download but if I'm going to download, print and cut, I might as well just make my own!  So here they are. 

I used the retired "Scalloped Tag Topper" punch. I didn't have anything current that would look cute. And it really didn't matter, it's not like the tag is going to be saved and cherished for all eternity! LOL   I punched a 2" x 4" piece of Basic White card stock. I cut and punched two, one of Fresh Freesia and one of Soft Sea Foam card stocks.  

The Basic White tags were cut at 3" x 1-1/2".  I was careful to try to get the piece inside the punch equally on both sides.

I took a scrap piece of the Fresh Freesia snowflake Designer Series Paper (DSP) from the "Penguin Playmates" 12" x 12" package and the Soft Sea Foam trees too.  I cut them at 2" x 1-3/4" each. I taped them to the bottom of each large tag.

Then I took some DSP that had the penguins sitting and I punched them out using the "Penguin Builder" punch. I added Dimensionals behind them. I set them on the Basic White tags but didn't affix them. I needed to see where the words were going to go. 

I set the words up in my Stamparatus. I needed to mask off part of the words on the stamp so only the "Be Merry" were exposed.  Then I inked it up with Soft Sea Foam ink and stamped the words.  I headed back to my cutting board because I forgot to remove the post it tape I had covering the words I didn't want.  UGH.  So I got the one done for the Fresh Freesia tag.  For the second tag, I managed to mess that one up too. And again, UGH!  Back to the cutting board.  I actually messed it up twice.  The third time was a charm, right?  Wrong. I had taken out the Mint Macaron ink thinking that might have been what I needed but it wasn't.  Not looking, I grabbed it and stamped the words.  I decided to just use them. Again, it's not like the tags are going to be saved! 

Next I affixed the penguins.  Then I grabbed some white Baker's Twine and some ribbons and threaded them through both tags at the same time. I looped them through the opening from front to back and slipped the ends through the loops and pulled.  I trimmed the ends and the tags were done.  I probably could have gone to and come back from the store quicker than it took me to make these with all the mistakes!!! LOL But they are done. They are homemade and as soon as I get done typing this, they will be on a couple of packages!

They were fun to make (excluding the mistakes). I like how they look and I love the colors.

Thank you SO very much for taking your time to stop by and see today's Christmas tags,
Wanda

Tuesday, December 21, 2021

Penguin Place, Candy Holder, Weekend Project

Today's "Weekend Project" is a fun candy holder I found on the internet. I thought it was so cute and would be perfect for a little teacher gift, stocking stuffer or something for the mail and delivery carriers. I found how to make them here. A little friendly tip here. If you are one who likes to play along, I recommend you either watch first or follow along with my tip.  The video for these cute holders starts at 11:06 in the video.  Before these, Christmas cards were made.

You will be instructed to cut the DSP from the "Penguin Place" at 2-5/8" x 6".  On the long side you will be scoring it at 3-3/4" and 4-1/8".  And the short side was scored at 3/8" on each side.  You also need to be aware of the orientation of your DSP. The first one I made, I had the DSP the wrong direction so when I started to fold my holder up, the characters inside were upside down.

At the top part of the piece you cut off 1-7/8" from the top down on each side. And you will be snipping the little scored areas between the 3-3/4" and 4-1/8".  You will snip to the 3/8" score line and then you will need to snip little "V's" off the sides of each of those little tabs.  After that was done (this is where I should have watched instead of followed along) you glue the piece.  You need to use a punch for the top piece to create the hole for hanging. I slid my piece in and the bump on the top of the piece is flat. You can really see it in the middle holder. Now you probably wouldn't have noticed had I not told you. But I did because I wanted you to know what yours could look like if you don't punch it before assembling. And when you punch it before, turn the punch over so you can see where it's going to punch. You don't want to cut off too much on the top.  

I used Ghirardelli chocolates for mine. They fit perfectly. Lindt's were used in the original holders.

I did not tie off my ribbon on the tip like it was done in the video. I just tied the 7" piece of ribbon in a knot and called it a done deal!!  

I wasn't fond of fussy cutting those little trees but I did it, I did three of them!! The two penguins were punched out and the fox was fussy cut. The characters were set in place with Dimensionals.  Set the tree and character in place with the candy in the holder. It will give you a somewhat firm surface to press down onto.

And that's it for the tips and how I made mine. These were very fun to make and I'd make more if it weren't so late in the season now. And they were pretty quick to make too!

Thank you SO very much for taking your time to stop by and see today's cute candy holders,
Wanda

Monday, December 13, 2021

Penguin Place, Penguin Playmates, Pop-Up Christmas Card, Weekend Project

Today I thought I would have some fun making a pop-up card. It was an experiment and I learned what not do to! LOL Here's how I made the card.

First lets talk about the front. I cut a half-sheet of Basic White card stock on the short 8-1/2" side so it measured 4-1/4" x 11" when I was done. Then I folded it in half. My card opens at the bottom and the fold is at the top. 

I cut a 4" x 5-1/4" piece of Shaded Spruce for the layer. Before I taped it down I die cut a circle using the largest die in the "Circle Dies" set. It measured 2-15/16".  Then I taped the piece on top of the front of the card.

A 3-3/4" x 5" piece of Designer Series Paper (DSP) was taped on top of the Shaded Spruce piece.

I die cut the dashed circle piece using a scrap of the DSP and the second largest circle die. I taped those two circles together.

The bear was fussy cut and set in place on the circle using Dimensionals. Then the entire piece was set in place on top of the card. 

I tied a silky white bow from some ribbon that was 5/8"wide. I set it in place with a large glue dot.

Now for the inside.  I made the pop up part and added the images. I am going to see if I can include the PDF for it here.  If not, I will add a photo of it. 

I then printed out the pattern onto a piece of Basic White card stock. I fussy cut the two pieces. I did trace a second set that has no writing on it because I could see the writing on my card but you really have to look at the inside part of it to really see it.  You could probably turn it over but there will be a light rectangle where the words would go. But you could do the words on a strip of card stock and tape it to the front.  Or you can just leave it as it is and ignore the marks in the inner part of the piece.

When you are done fussy cutting it out, you are going to score on all the dotted lines. I did score on both sides of the three lines that all cross each other. You want to soften them up a bit and scoring on both sides took care of that.  Then you are going to want to fold them in mountain and valley folds. It's a bit tricky but you can do it.  

I stamped the words from the "Snowman Season" set using Real Red ink. I had to do this now if I wanted to have it directly on the piece and not added later.

I cut the circle behind the bear and glued it in place. I added that first because I needed to make the slit for the mechanism and it had to go through both the fussy cut piece and the DSP.  I inserted end B into the slit and folded the piece upward. I glued it in place. Then the other end of the mechanism was glued in place. I folded that end downward and glued it to the area marked with an "A".  

Now I was ready to decorate my pieces. I fussy cut the bear and glued him in place.  I could have omitted adding the circle before the mechanism and raising the circle up higher but I was still experimenting.  If I were to make another one I think I would take that fussy cut circle and make it into a 1-1/4" rectangle that would be about 1-1/2" high.  But for now it's a circle and a little low on the card. 

I fussy cut the fox and snowman and glued them in place. I had added the glue to the side pieces and then added the characters. I did have to trim a bit of the card stock behind them, I didn't want any showing.  

Then the penguin was added. I die cut a 2-1/8" circle of the DSP with the trees in the design and I glued it to the tab that was sticking up. The penguin was added and the card was done. 

When you're holding it and opening it, it doesn't look so bad but the penguin could have been lower on the piece so the other two characters could be seen better. And the words could be stamped directly to the inside of the card.  There's other ways to make this work! I thought about trimming around the penguin so only a little bit of the tree paper shows, then the characters behind it could be seen better.  Still experimenting!!!

The inside cover could use some finesse too, but like I said, it was an experiment and I did learn a lot!

Now to figure out how to get the PDF available to you. From what I could figure out with my limited computer skills, I think you will just have to click Pop-Up PDF and you will get the pattern. If it doesn't work, please look on the right side bar, scroll down to where you can see my email and contact me and I'll send it to you!  I found this a bit confusing to do but I hope I did get it right. 

Thank you SO much for taking your time to stop by and see today's pop-up card,
Wanda

Tuesday, November 30, 2021

Penguin Place, Penguin Playmates, Stocking Stuffer, Weekend Project, 2021 Stampin' Up! Holiday Catalog

As I was trying to find a card to make today, I ran across this cute little gifty item to make. I found it here on Pinterest. There is also a video you can follow along to. I thought it would be great to make several of these to pass out to the mail carrier, USP driver, the ones who load my groceries in my trunk each week and more. I have a long list.  Just a little fun something. These are SO quick and easy to make. Plus they are a great way to use up some of that extra Designer Series Paper (DSP) you have. 

The DSP is from the "Penguin Playmates" 12" x 12" package and was cut at 3-3/4" x 6".  I added a strip of strong tape to one of the long sides. You just set the candy bar on top. This candy bar is not  a full-sized bar, it's a .071 oz. bar. Or the 100 calorie bar, whichever way you can find it in the store. If you're using the smaller ones, just adjust your DSP to fit. You will still need it to be 3-3/4" on the one side. You will need 1-3/4" more for the slack inside the tube. So measure your candy bar and add 1-3/4".  

Set the DSP face down and place the candy bar on top. Wrap the piece without the tape over it first and then affix the other edge on top. 

The bottom was just stapled. You can glue it or enclose that end any way you'd like. The instructions showed stapling it so I just followed a long.

I did have the "Label Me Fancy" punch that was used to make the hole in the top. Though you could use a anything to make a hole. I saw how she struggled to get the ribbon through the hole so I punched a little to the left of my first hole and then a little to the right so it was more elongated and wide enough for the ribbon. I added the ribbon and was ready to move onto the tag.

The white scalloped rectangle tag part is from the "Color & Contour" bundle. I cut it from a scrap piece of Basic White card stock.

I punched out the penguin body from a scrap piece of Basic Black card stock and the white part from a scrap piece of Basic White card stock.

The eyes were stamped using black Memento ink and the beak and feet were stamped using Pumpkin Pie ink. I glued it higher up on the rectangle

I stamped the words from the "Penguin Place" and trimmed them so only the "Be Merry" was left. They were just fussy cut and taped in place just under the Penguin.  I glued the piece to the front of the tube and it was done. I chose glue because I wanted to make sure it was going to stay put since it hangs over on the edges and could get caught on something and rip off. 

If you like to give it a more personal touch, you could always print out the names of the people you are giving these to and tape it on the tag.   

This was such a cute idea, wasn't it? I am glad I ran across it. It's very quick and easy to make too! Can't ask for more than that, especially this time of the year.

Thank you SO very much for taking your time to see today's fun Christmas project,
Wanda


Thursday, November 25, 2021

Penguin Place, Penguin Playmates, Chap Stick Lip Balm Holder, Stocking Stuffer, Weekend Project

It's time for a project. I like to call them my "Weekend Projects" because I most often work on the on the weekends.  But it's the night before Thanksgiving and I was caught up on everything I need for tomorrow so I thought I'd work on something other than a card.  A Chap Stick holder is on the worktable! I have made these before and they are fun to make. They are useful and they make great stocking stuffers.

I found the holder on Split Coast Stampers many years ago. Click here for the link to the pattern.

Here's how I did mine. The outside of my holder is 5-3/4" x 3-1/2".  I scored it at 2-1/2" and 3-1/4" on the long side.

The inside is done the same except there will be some cut lines. Once you've scored the inside, you will be making cuts that will be supports for the Chap Stick.  See the photo for cutting.  You can also cut the slots for the ribbon or you can use a small punch to make a line or you can use a single larger round punch. As long as it's big enough to get the ribbon through.

Once you have your front and inside done, start by gluing the inside piece in the center. Be sure not to glue over the areas you made the supports.  If you do that, it will be glued shut and not hold anything! And no, I have not glued mine shut! I actually paid attention.  After the center was glued, I glued the front and then the back.  I cleaned up my slit marks to make sure they lined up.  

Now it's time to decorate. The front piece of Designer Series Paper, DSP was cut 2" x 3".  It's from the "Penguin Playmates" 12" x 12" package.

The words are from the "Penguin Place" and were stamped using black Memento ink. I used the smallest circle die to cut them and I grabbed a scrap piece of Just Jade card stock and I used the smallest scalloped circle. I taped the two circles together and then set it in place using a few Dimensionals. 

Then I took some ribbon and threaded it through the holder and I tied a bow. The ends were trimmed and the holder was done.  

I really enjoy making these. They are fun and easy and don't take much time at all. I think the cutting the lines with an x-acto blade is the longest part of the card. I rounded my corners but you don't have to, you can leave them as they are. I just thought it gave them a more finished look.

I need to get some more lip balm so I can whip up a few more of these for stocking stuffers.  This would also make a great teacher gift. 

Thank you SO very much for taking your time to see today's weekend project,
Wanda

Sunday, November 07, 2021

Christmas Card, Crochet Snowman Card, Weekend Project

Today I'm going to share with you a card I made using a crochet snowman I also made. I was going to wait to post this until I had the instructions because I'm sure some of you will want to know how to make the cute snowman.  I'm not great at crocheting, so if I can make this guy, so can you! I know the basics to get by!

The base of my card is a folded half-sheet of Basic White card stock.  I had a  4" x 5-1/4" piece of Seaside Spray (retired) card stock and I don't know where this Designer Series Paper (DSP) came from but I liked the snowflakes.

I found the "Merry Christmas" in a retired set and stamped the words in Real Red.  I taped the DSP to the card stock and then taped the piece to the front of the card.

I set my snowman in place using glue dots. I made him so once removed he's an ornament for you tree. The hanger is tucked behind his body. The worst that happens here is the DSP tears or the glue dots stick to the yarn. It's easy to remove the glue dots from the yarn and once you remove the snowman, do you really want to keep the card??? LOL

Now I do not have the instructions ready. I was hoping to but I had gotten my booster yesterday and it's kicking me in the butt. I've had chills, headache, sinus pressure, my teeth hurt, every joint in my body hurt, my arm hurt at the injection site and I'm extremely tired.  And as soon as I get done posting this, I am going to go lay down again because apparently 12 hours of sleep isn't quite enough!  Though I am feeling a little better but not enough to be in my workroom for very long because I'm freezing. So I grabbed this card on my worktable and decided I'd post it and add the instructions at another time.  What's so odd is, I never had any symptoms from the first two shots, besides a little bit of a sore arm on the second dose.  All in all, I'd still recommend getting the booster, it beats getting sick from the virus. As you can see, I'm here able to type up my post!!

So I thank you in advance for your patience and I'll get the pattern printed out soon and online.

Thank you SO very much for stopping by to see today's Christmas card,
Wanda

Friday, October 08, 2021

Snowman Season, Penguin Playmates, Christmas Ornament, Weekend Project

It's been a while since I posted a "Weekend Project". I have been so into making cards that I tend to forget how fun the 3D items are to make and enjoy. So I decided I'd put together a Christmas ornament. I did this within a few days because I was busy with other items on my list. So one day I'd cut the card stock and another day I'd die cut and another day I'd glue.  The gluing is what takes the longest because of the wait time, though if you use the Tombow Mono Glue it sets up faster and you can get it all done in one sitting. 

So to begin this so you can have it ready to put together without too much wait time, fussy cut a snowman from the "Penguin Playmates" Designer Series Paper (DSP) or you can find something you like for that right side. The "Snowman Season" set has a snowman you can punch out. You will need to glue this to a piece of card stock. I used Basic White.  Then I trimmed around the snowman. I glued on another piece and trimmed. I did this for a total of four layers of Basic White card stock. You need to get this guy to be firm or it will sag. Once you are done with your final trim you can use a nail file or the edge of your scissors blade to scrape along the sides to smooth out anything you don't like the looks of.  I set him under my stamping mat and put a punch on top for extra weight. You want this piece to be flat when it's set up/dry.

Next cut five pieces of Basic Black card stock that measures 2-1/2" x 4-1/2".  Glue four of them together and press them like you did for the snowman. 

You will also need five pieces of Soft Suede card stock that measures 2-1/2" x 4-1/2".  I used the largest Stitched Rectangle that is in the set of four in the package "Rectangle Stitched Framelets" set.  If you don't have these dies you can use a 2-3/4" square punch and punch 3/8" from the side and evenly on the top and bottom. Move the punch to a new area and punch again, punch until you reach 3/8" from the other side. You can also use a craft knife and cut the opening too. The opening on my ornament is 3-11/16" x 1-11/16" but you can cut it however wide you want, just make sure it's even. After die cutting the Soft Suede pieces, I glued them all together and set them under my mat with a weight on top (another punch) to help keep it flat while the glue set up/dried.

Now take that last piece of Basic Black card stock, this is the piece you will be stamping in. Get our your Versa Mark, white embossing powder and the words  you wish to use.  The words I used are from the "Snowman Season" set. Take the Soft Suede frame from it's weighted area and set the Basic Black piece under it to see where the words will go. Put the frame piece back under it's weighted area for now. Stamp the words with Versa Mark and then heat emboss them using the white embossing powder. 

Glue the word piece to the rest of the stack of Basic Black card stock and put it back under it's weighted area.

The snowflake is from the "So Many Snowflakes" die set. I die cut three and glued them together. I also weighted them down to hold their shape. After looking at mine I was thinking I should have done four and I am pretty sure I could add another one but I'm going to leave it as it is because I'm not positive it will stay flat. 

I took 80" of white Baker's Twine and I folded it in half and then I folded that in half and I folded the whole thing in half one more time.  This is for the hanger.  Carefully set it aside.

I also cut 30" of white Baker's Twine and I folded it in half three times like I did for the hanger. This is for the bow. I carefully set that aside too.

I took the Soft Suede frame and glued it to the Basic Black pieces.  You can punch holes in the Soft Suede and then mark it for the Basic Black piece or you can use a Crop-a-dile punch (that is what I had done, it barely fit).  

I took my chalk marker and made snowflake dots all over the Basic Black word piece. 

The Wink of Stella pen was used to color the frame. I went over it twice.

The snowman was glued in place on the areas where he would be touching the frame.

Then the snowflake was glued on the same way.

The longer piece of Baker's Twine was threaded through the hole and tied in a knot on both sides.

The shorter piece of Baker's Twine was tied into a bow over the top part of the hanger. You could use ribbon here or you could just leave it as it is.  And there you have it. A fun handmade, all Stampin' Up! supplies Christmas ornament!

Thank you SO very much for taking your time to see this fun handmade Christmas ornament,
Wanda

Wednesday, September 15, 2021

Frightfully Cute, Cute Halloween, Halloween Treat Bag, Weekend Project

Today I thought I'd make a Halloween treat bag. I am going to need to make two but I don't want to make them the same. I have some time before Halloween to figure out what I'm going to do for the second bag. 

I used the Designer Series Paper (DSP) from the 6" x 6" "Cute Halloween" stack. You will need a full 6" x 6" sheet.  I scored the DSP at 1", 2-7/8", 3-7/8" and 5-3/4".  You turn the paper clockwise and score at 1" and 5-1/2". 

Fold all score line using a bone folder.  The top score folds down to there is a contrasting edge.  You can fold it inside but it looks better folded down in front.  And you can glue it down if you want. I only glued the ends. I wasn't sure if I was going to need to slip a layer under it or not. 

You do need to clip the bottom scores up to the 1" mark.  There will be a little 1" x 1/4" piece hanging there. Snip it off, you don't need it. Now to put the bag together, I prefer to glue the seams. Tape doesn't seem to hold as well. It doesn't take long for the glue to set up. Use your bone folder to press the glue into the paper and let it set for a minute and it's ready to go.  I glued the side seam first and then the bottom flaps.  And that was it.  Now you can decorate as desired!!!  

I used a die from the "Ornate Frames" dies.  These have been around for a little while so I'm guessing they will be retiring when the next yearly catalog comes out. So I'm going to try to get some use out of them before that happens.  It worked perfectly here. It fit nice in the open space plus it left me room for words. I die cut mine using Fresh Freesia card stock. I glued it in place on the front of the bag.

I punched out the pumpkin, ghost and cat face from some DSP in the same "Cute Halloween" package. I added Dimensionals to the back of each one and set them in place on the ornate frame.

The words are from the "Frightfully Cute" stamp set and were stamped using black Memento ink on Basic White card stock.  I used my "Modern Label" punch to punch them out and I snipped the ends to make it fit. Oh, also with the words, they read "Happy Halloween to You" but I masked off the "to you" so the words would fit on the bag. I added Dimensionals to the back of the word piece.  For those of you who don't have that punch, the word piece measures 3/8" x 5-1/5".  

I added the cute images and then the words.  I had some orange ribbon and I tied a bow and glued it to the top edge of the bag and the bag was done.  How cute is this?  You can also pinch the sides of the bag at the top if you want or you can punch holes and add ribbon for handles. You can also just staple the bag shut too!

This was a very fun project. I LOVE Halloween bags and these characters are so darn cute. Just perfect for little kids. Not scary at all. Just fun and friendly!

Thank you SO very much for taking your time to stop by and see today's Halloween bag,
Wanda