Pin It

Showing posts with label Paper Pumpkin Alternative Cards. Show all posts

Friday, April 14, 2023

March 2023 Paper Pumpkin Alternative Card, Birthday Card, Stampin' Up!

Hello! I'm happy you are here to see today's card. I thought I'd take my latest Paper Pumpkin kit out. I don't buy them very often but Stampin' Up! was promoting the anniversary of Paper Pumpkin with a peek of what was in it. I loved the vase with the flowers and the wording so I just had to order it. It's too bad they don't give us a peek each month.  It would help me to decide to purchase it or not but that's not how the member ship runs. So I just purchase when I want. Anyway, let's look at how I made today's card.

I took one of the pre-printed half-sheets of card stock in the kit. I chose the gold foiled polka dot one. 

Then I took the multi colored piece with the gold foil border and added Dimensionals to the back and set it in place on the center of the card.

Next I took the gold "happy" from the kit and cut up some Dimensionals and added them to the back and that piece was set across the foil bordered piece. 

I punched some Shaded Spruce leaves using the "Bough" punch, I added a little bit of glue to the stem and slid them under the foil bordered piece.

The words are from the Paper Pumpkin kit and were stamped using black Memento ink. The kit came with Polished Pink but I opted for something darker.  The piece the "birthday" was stamped on is also from the kit. I taped it in place just below the foil bordered piece and the card was done.

This was a fun card and easy too. I love it when everything is all cut out for you. I say that as I'm looking at some totes I have that I actually cut out all the pieces to cards, did all the coloring and yet there they sit!! The mystery of Wanda!!! LOL

Thank you SO very much for taking your time to stop by and see today's Paper Pumpkin alternative card,
Wanda

Monday, March 20, 2023

Days to Remember, March 2023 Paper Pumpkin, Birthday Card, Stampin' Up!

 Hello! I'm so happy you are here. I want to share my Paper Pumpkin card with you. I have not had a kit in a very long time and when I saw this one being promoted I thought I would buy it. It's very fun. There's lots of stamps in this kit because it's an anniversary kit. I have not played with the papers that are in the kit yet. I was just looking at the images and got inspired. So read on to see how I made this card. 

I chose Balmy Blue for my main color because I have lots of it.

The base of my card is a folded half-sheet of Basic White card stock. My card opens on the bottom and the fold is on the top. I cut a 4" x 5-1/4" piece of Basic White card stock and I textured it using the "Painted Texture" embossing folder. I glued the textured piece to the front of the card base.

The layers were fun. I LOVE lots of layers on cards.  Balmy Blue was used for the layers. I will go through each piece and layer instead of all the layers and then the pieces. That makes them easier to pair up and put together.

The larger back piece of Balmy Blue was cut at 4-1/2" x 3" and the Designer Series Paper (DSP) from the "Dandy Designs" 12" x 12" package measures 4-3/8" x 2-7/8". I taped the two layers together.

The next piece is the smaller strip. The Balmy Blue piece was cut at 2-3/4" x 1-5/8" and the DSP on top from the same package was cut at 2-5/8" x 1-1/2".  I taped those two pieces together.

And the focal piece was cut as follows. The Balmy Blue piece was cut at 2-1/4" x 3-1/4" and the Basic White piece was cut at 2-1/8" x 3-1/8".   Before taping those two pieces together I took my Blending Brush and scrubbed on some Balmy Blue ink.

Now the fun starts. I stamped the flower and the planter and fussy cut them out. I colored the flowers using my Blends Pens. I used the light Balmy Blue for the flowers and I added a little light Highland Heather for the inside of the flowers. The leaves were colored in using light Granny Apple Green. 

The planter was colored in using my Blending Brush and the ink that was left on it from the background focal piece. I took my dark Balmy Blue Blends pen and made dots all over the planter. 

The bottom leaf of the flowers is hidden behind the planter and the next two leaves were snipped close to the stem so they could be slid over the edge of the planter. I glued the stem you don't see to the back of the planter.  Dimensionals were added to the back. 

The words are from the "Days to Remember" set. I stamped them on a scrap piece of Basic White card stock using black Memento ink. I punched them out using the "Dual Oval" punch and I punched out the scalloped layer using the same punch. I taped those two pieces together and Dimensionals were added to the back.

Let's put the card together. 

I glued the large layer to the upper right corner about 1/8" from the top and right side of the embossed piece.

Then the smaller piece was set in place. The end of it is about 1/8"from the left side of the embossed piece and about 1-1/4" from the bottom of the embossed piece. Next the focal piece was set in place, it's about 1/4" from the top and 1/4" from the side of the larger DSP layer. The flower/planter piece was set in place using the Dimensionals. Cute so far, huh?

And lastly the words were set in place on top of the smaller piece using the Dimensionals. I did struggle with that piece. I wasn't sure where I wanted it. I had first thought putting it below in the more white area but the oval hid the DSP from the larger piece and it didn't quite look right. After moving it around I thought it looked best where it is. And the card was done.

This was a very fun card to make and I'm happy with the way it turned out. I LOVE all the layers!

Thank you SO very much for taking your time to stop in and see today's birthday card,
Wanda

Saturday, December 11, 2021

November 2021 Stampin' Up! Paper Pumpkin Alternative Christmas Card

The November 2021 Paper Pumpkin also has some Just Jade green cards. The green is on both sides. But we did use it as it was and didn't cut it in half.  There were other elements left over in the kit, some won't be used here at all but can be saved for future cards.

I cut a 4" x 5-1/4" piece of Basic Black card stock and then a 3-7/8" x 5-3/8" piece of the Designer Series Paper (DSP) from the "Penguin Playmates" 12" x 12" package. The DSP was glued to the Basic Black piece and then that was glued to the front of the card.

The Just Jade gingham piece is from the kit and was cut at 3" x 2-7/8".  The layer behind it was cut at 3-1/8" x 3" and the two were taped together.

The bear was fussy cut from the "Penguin Playmates" DSP and set in place using Dimensionals.

The words are from the kit and were stamped on a piece of Basic White card stock using black Memento ink. A Basic Black layer was cut 1/8" larger and set in place with Dimensionals too.  And that was it. This was a quick and easy card to make with only a little fussy cutting.

It was the last card we made from the two kits my friend brought over.  She was thrilled with all four cards when she left here.

Thank you SO very much for taking your time to stop by and see today's Paper Pumpkin alternative card,
Wanda

Friday, December 10, 2021

November 2021 Paper Pumpkin Alternative Christmas Card

Moving onto the November 2021 Paper Pumpkin my friend brought over on Wednesday, this is the card we came up with. I had seen a card on Pinterest that took one of the cards and cut it into strips. SO I went with that and this is my friends card. You can see the inspiration card here

For this card I took one of the printed cards in the kit and I first cut it in half. It's printed on the front and back so you can get 12 cards from the 6 in the kit!!  I think it was 6, could be 5. I don't recall but you will get twice as many if you make them all like this.

The base of this card is a folded half-sheet of Basic Black card stock. This card opens on the right and the fold is on the left. 

The strips were cut at. 5-1/2" long x 1-1/4" wide, 3/4" wide and 1/2" wide. I taped them to the right side of the card leaving about 1/8" space between them.

Now that I had that on the card I wasn't sure where I was going to go with it. I didn't care much for the green. So I thought I'd just add some words. I cut a piece of Basic White card stock at 2-1/2" x 2-7/8" and I cut the Basic Black layer at 2-3/8" x 3".  I took my Smoky Slate ink pad and my blending brush and started scrubbing on some ink but it was just too light. So I took my Basic Black ink pad and used it instead. It was just the darkness I was looking for. I taped this piece to the Basic Black layer.

The vellum trees came with the kit. I cut the one off on the far left. After I had taken the photo, I added a little glue to the trunk of the tree I had cut off and I slid it between the second and third tree. The trunk went down where the "Noel" is and looked just fine. It's always those things I do after that add just a little bit more to the card.

The silver "Noel" is also in the kit. You get four of them. So you may have to be a bit creative if you are making more than 4 cards using this layout.  Same with the Vellum trees.  

When you glue the trees in place, make sure the glue is going where the "Noel" is to cover it up. It will show through. Look above the "e" in "Noel". See the dot??? OOPS!! Live and learn and share your mistakes and finds!! I had cut my Dimensionals into smaller pieces so they would fit on the "Noel" so I could have it raised on the card.

A 4" x 5-1/4" piece of Basic White card stock was added to the inside and the card was done.

It was fun making this card and my friend was thrilled with it.

Thank you SO much for taking your time to stop by and see today's Paper Pumpkin alternative card,
Wanda

Thursday, December 09, 2021

October 2021 Stampin' Up! Paper Pumpkin Alternative Christmas Card

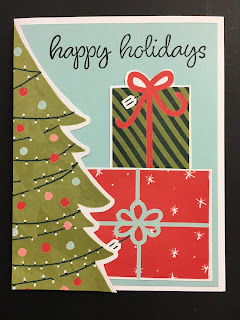
Yesterday when my friend was over with her Paper Pumpkin kits we had made a Christmas card using the tree and packages.  The packages were cut from one of the elements in the kit. It was meant to make a card with the hole lot of packages on the one sheet. But we had cut them apart for yesterday's card and there were packages left. So what do we do with them?  Well, we make another card.  

The base of the card is a folded half-sheet of Basic White card stock.  On top of that is a 4" x 5-1/4" piece of Soft Seafoam card stock that was textured with a snowflake background. You can texture it with whatever background you like. I glued it to the front of the card base.

Next I set out the packages on the front to see where they should go and after a bit of moving them around, this came to be the one we liked the best. They were taped in place. Though I would have preferred glue because of the texture but we ended up taping.

The words are from the same set and were stamped on one of the circles in the kit using black Memento ink. Then they were punched out using the 1-3/4" circle punch.  I die cut a 1-7/8" circle using Flirty Flamingo card stock for the layer and I taped the two circles together. 

Dimensionals were added behind the circles and they were set in place in the upper right corner and the card was done.

This was a fun, quick and easy card to make plus it was a great way to use those extra packages.  

Thank you SO very much for taking your time to stop in and see today's Christmas card,
Wanda

Wednesday, December 08, 2021

October 2021 Stampin' Up! Paper Pumpkin Christmas Card

Today a friend came over and brought her Paper Pumpkin kits from October and November. She was not happy with them so I told her I'd help her find some other ways to make card using them.

My friend told me someone made a card by cutting the tree in half and also using the boxes from another item in the kit. So while she cut the boxes, I worked with the tree and card base.

The base of the card is a folded half-sheet of Basic White card stock. This card opens on the right and the fold is on the left.  

I took a 4" x 5-1/4" piece of Pool Party card stock. I set the half a tree on top to see where to stamp the words. The words are from the Paper Pumpkin set and were stamped using black Memento ink. 

Next the packages were set in place and then the tree on top. The tree was trimmed at the bottom because it was too long.

This was a fun way to change up the kit and my friend was very happy with the way it turned out. I have not had a Paper Pumpkin kit in about a year now. I kind of missed it so it was a fun welcome time. So now my friend is going to go home and make more.

Thank you SO much for taking your time to stop by and see today's Christmas card,
Wanda

Saturday, March 27, 2021

March 2021 Paper Pumpkin Alternative Card, Father's Day Card, Sailing Home, Itty Bitty Greetings

Today I took another try at my March 2021 Paper Pumpkin kit and this is what I came up with.  Last one before I move onto my other stamp sets!!!

The entire background piece is one of the panels included in the kit. I made sure it measured 3-3/4" x 5".  I cut a Basic White piece that measured 3-7/8" x 5-1/8".  I taped the printed piece to the white piece and then I taped both of those to the card base that is included in the kit.

I stamped the birds in the sky with the stamps from the kit and I used black Memento ink to stamp them.

I added the trees die from the kit using Dimensionals.

The card really needed something in the center so I got out my "Sailing Home" set and I stamped the smaller sail boat and fussy cut it out.  I colored the sky area on the image using my light Seaside Spray Blends pen.  I also colored the boat using the light Calypso Coral Blends pen. I set the boat in place using Dimensionals.

The words are from the soon to be retiring "Itty Bitty Greetings" set and were stamped on one of the label pieces from the kit using black Memento ink. I trimmed the label to 2" long. I set the words in place using Dimensionals. and the card was done.

I like this one much better than the one I did on Friday.  

Thank you SO very much for taking your time to stop by and see today's card,
Wanda

Friday, March 26, 2021

Masculine Birthday Card, March 2021 Paper Pumpkin Kit, Alternative Card

I was SO excited to get my March Paper Pumpkin kit. But I was a bit disappointed in it when I opened it up.  There's several stencils to sponge and some die cut trees. What I did like was that there was an insert for the envelope instead of having to cut up an envelope to get to the printed paper.  But still, I had trouble getting into this kit.

I took one of the cards in the kit and I cut it apart. I ended up with the 3-1/8" x 2-15/16" piece with the sun, mountains, lake and trees.  I layered it on a piece of Seaside Spray card stock that was cut at 3-1/4" x 3". I taped those two pieces together.

Still not knowing where I was going with this, I took one of the flowered envelope inserts and I cut it at 1-5/8" x 4". I also cut a Seaside Spray piece of card stock at 2-3/4" x 4-1/8" and I taped those two pieces together. I set the long piece down and the focal piece on top of the peach colored piece. That piece is the backside of the scored card that came in the kit, it's the back of the focal piece I cut apart.

I saw how plain and open that  left side was so I took the trees stamp from the kit and stamped them using Shaded Spruce ink. And then I taped those two pieces in place.

The kit included some die cut trees, so I set them now on top of the focal piece. I thought some words would work out great on the olive green area so I stamped them using black Memento ink. Then I added the die cut trees using the Dimensionals from the kit. 

I thought it was a nice masculine card but it needed some bling. But it was a masculine card. But then again, there are flowers on the card.  UGH, what to do. So I took my Wink of Stella pen and colored over the sun's rays to give them a bit of a twinkle.  And that was it. Not very creative but different than what was in the kit. I have to give the other image in the kit some more thought and see if I can come up with something better.

Thank you SO very much for taking your time to pop in and see today's card,
Wanda

Friday, January 29, 2021

Valentine's Day Card, January 2021 Paper Pumpkin Alternative Card

I still had my Paper Pumpkin things sitting out so I thought I would use that strip that was left over from yesterday and work it into a card.  Here's what I came up with.

The base of the card one of the cards from the January 2021 Paper Pumpkin kit.  I taped the strip from the card that I cut off yesterday.  It's about 1/4" from the fold of the card.

Then I stamped the snail from the kit using black Memento ink. I masked him and then sponged on some Pear Pizzazz ink for grass. I also added a little grass to the bottom of the post of the mailbox.

I colored the snail with my light Petal Pink Blends pen. And the heart shape in the shell was colored with the light Poppy Parade Blends pen.

The words are also from the kit and were stamped using black Memento ink.  

I set the mailbox panel in place on top of the card base using Dimensionals, which came in the kit too.

I thought the snail could use some googly eyes so I found some in my workroom and glued them on. 

One of the medium sized hears was added to the envelope inside the mailbox. It needed something extra too.

And here you have it, a super quick and easy Valentine's Day card.  I have three more in the kit to do up. I'm not sure what I'm going to do with them but it won't be until sometime next week.

Thank you SO very much for taking your time to stop by today to have a look and sometimes a laugh,
Wanda

Thursday, January 28, 2021

January 2021 Paper Pumpkin Alternative Card, Valentine's Day Card

It was Paper Pumpkin day today. I thought I should open up my package and play with the stuff inside. My package/box didn't arrive on time and when it did arrive I realized why it was late. There was a big hole in the side of the box. My address was completely gone but there was a bar code on the package and the package was all taped up.  Who knows what happened but it did arrive and believe it or not, everything was inside undamaged!! So that's the story of my Paper Pumpkin box.  I wanted to find an alternative card to make. Not that the layouts in the kit weren't fine, I just wanted something more. I found a fun video here and loved the card. It's easy to make and cute too.

The base of the card is one of the striped cards from the kit. I cut off the right side on the front about 1-1/4".  The video said about 1-1/2" and the strip was used for another card. I didn't say on the video long enough to see what was done with that strip. I will watch the remainder this weekend. But I did save that strip. I hope it was 1-1/4".  I thought 1-1/2" looked too wide.

So then you will need a 7" x 4" piece of Poppy Parade card stock and fold it in half at 3-1/2". You take this piece and you fold it in half. You tape it to the inside of the card but you want this piece to have it's opening on the left and the fold on the right.  Opposite of what a regular card would be.  Then you tape it to the inside of the cut card from the kit. I did this before I added the heart piece, just in case I taped it on the normal way. Easy to do when you make a card every day. But I got it right.

Next I stamped the heart inside the gold foil heart using Poppy Parade ink. The ink cube came in the kit. I set it up in my Stamparatus so I could make sure I got a nice solid image. I was glad I set it up in there because my ink pad was a bit dry.  I got a solid image and I then taped the black scalloped edging to the back of the piece. The edging is part of the kit too.

The piece was then taped to the front of the Poppy Parade piece.

The "Love" from the kit was added with Dimenisonals (included in the kit) and the card was done.

So darn cute!!  Easy to make too!

Thank you SO very much for taking your time today to stop by and have a look,                                    Wanda

Monday, January 11, 2021

Itty Bitty Greetings, Birthday Card, December 2020 Paper Pumpkin Aternative Card

This is the last card I will be making using the December 2020 Paper Pumpkin kit. I still have pieces left but I have other cards I want to make, plus my new stamps should be here soon so I need to make time for them. And it won't be long before the January 2021 Paper Pumpkin kit will be here. So, I found a fun, quick and easy card to make using the kit.  I found this card here. There's also another card with a different orientation and a box to make too. There were no instructions so here is how I made it.

The base of the card is a folded half-sheet of Merry Merlot card stock. I added a 4" x 5-1/4" piece of Very Vanilla on the inside and on the outside. After assembling my card I realized I probably should have used Whisper White card stock.  But it's done and I'm not going to be redoing it.

I took one of the cards from the kit and I cut it in half and then I cut the front in half. I took that piece and cut a 2-7/8" x 4-7/16" piece of the gold foil card stock for the back layer. It appeared that some gold cord was tied around the two layers but I just made a bow so I could attach it later. I taped these two layers to the front of the card.

I took one of the white circles with the gold circle on it from the kit an added a layer behind it. I used the back half of the card that I had cut to make the front. I punched out a 1-3/4" circle.  And I die cut the second smallest stitched circle from the gold foil card stock. I punched my gold circle from the layer I just cut above. Die cut it in the middle so it won't show.  After die cutting, I taped the two layers together and set them aside. Be careful not to add tape or glue to the middle, it will just make a mess and won't have anywhere to stick anyway.   I taped the three circles together and then I added the package from the December 2020 Paper Pumpkin kit. The package was set in place using Dimensionals. Then I taped the circles to the front of the card.

The words are from the "Itty Bitty Greetings" set and were stamped on Very Vanilla card stock using black Memento ink. I set them in place with small Dimensionals. 

The bow was added using a tiny glue dot and the card was done. The original card didn't have any words on it. I liked it that way too but I like to have wordign on my cards.

This was a very quick, fun and easy card to make.

Thank you SO much for taking the time to stop by today and have a look,                                              Wanda

Monday, January 04, 2021

Peaceful Moments, Birthday Card, December 2020 Paper Pumpkin Kit Alternative Card

The December 2020 Paper Pumpkin kit was still sitting on my worktable so I thought I'd make a card with it today and this is what I came up with.

The base of my card is a folded half-sheet of Merry Merlot card stock.

I die cut the lacy frame from the "Ornate Frames" dies using Whisper White card stock.

I cut a 2-1/8" x 3-1/2" piece from the inside of the envelope that came in the kit.  I taped it to the lacy frame and then I taped the frame to the front of the card.

The bear is from the kit. I took one of the die cut cupcakes from the kit and added a Dimensional before I slipped it under the bear's arm. 

Next I added Dimensionals to the back of the bear and I set him in place on top of the lacy piece.

The words are from the "Peaceful Moments" set and were stamped on one of the die cut circles from the kit using black Memento ink. I taped the circle on the back side where the H and B are and then I added one at about the 12, 3 and 6 o'clock positions.  The circle was set in place on the bottom left side of the bear.

I added a 4" x 5-1/4" piece of Whisper White to the inside of the card and the card was done.  

I have had a lot of fun with these Paper Pumpkin kits lately. You sure can make a lot of alternative cards using these kits. You can make quite a few just using what is in the kit alone too!

Thank you SO much for taking the time to stop by today and have a look,                                              Wanda


Wednesday, December 30, 2020

Gorgeous Posies, Get Well Card, December 2020 Paper Pumpkin Alternative Card, Stamping Technique

Today I still had the Paper Pumpkin bug. I wanted to make just one more card using the December 2020 Paper Pumpkin kit before I move on to something else.  I have made this "Arrow Fold" technique card before. You can find the directions here.

The base of my card is a folded half-sheet of Calypso Coral card stock. This card is folded in half on the 8-1/2" side.

The "Arrow Fold" technique is a lot easier than it looks.  You just find the center of the front of the card (with the fold at the top) mark the sides at 2-1/8" on each side and then again at 2-3/4" on each side.  You do this lightly with a pencil.  Then you score from the top fold line on the edge of the 8-1/2" side and down to the center mark on the edge of the 5-1/2" side, repeat for the other side. Then score at the 2-1/8" mark to the center mark.  Repeat for the other side. 

Paying attention to which side is the front of your card, fold the long score line inward and the shorter one outward.  Use your bone folder to get those lines as crisp as possible.  

Then you will need to glue those folds down. Make sure you pay attention because it's easy to add glue where it doesn't need to be and you will glue your card shut.

For the Designer Series Paper (DSP) I used the inside of one of the envelopes that came in the Paper Pumpkin kit. This piece is cut at 4" x 5".  Mark the center at 2-1/2 on the bottom.  Cut the piece from that mark on the bottom to the top right tip.  Repeat for the other side. You now have three triangles, 2 small and one large. Keep them in order.  You will also need to cut a piece of Whisper White card stock for the inside and cut it the same way. You only need the larger triangle.  Though you could use the smaller ones instead of the DSP ones. I liked it better with the DSP.  

Now all you do is glue or tape those triangles in place.  

I took a piece of the back of one of the cards in the kit that was left over from yesterday's card and I cut 1/4" strips.  They each measured 3-7/8", 3-1/4" and 2-1/4" long.  I taped them in place on the front of the card. I started taping it 5/8" from the top and I used the strips as a guide for the placement of the next strip, and so on.  

The bear is from the kit and was set in place using Dimensionals.

On the inside triangle I stamped the "Get well soon" words from the "Gorgeous Posies" set using Calypso Coral ink. I taped the triangle in place and the card was done.

I do like how these "Arrow Fold" technique cards look but I don't like that I only have a triangle in the center to write on. So I was thinking about using a 4" x 5-1/4" piece of card stock and attach a 4" x 5-1/4" piece of DSP to the front and then tape whole arrow part to it. Then the card would open like a regular card and the inside would be a 4" x 5-1/4" piece of Whisper White card stock.  This card would have more layers than doing it the regular way but it gives you the option to having a full card instead of a folded front card.  But don't get me wrong, I do like how this looks and it's not the first one I made!!

Thank you SO very much for taking the time to stop by today and have a look,
Wanda

Tuesday, December 29, 2020

Itty Bitty Greetings, December 2020 Paper Pumpkin, Birthday Card

I am having some fun with the December 2020 Paper Pumpkin kit.  I am probably going to be making the rest of my bear ones using this layout. I like it and it's quick and easy enough. Plus I don't want to spend a lot of time with the Paper Pumpkin kit. I have other cards I want to make. So I will try to use up as much of the supplies in the kit as possible so I can move on to other cards. Most of the time I don't get done with the kit and the next month's one arrives.  I hate it when that happens. I put the previous months kit away and move on. I have boxes of unfinished Paper Pumpkin kits.  UGH!

So, let's talk about this card. I found it on Pinterest and I like how it was made. You can see the original card here. It is a get well card but I changed mine to a Birthday Card. 

The base of the card is a folded half-sheet of Whisper White card stock. 

I cut the inside of an envelope and used the striped piece for the background of this card. It was taped to the card base.

Next a card from the kit was cut in half and then the front of that card (with the gold leaves) was also cut in half.  That piece measures 2-3/4" x 4-1/4".  You can make two cards with that piece.  I laugh at that because I'm trying to use up the pieces in the kit, I cut one in half and I feel like I took a stamp backwards, well, maybe not backwards but I didn't gain any ground!!! LOL  So I took that piece and set it aside. I need to cut a 4-1/4" x 1-1/2" piece of Merry Merlot that needs to go down first. I taped the strip to the front of the card and then I taped the piece I cut in half on top of that.  

The words are from the "Itty Bitty Greetings" set and were stamped using Merry Merlot ink on one of the gold framed strip labels that came in the kit.  I taped the label in place.

I too one of the packages from the kit and I added a Dimensional behind it and stuck it in place under the arm of the bear. The bear already had the arm die cut so it can be lifted up. 

Dimensionals were added to the back of the bear and the bear was set in place.  

And the card was done.  Cute, isn't it? I have two more bears to use and I think I will make a get well card and maybe a thinking of you card just like this card.

Thank you SO much for taking the time to stop by today and have a look,                                                Wanda


Sunday, December 27, 2020

Get Well Card, Paper Pumpkin Alternative Card, December 2020 Paper Pumpkin Kit

For today's card I thought I would play with the December 2020 Paper Pumpkin kit.  There's some cute characters in that kit. This bear was one of them. Plus there's bear stamp for when you run out of the printed die cut ones and you want to make your own.  He's the same size on the sides and head but the bottom part is shorter on the stamp. But that's okay, he's still cute!

The base of my card is a folded half-sheet of Whisper White card stock.  I cut one of the envelopes up so I could get a 4" x 5-1/4" piece. I cut that in half on the 4" side. I also cut a 2" x 5-1/4" piece of Daffodil Delight card stock.  I turned the two pieces over and scotch taped them together along the seam.

I had some gold ribbon so I taped a piece of that along the seam where the card stock met the envelope piece.

I die cut a Whisper White rectangle from the "Ornate Layers" dies set and I taped it on the Daffodil Delight piece.

The leaves were die cut from the "Forever Flourishing" dies. I used the flap of the envelope to cut these. The outside of the envelope is the Soft Sea Foam green and the inside is the striped image you see on the right side of the card. I die cut the two largest leaf bunches. I removed one of the branches because it was hidden under the bear and I will use it on this card later.

I set the branch on the left in place and then the other one on top to see if I liked the placement. I set the bear on top of the two and moved them around a bit to get the best look. I removed the bear and the top branch of leaves and I taped the first one in place, then the second one.  

I added a Dimensional to the back of the flowers under the bears arm. I taped the bear in place using double-sided tape. 

Now this is where that little leaf bunch comes into play. I taped it just behind the bears right leg. 

The words are from the kit and they were stamped using Rich Razzleberry ink that comes in the kit. They were stamped on one of the gold framed labels from the kit. And they were set in place on top of the bear using Dimenisonals.

And that was it. A quick and cute get well card. This would also make a great thinking of you card, a Mother's Day card or even birthday card.  Lots of fun in this kit!

Thank you SO much for taking the time to stop by today,                                                                          Wanda

Sunday, December 20, 2020

Christmas Card, November 2020 Paper Pumpkin Alternative Card, Stampin' Up!

There's only a handful of days left till Christmas and I still have lots of Christmas cards I want to make. I said that after looking through the new spring catalog and writing up a wish list!!! LOL But after Christmas I won't be making anymore Christmas cards but I may be making some winter cards with a Christmas theme to use as thank you cards. And then there's that couple of weeks before you can order and receive your new stuff. So I will be playing with some stuff from the latest catalog so I can feel better about getting some use out of them.  Such a sad cycle!!! LOL

So for today's card I thought I'd play with the November Paper Pumpkin kit. I still have lots of pieces to it but will not be making anymore cards from it to post here. I may use up the pieces making cards I already made so I have extra on hand for next year.

The base of my card is a folded half-sheet of Whisper White card stock.  I'm amazed at how many cards I've made using Whisper White as my base this month. I usually use a lot of red for Christmas. Interesting.  Anyway, I cut a 4" x 5-1/4" piece of Sea Side Spray and textured it using the "Winter Snow" embossing folder. 

I took a 1/4 sheet of Whisper White card stock and used the dotted die from the "Curvy Dies" set. I turned it so the dots were on the side I didn't want. I just wanted to make some smooth curves and not ones that looked like I made them with my scissors.  I made two and taped them together. Mine did overlap on the bottom but when I was done I cut them off so the piece once again measured 5-1/4" long.

I cut a house with a green door apart from the kit and taped it to the front of the card. I left 1/4" on the left side. I did tuck the house into the front wave of snow to make it look like it wasn't just sitting on the snow. 

I took one of the white pieces in the kit and I stamped on it using the images that came in the kit. I used Cajun Craze ink for my stamping. I did end up tracing a door from one of the factory printed other white pieces because I decided I wanted the green door to show but I didn't want to stamp on the backside of one of the factory printed ones. I set this piece in place using Dimensionals.  I also added a green candy dot to the top part of the house.

I die cut two trees from the "In the pines, Pine Woods" dies. I used a double-sided sticky sheet to put the Whisper White card stock on and cut them out. I didn't want to mess with gluing them. So this made them into stickers. I removed the backing and stuck the trees in place on the side of the house. I set one lower than the other for some dimension. I was going to add a little Shaded Spruce ink to the trees but I decided to leave them white.  

The words are from the kit and I stamped them using Cajun Craze ink.

I wrapped a some white twine around the piece, tied it in a bow.  The piece was then set in place on top of the Whisper White card base and the card was done.

This was a fun card to make and I'm off to look for something fun from my list of card ideas to make  for tomorrow.

Thank you SO much for taking the time to stop by today and have a look,                                              Wanda

Thursday, December 10, 2020

Christmas Card, Stamping Techniques, 2020 November Paper Pumpkin Alternative Card

I found another fun card to make using the November 2020 Paper Pumpkin kit.  It's also a fun "Z-fold" technique.  I'll walk you through it, it's very easy.

The base of my card is a folded half-sheet of Cinnamon Cider.  Score the piece in half as you normally would. Then on the front piece, score it at 2-1/8". Fold the card in half as normal and then take the edge of the card towards the center fold. You are going to be making a mountain fold here. The inside is a valley fold. You will want to use your bone folder to make nice tight creases because this card does not like to stay shut on it's own.

Here I used two 5-1/4" x 1-7/8" pieces of Designer Series Paper (DSP) from the Subtles collection of the 6" x 6"stack. I used the Blushing Bride colored one.  I'm not as fond of these papers as I have been of the older designs. But it's all a part of moving forward I guess!  Anyway. I taped the strips to the left side of the card. If you were to fold the card shut you would actually be taped these strips to the inside of the front of the card.  But since we are making a "z-fold" the first fold on the inside is now on the outside.

I added a 4" x 5-1/4" piece of Whisper White card stock to the inside of the card.

Next the house was worked on. I cut one of the houses from the November 2020 Paper Pumpkin kit in half. I used the side without the printed door, it's going to be covered up by the white die cut piece anyway. 

I took one of the white die cut pieces that didn't have any printing on them and I stamped the house using black Memento ink. Then I stamped the swirly image above the house using black Memento ink as well. I colored the house in using my Blends pens. I used light Cajun Craze, which looks a lot like the Cinnamon Cider. I also used light Balmy Blue and light Daffodil Delight.  I have to laugh when I looked up at the photo as I am typing this. I forgot to finish coloring in the roof. Those white shingles are supposed to be colored in using the light Cajun Craze pen. I laughed because the first time I took the photo I had forgotten the words.  WOW, my mind is not working well today! After coloring I taped the white piece to the house shaped piece. Then the house shaped piece was taped to the card. When taping the house piece to the card, only tape it on the left side of the house or you will not be able to open up the card.  

The words are from the set and were stamped from the images in the kit. I used black Memento ink to stamp them. I had used Blushing Bride card stock that was cut 1/2" x 1-3/4". I taped the words in place on top of the house. You can see the original card here. The image shows the card open so you can see what I mean about the house laying on top of the two DSP strips.

For a final touch the candies from the kit were added and the card was done.

This is a very simple and fun technique to do. You just pull the left side of the card out and it's open. The house will lay flat on the inside cover across the two taped DSP strips.  Fun and easy, huh?

Thank you SO much for taking the time to stop by and have a look today,                                                  Wanda

Sunday, December 06, 2020

Christmas Card, October 2020 Paper Pumpkin Alternative Card, Quick Card

I thought I'd sneak in one more October 2020 Paper Pumpkin kit Christmas card. I don't remember where I found this card but I thought it was pretty and quick enough to make. You can do the "One Sheet Wonder" technique here.  

Grab a full sheet of Real Red card stock and stamp the flower image where you'd like. Here I used Versa Mark ink sprinkled it with gold embossing powder and then heat set it.  Cut the card stock 3-7/8" x 5-1/8".  

The base of the card is a folded half-sheet of Whisper White card stock. On top of that I used a piece of Crumb Cake card stock. I didn't have enough gold foil card stock so I improvised.  

I taped the embossed piece to the Crumb Cake piece and then I taped all that to the front of the card base.

I cut a 3-7/8" x 1-1/4" piece of Real Red card stock and I stamped the words from the kit using Versa Mark and heat set gold embossing powder on it. 

I taped the word piece to a 3-7/8" x 1-3/8" piece of Whisper White card stock. I took some gold thread and tied it around the two taped pieces and then I set those pieces in place using Dimensionals. 

A few gold sequins were added and the card was done.  

I thought it was such a pretty card and of course I can't find the original card from Pinterest so I can provide a link, but when I do I will post it.

Thank you SO much for taking the time to stop by today,
Wanda

Friday, December 04, 2020

Christmas Card, November 2020 Paper Pumpkin Alternative Card

I found today's card on Pinterest unfortunately the picture doesn't click to any web site for instructions or a story on how it was made. So here is how I made it.

The base of the card is a folded half-sheet of Mint Macaron card stock. 

On top of that is a 4" x 5-1/4" piece of vellum that was textured using the new "Winter Snow" embossing folder. 

The house was cut from one of the gift card holders in the November 2020 Paper Pumpkin kit. I used the side without the door printed on it since most of the front was going to be covered with the white tag in the kit. 

Next I stamped the gingerbread house image from the kit using Cajun Craze ink. I also stamped one of the swirly images above that house.  I colored the roof using using my Blender Pen and the Cajun Craze ink pad. I colored in the rest of the areas using my Blends pens. I used light Daffodil Delight, Dark Mint Macaron (only because my light is dried up - how did that happen?) Light Flirty Flamingo and Light Pumpkin Pie.   After coloring I taped the house onto the vellum piece.  Then I taped the vellum piece to the front of the card base. But I only added tape where the house was or it would show through. That is why I taped the house on the vellum first. And when taping the house I didn't add the tape real close to the right side, I needed to slip the tree under it.

My tree is different from the one on the original card because I didn't have that die cut/punch. I had a tree punch so I used what I had. I punched them from some Just Jade card stock. I thought the trees looked pretty blah so I used my white Chalk pen to add some snow to it. The tip of my Chalk pen is ruined because it used it to flick/splatter on a project and found that the tip to this pen is much more brittle than the marker tips. So it started to fall apart. I stopped flicking and the end is all over the place, not smooth. One touch and I get 3 or 4 dots on the paper at a time. It was perfect for this purpose.

I taped the first tree and slipped it under the house. 

The words are from the kit and were stamped on one of the tags from the kit using Cajun Craze ink. I taped it to the front of the house.  

Then I added the second tree using Dimensionals.

I added a little Wink of Stella on anything round or scalloped, except for the roof.

A 4" x 5-1/4" piece of Whisper White was added to the inside and the card was done.

This was a fun, quick and easy card to make.  I especially love the snowflake background.

Thank you SO much for taking the time to stop by today,
Wanda

Wednesday, December 02, 2020

Winter Woods, Christmas Card, November 2020 Paper Pumpkin Kit

I found a wonderful card on Pinterest using the November 2020 Paper Pumpkin kit. I didn't have the stamp set used so I improvised and this is what I came up with.  VERY close to the original.

The base of the card is a folded half-sheet of Cinnamon Cider card stock. That color is starting to grow on me and I may have to order a full pack of it (I had ordered the variety pack). I still have my gingerbread boy punch and that color is perfect.  Anyway, this card opens on the right and the fold is on the left. I added a 4" x 5-1/4" piece of Whisper White card stock to the inside.

I cut a 4" x 5-1/4" piece of the Designer Series Paper (DSP) from the "Snowflake Splendor" 12" x 12" package.  

I fussy cut a Whisper White piece that was 4" wide for the snow hill.  It ended up being about 1-1/2" tall at the top of the little hills. And then I taped that piece on top of the DSP at the bottom.

Next the tree was stamped. Mine is from the "Winter Woods" set. I set it up in my Stamparatus because I wanted to make sure I got a nice image. I inked it with Shaded Spruce and stamped it three times to get a nice dark image. There's always a little gap between the card stock and the layer behind it so I took my Shaded Spruce marker and just colored in that space until it looked like it blended in. 

The house is from the kit and I cut off the side that had the door and I also cut off the flap. I taped that to the front of the card.

I took one of the white pieces in the kit and I removed the door and the heart at the top. I stamped the design on it using Cajun Craze ink. Then I set that on top of the house using Dimensionals. 

The words are from the kit and were stamped using Cajun Craze on a tag from the kit. They were set in place with Dimensionals at the bottom. 

Three of the candies from the kit were slipped in behind the word tag and the card was done. 

This card was easy enough to make and it's SO darn cute. I may make a couple more. I have other sets I want to use before Christmas so I need to spend more time with them instead of the kit. Unless I run across one that I just HAVE to make!! LOL

Thank you ever SO much for taking the time to stop by today,
Wanda