Pin It

Showing posts with label Kids Projects. Show all posts

Wednesday, March 22, 2023

Art Gallery, Dainty Flowers, Ghirardelli Treat Holder Gift Box, Weekend Project, Stampin' Up!

Hello there. I'm happy you are here today so I can share with you a fun find!  Did you ever find something on the internet (mostly Pinterest) that you wanted to make and then quite a few days later you get around to making it?  I have a lot of those. And some of them just get put into a folder and I forget all about them.  But I knew I wanted to make one of these when I saw it on Kadies "Kards by Kadie" blog. I follow her because she's got lots of fun things to share. Now she posted hers about 4 days ago and I think I did well to make it before a week went by! I just thought this holder was adorable. Plus it's easy to make too. You can see Kadie's by clicking here.  Read on to see how I made mine.

The piece was made by cutting a piece of Fresh Freesia card stock at 4" x 6".  On the 4" side you score at 1/2" on each end. I like to score on the left side and then turn my piece 180 degrees and score on the other end. It just works best for me to do it that way.  Plus if there's any discrepancies in the measurements I know the ends are always the same size! Next the scoring on the 6" side went as follows, score at 1", 1-1/2" and 3-3/4".  And that's it for the scoring.  I've included a photo of how the piece was cut out. In the photo I showed how one side was cut out.  And yes, I did use pencil on my piece but I have an art gum/kneadable eraser and it removed graphite without ruining the surface of any paper.  It's a must have in my craft room.  I have even removed the eraser from my mechanical pencils and kneaded up pieces of the eraser to fit in the spot. I just love this type of eraser. Oh and there's no bits of eraser to wipe of onto the table or floor either!!  So once I got my pencil lines erased I was ready to start assembling.  First I glued the top section down. It's pretty long and once folded it makes the back wall pretty strong and stable. And then I set it aside. I also snipped the little tabs so they fold in a little better. I also marked the piece at 2-1/2" from the bottom piece (on each side) to cut the angle equally.  

Next I cut the Designer Series Paper (DSP) from the "Dainty Flowers" 12" x 12" package to measure 2-7/8" x 2-1/8" for the back wall of the holder.  And the front strip measured 2-7/8" x 7/8".  I glued those two pieces in place. 

The box was glued together. I glued the side back piece to the small flap on each side and then I glued the front piece to the back side piece. You want to do it in this order or you will have raw edges on the front of your holder.

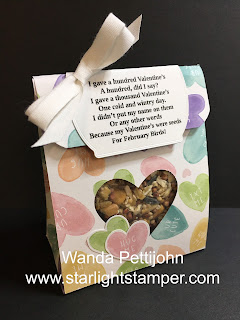
Once the box was glued I tied a ribbon around it. My ribbon is Fresh Freesia, I still had some left. I think I have enough left to make one or two more cards and then it's gone. I'm happy it will be gone but sad because it's so pretty.  But at least I will finally have used something up in my workroom!!

Now I was making this with a certain friend in mind whom I will be having lunch with tomorrow. She's going to love it and these words are perfect for her. She is a lovely lady and I'm so happy she is in my life.  The words are from the "Art Gallery" set and were stamped using black Memento ink. I die cut them with the smallest die from the "Tailor Made Tags" die set (that I forgot I bought a long time ago). It's still current and I hope it's in the next catalog because I need to play with it. You might be seeing it on some upcoming cards so I can feel better about the purchase!!

The word piece was slipped under the ribbon and glued in place. 

I added two Ghirardelli pieces of candy in the holder and the piece was done.  Isn't it cute?  I can see making these at Christmas for special friends or stocking stuffers. Let's hope I remember that I want to make these then!! I even thought about changing the measurements to make it a bit wider so it will accommodate a gift card. It's tall enough but not wide enough. It wouldn't take much to add 3/8" to the width.  

Oh and I think these would be great teacher gifts. A little bit of card stock, ribbon and DSP plus some candy and you've got a nice little gift for a teacher at Christmas or for the last day of school. 

This was fun. It's a very quick and easy holder to make and I can see myself making more of them in the future! Really!!!

Thank you SO very much for taking your time to stop in and see today's treat holder,
Wanda

Thursday, February 10, 2022

Sweet Talk, Valentine's Day Bag, Weekend Project, 2022 Stampin' Up! Spring Catalog

I don't often make many cards or gifty items for Valentine's Day. It's a one day thing and it's over. It's not like you decorate all month for it or prepare for weeks for it. You give a card, maybe some candy or a token of your love and that's it. Done. So I usually make one or two cards and sometimes a 3-D item. In my email today I got a "Treat Box" tutorial from Split Coast Stampers.  It was called a "Shaped Window Treat Box". Though it seems more of a bag to me than a box.  But I played along because I thought it was cute and would be fun.

The Designer Series Paper (DSP) is from the "Sweet Talk" 12" x 12" package and it was cut at 6-3/4" x 11-1/4".  The instructions for scoring and cutting on their site. I gave the size so you know what size piece of DSP you would need should you decide to make one. So if you've the a piece of DSP large enough, head on over there and take a look at the instructions. There's also a video. I just used the written instructions. Here's a link to the instructions, though I think you need to sign up to get them. They don't bug you or sell your info so your email won't be bombarded by a ton of junk mail.  I signed up many years ago and was a member for quite a few years but quit when the shop I worked at closed and I no longer had a job to help pay for fun things. There's a lot of techniques on their site plus TONS of card sketches (card layouts).  Every week there's something new. 

I added some birdseed to the bag and stapled the bag shut. I didn't like the squeezing of the sides to get the bag to close. If I were to make this again, I would add some score lines at the side pieces about 1" down from the top edge to make that "pinch" a bit easier and crisper.

I opted to do my bird Valentine's.  I hadn't done them in a few years. I think they are fun and school kids should give these out instead of cards and candy or whatever they give out now a days!  

The words are as follows:

I gave a hundred Valentine’s

A hundred, did I say?

I gave a thousand Valentine’s

One cold and wintry day.

I didn’t put my name on them

Or any other words

Because my Valentine’s were seeds

For February Birds!


I just printed them out and die cut them with a "Tasteful Labels" die. I lined up the die so the words were close to the bottom and folded the top edge over the top edge of the bag. I had stapled the bag shut and I glued the words on top. I added a bow and the bag was done. I can see making these for Easter!! Probably with candy this time!  LOL

This was a fun project and there's going to be some happy birds out there!

Thank you SO very much for taking your time to stop by and see today's Valentine's Day gift bag,
Wanda

Friday, December 20, 2019

Life Saver Matchbook Candy holders.

I made these a few years back but they are worth repeating!  These make great "Stocking Stuffers" and little gifts of thank you for teachers, the mail carrier, the USP driver, the sales clerk, etc.  You know who you can give them to!

You can find the instructions for these fun matchbook candy holders here.

Sorry my post is so short today. I have a Christmas party to go to tonight and I am WAY behind on what I need to do to get out the door on time.

Have a great day and thank you for stopping by,
Wanda

Saturday, April 16, 2016

Elmo Pyramid Pals Gift or Candy Box Party Favor

Today I would like to share with you one of the fun "Playful Pals" Pyramid Pal Thinlit's die box I made.  

As you can see it's Elmo!!!  I thought it would be fun to make him into a party favor.  It can also be used as a gift box (without the window if you want to keep what's inside a secret).  Before I put the box together, I punched a hole and added a piece of window sheet to the inside.  Now I had a cute viewing window.  I added some red mini M&M's in a piece of cling wrap and tied it shut.  Don't make it too big or it won't fit inside and then the back won't close either.  

Here is how it's made:
I made my red pyramid (leaving the back open for candies or gifts) and then I punched out some circled for the eyes, nose and mouth. It was super simple to make.  I did stamp some curly "fur" on the outside using Real Red ink before I put the box together.

Yup, as simple as that.  He was SO quick and easy to make.  And REALLY fun too!!  They don't take much card stock and you can use scraps for the details.  And he would be a great addition to a kids party!

Thank you SO much for visiting today,
Wanda

Friday, February 26, 2016

Playful Pals and Disney's Olaf from Frozen Pyramid Pal Thinlit Die Box

I LOVE using the "Pyramid Pal" Thinlits.  You are only limited by your imagination with this set and matching dies. I do like the movie "Frozen" and Olaf is an adorable character. So, why not make one!  

I used the Dazzling Diamonds card stock.  This paper is a little bit trickier to work with than regular card stock.  It's stiffer.  I had to use clips to hold the seams together to allow them to set up.  I used glue and not tape.  Because the paper was so stiff, there was no way the tape was going to hold for long.

I used some oval and round punches as well.  For the nose I just cut a wedge of Pumpkin Pie card stock and used a Pumpkin Pie marker and drew on some lines.

The top of his head is the toes from the frog die.  He was simple to make but like I said, you need to clip the seams together until they are set up.  For the pieces, I used both glue and tape.  I didn't want to sit there and hold pieces in place so I used tape and glue. I knew the tape would hold while the glue dried.  It was like getting the best of both worlds!!

I left the back open, I didn't glue it shut.  That way he could be used as a party favor or a gift box.

Isn't he adorable?  Please remember if you make these, you can not sell them unless you contact Disney and get a contract with them.  Olaf (and any other Disney character) has a copy right and you will be infringing on it if you sell their images.  It's best to check into things before you sell products that you don't own the rights to!

Thank you SO much for visiting today,
Wanda

Tuesday, February 23, 2016

Playful Pals Angry Bird Pyramid Pal Thinlit


Today I would like to share with you one of the fun "Playful Pals" Pyramid Pal Thinlit's die box I made.  

As you can see it's the red Angry Bird.  I played that game for a while but I'm not that great at projectories so I ended up giving up.  I wasn't having fun with it anymore.  But, I did have fun making this guy.

I made my red pyramid (leaving the back open for candies or gifts) and then I punched out some circled and cut some lines. I just found a picture of the red angry bird and went from there.  The top of the head "hair" was from a die in the package.  It made a fringe piece.  I just rolled it and glued it up.

Yup, as simple as that.  These critters are SO quick and easy to make.  And REALLY fun too!!  They don't take much card stock and you can use scraps for the details.

Thank you SO much for visiting today,
Wanda

Sunday, February 07, 2016

Playful Pals and Pyramid Pals Cookie Monster Box

I am having a lot of fun with these "Playful Pals" .There's so many fun pieces to the stamp set and to the "Pyramid Pals" Thinlit dies.  

Today I thought I would incorporate some other punches with the set.  

I thought a Cookie Monster critter would be fun.  Oh and it was super easy to do too.  I used a scalloped circle and some round punches.  It doesn't get any easier than that.  

A tip from one of my previous posts:
Now when you make these fun pyramids, be mindful as to whether or not you want the pyramids to open or to be glued shut.  Since you have to cut out two pieces to form the pyramid, I glue them one at a time.  After I glue the first one, I will glue the bottom only to the second piece and insert it inside the first half I glued.  Now you can see which side you need to glue to have a pyramid that opens or one that is glued shut.  Ones that open are nice because you can put candies or other things inside them. They make great kids party favors.  They also make great co-workers gifts too!!  There's LOTS of ideas you can come up with for uses for these adorable boxes.

A tip if you are using the glitter papers.  You will need to use a large paper clip to hold the seam in place while it dries.  With card stock you just add glue, run your bone folder over the seam and it's good to go. But this glitter paper needs a little more help and time.

So if your little kiddies love Cookie Monster, you can make a whole herd of them!!!  This one is open in the back so I can add some little cookies inside as a treat for my little grand-monster!!! LOL  I think she would get a big kick out of him.  Plus I know she'd love the cookies.

I had used Pacific Point here for him.  I also stamped the curls on using Pacific Point ink.  What took the longest to make this was getting all the punches out!!!  

These are SO much fun and I have a few more to show you soon!

Thank you SO much for visiting today,
Wanda

Wednesday, January 27, 2016

A Playful Pals Polar Bear

These "Playful Pals" are so much fun!  I thought I would make a polar bear.  There's so many fun pieces to the stamp set and to the "Pyramid Pals" Thinlit dies.  All of the pieces here were done with the dies except for the smirk!  I just used a paper punch and then punched a little sliver off the edge.  Oh, and the eyes were also done using a small paper punch.  

Now when you make these fun pyramids, be mindful as to whether or not you want the pyramids to open or to be glued shut.  Since you have to cut out two pieces to form the pyramid, I glue them one at a time.  After I glue the first one, I will glue the bottom only to the second piece and insert it inside the first half I glued.  Now you can see which side you need to glue to have a pyramid that opens or one that is glued shut.  Ones that open are nice because you can put candies or other things inside them. They make great kids party favors.  They also make great co-workers gifts too!!  There's LOTS of ideas you can come up with for uses for these adorable boxes.

A tip if you are using the glitter papers.  You will need to use a large paper clip to hold the seam in place while it dries.  With card stock you just add glue, run your bone folder over the seam and it's good to go. But this glitter paper needs a little more help and time.

These are SO much fun and I have a few ideas for more!!

Thank you SO much for visiting today,
Wanda

Thursday, January 21, 2016

Playful Pals Bunny

Just in time for Easter!!  I made a cute little bunny with the "Playful Pals" and "Pyramid Pals Thinlits Dies".  I love it that I don't have to cut out all of the pieces individually.  Just those dies. It saves so much time and they allow me to make things I wouldn't because sometimes when it comes to cutting, I can be pretty lazy!  I have often passed up things because of the cutting.  Not anymore, not when the sets come with matching dies.  It doesn't get any better than that!!!

I made this cute little bunny with the set.  Even the nose is a die!! Oh and no stamping with the nose, it is just cardstock!

I'm not thrilled with how I put the feet on.  I kind of like them but yet I don't.  I could have added them to the bottom of the box and then folded them to make them like they are "bent kneed".  Or just sticking out from the bottom.  As I look at it here, it looks like the bunny has to go to the bathroom really bad and is crossing it's legs to hold it.  LOL  

On the feet, I did use a colored marker to draw the pads in.  

The eyes, whiskers and mouth are stamps included in the set. 

I made it so the box opens in the back so you can put candies or whatever inside.  I added a pompom for a tail, I thought it could use something back there!!!

I can't wait until my granddaughter is old enough to play with this. It's a set I will keep for many years to come.  

These are a lot of fun and they go together pretty fast!  I prefer to use glue to put them together.  I know glue will hold.  The tape... not so sure.  And I know it won't hold long on the glitter paper. Even the glue was tough to work with.  I had to clip it to make it hold.  On regular cardstock the glue held almost immediately after I pressed the seam with the bone folder.   I'm looking forward to playing with this again.  There's lots of critters to make!!

Thank you SO much for visiting today,
Wanda

Saturday, January 16, 2016

A Playful Pals Piggy Bank

Today I'm going to share with you one of the critters I've made using the "Playful Pals" and "Pyramid Pals" Thinlits Dies.  

These are SO much fun to make.  You need to cut out two panels and glue them together.  I glue 2 sides so I can keep the back open to add gifts, candies, etc.  This one I glued all sides shut.  I cut a slit in the back before I glued it and then I added a little panel with a slit in it to support the back so the coins don't wear down the cardstock.

I used the dies and cut out the nose and ears with the blush colored glitter paper.  It's such pretty paper.  I can't wait to use some for a few Valentine's Day cards.  

For the eyes I used the 1/8" paper punch and punched a couple dots out of Basic Black cardstock.

It's hard to see in the photo but there's some stamped lines on the front of the pig.  You can tape the pieces in place but I don't think the tape will hold together as well as the glue will. When I set the nose in place I used a Dimensional.  I thought the face could use a little something more.  

For an added touch, I took a circle of cardstock and cut it into a coil and added it for the tail.  

I got the idea for the pig right from the 2016 Occasions Catalog.  There's a few more ideas in there to copy too.  I have made several of these critters and I'll be sharing them with you now and then.  I have other things I'm making that I want to share too.  SO many things, so little time!!! LOL

These are so fun and easy to make and the kids will LOVE making them along with you!!  Or just play alone, it's still fun!!

Thank you SO much for visiting today,
Wanda

Tuesday, February 05, 2013

Greeting Card Kids Valentine's Day Candy Project

This did not photograph well but you can get the idea.  I used one of those 1"x8" Cellophane bags I bought through Stampin' Up! quite a while back.  I still have a bunch of them left.  

I added some of those Conversation hearts to the bag and folded it shut.  I punched out two red scalloped circles and taped them together between the bag.  Then I stapled the circles to the bag.  I usually turn the stapler around the other way so the bumps are in the front and the smooth part is in the back but today I forgot to do that.  So with the bumps sticking out in the back I was about to scrap this piece and I got a bright idea. I took out my hammer and hammered those bumps flat.  Nothing is sticking up to poke or catch on anything.  Color me happy there!

Next I taped the white circle on the front.  But before I had taped it I with a sponge dauber, I sponged the center with Daffodil Delight and dragged the color outward.  If you click on the photo you can get a closer view of this.  

The image was cut out and colored and then taped in place.  An easier way to make this is to stamp directly on to the circle piece but I had this little girl cut out so I thought I would use it.

I took a fine point permanent marker (005 point) and wrote "Be Mine" in the tiny heart the girl is holding.  I didn't need any more wording than that.  And that was it.  Quick and easy yet cute!! Now I need to make a bunch more of these for some friends.  I hope they like these candies.  Personally I think they are horrible, I have never ever liked these.  LOL

Thank you SO much for visiting today,
Wanda

Saturday, December 01, 2012

Fancy Favor Santa Theme Gift Box Weekend Project

Today I have another Weekend Project for you.  There's LOTS of Weekend Projects on my blog.  Over 200 of them!!  You can find them all by clicking here.  There's plenty to keep you busy all month!

I whipped up a Santa Theme box.  I also have a LOT of Santa Theme items on my blog too and this one makes 20.  Just click here to see all of those!

I used the Fancy Favor die for this box but I'm sure you can get the same look just cutting and scoring your own box shape.  If you scroll down on the sidebar of my blog you will see a link to boxes!  You can custom make a box there.  It's called the Super Deluxe Tuck Box Maker.  You don't need to keep the tuck part, you can just cut off the flap (if you wish) and have an open top box.  The only drawback of that box maker site is that you have to cut the box out by hand.  It's not bad if you're only making a few but to cut out a bunch, well... I think twice on that one!  I'm SO spoiled by the die cuts now!

Ok, onto the box here.  I used a half sheet of 12" x 12" Real Red card stock and cut the die out on my Big Shot.  Then I glued it together. I much prefer glue than the tape for things like this.  And yes, I even prefer the glue over the Red Line or Sticky Strip tape (Both the same exact thing).  Then I took a piece of scrap black and trimmed it on the edges to fit the front of the box.  I added a 1" punched piece of silver glitter paper and then a 3/4" punched piece of Basic Black card stock.  I punched out a couple of 3/4" circles for the buttons and I had also cut a piece of white scrap card stock to match the shape of the top of the box.  I did use the die to cut that white piece.  And the final step was to fill it with candies.  It makes a great party favor or even a cute box for some wrapped goodies.  I just poured some candies in it because I'm just setting it out on my counter.


This was quick and very fun to make.  This is even something the kiddies could help out with for their friends or teachers!!!  Have fun!

Thank you SO much for stopping by today,
Wanda

Wednesday, October 24, 2012

Fun & Easy Bookmarks

 Today I'm going to show you how to make a very fun and easy bookmark.  I will give you the measurements for the one you are seeing here but you can cut your card stock or decorative papers any size you wish because it's all in the folding!


I started out with a 4" x 4" piece of card stock.  I folded it in half from top to bottom.  I opened it up and then folded it in half from side to side so when I was done I had four equal folded squares on my card stock.  You can also just score it in half at the top and at the side.  I just folded because it was easier and quicker for me.  


Now looking at the folded square areas, we will visually number them.  Starting at the top left that one is #1, next to it is #2.  Under #1 is #3 and next to it is #4. So you have 1 & 2 at the top and 3 & 4 at the bottom.   Cut away square #2.  Next you will need to cut square #1 from corner to corner.  Start with the outside corner of #1 & #3 and cut across the square to where the top of square #2 was.  And for the bottom you will be cutting from the bottom corner of square #3 to the side where square #4 and square #2 met.  See the photo I've added.  


Next you will be folding the #1 cut square down and the #4 cut square inward.  Make sure the folds are sharp.  Glue the #4 part to the top of the #1 part.  The #4 part is the one you want on top.  And that's it. You are now ready to decorate it as you wish!  Even the kids can have fun decorating these!

Wouldn't these be a fun make & take project?

Thank you for visiting today,
Wanda


Monday, March 19, 2012

Easter Gifts Weekend Project

These are quick fun little projects that the kiddies can get involved with too.  You can stamp the image(s) and the kids can color them.  Once they are all assembled the kids can give them out to their friends, teachers and Sunday school teachers!! 

Aren't the tiny chocolate bunnies adorable?  They are made by the Russell Stover company.  I think the package said there was something like over 60 bunnies in it or it could have been more.  Just look at it, there's LOTS of bunnies in it and these two little baggies were from just one package!!

The bunny image is from one of the dollar stamps at Michaels.  I just thought he was a cute bunny!  I thought it was something fun that the kids could do.  Kids love to be in the workroom/craft room and they love to get their hands on your "stuff!"  What a perfect project for them to have some fun with and be creative too AND without a lot of mess!

The bunnies were colored in using watercolor crayons and a blender pen.  For smaller kids you could color in the images and then just hand them the blender pens to blend (and probably mix) the colors!!!  It's just nice when you can get the kids involved in some creativity and away from the tv!!!

Ok, great news here.   Tonight I have one more "thing" to do on the project I've been talking about for what seems like months!!!  And it will be ready to show you tomorrow!!  So be sure to check back tomorrow to see what all the hype was about!!  I am happy with the way it turned out.  For my first one I know there's a few things I would have done differently but like I said it was my first one and I'm sure I will be making more!

Thank you SO much for stopping by today!
See you tomorrow,
Wanda

Sunday, March 04, 2012

Weekend Project Time!

I love these weekend projects, don't you?  Well, most of them anyway!!!  I especially love the ones that don't take very long to make.  

A few weeks ago I had made a St. Patrick's Day birthday card for hubby's aunt.  It was a fun and quick card to make.  I had gotten these cute St. Patrick's Day stickers at Michaels because they were not only cute but on sale for under $.70 for the strip of them!  When I saw them I knew I was going to be making a card for hubby's aunt since there are really not a lot of St. Patrick's Day stamps out there and even less that are for a birthday on that day.

I let the gals use the rest of the stickers when they came here to stamp last month and there was one left.  Well, I didn't want to store it with the rest of the TONS of stickers that I have so I thought I would just use it. 

I took one of those cute little clear containers I had gotten at Clear Bags and I filled it with green Sixlets. I LOVE that color of green and it's perfect for what I was doing with them.  Next I tied a bow around the clear box and then I just stuck the sticker on.  How simple is that??

A couple of weeks ago at the Stampin' Up! Open House I was at my sister and I bought the Stampin' Up! stickers.  I don't know what they are called since we split the package and I gave her the vital information part!!!  Some of the stickers, like the cake are too big for this box but there are some other ones that would be adorable on here.  I was thinking on how to go about doing this and I would do it much like this sticker is done.  I would punch out a round circle and add the stickers to it and add another one matching one on top of that one using a Dimensional.  Then I would have the layered look of the sticker like this one has.  I think it will work!  I'm going to see if I have time later in the week to give it a try.  I have a lot of hours at work coming up this week so it may be tough to sneak some time in at home to try this but I'll try my best to see if I can.

I can see these little containers showing up in Christmas stockings too, can't you?  I would love to make one up but I think I'm going to save that idea until fall because I am really not in the mood for winter projects now.  I want spring!!!  And I can see these as a fun Make N Take, a Stamp Camp project and even selling them at craft fairs.  Though I think Christmas ones would sell better at craft fairs.  I may have to try out a few of them this fall myself.  And don't forget the kiddies.  This could be a fun gift for the kids to make for the grandparents or teachers!!! You can make them for co-workers, the mail carrier and the UPS delivery person too!

Thank you SO much for visiting today,
Wanda

Friday, February 03, 2012

Labeled LifeSavers Valentine's Day Treats

These fun little treats are easy to make and would be a great thing for the kiddies to pass out to their friends.  Pop a few in the mail box for your mail carrier!  A great little tasty treat to set on the teacher's desk or the desk of your co-workers.  They could be fun for a Make N Take, Hostess Appreciations, Customer Appreciations and change the theme and they even make great Stocking Stuffers at Christmas time!  These are even something the kiddies can help make.  They don't require any tools other than punches.  You just print out the words and the card stock is ready to punch.

I punched out the labels and scored them in the middle on the long side.  I folded them in half.  On the word side I added the hearts.  It is hard to see in the photo but the hearts are white with pink center and pink with white centers.  I used Glue Dots on both sides of the label to attach the LifeSaver and that was it.  It's a quick thing to make and these can be used for SO many occasions.  I am thinking I may make some of these in all the colors for a bridal shower for the favor bags for the attendees.  If I make them I will be sure to show you!!

Well, I think I covered everything I can on these.  They are quick, simple and cute!!  They are going in the Valentine's Day basket for my friend.  And I think that just about fills it up!  Finally!!!

Thank you SO much for visiting today,
Wanda

Saturday, January 28, 2012

Caramel Hearts Valentine's Day Gifts Weekend Project

It's always fun to dress up an item for gift giving.  I got these hearts at the grocery store and even though the wrapper was a perfect color for the occasion and the basket, I felt I needed to give it my own personal touch.  A belly band around candies is always nice.  It's easy and it's cute too!

For this belly band I started off with a piece of Real Red card stock and on top of that I added a piece of Pretty in Pink.  I crimped the two pieces and glued them together.  Tape just wouldn't stay with those ridges.  I did cut the Pretty in Pink piece about 1/8" narrower than the red. 

When the glue was set up enough I wrapped it around the candy and glued the back seam together.  I used some clips to hold it in place while I worked on other parts of the band.  I don't like to sit and hold things while they dry.  I have to keep moving!!!  I removed the candy from the band and set it aside to set up and/or dry.

While that was drying I used the heart Sizzlet to make the scalloped heart.  I used Regal Rose for that.  It was nice too that I was able to find some scraps for it. I LOVE it when I can use up those scraps.  

The words were done using the computer and I punched them out with the large heart punch. I sponged the edges and taped it on top of the scalloped heart.  I did glue the layered heart in place on top of the belly band.  Those ridges just wouldn't allow much tape to stick to them and the heart kept coming off.  Once the heart was set in place I added the little heart to it in the corner. And on that little heart I added a tiny pearl.  That just completed the belly band.  I set it all aside to dry completely.  One of them is going in the basket for my friend and the other is going to be for hubby on Valentine's Day.  We don't usually do anything for Valentine's Day.  We don't do gifts (or flowers), we don't do cards (anymore) or even go out to dinner.  I often fix a very nice dinner for us and that is about it.  It doesn't mean that we don't love each other anymore, it's just that we feel we don't need to express it like that on a single particular day when we feel the same for each other ever day of the year!  (well, most days - as long as he doesn't get on my nerves!!! LOL)

I have another project I am working on and I will share it with you when it's done.  I think it's big enough to finally fill that basket!!!  And then I want to make a special card for my friend too and of course I will share that with you as well.

I do need to make a birthday card for my brother-in-law.  It's his birthday tomorrow and of course my card is going to be late.  And here I was doing so well getting the cards out on time and even early for some!  My how quickly things revert back!!!  

Be sure to stop back to see what else I'm up to!

Thank you for stopping by today,
Wanda

Thursday, January 19, 2012

Easy Events Valentine's Day Candy Header

I think candy headers are one of the most funnest things to make.  I have made lots of them and they make wonderful gifts.  I have also used them in craft fairs as well and they have been successful there too.

This one is for a gift.  It's going in that basket of "stuff" I've already made in the past couple of weeks.  I was trying to make a card one day and a gift item the next but the Wednesday Sketch Challenge messed that up!! LOL  But I'm back on track and today is the gift item!

These are very easy to make.  You just measure the bag you are using and add 1/4" to it.  Then you need to figure out what you are doing for the image part and then you can figure out the size of the length of the header.  Remember that the front of the header is the part people see but you need to double that measurement because it folds over onto the back.

A little trick I ALWAYS do when I staple the header to the bag.  I staple it on backwards.  I like to have the smooth bar of the staple in the back side.  That way no prongs stick out to poke fingers or get caught on stuff.  I used Dimensionals on the image piece so the bumps from the staple won't effect it. You can just tape it too but use some really strong tape like Stick Strip or Red Line (it's the same thing). The bumps will show a little but if you are trying to cut corners and save some money in making these then that is what you will need to do!

These would also make great gifts for co-workers, make and takes, customer appreciation gifts, hostess gifts, gifts for the kids and even teacher gifts.  Have fun making them.

Thank you SO much for visiting today,
Wanda

Sunday, May 15, 2011

Ladybug Weekend Project

Wouldn't this make a great summertime party favor???  I had seen this ladybug a long time ago, probably when these Sweet Treat cups first came out and I filed it away.  I didn't realize I had filed it away that long!!

This adorable ladybug is SO fun and quick to make too.  The part that took the longest was waiting for the glue to dry on the stick.  I was thinking that if I had a lot of these to make I would use a hot glue gun for that but then again if you have a lot to make by the time you are done with the last one the glue will be set up enough to handle.  I guess it's whatever you want to do to keep the stick on!!

To make this I just punched out some red card stock, I filled the cup with red candies and stuck the cup to the card stock.  I punched out small black circles and glued them to the outside of the cup.  And for the head I just punched out a 1-3/8" circle and glued it to the back of the red circle.  I used the white gel pen to dot in a couple of eyes. But I think those wiggly googly eyes would be adorable on it too.  I couldn't fine mine so I just went with the gel pen.  When I find the eyes I'll just glue a couple on and she will be even cuter!

These are a great thing that the kiddies can help make too for a class gift or just a single one for a teacher gift.  They are fun and easy to make, not to mention how adorable they are!!

Thank you SO much for visiting today,
Wanda

Tuesday, March 15, 2011

Lucky Shamrock Candy Bag Weekend Project

Here is a fun way to whip up some "Lucky Shamrock" candies for your friends, co-workers, customers or even for the kids!!! Including hubby!  I made this for my hubby!  Hopefully he won't see this post before St. Patrick's Day but if he does it's ok, it's not like it's Christmas and I'm showing his gifts on here!!

To make this I used the "Lucky Shamrock" download.  I opened up the image and set it on the page.  First I printed it out at a size that I could punch out the center with a 1" punch.  It's very easy to do it and it really doesn't waste that much ink. Just be sure when you print you start out with one on the page and print it in a draft mode so it uses very little ink.  Then check the size of it with your punch or with the catalog the original image is from.  Once you are happy with the size fill the page with the number of them you need.  I needed 8 for punching out the shamrock and one more for the header. 

Once I got them printed and punched out I punched out eight 1-1/4" circles out of Garden Green and taped them with Glue Dots to the foil candies.  The Glue Dots seem to stick the best to that foil.  Then I taped the single shamrocks on top of the green circles.  I set them aside and went back to the computer to work on the background of the "Top Note" Sizzix die piece.  I deleted all of the shamrocks on the page and then I just shrunk the shamrock down to a small size. I printed out one to see if I was happy with the size. And luck was on my side, I liked how it looked.  So I did a copy and paste and kept adding the image until the page was full enough so I could fit it on my "Top Note" die.  I printed it out on card stock and then cut it to fit on the "Top Note" die.  I also cut out a piece of Garden Green on the "Top Note" die.  I trimmed the printed image so the Garden Green piece would be the border.  I scored both pieces in the center and then I taped the printed piece to the green piece. 

Next I got a little zip baggie that measures 3" x 5" (these work the best with the "Top Note" headers) and I filled it with the candies. I took the "Top Note" header and I stapled it in place.  Now I ALWAYS staple these type bagged "thing" backwards.  I am covering the staple with the scallop so when I staple it backwards, the back will have the smooth part of the staple and the front will have the bumps. And of course those bumps will be covered with the scallop image and the back of the header is nice and smooth.  Plus you don't have to think about one of those bumps catching on anything, including a finger if it didn't staple nicely!

Before attaching the scallop I added three little pieced of ribbon loops to the back, then I taped it in place and VIOLA, it was done!  This is something the kids can help work with you on too (if you let then in your workroom that is!!!).

I'll leave it on my worktable, hubby will probably not see it and if he does I'm sure he won't think it's for him!!

Have fun making someones day with a candy treat bag!!

Thank you ever SO much for visiting today,
Wanda