
The base of the card is a folded half-sheet of Misty Moonlight. That is why I wanted to make this card. I LOVE that color and sad to say, it's retiring soon. And the "Hand-Penned Petals" set is one that I love using. It's fun, easy and SO pretty when you are done. It's one of those that is kind of hard to ruin! After cutting the card stock it measured 4-1/4" x 11". The fold is on the top and the opening is on the bottom.
I cut a 3-3/4" x 5" piece of Basic White. Then I cut a 3-5/8" x 4-7/8" piece of Basic White for the front of the card.
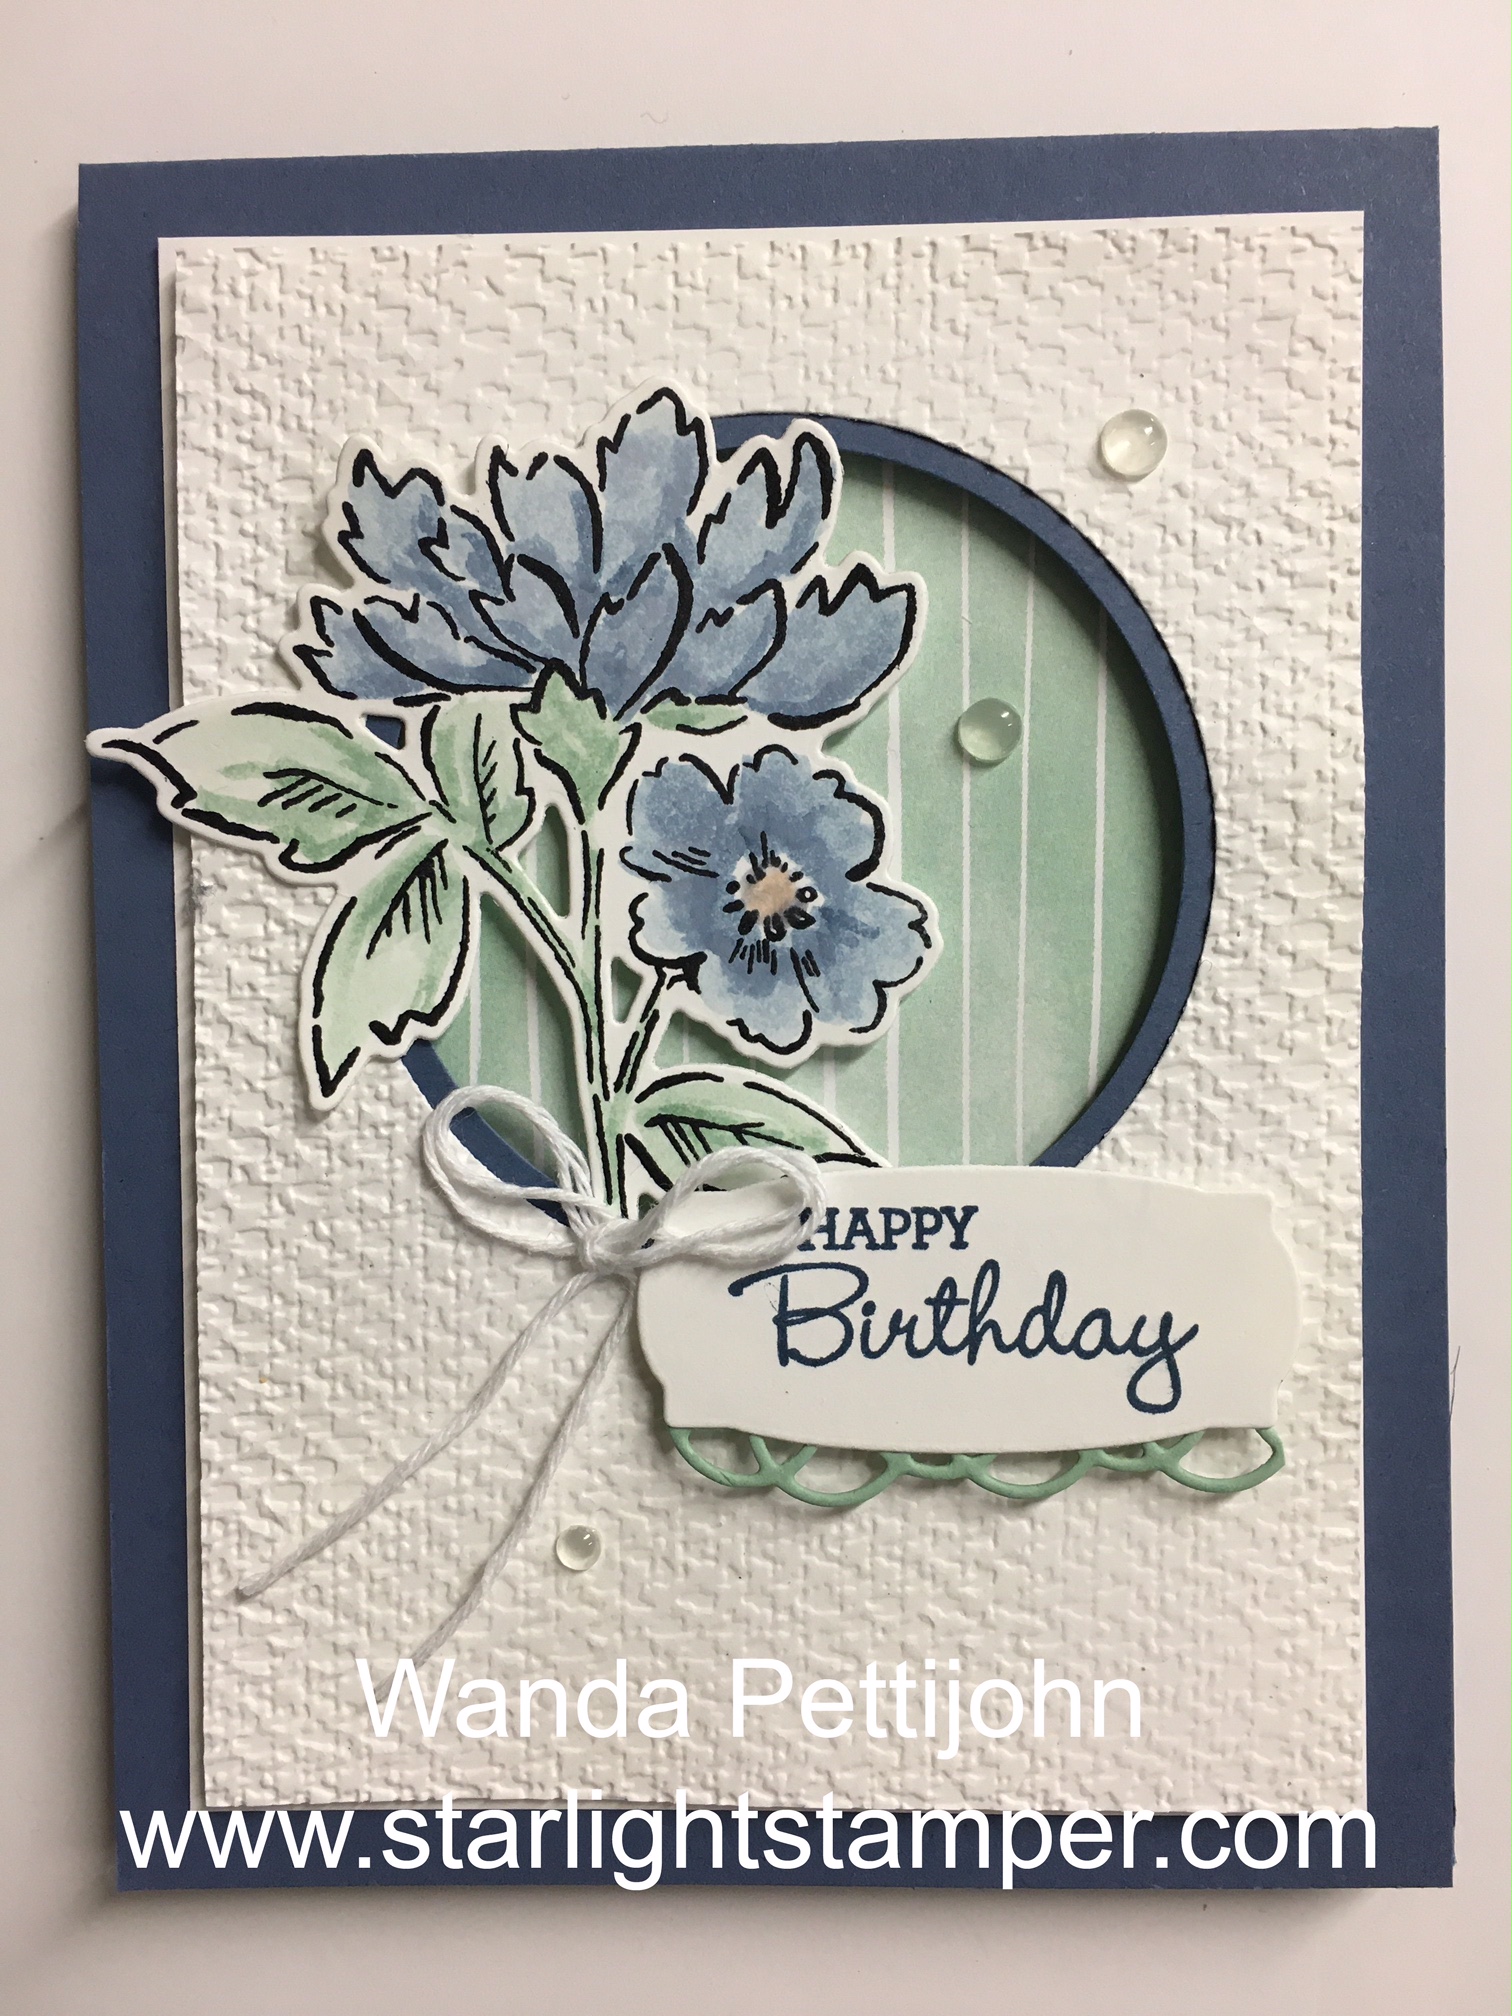
The video showed the new "Stylish Shapes" dies but I don't have them yet, so I used the 2-5/8" circle die and cut the circle out. The piece was then textured using the "Tasteful Textures" embossing folder.
A 3" x 3" piece of Misty Moonlight card stock was cut and a 2-1/2" punch was used to cut the circle. That piece was then glued to the back of the textured piece.
The Designer Series Paper (DSP) from the "Hand-Penned" 12" x 12" package was cut at 3-1/4" x 3-1/4" and taped it to the upper part of the first Basic White piece that was cut. I made sure it was equal across the top and sides. Then the piece with the holes in it was set on top using Dimensionals.
The flower was stamped using black Staz-On ink and watercolored using Misty Moonlight and Mint Macaron inks. And the center of the flower was colored in using the light Petal Pink Blends pen. It caused my ink to smear so I ended up coloring over it using the Petal Pink marker. The flower was set in place using Dimensionals and a bit of glue on the parts that were sticking up on the upper left side of the circle.
The words are from the "Pansy Patch" set using Misty Moonlight ink on a scrap piece of Basic White card stock. I didn't have the same dies that were used in the video so I used one from the "Many Messages" bundle (that is also retiring).
I didn't have the scallopy thing that was used on the original card so I used and edge one from the "Painted Poppies" bundle with Mint Macaron card stock. I trimmed the sides to fit the word piece and I glued it in place on the back. Dimensionals were added to the back of the word piece and it was set in place on the front of the card.
A bow was tied using white Baker's Twine. I didn't have the blue that was used on the original card. I didn't have the same embellishments that were used on the original card so I just added some clear "Polished Dots". Just using what I have and trying to make it work.
I do like how the card turned out!
Thank you SO very much for taking your time to stop by and see today's birthday Card,
Wanda

4 comments:
I haven’t seen the card that inspired yours, but this is beautiful! Thank you for posting. Now to head down to the craft room and see how I can adapt my supplies and tools to my version!
You have the right idea, Lynn. Use what you have to create something similar!! I have done that many times and have been pleased with how things turned out (most of the time!!!). Have fun creating!
I just discovered this card on Pinterest and I'm going to make one very similar using these papers for a Granddaugher's birthday on 12/12.
Beautiful card that I am going to recreate! Thank you for sharing the particulars, it is appreciated!
Post a Comment