 A couple of comments were left on my "Wintery Sky" post yesterday, a couple of wishes!! Wishing they could sponge like that. Well, you can!! It's REALLY not hard at all. I will walk you through it step by step and the next thing you know you will be able to do it too!!
You will need a few things first. A piece of glossy card stock cut 5-1/2" x 4-1/4". For this picture I used Pretty in Pink, Apricot Appeal, Bashful Blue, Brocade Blue and Night of Navy ink pads. You will need a sponge for each of those ink pads. You will also need an image to stamp with Staz-on ink
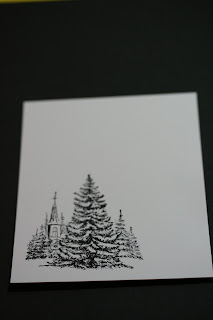
Stamp your image on the glossy card stock. Stamp another image on some scrap copier paper. While the Staz-on is trying cut out the image stamped on the copier paper. You don't need to go around each branch of the trees. Click on the photo and you will be able to see how my masking was done. If you look close at the little tree on the right side you will see LOTS of sky area still exposed. It will be taken care of later. I should have trimmed the copier paper just a bit more. But it's no big deal and is easily fixable.
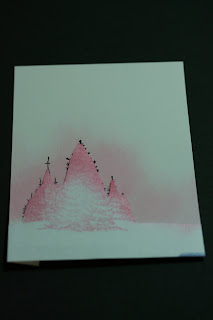
Now set the mask in place over your image and fold it around the edges of your card stock. You can tape it on the back if you like or just hold it in place as you sponge.

First I took the Pretty in Pink ink and get the sponge inked up. Now just drag the ink on the card stock. You're really not sponging or dabbing like you would do for the edges or on regular white card stock. Just drag the ink up towards the sky. Ink up the sponge again and repeat until you have a "halo" around the image.
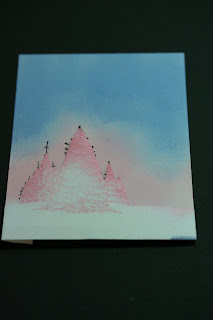
Then I took the Bashful Blue and did the same thing but I forgot to take a photo of it. I did sponge a little on the pink. You want to do that so the colors blend together

After the Bashful Blue I took the Brocade Blue and sponged into the Bashful Blue and again pulled the colors up towards the sky. You want to make sure you are not covering all of the Bashful Blue. You want to be able to see each color you add.
And for the final blue I used the Bight of Navy and kept dragging it towards the top of the card. It wasn't as dark as I wanted it to be but it worked.
Then I took the Apricot Appeal and dragged some up into the pink to give it the look of a sun setting in the background. Now to have a truer looking "sunset" you can add the Apricot Appeal to the window of the church when you are done. I used Yo Yo Yellow and it's too "yellow." It didn't give a "true" look of the setting sun shining through the window. But no one left me a comment telling me they noticed it!!! LOL
Remove your mask and you can see the image with the beautiful sky behind it. I know you can do it!! Now it's ready to color. When I did mine I had colored in the church and trees first and then did the sky. Either way works, there is no right or wrong way to do it.
To fix the sky on the right side of the trees and there is other bits of sky showing just take a Q-tip and push it into the ink pad and rub the color in.
Now would be a good time to add some white crayon on the branches of the trees if you want the snow to show. I did it but it was after I had begun coloring the tree in so it didn't work. But now I have a second image ready to color in!!!
Ok now it's your turn!! And I KNOW you can do it!!
Thank you SO much for stopping by,
Wanda


9 comments:
Wow what a wonderful tutorial,i am definitely going to try this! I'm keeping this tutorial in my folder for references!
Thanks a bunch Wanda,when I do use it i'll let you know,TFS!!!!!
great job thanks for thr tutorial
Wanda, when I saw this card before I said to myself - Beautiful, but I'll never be able to do that.
And now you've made it possible for me to give it a try. Thanks sooo much for sharing, and I'll let you know how it turns out.
Hugs
Carol
Wonderful tutorial! Thanks for doing this- I think I can,I think I can...
Wow, that is wonderful for sure I am going to give this a try. Thank you Wanda!
Wanda, thanks for making it look so easy with this tutorial. I've always wanted to try this, and think I will for an upcoming swap card.
Susan :-)
Thanks for the tutorial, your card is gorgeous. I'm going to give this a try.
You did an excellent job!! Wish I had some glossy cardstock. It's really beautiful esp. with these colors and the winter trees/church.
You make it look so easy!! :)
Post a Comment