Pin It

Friday, December 31, 2021

Forever Fern, Art Gallery, Anniversary Card, 2021-2022 Stampin' Up! Catalog

It's New Year's Eve and this is my last card for 2021. I was hoping to have a super "WOW" card but it's the end of the year and I'm tired!  LOL  This is my 365th post for the year. One a day! There's a big "WOW"!  LOL I wish you all a very Happy New Year that is filled with good health and much happiness.

SO onto today's card. I was looking through my current stamp sets and not a one of them had the words "Happy Anniversary".  UGH. I didn't want to take the time to hunt down the words in the pile of retired sets so I just went with Congratulations. It fits but not what I wanted. 

The base of my card is a folded half-sheet of Basic White card stock. I cut a 4-1/8" x 5-3/8" piece of Old Olive card stock for the layer. I taped it to the card base.  I was fortunate to have had a piece in my package that was die cut in the middle so there isn't any waste on that piece. I just trimmed it to fit. YAY!!

I cut a 4" x 5-1/4" piece of Basic White for my top layer. 

I stamped the leaves from the "Forever Fern" set using Old Olive ink and I die cut them out.  I set them on top of the card front for placement. I knew what I wanted in this card, it was just a matter of how I was going to do it.  

I took a piece of card stock that was sitting on my worktable and I traced the top and right side with a pencil. These lines are 1" from the top and 1" from the right side.

Next I stamped the dots from the "Forever Fern" set using Fresh Freesia ink. I'm not sure I like that color but it's on there now!  I set the die cut piece on top for placement of the words.

The words are from the "Art Gallery" set and were stamped using black Memento ink. 

Next I set my scrap piece of card stock on top of the card and traced over the lines using my Basic Black marker.

I set the die cut leaves in place using Dimensionals. It looked kind of blah so I got out my Wink of Stella pen and colored the leaves.

I took some of the green "Genial Gems" and added them to the front. I looked for the ones that had a lot of sparkle in them because it made them look darker, more like Old Olive than the paler green that the are.  It added a nice touch and I decided to leave it as it is.

This was a quick and easy card to make though I think I would have drawn the lines using my Old Olive marker instead of the Basic Black one. It just stands out too much.  But it's an okay card, I don't dislike it.  LOL

Thank you SO very much for stopping by to see today's anniversary card,
Wanda

Thursday, December 30, 2021

Forever Fern, 2022 Monthly Calendar, Weekend Project

Just before Christmas I was at the Dollar Tree. Not the one by my house. It's hit or miss if they are open but the one about 6 miles from me. I was there to pick up some things my mom had asked for and while I was looking around I saw this fun notepad with a 2022 calendar on it. I had not made a calendar for my workroom in a long time. Last year I just printed out a 4" x 5" 12 month sheet and stuck it on the wall next to my computer. I did refer to it a lot. I'm used to having a small calendar there. So when I saw this I thought it would be fun to make one, plus I get a note pad to write on too! Such a deal. 

I took the calendar off the backing and when I looked at it I thought it looked rather thick. There were three of each month in it.  So I took it apart and made three piles of calendars. I took one pile and jogged the pieces until they were even on all sides and I took some tacky glue on my finger and ran it across the top edge. My sister works in a print shop and she says that is how they make scratch pads there.  Good to know for future reference. Glad I remembered how it was done. Not like it's hard to do!  Then I took three binder clips and clipped the pieces across the top to hold them while the glue dried. I repeated that for the other two calendars too. Not sure what I'm going to do with them, I only need one calendar.

So today I thought I would make the calendar for my wall. I cut a piece of Just Jade at 3-1/2" x 5-1/2".  I chose Just Jade because it seemed to match the calendar the best. 

Then I took a 2-1/2" x 3" piece of Basic White card stock for the top part. I stamped some dots on it using Granit Grey ink, stamping once with full ink and then stamping again before reinking. I covered the piece with dots. The dots are from the "Forever Fern" set.

The leaves were stamped using Old Olive ink and then die cut. I had those on hand in the stamp set. There was a lot of extra pieces in that case. 

The rounded leaves are stamped using Real Red and Blushing Bride ink. They were die cut and set aside. 

There's a bigger leaf die in the set and I had cut it using Mossy Meadow card stock. I clipped off pieces to use on the calendar top.

To assemble, I added some Tombow glue in the middle and started setting pieces on. I lightly set the Real Red and Blushing Bride pieces and then started tucking other pieces in here and there. I tucked them in enough so they got some glue on them so they didn't move.  When I got everything where I thought it looked okay, I glued them down.

The ribbon was left over from a card I made a few days ago. There was a piece of ribbon left and at the time I wondered if it was enough to make a bow. So I made a bow and set it aside for another day. Today was that day!  I used a glue dot to set it in place and all I have to do is punch the hole to hang it.  

As I was looking at the calendar in the photo I realized that I need to glue a piece of thin shirt board behind it. Shirt board is the same stuff that is used on tissue and cereal boxes.  If you don't have any, glue a couple piece of card stock together and then glue the Just Jade piece to that. Use Tombow glue so it doesn't warp.  I'll be hanging mine up tomorrow. I'm going to put the piece under a few punches to weigh it down and in the morning I'll be adding the hole and hanging it up.  

This was fun and I am happy to have a larger calendar on my wall for 2022!  And the price was right too!

Thank you SO very much for taking your time to stop by and see my 2022 calendar,
Wanda

Wednesday, December 29, 2021

Senior Years, Smooth Sailing, Masculine Birthday Card, Stampin' Up! 2021-2022 Catalog

I had left the "Senior Years" set out that I used yesterday. I liked the "Happy Birthday" on it and it fit so well in the "Smooth Sailing" die.  So today I thought I would make a masculine birthday card.  There's always SO many female birthday cards on the internet but not a lot of masculine ones.  I may use this set again, because there is a female image in the set too.  I was going to say "old people" but I'm an "old people" now!!!  LOL

The base of my card is a folded half-sheet of basic White card stock. 

I looked through my current Designer Series Paper (DSP) to see what would work on a masculine card.  I found the striped paper in the "Pansy Petals" 12" x 12" package. I cut it at 4" x 2". Then I cut a 4" x 2" piece of Evening Evergreen card stock and I textured it using the "Timber" 3D embossing folder.  I glued the two pieces to the front of the card. 

The man from the "Senior Years" set was stamped using black Memento ink and then fussy cut.  I even cut out the arm pits areas.  I colored him in using my Blends pens, except for the vest. I didn't have the Evening Evergreen Blends pen so I used my Blender pen to color it in. The shirt is colored in using both light and dark Soft Sea Foam. The pants were colored in using Light Soft Suede. The shoes and belt were colored in using Bronze. The face and hands were colored in using Light Petal Pink and the hair and eyebrows were colored in using Light Smoky Slate.

I die cut a 2-7/16" circle using Soft Sea Foam card stock.  I glued it on top of the DSP and then I added the man using Dimensionals.

The words are from the "Senior Years" set and the die is from the "Smooth Sailing" die set. I stamped the words using Evening Evergreen ink. I set the words in place using Dimensionals and the card was done.

This was a fun card to make. I like the character. Do you really have to wear a vest when you retire??? LOL  I like the colors and this definitely looks like a masculine card!  I need to make some retirement cards soon too. Look forward to those in the near future.  I have to play with my current stuff now until the new items arrive (after I order them on the 4th of next month). It seems like a long time to wait but it gives me time to play with the sets I ignored once the Holiday mini catalog came out.  I have to learn not to order so many sets. I can't seem to play with them all enough.

Thank you SO very much for taking your time to stop by and see today's masculine birthday card,
Wanda

Tuesday, December 28, 2021

Senior Years, Thank You Card, The Good the Bad and the Ugly, Stampin' Up!

Every now and then the card in my head is nothing like what ends up on paper.  This is one of the "ugly" cards. 

I used a 4-1/4" x 5-1/2" piece of Designer Series Paper (DSP) from the "Pansy Petals" 12" x 12" package and I taped it to the front of a folded half-sheet of Basic White card stock.  

Then I die cut the lacy frame from the "Ornate Layers" dies using Cajun Craze card stock. 

I cut a piece of Basic White card stock 2-3/16" x 3-9/16" and I sponged it using Cajun Craze ink first and then a little Bermuda Bay ink was added.

I stamped the lady from the "Senior Years" set on a piece of Basic White card stock and fussy cut her out.  I colored her with my Blends pens. I used Light Basic Gray for the hair. Light Pumpkin Pie for the top and Dark Pumpkin Pie for the skirt. I colored her face, hands and legs using Light Petal Pink. Her earrings, necklace and shoes were colored in using the Light Bermuda Bay pen. I set her in place on top of the sponged Basic White piece using Dimensionals. Then I taped the piece in place on top of the lacy Cajun Craze piece.

The words are from the "Pansy Patch" set and were stamped using black Memento ink on Crumb Cake card stock.  I set them in place using Dimensionals. 

Then I set the entire piece on the front of the card using Dimensionals and the card was done.

I do not care for this card at all.  I am not sure what I could do to improve it. Perhaps remove the wording and try something else??? I don't know.  But the friend I made it for is going to like it. I guess that's what's important, right?  As for me, I think it's ugly!!!  They all can't be winners now, can they?  LOL

Thank you SO very much for taking your time to stop by and see the ugly cards too,
Wanda

Artistically Inked, Birthday Card, 2021-2022 Stampin' Up! Catalog

The "Artistically Inked" set/bundle was one of my favorites from the Stampin' Up! 2021-2022 annual catalog. I had used it to make quite a few cards. I still have some Designer Series Paper left that matched it. I found this card on Pinterest and I did have to change a few things do to supplies.  You can see the original card here

The base of my card is a folded half-sheet of Basic White. I used Blushing Bride card stock instead of the Petal Pink only because I had a half-sheet of it sitting out for some odd reason and instead of putting it away, I thought I'd just use it.  

I cut the Blushing Bride card stock to 4" x 5-1/4".  Then I textured it using the "Ornate Floral" embossing folder. I glued the piece on to the front of the card base.

When I was looking for some measurements at the original site, I was not able to find anything. The rectangle used is from the "Stitched Rectangle" dies and that's all that was said about them. So I had to try to figure out which one was used. The dies have three groups.  One really large one (with 8 in the group), one single one (which really isn't a group now is it?) and the one with four in the group. I used the second largest one in that group of four. And for those of you who don't have this die set, the rectangle measured 3-1/4" x 1-1/4".  If I didn't have the dies, I would sponge the edges of that piece to give them a little more detail.  

Next I cut the Basic White pieces. One piece was cut at 1-1/2" x 3-1/8" and the other was cut at 1-5/8" x 3-1/4".  I took the smaller one and sponged on some Blushing Bride and Flirty Flamingo ink. I taped the two basic White pieces together.

I didn't have the leaf stem that was used on the original card so I just die cut come gold card stock leaves from the "Artistically Inked" set. I cut the top too off together and then the third one separately.

The words are from the "Sweet Ice Cream" set and were stamped using Versa Mark on a 1" x 3-1/2" piece of Basic White card stock. I heat embossed them in gold.

I didn't have the ribbon that was used but I had some ribbon with gold in it so I colored it with my dark Petal Pink Blends pen. I colored over it, turned it over, colored over that side and then turned it over and colored it once more. I just laid the ribbon under the pen and pulled the ribbon while the pen stayed in one spot. I tied it into a bow and set it aside.

I took a piece of Basic White card stock and die cut the larger floral image. 

I was now ready to assemble the card. First I put a little glue down on the center area of the Blushing Bride textured piece. It's all going to be hidden so it doesn't matter what it looks like. 

Then I added Dimensionals behind the stitched rectangle piece and I set it in place on top of the die cut flower image. I tried to line up my piece like it was on the original card.

Dimensionjals were added to the left side of the white rectangles and double-sided tape (or glue) to the right side and it was set in place partially over the stitched rectangle piece.  Check the photo for placement. 

The two gold leaved were glued in place. I had bought some spray glue at the Dollar Tree.  You get what you pay for. It wasn't even worth a dollar but I did like the concept.  So I got out my Tombow glue and took a toothpick and put glue on the leaves and set them in place.

Then the "Happy Birthday" piece was added. Dimensionals on the sides and tape or glue in the middle.

After the words were set in place, I added the single leaf. I just used Tombow glue this time to avoid any mess or wasted time. I opted to cut these leaves apart so I could have one go over the word piece.

I used a glue dot to add the bow and for the final touch, I added some gold "Metallic Pearls" and a couple "Genial Gems" and the card was done.

I do like how it turned out, though I like the original one much better.  But I worked with what I had and I was able to create a card that I liked. 

Thank you SO very much for taking your time to stop by and see today's birthday card,
Wanda

Monday, December 27, 2021

Pansy Patch, Stitched Snowflake, Thank You Christmas Card, Stampin' Up!

I needed to make some thank you cards to send out for some Christmas gifts I had received. SO I opened up Pinterest and there was this pretty snowflake Christmas card and I thought how great that would look for a thank you card. You can see the original card here. I did change it a little.

The base of the card is a folded half-sheet of Basic White card stock.  Then I cut a 3" x 3" piece of Basic White card stock and textured it using the "Wintry" 3D embossing folder. Then I cut a 3-1/8" x 3-1/8" piece of Real Red card stock for the layer.

Before taping the textured Basic White piece to the Real Red piece, I die cut the snowflake from the "Stitched Snowflake" die set. I added a little Tombow glue to the snowflake and then set it in place on top of the textured piece. While that was drying, I got out some red and white Baker's Twine and wrapped it three times around the piece and tied it in a bow.  I added a little dot of glue behind the bow to hold it in place.  Then I glued the Basic White piece to the Real Red piece.

Dimensionals were added behind the Real Red piece and set on top of the card for placement for the words.

The words are from the "Pansy Patch" set and were stamped using Real Red card stock. Once the words were stamped, I removed the backing on the Dimensionals and set the piece in place on the front of the card and the card was done. Or so I thought. The center of that snowflake looked like it needed something so I took a 3/8" circle punch and punched out a piece of silver foil card stock. I didn't like the way that looked so I took out the "Subtle Shimmer" sequins and glued on in place in the center of the snowflake and now it was official, the card was done.  Now I'm off to make several more. So glad I left the word piece in my Stamparatus. I almost always stamp my words in the Stamparatus. I no longer trust my stamp pads or me to stamp them solidly the first time.  Plus when making more than one card, even if it's only two, it's nice to have it set up a head of time. You just ink and stamp and maybe have to repeat but at least it's there waiting for you to make one more or many more impressions!   I need to make 3 more so I'm off to do that. It will be quick and easy to do.

Thank you SO very much for taking your time to stop by and see today's holiday thank you card,
Wanda

Sunday, December 26, 2021

Sailing Home, Senior Years, Masculine Birthday Card, Stampin' Up! 2021-2022 Catalog

Today is my hubbies birthday and I always make him a card that has no Christmas colors in it at all. I looked at my stamp sets and thought I'd use the "Sailing Home" set for a several reasons. One, it would be be great on a masculine card. Two, it could work with yesterday's card layout that I REALLY liked. And three, I think this set will be retiring. Thinking about the new sail boat set in the next mini catalog and how long this one has been available, it just added up to "soon to be retired".  Just an educated guess but I think it probably will be retired in the spring.  Time will tell.  Anyway, let's move on to how the card was made.

The base of the card is a folded half-sheet of Basic White card stock. I cut a 4" x 5-1/4" piece of Balmy Blue card stock. I did die cut a stitched circle from the middle of it but it seemed to get lost with the blue background.

I took a piece of Designer Series Paper (DSP) from the "You're a Peach" 12" x 12" package and I cut it at 3-7/8" x 5-1/8".  I taped the DSP to the Balmy Blue piece and then I taped those two to the card base.

I cut two 7/8" x 4" pieces of the striped DSP from the same package. Then I cut two 1" x 4-1/8" pieces of Basic White card stock for the layers. I taped the DSP strips to the Basic White strips and then I taped them to the front of the card. They are about 1-1/16" from the side edges of the card and just shy of 3/4" from the top and bottom of the card edges.  

I had ended up die cutting a Basic White circle using the largest Stitched Circle die. I took the blending brush and scrubbed on some Balmy Blue ink and then at the bottom I added Balmy Blue and then some Night of Navy on to of that. I thought I got it a bit too dark but once the boat and words were on it didn't look as dark.  After the blues were added I took the birds stamp and stamped them using black Memento ink.

I stamped the sail boat using black Memento ink and I die cut it with the matching die. I colored in the boat and sails with my light Balmy Blue Blends pen and I colored the sides of the boat with the dark Balmy Blue Blends pen. I set the boat in place on the circle using Dimensionals.  

I added Dimensionals to the back of the circle and I set it in place on the front of the card.

The words are from the "Senior Years" set and stamped them using black Memento ink on a scrap piece of Basic White. The fun die is from the "Smooth Sailing" dies that match the stamp set. I set the words in place using small Dimensionals and the card was done.

I do like how this card turned out and I REALLY like this layout! I was glad that the "You're a Peach" DSP worked for this masculine card. Who would have thought???  So now I'm off to give hubby his card and birthday present.

Thank you SO very much for taking your time to stop by and see today's masculine birthday card,
Wanda


Saturday, December 25, 2021

Merry Christmas, My Stampin' Up! Christmas Cards for 2021

I wish you all a very Merry Christmas. WOW! I can not believe how fast this month flew by.  In a blink of an eye shopping, wrapping, baking and card making/sending is all done.  I find it amazing how I can get all that done in 25 days and yet I can't do half as much every other month after that!  Motivation must be the key word!!! Now, how can I be motivated like that each month? The question of the year! 

I'm posting the cards I sent out this year. They are from retired products. I needed to use them up and since they were at hand and easy enough to do, I thought I'd make my cards and use up some supplies I had on hand.  Mission accomplished. I sent out just under 50 cards this year. And three went to strangers. I always manage to find some place where people are asking for cards for a loved one who has no one or very little family and would love a card. So those went out with our regular Christmas cards.  

I hope all of you have a wonderful Christmas. Be safe and enjoy the time with friends and family, even if it's remote. 

Thank you all for visiting my blog when you can. I do want you to know that I greatly appreciate it.

Merry Christmas to you,
Wanda

Friday, December 24, 2021

Stampin' Up! 2021 Holiday Catalog, Penguin Place Christmas Card

My last "Penguin Place" card for the year. Tomorrow is Christmas and after that I shouldn't need any more Christmas cards!!  But I will need a birthday card. The husband's birthday is the day after Christmas. Poor guy!!  We've always celebrated it separate from Christmas. He never got a gift that was for Christmas and his birthday from us.  So onto today's card.

I found this one on Pinterest and I loved the layout. It happened to be a sketch challenge.  You can see the original card here. I did change it a little. I did click through the link but had no luck with measurements, so here's how I made the card.

The base of my card is a folded half-sheet of Basic White card stock. On top of that is a 4" x 5-1/4" piece of Fresh Freesia card stock. I did it that way to save on my Fresh Freesia card stock.  Then I cut a piece of Designer Series Paper (DSP) from the "Penguin Playmates" 12" x 12" package at3-7/8" x 5-1/8".  That will be taped on top of the Fresh Freesia piece.

Next I cut the two strips in the background. I cut them at 7/8" wide and 4"long for the DSP and 1" wide and 4-1/8" long for the Basic White layer behind it. I taped them to the front of the card about 1-1/16" from the side(s) and almost 3/4" from the top or bottom. What's left in the middle just happens!

I did like the stitched circle and I still have my dies so I took the largest one and cut it from Fresh Freesia 4" x 5-1/4" piece.  

I fussy cut the characters from a sheet of the DSP, even a tree!! I don't care much for cutting the trees but I did find it easier if I snipped either side of the trunk first and then the bottom of the trunk. After that I just carefully worked my way up and then down the tree.  I think the tree took longer to cut than the characters did. 

The words are from the same "Penguin Place" set and were stamped using black Memento ink on a 1/2" x 3" piece of Basic White card stock. 

To assemble, I taped the Fresh Freesia piece on top of the card base, then the DSP.

The strips were added next. 

For the circle, I first taped the bear down, then the words. The penguin was next and the fox was added last. I turned the circle over and added Dimensionals. I don't know if that was how the original card was made but I thought it should be popped up. I do like the look of it popped up.

Isn't it adorable? See why I just had to make it?  I LOVE this layout and I hope to use it again sometime.

Thank you SO very much for taking your time to see today's Christmas card,
Wanda

Thursday, December 23, 2021

Penguin Pals, Snowman Season, Christmas Card, 2021 Stampin' Up! Holiday Catalog

With only a couple of days till Christmas, I'm still making Christmas cards. There's a few I needed to make to hand deliver.  Which is a good thing because I don't think the mail service could get them to their destination in time, even if it's just across town! I often make a lot of my hand delivered cards with lots of bling and raised elements because I don't have to think about paying extra postage.  

I decided to make today's card a bit more festive with the penguins and the colors.

The base of my card is a folded half-sheet of Basic White card stock. This card opens on the right and the fold is on the left.

I cut a piece of the dotted Designer Series Paper (DSP) from the "Penguin Playmates" 12" x 12" package at 4" x 5-1/4".  I cut 1-1/2" off the top and turned it over. Then I taped the two pieces to the front of the card.

I cut a 5/8" x 4" piece of Basic White card stock and stamped the "Merry Christmas" from the "Snowman Season" set using black Memento ink. I think Just Jade ink would have been prettier but I didn't think about it till just now.  

Then I cut a 7/8" x 4" piece of Just Jade card stock and layered the word piece on top. I taped the layers to the front of the card, lining up the top edge to the bottom edge of the 1-1/2" strip of DSP.

The penguin was punched out using the "Penguin Builder" punch and Basic Black card stock for the body and Basic White for the belly/face part. I taped those two pieces together.  Then I stamped the eyes using black Memento ink.  I finally got the eyes where they looked fairly normal. Some of my penguins eyes were very weirdly placed.  Poor little guys!!! LOL  Then I stamped the bow tie using Just Jade ink.  See how pretty the words would be in that color?  And the feet were stamped using Pumpkin Pie card stock and Pumpkin Pie ink. They were punched out using the "Penguin Builder" punch and glued in place. I thought it would be a bit too messy to tape them. I'm not good taping tiny pieces but a dot of glue is perfect for me. 

I die cut a circle using the 1-7/8" using the Just Jade dashed looking DSP.  And I used the 2" scalloped die on a scrap piece of Just Jade card stock. I think I'm down to just scraps now.  It's going to be retiring in a few months so do I just tough it out or buy a full package?  Not sure I can use a whole package up before it retires.  Though there is the variety pack.  Hmmm. I'm going to have to give that some serious thought.  Okay, once I got the circles cut, I taped them together and I set them in place on the card using Dimensionals.  

The penguin was taped in place and I thought the card was done. SO as I was putting the words back in the "Snowman Season" container, a snowflake fell out of it so I took it and glued it to the front of the card next to the penguin. I thought it could use some bling, so I took out the "Subtle Shimmer" sequins and glued a few to the card and now the card was done.

This was a very fun card to make and I love how cheery it looks.

Thank you SO very much for taking your time to stop by and see today's cheery Christmas card,
Wanda

Wednesday, December 22, 2021

Penguin Place, Gift Tags, 2021 Stampin' Up! Holiday Catalog

I was in need of a couple of gift tags. I didn't want to run out to the store and buy more. Like I'd find any this late in the month anyway.  I could have gone online and found some to download but if I'm going to download, print and cut, I might as well just make my own!  So here they are. 

I used the retired "Scalloped Tag Topper" punch. I didn't have anything current that would look cute. And it really didn't matter, it's not like the tag is going to be saved and cherished for all eternity! LOL   I punched a 2" x 4" piece of Basic White card stock. I cut and punched two, one of Fresh Freesia and one of Soft Sea Foam card stocks.  

The Basic White tags were cut at 3" x 1-1/2".  I was careful to try to get the piece inside the punch equally on both sides.

I took a scrap piece of the Fresh Freesia snowflake Designer Series Paper (DSP) from the "Penguin Playmates" 12" x 12" package and the Soft Sea Foam trees too.  I cut them at 2" x 1-3/4" each. I taped them to the bottom of each large tag.

Then I took some DSP that had the penguins sitting and I punched them out using the "Penguin Builder" punch. I added Dimensionals behind them. I set them on the Basic White tags but didn't affix them. I needed to see where the words were going to go. 

I set the words up in my Stamparatus. I needed to mask off part of the words on the stamp so only the "Be Merry" were exposed.  Then I inked it up with Soft Sea Foam ink and stamped the words.  I headed back to my cutting board because I forgot to remove the post it tape I had covering the words I didn't want.  UGH.  So I got the one done for the Fresh Freesia tag.  For the second tag, I managed to mess that one up too. And again, UGH!  Back to the cutting board.  I actually messed it up twice.  The third time was a charm, right?  Wrong. I had taken out the Mint Macaron ink thinking that might have been what I needed but it wasn't.  Not looking, I grabbed it and stamped the words.  I decided to just use them. Again, it's not like the tags are going to be saved! 

Next I affixed the penguins.  Then I grabbed some white Baker's Twine and some ribbons and threaded them through both tags at the same time. I looped them through the opening from front to back and slipped the ends through the loops and pulled.  I trimmed the ends and the tags were done.  I probably could have gone to and come back from the store quicker than it took me to make these with all the mistakes!!! LOL But they are done. They are homemade and as soon as I get done typing this, they will be on a couple of packages!

They were fun to make (excluding the mistakes). I like how they look and I love the colors.

Thank you SO very much for taking your time to stop by and see today's Christmas tags,
Wanda

Tuesday, December 21, 2021

Penguin Place, Candy Holder, Weekend Project

Today's "Weekend Project" is a fun candy holder I found on the internet. I thought it was so cute and would be perfect for a little teacher gift, stocking stuffer or something for the mail and delivery carriers. I found how to make them here. A little friendly tip here. If you are one who likes to play along, I recommend you either watch first or follow along with my tip.  The video for these cute holders starts at 11:06 in the video.  Before these, Christmas cards were made.

You will be instructed to cut the DSP from the "Penguin Place" at 2-5/8" x 6".  On the long side you will be scoring it at 3-3/4" and 4-1/8".  And the short side was scored at 3/8" on each side.  You also need to be aware of the orientation of your DSP. The first one I made, I had the DSP the wrong direction so when I started to fold my holder up, the characters inside were upside down.

At the top part of the piece you cut off 1-7/8" from the top down on each side. And you will be snipping the little scored areas between the 3-3/4" and 4-1/8".  You will snip to the 3/8" score line and then you will need to snip little "V's" off the sides of each of those little tabs.  After that was done (this is where I should have watched instead of followed along) you glue the piece.  You need to use a punch for the top piece to create the hole for hanging. I slid my piece in and the bump on the top of the piece is flat. You can really see it in the middle holder. Now you probably wouldn't have noticed had I not told you. But I did because I wanted you to know what yours could look like if you don't punch it before assembling. And when you punch it before, turn the punch over so you can see where it's going to punch. You don't want to cut off too much on the top.  

I used Ghirardelli chocolates for mine. They fit perfectly. Lindt's were used in the original holders.

I did not tie off my ribbon on the tip like it was done in the video. I just tied the 7" piece of ribbon in a knot and called it a done deal!!  

I wasn't fond of fussy cutting those little trees but I did it, I did three of them!! The two penguins were punched out and the fox was fussy cut. The characters were set in place with Dimensionals.  Set the tree and character in place with the candy in the holder. It will give you a somewhat firm surface to press down onto.

And that's it for the tips and how I made mine. These were very fun to make and I'd make more if it weren't so late in the season now. And they were pretty quick to make too!

Thank you SO very much for taking your time to stop by and see today's cute candy holders,
Wanda

Monday, December 20, 2021

Penguin Place, Christmas Card, 2021 Stampin' Up! Holiday Catalog

I have SO much Designer Series Paper (DSP) left from the "Penguin Playmates" 12" x 12" package.  I have fussy cut and punches out characters and used a lot of it for backgrounds but I still have a lot left. And using the small amount I did on today's card shouldn't even count!!! LOL

The base of my card is a folded half-sheet of Basic White card stock with a 4" x 5-1/4" piece of Soft Sea Foam card stock for the layer.

The focal piece was cut at 3-3/4" x 5". I textured it using the "Wintry" 3D embossing folder. That folder doesn't cover the entire area so I had to move the folder over and do the side that didn't get embossed the first time through the Big Shot.  You can hardly tell.  And I'm not going to point it out to you. You can get by with this as long as you have some images that will cover those areas. Or something SO fantastic that it takes the eye away from the background!! I'm going with the images that cover here because it's not fantastic!!! LOL

After embossing the Basic White piece, I glued it in place on top of the Soft Sea Foam piece.

I took the 1-5/8" and 2-1/8" circle dies and I took the DSP and set it on top of a scrap piece of Basic White card stock (you can use Soft Sea Foam card stock instead).  I set the circles on top of the DSP and taped them down with some post it note tape. I didn't want them shifting on me.  I slipped the Basic White piece under the DSP and I die cut them at the same time. I wanted to make sure that circle was firm and not flimsy from just using DSP. I was going to tape them together before I die cut but I didn't want the sticky tape on my dies and I didn't want to use a lot of tape to cover and area that wasn't going to be needed. So once it came off the Big Shot, I taped the pieces together. 

Next I fussy cut the penguin from a piece of the DSP in the package. I placed him in and behind the circle and glued him in place. I added Dimensionals to the back and set it aside.

The words are from the "Penguin Place" set and were stamped using black Memento ink on a 1-1/8 x 5/8" piece of Basic White card stock. I cut a piece of Soft Sea Foam 1-3/8" x 7/8" for the layer. I added Dimensionals to the back and set it aside.

Then I set the circle in place on the front of the card and then the words.  I added some sequins from the "Subtle Shimmer" container. It was just enough to give the card a little bling.  And that was it.

This was a very quick, easy and fun card to make.

Thank you SO very much for stopping by today,
Wanda

Sunday, December 19, 2021

Penguin Place, Snowman Season, Shaker Card, 2021 Stampin' Up! Holiday Catalog

I had bought the "Snow Globe Shaker Domes" and had only used them once. I found a card on Pinterest and there was the globe, which I forgot I had. SO I stopped my searching and decided to go with this card. You can see the original card here. I tried to search for instructions but there was no direct link to the card, so here's how I made it. 

The base of my card is a folded half-sheet of Basic White card stock. The original card used a folded half-sheet of Just Jade card stock. I don't have enough Just Jade to do that so I had to work with what I had. I cut a piece of Just Jade card stock to 4" x 5-1/4".

Then I cut a 3-7/8" x 5-1/8" piece of Designer Series Paper (DSP) from the 12" x 12" "Penguin Playmates" package. The dotted paper is SO cute.  I also cut a 3" x 3-1/2" of the Fresh Freesia snowflake DSP for behind the dome.

The penguin and tree were fussy cut out from another piece of DSP. They were set in place on the Fresh Freesia piece of DSP.  I piled some of the cute "Subtle Shimmer" sequins on the penguin's belly and stuck the dome in place over them. For placement of the tree and penguin, I did set the dome over the area to know what type of space I had to work with.  Once the dome was placed it's placed. There's no moving it. I thought my penguin was a little crooked but once it was all together, it looked fine. I had set the penguin and tree in place using Dimensionals.  Those sequins were a bit touchy to work with today. My house is very dry with this cold weather we've been having.  I usually put a tiny square of dryer sheet in my sequins to keep them from getting full of static.  SO they were stuck to my fingers and everywhere else too! UGH.  A few huffs on it and they fell off.  I got my dryer sheet square and it's now in the container!

I did not have the die that helps with the dome, so I had made a template from the piece that protected the sticky tape on the dome. I traced it and cut it out using card stock so it was nice and firm.   I had taken the dotted DSP and added a 1-3/4" x 3-7/8" piece of Basic White card stock to the bottom.  Then I took my template and traced around it so I knew where to cut for the dome. Once the cutting was done I placed the piece over the dome to make sure it fit. Then I removed the protective piece and exposed the tape. I set the DSP piece on top.  Then I glued it to the DSP and then it was glued to the card base.

The words are from the "Snowman Season" set and were stamped using Just Jade ink. That piece measures 3-3/4" x 5-1/8".  I set it in place with Dimensionals and the card was done.

It's a pretty quick and easy card to make and would probably be quicker if I had the dome die but I made it work so I'm happy.

Thank you SO very much for taking your time to stop by and see today's Christmas card,
Wanda

Saturday, December 18, 2021

Snowman Season, Stitched Snowflakes, So Many Snowflakes, Christmas Card

I love snowflakes. I love snow. I live in Minnesota and winter with snow is a big part of the package! I can deal with all of it except the ice. So as I was cleaning up my worktable, I found several snowflakes and thought I'd make a snowflake card.  This is not what was in my head. FAR from it! But I'm sharing it with you so you don't make the same mistake!!! LOL

The base of the card is a folded half-sheet of Basic White card stock.  

A 3-7/8" x 5-1/8" piece of Basic White card stock was cut for the top layer.

I cut the snowflakes using the "Stitched Snowflake" dies. I used Fresh Freesia for the center one. The purple ones are Highland Heather and the bluish ones are Pool Party. 

The white one off to the left is from the "So Many Snowflakes" die set. 

I laid the snowflakes on the top of the card stock to see where the words should go. I stamped them from the "Snowman Season" set using Highland Heather ink. Then I taped that piece on top of the card base.

I glued the snowflakes in place. Yup, glued. I didn't use the double sided stick paper. Though it would have been nice if I had. But I just took some Tombow Mono glue and spread it thinly on a piece of the backing paper I saved from my Dimensionals. (I save everything, just ask my husband or look around in my workroom). I took another piece of the backing paper and after setting the snowflake in the glue, I pressed it down with the other piece. Then I set it in place on the front of the card. I did lift up a few branches on the center snowflake so I could slip other ones under it. 

I took the white snowflake and added a Dimensional behind it. I was going to add a rhinestone to the center but decided that since it was going to go in the mail, I thought I should try to keep it flat, so I punched out a silver foil circle and glued it in place.

And that was it. This was fun to put together but not what I had in mind.  It's colorful!! I can say that much!

Thank you SO very much for taking your time to see today's snowflake card,
Wanda

Friday, December 17, 2021

Bright Baubles, Candy Canes, Christmas Card, 2021 Stampin' Up! Holiday Catalog

While looking through my stamps from the 2021 Holiday Catalog, I saw a set I hadn't touched. It was the "Candy Cane" background image.  I thought it was so cute but yet I hadn't used it. So I thought I'd take it out and see what I could do with it. Here's how I made today's card.

The base of the card is a folded half-sheet of Basic White card stock.

I took a 4" x 5-1/4" piece of Basic White card stock and I textured it using the pine branches in the "Wintry" embossing folder set. 

Then I stamped the candy canes from the "Candy Cane" background set using Real Red card stock. I stamped it on a 4" x 5-1/4" piece of Basic White card stock.  Then I cut it in half because I wasn't sure I could make that larger piece work. I taped it to the bottom of the 4" x 5-1/4" piece.   

A piece of Real Red ribbon (retired) was taped on the backside using scotch tape and then I glued the piece to the card base. 

I die cut the Basic White solid bulb shape from the "Bright Baubles" set.  Then I die cut the "Merry & Bright" bulb using a piece of Real Red card stock that had the sticky sheet attached to the back so I could make it into a sticker for easier placement.  I am not fond of gluing these thinner pieces on card stock but I will if I have to. Dimensionals were added to the back and it was set on the front of the card. 

I thought the bulb could use a little bit of finesse so I colored over the Real Red piece with Wink of Stella. If you click on the photo you can see some of the sparkle. In real life it's very sparkly and pretty.

A bow was tied and affixed to the top of the bulb and the card was done.

This was a very fun, quick and easy card to make.

Thank you SO very much for taking your time to see today's Christmas card,
Wanda

Thursday, December 16, 2021

Bright Baubles, Christmas Card

I don't feel that I've played with the "Bright Baubles" set/bundle enough. It was kind of expensive and I've hardly made any cards with it. I did find this card on Pinterest. I changed it a little but it's pretty much the same. You can see the original card here.

The base of the card is a folded half-sheet of Real Red  card stock. This card opens on the right and the fold is on the left.

I cut a 4" x 5-1/4" piece of Basic White card stock. I was going to die cut the "Joy" from the center but then I remembered that I would have to do some serious gluing so I just taped it on the front of the card as is. 

The top layer is a 3-7/8" x 5-1/8" piece of Real Red card stock and I textured it using the "Merriest Frames" embossing folder. The folder is much larger than the piece of card stock I was using so some of the details got cut off but it still looks good. I glued that piece in place. I prefer glue because of all of the texture. There isn't always great surface contact when using tape but with glue it doesn't matter. As long as some glue adheres to the piece below it, it's not going anywhere once it dries!

Next I die cut the bulb shape using some Designer Series Paper (DSP) from the "Peaceful Prints" 12" x 12" package. 

I die cut the "Joy" bulb using the die from the "Delicate Baubles" die cut set on a piece of Basic White card stock that a double sided sticky sheet was added to make it a sticker once it was cut.  I affixed this piece to the DSP bulb piece.

The bow was die cut from a piece of gold foil card stock. I trimmed the top of the bow later.

The bulb was set in place using Dimensionals. I set it in place on the front of the card, centering it as much as I could. Then I trimmed the top part of the bow.

I stamped the words form the "Bright Baubles" set using Real Red ink on a 3/4" strip of Basic White card stock. I trimmed the ends to fit. I had trouble getting the point right and I kept trimming it and trimming it until I just had to stop before I was too far into the words. It's kind of like that pencil you can't get quite sharp enough and by the time you are done taking it in and out of the pencil sharpener, it's half the size you started with!!  That happens a lot to me with colored pencils!  LOL

This was a fun card to make and I just used what I had here to try to recreate as close as I could.

Thank you SO much for taking your time to stop by and see today's Christmas Bauble card,
Wanda

Wednesday, December 15, 2021

Snowman Season, Stitched Snowflakes, Christmas Card, Stampin' Up! 2021 Holiday Catalog

Today I'm going to share with you a quick and simple Christmas card. SO if you are behind on your holiday cards, you can whip up a few of these in no time.

The base of the card is a folded half-sheet of Basic White card stock. This card opens on the bottom and the fold is on the top.

I cut a 4" x 5-1/4" piece of Pool Party card stock for the layer.

Then I cut a 3-7/8" x 5-1/8" piece of card stock for the top layer. 

I used my scoring board and I scored the piece on the long side at 4-1/4" and 3-1/4" down. The next score is at 4-3/8" and down 3-1/8". And the final score line is at 4-1/2" and down to 3".  Turn the card stock so the score lines are on the bottom. Score at 3" and meet up to the third vertical score line. The next score is at 3-1/8" and score to the center vertical score line. And the last score line is at 3-1/4" and score to the first vertical score line.

Turn the card stock over. You are going to be using the opposite side.

I stamped the words from the "Snowman Season" set using Pool Party ink.

The layers were taped together and then taped to the front of the card.

The snowflake is from the "Stitched Snowflake" dies and was cut from a scrap piece of Basic White card stock. I set it in place over the area where the lines meet. I used a Dimensional to set it in place. A clear crystal rhinestone was added to the center of the snowflake and the card was done.

If you are planning on making them to mail out and don't want to pay the extra postage for the rhinestone, you can die cut or punch out a small circle using silver foil card stock or some silver or white glitter card stock. Tape or glue the circle in place and you're done.

This was a very fun card to make. I love making those score lines. They add a lot in a subtle way.

Thank you SO very much for taking your time to stop by and see today's Christmas card,
Wanda

Tuesday, December 14, 2021

Snowflake Wishes, Christmas Thank You Card, Stampin' Up!

I ran across this pretty snowflake card on Pinterest. I love snowflakes and this is such a pretty set. You can see the original card here.

The base of my card is a folded half-sheet of Basic White card stock. This card opens on the bottom and the fold is on the top. 

I die cut the opening using the die from the "So Many Snowflakes" die set. Then I textured it using the "Wintry 3D" embossing folder. It doesn't fit the whole 4-1/4" x 5-1/2" area so I had to emboss what I could first and then slid the card stock in on the other side to catch the rest of the untextured area.  It worked and you can hardly tell.  If you place the snowflakes just right (I didn't) you wouldn't be able to tell at all!  But it's still pretty.

The Pool Party snowflakes were die cut to be used on the front. But before I added them, I cut a 4-1/4" x 5-1/2" piece of Vellum.  I cut it just a hair shorter than those measurements so it wouldn't hang over on any of the sides.

The words are from the "Snowflake Wishes" set and I stamped them using Night of Navy ink on a scrap piece of Basic White card stock. I die cut them using the smallest "Stitched Circle" die (retired). I added Dimensionals to the back and set it in place on top of the vellum.

I added a little bit of glue to the snowflakes and set them in place on the front of the card. 

Then I colored some tiny rhinestones using my dark Pool Party Blends Pen and set them in place on the card. I colored a total of 8 rhinestones.  And that was it. It's a very quick, easy and simple card to make. And just change the words in the center and make a pretty Christmas card!!!

Thank you SO very much for taking your time to stop in and see today's Thank You card,
Wanda

Monday, December 13, 2021

Penguin Place, Penguin Playmates, Pop-Up Christmas Card, Weekend Project

Today I thought I would have some fun making a pop-up card. It was an experiment and I learned what not do to! LOL Here's how I made the card.

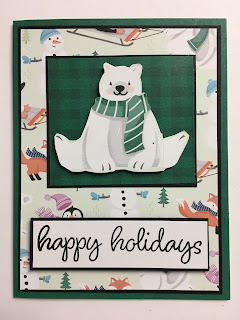
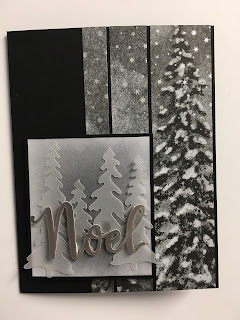
First lets talk about the front. I cut a half-sheet of Basic White card stock on the short 8-1/2" side so it measured 4-1/4" x 11" when I was done. Then I folded it in half. My card opens at the bottom and the fold is at the top. 

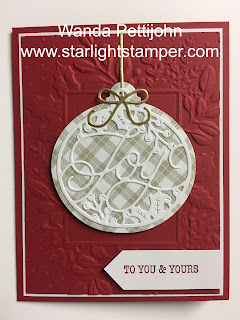
I cut a 4" x 5-1/4" piece of Shaded Spruce for the layer. Before I taped it down I die cut a circle using the largest die in the "Circle Dies" set. It measured 2-15/16".  Then I taped the piece on top of the front of the card.

A 3-3/4" x 5" piece of Designer Series Paper (DSP) was taped on top of the Shaded Spruce piece.

I die cut the dashed circle piece using a scrap of the DSP and the second largest circle die. I taped those two circles together.

The bear was fussy cut and set in place on the circle using Dimensionals. Then the entire piece was set in place on top of the card. 

I tied a silky white bow from some ribbon that was 5/8"wide. I set it in place with a large glue dot.

Now for the inside.  I made the pop up part and added the images. I am going to see if I can include the PDF for it here.  If not, I will add a photo of it. 

I then printed out the pattern onto a piece of Basic White card stock. I fussy cut the two pieces. I did trace a second set that has no writing on it because I could see the writing on my card but you really have to look at the inside part of it to really see it.  You could probably turn it over but there will be a light rectangle where the words would go. But you could do the words on a strip of card stock and tape it to the front.  Or you can just leave it as it is and ignore the marks in the inner part of the piece.

When you are done fussy cutting it out, you are going to score on all the dotted lines. I did score on both sides of the three lines that all cross each other. You want to soften them up a bit and scoring on both sides took care of that.  Then you are going to want to fold them in mountain and valley folds. It's a bit tricky but you can do it.  

I stamped the words from the "Snowman Season" set using Real Red ink. I had to do this now if I wanted to have it directly on the piece and not added later.

I cut the circle behind the bear and glued it in place. I added that first because I needed to make the slit for the mechanism and it had to go through both the fussy cut piece and the DSP.  I inserted end B into the slit and folded the piece upward. I glued it in place. Then the other end of the mechanism was glued in place. I folded that end downward and glued it to the area marked with an "A".  

Now I was ready to decorate my pieces. I fussy cut the bear and glued him in place.  I could have omitted adding the circle before the mechanism and raising the circle up higher but I was still experimenting.  If I were to make another one I think I would take that fussy cut circle and make it into a 1-1/4" rectangle that would be about 1-1/2" high.  But for now it's a circle and a little low on the card. 

I fussy cut the fox and snowman and glued them in place. I had added the glue to the side pieces and then added the characters. I did have to trim a bit of the card stock behind them, I didn't want any showing.  

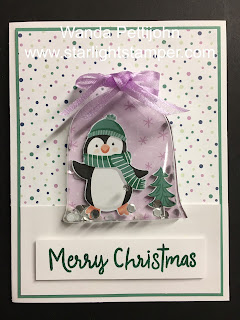
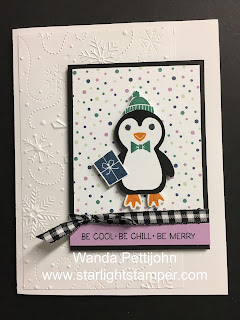
Then the penguin was added. I die cut a 2-1/8" circle of the DSP with the trees in the design and I glued it to the tab that was sticking up. The penguin was added and the card was done. 

When you're holding it and opening it, it doesn't look so bad but the penguin could have been lower on the piece so the other two characters could be seen better. And the words could be stamped directly to the inside of the card.  There's other ways to make this work! I thought about trimming around the penguin so only a little bit of the tree paper shows, then the characters behind it could be seen better.  Still experimenting!!!

The inside cover could use some finesse too, but like I said, it was an experiment and I did learn a lot!

Now to figure out how to get the PDF available to you. From what I could figure out with my limited computer skills, I think you will just have to click Pop-Up PDF and you will get the pattern. If it doesn't work, please look on the right side bar, scroll down to where you can see my email and contact me and I'll send it to you!  I found this a bit confusing to do but I hope I did get it right. 

Thank you SO much for taking your time to stop by and see today's pop-up card,
Wanda

Sunday, December 12, 2021

Bright Baubles, Christmas Card, Stampin' Up! 2021 Holiday Catalog

I knew this card was missing something. Oh well, it's done and it's just okay.  I found this card on Pinterest. I'm always on the lookout for some pretty cards made using the "Bright Baubles" bundle. You can see the original card here

The base of my card is a folded half-sheet of Shaded Spruce card stock. This card opens on the right and the fold is on the left.

I cut a 4" x 5-1/4" piece of Real Red card stock. To save some card stock you can cut out the Real Red bulb shape from the center. No one will know it's missing once the Basic White piece is attached. The Rea Red piece was taped to the front of the card and the bulb shape was set aside for now.

For the Basic White piece, I textured it with the "Wintry  3D" embossing folder. The folder doesn't cover the full piece so I had to emboss on the left and then line it up and emboss on the right. There was a snowflake in the center that got cut off and looked a bit odd but the bulb hid it so now it just looks like it was embossed on the whole sheet from a larger folder!  Mission accomplished. I just think this folder is SO pretty and I was glad I was able to make it work.  

The bulb was die cut using gold foil card stock. I had used a double-sided sticky sheet to make this into a sticker because I'm not fond of gluing all of those little lines to make it stay in place.  I also die cut the bow. What I liked about this bow was that it was threaded through the loop of the bulb from the front to the back instead of just sitting on top.  I taped the bulb in place on the front of the card and then I trimmed the top "string/hanger" of the bow. 

A 4" x 5-1/4" piece of Basic White card stock was added to the inside and the card was done.  This was a very fun and easy card to make even though I forgot to tuck a couple of die cut snowflakes behind it. I like it anyway.  

Thank you SO very much for taking your time to stop by and see today's Christmas card,
Wanda

Saturday, December 11, 2021

November 2021 Stampin' Up! Paper Pumpkin Alternative Christmas Card

The November 2021 Paper Pumpkin also has some Just Jade green cards. The green is on both sides. But we did use it as it was and didn't cut it in half.  There were other elements left over in the kit, some won't be used here at all but can be saved for future cards.

I cut a 4" x 5-1/4" piece of Basic Black card stock and then a 3-7/8" x 5-3/8" piece of the Designer Series Paper (DSP) from the "Penguin Playmates" 12" x 12" package. The DSP was glued to the Basic Black piece and then that was glued to the front of the card.

The Just Jade gingham piece is from the kit and was cut at 3" x 2-7/8".  The layer behind it was cut at 3-1/8" x 3" and the two were taped together.

The bear was fussy cut from the "Penguin Playmates" DSP and set in place using Dimensionals.

The words are from the kit and were stamped on a piece of Basic White card stock using black Memento ink. A Basic Black layer was cut 1/8" larger and set in place with Dimensionals too.  And that was it. This was a quick and easy card to make with only a little fussy cutting.

It was the last card we made from the two kits my friend brought over.  She was thrilled with all four cards when she left here.

Thank you SO very much for taking your time to stop by and see today's Paper Pumpkin alternative card,
Wanda

Friday, December 10, 2021

November 2021 Paper Pumpkin Alternative Christmas Card

Moving onto the November 2021 Paper Pumpkin my friend brought over on Wednesday, this is the card we came up with. I had seen a card on Pinterest that took one of the cards and cut it into strips. SO I went with that and this is my friends card. You can see the inspiration card here

For this card I took one of the printed cards in the kit and I first cut it in half. It's printed on the front and back so you can get 12 cards from the 6 in the kit!!  I think it was 6, could be 5. I don't recall but you will get twice as many if you make them all like this.

The base of this card is a folded half-sheet of Basic Black card stock. This card opens on the right and the fold is on the left. 

The strips were cut at. 5-1/2" long x 1-1/4" wide, 3/4" wide and 1/2" wide. I taped them to the right side of the card leaving about 1/8" space between them.

Now that I had that on the card I wasn't sure where I was going to go with it. I didn't care much for the green. So I thought I'd just add some words. I cut a piece of Basic White card stock at 2-1/2" x 2-7/8" and I cut the Basic Black layer at 2-3/8" x 3".  I took my Smoky Slate ink pad and my blending brush and started scrubbing on some ink but it was just too light. So I took my Basic Black ink pad and used it instead. It was just the darkness I was looking for. I taped this piece to the Basic Black layer.

The vellum trees came with the kit. I cut the one off on the far left. After I had taken the photo, I added a little glue to the trunk of the tree I had cut off and I slid it between the second and third tree. The trunk went down where the "Noel" is and looked just fine. It's always those things I do after that add just a little bit more to the card.

The silver "Noel" is also in the kit. You get four of them. So you may have to be a bit creative if you are making more than 4 cards using this layout.  Same with the Vellum trees.  

When you glue the trees in place, make sure the glue is going where the "Noel" is to cover it up. It will show through. Look above the "e" in "Noel". See the dot??? OOPS!! Live and learn and share your mistakes and finds!! I had cut my Dimensionals into smaller pieces so they would fit on the "Noel" so I could have it raised on the card.

A 4" x 5-1/4" piece of Basic White card stock was added to the inside and the card was done.

It was fun making this card and my friend was thrilled with it.

Thank you SO much for taking your time to stop by and see today's Paper Pumpkin alternative card,
Wanda

Thursday, December 09, 2021

October 2021 Stampin' Up! Paper Pumpkin Alternative Christmas Card

Yesterday when my friend was over with her Paper Pumpkin kits we had made a Christmas card using the tree and packages.  The packages were cut from one of the elements in the kit. It was meant to make a card with the hole lot of packages on the one sheet. But we had cut them apart for yesterday's card and there were packages left. So what do we do with them?  Well, we make another card.  

The base of the card is a folded half-sheet of Basic White card stock.  On top of that is a 4" x 5-1/4" piece of Soft Seafoam card stock that was textured with a snowflake background. You can texture it with whatever background you like. I glued it to the front of the card base.

Next I set out the packages on the front to see where they should go and after a bit of moving them around, this came to be the one we liked the best. They were taped in place. Though I would have preferred glue because of the texture but we ended up taping.

The words are from the same set and were stamped on one of the circles in the kit using black Memento ink. Then they were punched out using the 1-3/4" circle punch.  I die cut a 1-7/8" circle using Flirty Flamingo card stock for the layer and I taped the two circles together. 

Dimensionals were added behind the circles and they were set in place in the upper right corner and the card was done.

This was a fun, quick and easy card to make plus it was a great way to use those extra packages.  

Thank you SO very much for taking your time to stop in and see today's Christmas card,
Wanda

Wednesday, December 08, 2021

October 2021 Stampin' Up! Paper Pumpkin Christmas Card

Today a friend came over and brought her Paper Pumpkin kits from October and November. She was not happy with them so I told her I'd help her find some other ways to make card using them.

My friend told me someone made a card by cutting the tree in half and also using the boxes from another item in the kit. So while she cut the boxes, I worked with the tree and card base.

The base of the card is a folded half-sheet of Basic White card stock. This card opens on the right and the fold is on the left.  

I took a 4" x 5-1/4" piece of Pool Party card stock. I set the half a tree on top to see where to stamp the words. The words are from the Paper Pumpkin set and were stamped using black Memento ink. 

Next the packages were set in place and then the tree on top. The tree was trimmed at the bottom because it was too long.

This was a fun way to change up the kit and my friend was very happy with the way it turned out. I have not had a Paper Pumpkin kit in about a year now. I kind of missed it so it was a fun welcome time. So now my friend is going to go home and make more.

Thank you SO much for taking your time to stop by and see today's Christmas card,
Wanda

Tuesday, December 07, 2021

Penguin Place, Christmas Card, 2021 Stampin' Up! Holiday Catalog

Today I found this little darling on Pinterest. I thought it was so cute that I just had to make it.  One thing here that caught my eye was the textured background. I liked the idea that it was not a full sheet of card stock. It really couldn't be because the embossing folder isn't a big one. It's 3-1/4" wide. You can see the original card here.  

The base of the card is a folded half-sheet of Basic White card stock. This card opens on the right and the fold is on the left.

I cut the embossed piece 3-1/4" x 5-1/4". It was textured using the "Wintry 3D" embossing folder.  I glued it to the front of the card. I tend to glue textured pieces because I know they will stay put. With tape I'm never sure if there is enough surface contact to keep the piece in place.

I punched out the penguin body using Basic Black card stock. And the belly/face part using Basic White card stock. I taped the two pieces together. Then I stamped the eyes from the "Penguin Place" set using black Memento ink. The beak was stamped using Pumpkin Pie ink and the bow tie was stamped using Just Jade ink. 

The feet were stamped on a scrap piece of Basic White using Pumpkin Pie ink. I glued them to the body piece.

The hat was stamped using Just Jade ink and was fussy cut. I didn't fussy cut the bottom part of the hat, I left it in kind of a cone shape so I could tape it to the back of the head while lining it up with the top of the head. Then I added Dimensionals to the back and set it aside. I made sure my Dimensionals went over the feet area and the hat area to give those pieces some extra hold.

I stamped the package with Misty Moonlight ink. I fussy cut it out and then I taped it to the right wing of the penguin. 

The Designer Series Paper (DSP) was cut at 2-1/2" x 3-1/2" and was taped to a 2-3/4" x 3-3/4" piece of Basic Black card stock. 

I stamped the words from the "Penguin Place" using black Memento ink on a 3/8" piece of Fresh Freesia card stock. My piece was a little long so I didn't have to be so concerned about getting it centered on the strip. I added tape on the back and then I centered it on the DSP and trimmed the ends after. 

Black and white gingham ribbon was taped to the back of the piece. I also taped it down with scotch tape to make sure it will stay in place. I slipped the ribbon end (while still on the spool) under the taped ribbon and tied a knot. Then I trimmed the ribbon. You waste less ribbon doing it this way.  Dimensionals were added to the back of this piece and set in place on the front of the card.

The penguin was added and the card was done.

So cute, huh?  See why I had to make one? I'm not sure if I got their measurements right but it's close enough. It looks good to me!

Thank you SO very much for taking your time to stop by and see today's Christmas card,
Wanda


Monday, December 06, 2021

Penguin Playmates, Snowman Season, Christmas Card, 2021 Stampin' Up! Holiday Catalog

I liked yesterday's card and the site that I found it there was one in Fresh Freesia that I thought was pretty, so I thought I'd give this one a try, especially since I had the measurements.  Why not, right?

The base of the card is a folded half sheet of Basic White card stock. This card opens on the right and the fold is on the left. 

I cut a 4" x 5-1/4" piece of  Designer Series Paper (DSP) from the "Penguin Playmates" 12" x 12" package and I taped it to the front of the card.

I fussy cut a penguin from the DSP, I added Dimensionals on the back and set him aside.

Then I die cut a snowflake. (I'm not whining here about not having the same snowflake, you read enough of that yesterday!!! LOL). I used some card stock that I had the double sided sticky sheet attached to it. I had made a large sheet so it would be available when I needed it.

I cut a 3" x 5-1/4" piece of Basic White for the center strip. I used Fresh Freesia and my blending brush to scrub on some Fresh Freesia ink.  I taped this strip on top of the DSP.

The snowflake was added to the upper part of the strip.

The words are from the "Snowman Season" set and were stamped using Versa Mark. I embossed them using white embossing powder. The Fresh Freesia strip the words are on was cut 3/4" x 3". I added Dimensionals on the back and set it in place 3/8" up from the bottom of the Basic White strip.

I added the penguin and then a few sequins from the "Subtle Shimmer" sequins package. And that was it, the card was done. 

I like this card a lot. So much more than yesterday's bear card. I think it's the color that is more appealing to my eyes.  

Thank you SO very much for taking your time to stop by and see today's Christmas card,
Wanda