Pin It

Tuesday, July 31, 2007

Continuing To Use What I Made!

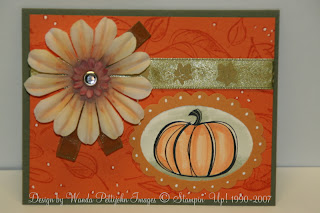
Here is the first flower I colored and posted the tutorial for it. I decided since the colors had a fall look to them I should make a fall card. SO I took out the pumpkin from the Year After Year set and used the Giga scalloped punch and the Coluzzle oval template and put this card together. I found this ribbon on my shelf and thought it would fit well with it. The leaves in the ribbon seemed to go well with the theme of this card. But the flower looked like it needed something more. Not more color, it was colorful enough. But it needed leaves to go with the rest of the card. Well, cutting out leaves from the Leaves Awash jumbo wheel wouldn't do it for me, it needed something else. RIBBON!!!! Yes, ribbon!!! Make ribbon leaves. It will tie in the fabric of the ribbon to the fabric of the flowers nicely and I believe it did. I just tucked in loops (glued together) of olive green organza ribbon behind the flower and they represent leaves. I liked it when I added the third one!


I used Pumpkin Pie ink on the wheel and rolled it on the Pumpkin Pie paper. I attached that to the Always Artichoke paper, the main paper of the card. I used the gel pen to fill in the dots on the background paper and on the scallops. It ties in the white from the pumpkin stamped paper. I put it all together and called it a done deal!!! It's an ok card. I feel it is lacking something but I'm not sure what I'd do to it. Maybe just leaving it alone might be the thing to do. In some cases it's best to just walk away!!!


I'd love to see what you've done with your Pretties Kit flowers!!! Email me with your cards!


Thank you for stopping by,
Wanda

Monday, July 30, 2007

Using What You Make!!!

Making something is one thing but using it is another. I LOVE to make things and some of these things need to be used in another project but I don't often get around to doing that. Well, as I'm getting older I'm realizing I need to use these things up!! SO I decided I'd start with my newest creation, the flower I made for the tutorial I posted yesterday!! Since the flower was a soft "girly" looking flower I decided I needed to make a very feminine card. Here is what I came up with. I do like this card. Many time when I make a card I am not 100% pleased with it. There is always something more than could be done to it. But this one I just wanted to keep simple and simple is what I got. It needs nothing added to it nor nothing taken away from it either! Now all it needs is an envelope and someone to send it to! The someone to send it to is a lot easier than finding an envelope!!! LOL This card can be used not only as a thank you card but for Birthdays, Mother's Day, Wedding, Anniversary or Get Well.


Thank you for stopping by,
Wanda

Sunday, July 29, 2007

Pretties Kit Tutorial Part 2

Making your Pretties pretty using your ink pad and markers.

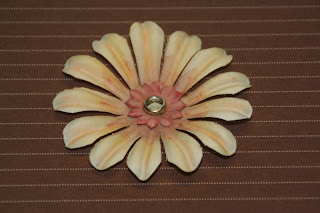
For this flower I used Pretty in Pink and a sponge. I used my finger to cover the ridges in the flower and sponged over the edges, including the tip of my finger. If you have acrylic nails you may want to cover them for this technique. You WILL get ink on your fingers. I went over the flower several times to get it as dark as I possibly could. Don't worry about how dark it is, as you proceed it will get lighter, trust me here!


After your petals are nice and dark you will be adding the yellow. For mine I used the Apricot Appeal marker and just colored in from the center of the flower out to about 1/4" from the edge of the pink. You want to leave 1/4" of white showing. Now you are going to take your aqua painter or a wet paint brush and starting from the middle of the flower (one petal at a time) you will be dragging the color towards the white part. You will see a bleeding effect happening. It will start from the center and work it's way to the tip of the petals. If this is not happening then your brush is not wet enough. You don't want it too wet either but if it is too wet take a paper towel and blot it, stopping the bleeding from contusing. You want the bleeding to go almost to the tip of the flower. This will take some practice. You can always wash off the ink and start again (using the same colors, washing the petals does not remove all the color but most of it). After you've done all four petals allow the flower to dry just a little. You want it damp but not wet. Again you can use the paper towel to help this process along.

I then took the apricot marker and drew in a bit more color with the marker end. Since the flower was still damp the color bled just a little, just enough to give it an even look.

Then I colored the center with Green Galore. I took the aqua painter again and touched it lightly. I didn't want the color to bleed too far. Then I stopped the bleeding with a paper towel and added a little Sage Shadow to darken the center just a bit more. Set it aside to dry.


While that is drying, take another flower the same size and sponge Pretty in Pink on it lightly. You don't want this one as dark as your other one. This will go behind the flower that is drying.


I added a rhinestone brad to the center and it's now ready for any of my projects.


I also made a second flower to see if I could follow my own directions!!! This one I did a little lighter. I like how both of them turned out.


Thank you SO much for stopping by,
Wanda


Saturday, July 28, 2007

Pretties Kit Tutorial

I was playing with the new Pretties Kit and thought I'd share some things with you.

These flowers are fabric so you can do a lot with them. You don't have to worry about them tearing or losing their form.
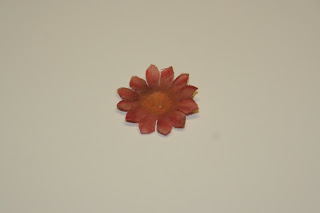
For the flower I am showing here I wet the flower and then took the Watercolor Wonder Crayons and colored directly on the flower itself. I took my aqua painter and scrubbed the color into to the flower.


Then I added some Really Rust and scrubbed it in and bringing it up each petal.
I then took some Chocolate Chip and colored directly in the center. I scrubbed it in and dragged the color out just a little past the center. My flower did dry while I was working on it so I just gave it a spritz from my mister bottle.

I took a smaller flower and added Really Rust and Chocolate Chip and blended them together. I then added some really rust to the tips of the tiny flower and set it aside to dry. Once it was dry I added the rhinestone brad and it is now ready to use on a card, package, scrapbook page, album cover, etc!

I did work on one of the flowers with the Watercolor Wonder Crayons and the blender pen. Due to the glycerin in the blender pen the flower didn't really dry and it looked like it had a big wet grease stain on it. I did wash the flower off in soapy water and it's now stained a light yellow, which I can still use on another project.

I also took another flower and dampened it and tried the chalks on it and got much the same effect as I did with the crayons. I didn't try markers as I thought they would be way too dark. But I am still thinking about experimenting with them at another time.
Thanks for stopping by,
Wanda

New Drawing on the Blog Candy!!

Well, I did not hear back from Barb S so the blog candy is up for grabs again!

I went to the Random Number Generator and #4 came up. And that lucky person is:

Kristina Lewis and here is what she said...
Way to go with the hits!! X in the middle, baby!! You are so funny, where do you find these???

Ok, Kristina. You have until Monday evening to email me with your snail mail address.

Thanks for playing!
Wanda

Friday, July 27, 2007

Here, Kitty Kitty

I LOVE cats and of course stamps of cats! I bought this set not only because of the cats on it but because one of the stamps reads "Happy Birthday from the cat." Well, I thought my son would get a BIG kick out of it if I made a card for him with this set!


Last week a friend of mine told me her cat she had for 20 years died. SO I thought I would make her a sympathy card with this set. Our pets become such a part of our family that we feel a great loss when they are gone. This was the card I made for her. I used one of my favorite card layouts. You can find the instructions for the card here. Click on January 2007 on the right side of her blog to find the tutorial. It's very easy to make. I did find a better way to do the second (larger) hole punch. You don't need to trace the circle. Just take a piece of copier paper and place it behind the smaller hole on your top piece of paper. You may want to add just a touch of tape to keep it from slipping but I don't always find that necessary. Line up your larger punch around the smaller circle, try to center it as much as possible and punch it out. A small ring of the top colored paper will pop out along with the copier paper. You are now ready to finish your card as directed in the tutorial. I find this method easier since trying to turn the paper over and line it up to trace the circle was more difficult for me.


I kept the colors a bit drab. I didn't want to dress it up too much. I used Basic Black, Sahara Sand and Whisper White card stock. It's a subtle sympathy card.


Thank you for stopping by,
Wanda

Thursday, July 26, 2007

From Trash to Treasure!!

Remember those AOL disks you'd get in the mail? I had some come in these wooden boxes. Well, I just couldn't throw them away!!! It's tough to do, isn't it Cyndi??? (you know who you are!!! *winks*).

I ran across one in my workroom and decided it was time to do something with it. I had just gotten my new 12 x 12 papers and thought I'd actually use them! They may expire after this 6 month catalog season. I just hate it when I have papers I haven't even opened and find out they retired!!! It's not like you can't use them but you just can't demo with them. SO, I'm trying hard to use my papers, embellishments and ALL the stamps in the set, not just one or two that I favor!!! That's a BIG challenge in itself!


Here is what I did. I started out with the wooden AOL box. I didn't remove any of their labels, I just covered it as it was. Except I did sand the surface a little to allow the glue to have something to adhere to. I wrapped the paper around the box and marked with a pencil where I needed to trim it. After trimming I used the Anywhere Glue Stick and got the paper attached to the box. I left the box open to dry while I worked on the matching cards. After I finished the cards I made a belly band for the box. Not that it really needed it but I thought the box needed a bit more finesse and I didn't want to make the front look just like a card so I thought the belly band was the way to go.


I took the Brocade Blue marker and colored along the edges of the box. It was raw wood but I felt it needed some color. I wasn't all that thrilled with how dark it turned out. I was surprised at how much color got absorbed into the wood. But it's ok, no one will notice unless I point it out to them!


I did use the little flowers Cuddlebug folder on the white card stock. If you don't have that and want to keep this all Stampin' Up! you can use the set "Little Pieces" and clear embossing powder and get a look similar to this.


Once I finished the cards I stamped the lower left corner on the front of the envelope. Stamping your envelopes is all a part of the presentation, right Ann? My friend Ann is the one who got me to stamp my envelopes. You don't make a card without stamping the envelope. I still do but I try to make a better effort to stamp the envelopes!!


Anyway, this is the finished product. It's now a great gift for someone special! It makes a great Hostess Gift, Door Prize or just a gift to give to a wonderful friend.


Thank you for stopping by,
Wanda

Wednesday, July 25, 2007

SC 134 Challenge

Yup, it's Wednesday and that means it's the Sketch Challenge (SC) at Split Coast Stampers! It's really the only challenge (so far) that I participate in. I LOVE learning and doing new layouts for cards. This one has been around for a while but I'd never done one. I've thought about it but never have. But since it was the Wednesday challenge I just HAD to!!


I used the Holiday Tag Team snowman and the snowflake stamp. The words are from Cold Play. Two of my favorite sets!!! I LOVE snowmen and snowflakes! And I also LOVE the color purple. SO I thought I'd try purple snowflakes. Though the photo turned out more blue but that's ok too.


My card stock colors are Lovely Lilac, Elegant Eggplant and Whisper White. The snowman was done using Black Staz-on on watercolor paper. I used the Eggplant grosgrain ribbon to hide where the papers merge. I also used the punch to make the scallops. I added some dots on the Lovely Lilac scallops with the white gel pen, it just needed something more down there.


The measurements for the main part of this card is 4 1/4" x 8 1/2". You fold it to measure 4 1/4" x 4 1/4" and then you add the top piece, placing it far enough up to equal 5 1/2" in overall length. It's called a "Tent" card and the top part doesn't do anything, it doesn't flip or turn, it's just there to balance the card out so it measures 4 1/4" x 5 1/2". Simple as that!!! I may try another one and use words at the top part and an image in the bottom. That's one of the fun things with this layout, either way you do it, it's fabulous!!!


Thank you for stopping by,
Wanda

Yoo Hoo Barb S ! ! ! ! ! ! ! ! ! ! ! !

I still have not heard from the Blog Candy Winner.

and the winner is Barb S. and here is her comment:
"Congrats on the 90,000 I am going to say yes to the X in the middle. I figure it's probably to easy to be right but it looks good on paper. Pick me!! lol"

If I don't hear from Barb S. by Saturday July 28th, I will do another drawing for it.

Tuesday, July 24, 2007

Priceless French Flair!

I wanted to make a sympathy card using the Priceless set but it was just a bit too "fancy." SO I thought if I used a background that didn't have any dots in it, it might tone it down a bit and I think it did. I masked off the doves in the French Flair background stamp and stamped the butterflies there instead. Then I stamped 3 butterflies on Pale Plumb card stock and cut them out. I didn't cut the antenna because they will be visible on the French Flair piece. I did roll the wings around a pencil to make them curl a bit. I gave them a slight fold in the center and then set them in place with Crystal Effects. I did add the words before I attached the butterflies. I thought they might get in the way. I added a thin layer of Pale Plumb behind the Whisper White and then set those on top of the Perfect Plum. The butterflies took a little while to cut out (fortunately there were only 3!!!) but other than that it was a pretty simple card to make. This would also make a nice Get Well, Birthday, Wedding and/or Anniversary cards. It's all in the colors you use for those occasions!


Thank you SO much for stopping by!
Wanda

Monday, July 23, 2007

2, 4, 6, 8 Box & Instructions

I saw these cute boxes on Split Coast Stampers. They are called 2-4-6-8 boxes. I tried to find them on SCS but couldn't locate them again.

So I'll tell you how I made mine. My card stock was cut 8 1/2" x 9". Score at 2" on the 8 1/2" side. This forms the bottom flaps of the box.

Stamp your design on before or after you score, it really doesn't matter. I usually stamp after I score in the event I score wrong and have to scrap it.

Turn the card stock to the next edge and score at 2", 4", 6" & 8" (hence the name of the box!!!!). You will have a half an inch left to glue the box together. Before you glue the box together you need to snip the bottom flap pieces so you can fold them (flap over flap) and tape or glue them shut. Once you tape or glue the side and the bottom pieces you will fold the front and back top pieces towards each other. This will create a buckle in the sides, which is what you want. Notch the sides near the top and tie your ribbon on. Notching it helps the ribbon stay in place.

For the design on this one I used the Spook Skyline wheel and a round background stamp for the moon. Quick and easy!! These look like they would hold a fun size candy bar and a few pieces of other small candy. Great party favors! Imagine these with a baby, bridal or wedding motif???? Ok, I gave you some ideas, get cracking on it. Email me with your finished project and I'll be happy to post it here for you (giving you full credit). Any takers???


Thank you for stopping by,
Wanda

Sunday, July 22, 2007

Make N Take From My Open House & Instructions

This is one of the Make N Takes I had for my Customer Appreciation Open House last Sunday. The new See You Around wheel was used for the background on the Tempting Turquoise card stock. The Office Accoutrement set was used on the front, adding black for the layers.


On the inside I used a piece of white card stock for the base to tape on the pad and pencil. I cut a 3/4" piece of card stock to hold the pencil. I cut the piece about 4" long and wrapped the pencil in the center and then taped it shut close to the pencil. Then I taped the strip between the white card stock and the note pad. I added a piece of Velcro to the top to keep it shut. But before I did that I punched an oval in the upper part to serve as a handle. Punch them one at a time. Punching both is possible but why push your luck on your punch, it's not worth it.


Measurements:

4 1/4" x 11". You will get two from one piece of card stock.
1 7/8" x 2 1/8" white piece to stamp on

2 1/8" x 2 3/8" colored piece for layer
2 3/8" x 2 5/8" black layer

Scoring: score at 5 1/4" and again at 5 3/4"

The circle was stamped in black on white card stock and then punched out and the layer behind it is a scrap piece of black.

The white piece behind the post it notes
measures 3 1/4" x 3 1/4"

I thought I should add this little note. For those of you without the means to cut a pencil like I did, here's a couple of things you can do. You can purchase the "golf" pencils. They are the ones used at the golf course. Or you can score the pencil a bit longer than you need and snap it. To score it you would take you x-acto knife and push it into the wood and roll it until it comes full circle. Then you continue doing that until you have a nice groove in it. Then you snap the pencil at the score line. Now you will sharpen that end because it's not very attractive , it's uneven and will have rough bits of wood sticking out.

Have fun making these. They are a quick project!

Thanks for stopping by,
Wanda

Saturday, July 21, 2007

Flaky Tags!

I know it's a bit early for Christmas things but you have to start sometime. Anyone done with their Chritmas shopping?? I would answer no to that unless I was asked that question on the 22nd or 23rd of December!!! LOL

This is a fun little tag but I'm not sure I would make too many of them to put on gifts. I mean, they're just going to toss them anyway. Maybe if the top tag was laminated then you could just use some Staz-on remover and wipe the names off and use it again and again and again until someone actually throws it away!!! LOL


I did stamp the mitten on the white piece and color it. Then I stamped another mitten and cut it out after I colored it. I set it on top of the first mitten with a dimensional. I added a little hemp and a couple of tiny clothes pins. I used the snowflake stamp from the Flaky Friends set for the background of the white piece. I taped the layers together and punched a hole in the tag and it's now ready to use (if I dare!!!). LOL

Helen left a comment on this post asking about the tag. The tag was made by hand, no punches or die cuts. If you're going to make a bunch of these, to make it go faster, just make one small one and one large one and trace them. When I made mine I used copier paper to make my rectangle. Then I folded it in half and clipped the corners on one end. Open it up and you have symmetrical corners. For the layer tag I just set the other one on top and clipped one edge (on copier paper again) and then folded it in half to get both sides symmetrical. Now you have a pattern to crank out TONS of these!!!


Thank you for stopping by,
Wanda

Blog Candy Winner!

This was another fun "Puzzling Puzzler!" I LOVE your answers. I have this awful feeling I may be named in Denise C.'s divorce papers since my blog was the first one she subscribed to and is not hooked!!! LOL

And Stacey's comment made me wonder if someone was going to argue the existence of "X"!!! LOL

I had a blast reading your comments, it makes giving away the "Blog Candy" even more fun. I do have some other fun stuff for future Blog Candies. You didn't think I wasn't going to make you work for it now, did you???? In spite of what people say, nothing and I mean NOTHING in life is free!!!!! LOL

I would like to thank each and every one of you for visiting my blog, for leaving comments on my posts and for playing along with the blog candy puzzles!

Ok, enough! I know you want to know who the winner is. I used the random number generator and the winner is Barb S. and here is her comment:

"Congrats on the 90,000 I am going to say yes to the X in the middle. I figure it's probably to easy to be right but it looks good on paper. Pick me!! lol"

Barb, please email me with your snail mail address and I will get your candy out to you soon!

Thanks for playing,
Wanda

Rockin' Girl Blogger Award!

Frances over at Stamp Owl's Studio tagged my blog for the Rockin' Girl Blogger award. Thanks SO much Frances! Such an honor! So now I am supposed to tag 5 other bloggers and give them this award too.

Diane at My Little Stampin' Spot
Michelle at Painted Desert Serenade
Michelle at Michelle's Stamping Room
Cindy at Imagine, Dream, Create
Kate at Espresso Yourself

Friday, July 20, 2007

Another Challenge At Split Coast

This was the challenge at Split Coast Stampers last week. I forgot to submit it when I finished it. It's not too late so I'm sure I'll get it posted on there soon. The challenge sketch was a difficult one to look at without seeing any finished samples. I sometimes need to see a sample before I get inspired. This card is ok. To me it seems to need a little more finesse but I don't know what else I could do to it. I used the Flannel Plaid stamp and Creamy Caramel ink for the Always Artichoke background piece. I used the Noble Deer set. I stamped the deer in Close to Cocoa on Vanilla card stock. I also stamped the image again so I could cut out the wedge piece. I prepared the background by using the linen stamp and creamy caramel ink. I punched out a piece of Black card stock and set it on top of a larger clear button and poked holes in it to match the button. Then I punched another larger circle out of Always Artichoke and layered it behind the black piece. Then I set it in place with a dimensional. The black "things" are large paper fasteners from Office Depot. I heated them up (holding them with a clothes pin of course) and dipped them in black embossing powder and heated the powder until it was melted and smooth. Because the large paper fasteners have long prongs I decided I needed to cut them down. I just used a regular pair of scissors. Don't use a good pair of scissors. If you have time, give the Sketch Challenges listed on Wednesday's a try. I like to find new layouts and this is a perfect place to do it!


Thank you for stopping by,
Wanda

Thursday, July 19, 2007

I Am Seeing Spots!!

This "Seeing Spots" set is a very fun little set to play with. There's SO much you can do with it. I haven't played with it much but I do have great plans for it, starting with this card. I saw a card using this layout and knew I had to make it. I did change it a little. I used Night of Navy for the main part of the card. Then the next layer is the new Groovy Guava. I also used Ruby Red card stock for the layer. Be sure to stamp your round images first and then punch them out. Doing it that way makes it a lot easier to keep the image centered! Under the "Thank You" circle is a dimensional. I like to use them when I use brads because a brad never really lays flat enough for me. Again, this was a pretty simple card to make.


Thank you for stopping by,
Wanda

Wednesday, July 18, 2007

SCS Challenge

WOW! This was one tough challenge for me. I like the sketch but I didn't really know how to work with it. But after some thought I decided it HAD to be a winter card and to me a winter card means a snowman card!! And you all know how much I LOVE snowmen!!!!


I used the Snowflakes Cuddlebug folder. I only caught a "little bug!!!!" LOL I don't have a Cuddlebug machine but I do have my Sizzix with the adapter and it works just fine. If you are a Stampin' Up! Demonstrator, for the background you can use the snowflake stamp that comes with the Cold Play set or you can use another snowflake set and stamp the snowflakes in Bashful Blue on the Whisper White card stock. Once I was done with the Cuddlebug Folder I used Bashful Blue ink on a rubber brayer and went over the piece allowing the ink to pick up on the raised snowflakes and of course some goes where you don't want it but it's ok, it is after all a handmade card!!! Then I added the layers as shown in the diagram they present each week at Split Coast Stampers (SCS). I added three light blue buttons and called it finished. Once I figured out what I wanted on the card it went smoothly. It's that trying to figure out what you want on it that is the most difficult part. So there you have it, my little snowman card!! Nice thing to make on such a HOT and HUMID day here in Minnesota. UGH!!!

Don't forget to leave your comment for the Blog Candy drawing to be held on Saturday!

Thank you for stopping by,
Wanda

Tuesday, July 17, 2007

Scary, Isn't He?

I can't wait to tell my son I put a photo of him on the Internet. It could be worse, it could be the "potty chair" photo!!! LOL I'm saving that one to show someday to his fiance!!! Revenge is SO sweet!!! LOL

We had to blow out the candle because this kid LOVED fire! He was SO excited on his first birthday (a month before Halloween) and he just wanted to touch the flame.

Notice the background paper here, not just the paper on the page but behind it? It's from last year and of course it's retired. SO when you buy these decorative papers, USE them!!! I will eventually use these but they can not be used on anything you demo.

This page is done in the same size as the recipe card I posted yesterday. It's 6" x 6". It's a very nice size to display some of your favorite photos. It's more portable than a large album and it sits nicely on an end table or coffee table. I like the 6" x 6" pages. Plus you have less space to decorate!!!

Thank you for stopping by,
Wanda

90,000+ Hits Blog Candy!

I can't believe this blog has 90,000+ hits. I'm not far from 100,000 hits. What a celebration that one will be. I'll have to find some REALLY special Blog Candy for that.

The puzzle this time is a "Tic Tac Toe Challenge." I'm telling you, this is the most difficult one yet!!! The challenge reads:

"You are battling for the tic tac toe championship of the world. (Of the world, mind you! NO stress there!!! lol) You have the last move and one open square is left. Can you win the championship with only one move? You are x. Good luck!"


SO, the question here is obvious, "can you win the championship with only one move?" I know it's tough but give it a try! Sorry to say that this is the last of those puzzles. I do not know where on the internet I found them and no one has contacted me to tell me they belong to them. We will probably have to play some "real" games for Blog Candy in the future. LOL


Have fun!


The Blog Candy posted here is some fun stuff! Yet useful!


There's a package of square double-sided foam "dots" a package of round double-sided foam dots, double-sided tape, a package of purple fibers, 3 rolls of ribbons, a package of baby charms and two packages of the small clear rubber stamps.


I will draw a name/number sometime on Saturday afternoon July 21, 2007.


Good luck!

Monday, July 16, 2007

Scary Monster!

Switching gears a little here. I mostly do cards. But when I think about it, there's probably as many cards on here as there are little gift items, etc. But I can say I don't do a lot of scrapbook pages and that is something I am going to be challenging myself to do. I need to keep a good balance of stamp crafting, cards and scrapbook pages!!!


This set is SO adorable but not as cute as the "Best Fiends" set was. But this will still do for this 6 x 6 recipe swap card. I LOVE making these for my recipe book. I have been collecting recipes since I was 16 (A VERY long time!) and I want to put my favorite recipes on these cards. It really dresses up a recipe card now doesn't it? These make great gifts too.

You set up your computer to print out your wording within a 5" x 5" space. You want to have some room on the sides for layers and sponging and just space to make it look even. I typed in my recipe and I printed out about 6 of them. I plan on keeping 4 so 6 is usually pretty close! I lose one or two with experimenting. And when I don't I have an extra for a gift for someone special!! Now once you set up your page, save it. This way you can just go in and make the changes for another recipe and do a "save as" for it and you've got another page saved. Though I usually just do a regular save since I REALLY don't want to make any more of the pages I've already done. They never turn out the same anyway. I just make the amount I want with the first run and that's it.

Once you print your recipe on card stock cut it to 5 3/4" x 5 3/4", enough room for the 6" x 6" piece of background layered card stock to go behind it. You don't need to do a layer but it does make the card look better. Stamp your images on the recipe and color them in as you like. For this one I used googly eyes on the spiders and Frankie. I glued them in place with Crystal Effects. I didn't want any glue to show. Once it dried and my layering was done I slipped it into the 6" x 6" scrapbook sleeve along with the other recipes! Eventually my book will be full of cute little recipe cards that are also fun to look at. And the bonus to doing this is that each page is in a plastic sleeve so there will be no sticky recipe cards!!!


Thank you for stopping by,
Wanda

WOW! It Looks Like More Blog Candy Is On The Way!

Didn't we just do this a little while ago??? LOL

I will put together some blog candy and post it to celebrate 90,000 hits!

Wait until you see what I have in store for the 100,000 hits!!!

Stop back tomorrow!

Sunday, July 15, 2007

Thank You Motif

OK, last Baroque Motif card, I promise! But I really do like this set!


This card did take a little longer than the other ones because the illusion of a "reflection" was done using Baroque Burgundy ink. The words were added and then the White Craft ink was added on top of that. The card was set aside to dry. Craft ink takes a little longer to dry than the regular water-based inks. While the white was drying I stamped the flower and cut it out by hand. I didn't cut the dots around the flower image, I didn't feel they fit with the design on this card. I added a pink rhinestone brads from the new "Fire Circles" group. I affixed it to the card with a dimensional. The brad doesn't really match the burgundy card stock but once it was all assembled it blended in just fine. Those are very fun and pretty brads. And here's the shocker! I'm actually using the new stuff instead of hoarding it until it retires and then I can't use it in swaps! Imagine that, using your new stuff instead of keeping it around!!! Interesting concept! My favorite thing about this card is how the first image was stamped in Bravo Burgundy and it really makes the white just pop. And it REALLY does give the illusion of a shadow there! Just way too cool how that worked out!

Thank you for stopping by,
Wanda

I've Been Tagged Again!

I have been tagged (again) by Jennifer at Stampin' Crazy. Since I've already done this I will post a link to the 7 random things about me! You can view that here if you'd like.

Saturday, July 14, 2007

Thanks So Much Motif

Ok, here I'm trying out a color combo I think actually worked!! I started out stamping my image on Very Vanilla card stock. I embossed it in black, doing the words at the same time. Then I cut a piece of Elegant Eggplant and taped it on behind that and put the two layers on top of a half sheet (folded) of the new Blue Bayou color. The colors blended together well and give a nice warm look to the card. The photo doesn't do the colors justice. And again, this was another quick and simple card but it doesn't give the appearance of being neither quick nor simple. Don't you just love that??? For those of you who read my blog frequently, can you tell I'm having sponging withdrawals?? LOL


Thank you for stopping by,
Wanda

Friday, July 13, 2007

Altered Note Paper & Pen

Oh my, it's NOT a Baroque Motifs card! Not even a Baroque Motif notebook!!!! LOL I am sure having a lot of fun with that set. I just can't believe how quick you can make a lovely card with so few stamps!

This is one of those little notebooks from the dollar bin at Michaels. I took the ink pen out and opened up the cover. I didn't remove the note paper. When I say I opened up the cover I am saying I pulled it open until it's glue didn't hold anymore. I laid it flat and measured a piece of Rose Red card stock. I made the card stock 1/8" longer than needed. Once you fold the card stock you lose a little in the folds. I marked where the original cover was scored and scored the card stock accordingly. I taped it in place. I usually use the Anywhere Glue Stick by Stampin' Up! but I ran out and my order is not coming until Monday. So you just make due with what you have. After the cover was on I glued the seams shut with tacky glue and clipped them in place. You can use clothes pins or paper clips for that. I just wanted to have my hands free so I could move along with this project. As the glue was drying I took some of the smaller pieces of the Prints designer papers that I had in a pile and cut them to fit the front of the notebook. I added a piece of ribbon to cover the seam where the two sheets of paper meet. I added a layer on top of that and the flowers. Stampin' Up! has come out with some flowers. I have not seen them yet but if you want to make this a Stampin' Up! project you can replace these Prima flowers with theirs. For the words I had gotten a rubber stamp made (for free) from Vista Print. They have business cards, note pads, post-it notes and many other office items. I have ordered from them several times and have been pleased with every order I've received. For the "notes" I just entered in that instead of my name and address. It's a quick way to stamp something you stamp often. It's a pre-inked stamp which makes these projects go even quicker! My "notes" had a black border around it but I cut it off because I was using a piece of black card stock on the layer and the black border didn't look right.


Now for the brads, those are the new ones from Stampin' Up! I didn't want the backs to show so I took a pair of utility scissors (not really the official word for that pair of scissors, they are a pair of old ones that it doesn't matter what I cut with them) and I cut off the prongs fairly close to the back of the brad. I left about 1/8 so I could take a pliers and fold it back. I "glued" the flower and the brads in place with Crystal Effects. I LOVE how that stuff sticks metal to paper. Once it dries it will be ready for gift giving. These also make great craft fair items but I recommend you purchase your own pen, paper and make your own pattern for the cover or you'd have to charge a lot for them at a craft fair and they won't sell as fast. Rule of thumb in selling your crafts is "Materials times 3." In some cases it doesn't work. I've made things from scraps amounting to 15 cents and in cases like that you use your best judgment. Shop around and see what other items close to what you make are selling for. It's a tough call to make. And you have to ask yourself if you want to sell a few at a higher price or sell them all for a lower price. Either way you are making money and that is why you're selling them, isn't it???

So back to the notebook. These do not take long at all to make and remember what you add for embellishments costs you money too! I tend to give more of these away as gifts than I sell.
Thank you for stopping by!
Wanda

Wednesday, July 11, 2007

Anniversary Motif

WOW, if you need an anniversary or wedding card in a hurry, this is the one to make! I can't tell you how quick this card was to make. And no sponging either!!! I used VersaMark on the Whisper White card stock and sprinkled it with silver embossing powder. Do the words at the same time. If you overheat embossing powder it no longer stays raised, it sort of melts into the card stock and especially the black will look like a big grease spot. Just slowly move your heat gun across the area and watch the powder melt as you go.

After the embossing I put it on a layer of Basic Black card stock and then adhered that to a half sheet of Whisper White card stock. SO quick and SO simple!


Thank you for stopping by,
Wanda

More Motifs

I SO copied this card (CASE) from one posted on SplitCoastStampers. I made some color and wording changes but for the most part it's a CASE. It's been a LONG time since I've done that. It's not that there aren't a lot of cards on there to CASE, believe me, there are. But I usually try to come up with my own design. But once and a while a card comes along that you just can't add or change it much but yet it's so inspiring to you. Well, that is what happened with this card. It's ok to CASE, just give credit where credit is due.

For my card I used Sahara Sand for the center, behind that is Bravo Burgundy and the main part of the card is Night of Navy. I wanted something dark but not black. On top of the Sahara Sand I used the Fine Lace Background stamp and Sahara Sand ink pad. For the swirls on the card I used the larger stamp from the Baroque Motifs set and Night of Navy ink. The tiny flowers are also in the set and those were put on using Bravo Burgundy ink. The larger flower in the middle was stamped on Very Vanilla card stock with Bravo Burgundy ink. I used a silver brad in the center. I cut it out by hand (too bad there isn't a punch to go with that one!!) and I used a dimensional on the back to pop it up off the card. I also used the Sincere Salutations "Best Wishes" stamp for my wording. I needed an anniversary card. Then I assembled the card. And I just realized, I made a card without any sponging on it!! Rare occasion!!!


Thank you for stopping by,
Wanda

Color Selector is Updated

Be sure to check out the color selector at Scraptitude. They've added the 6 new "in colors." Though I wish they would have removed the last 6. But you just have to work around them if the come up in your search. It's a fun place to experiment with new color combinations. It's amazing what colors actually go together! Give it a try!

Title Troubles

It would appear that Blogger has their glitch fixed. Well, let's put it this way, it's working for me. I did have trouble with mine the last two nights. On Sunday night I submitted my post and then went back in to the edit part and added the title. Hey, I even rebooted thinking it was a glitch on my computer. I'm using (trying to learn) the new Window's VISTA. What a nasty piece of software that is!! Anyway, last night I tried to enter a title but it wouldn't work but then I had clicked outside the title rectangle and the cursor appeared inside the rectangle to I entered my title and ran!!! Blogger is pretty good about getting things fixed and from my end it looks as though they have. But should any of you bloggers encounter this problem again try what I did and see if that works.

Tuesday, July 10, 2007

Simple, Quick & Yet Elegant!

I can not believe the simple, quick and yet elegant cards you can make with the "Baroque Motifs" set by Stampin' Up!


For this card I used Lovely Lilac, Lavender Lace and Whisper White card stock. I used Lovely Lilac ink and white embossing powder. I didn't check the new catalog to see if white embossing powder made the final cut!! If it isn't in the book you can use white craft ink for the flowers and clear embossing powder and get the same effect. I used the Sincere Salutations "thank you" stamp for my wording in the bottom right corner. A few lines of tape and you have a quick, simple and yet elegant card!!!! I'm going to play with this set a bit more before I go back to finishing my challenge of using every stamp in the "Year After Year" set.


Thank you for stopping by,
Wanda

Monday, July 09, 2007

BUGS!!!

Back to summer stuff and the theme tonight is a BUG! I am participating in a swap this month and the theme I chose is a bug. I have seen these adorable ladybugs all over SplitCoast and just had to try one. You use the Stampin' Up! set "Pick A Petal" an oval punch for the head and a round punch for the bottom. I used the new "Seeing You Around" wheel for the background. I tried to stay away from the Cuddlebug folders because I wanted to keep this strictly a Stampin' Up! card since it is for a demonstrator swap. I used the layout I had found at SplitCoast a few weeks back. It's #126 in their Weekly Sketch Challenge. They have some nice layouts there. Check them out if you're looking for something different for your cards. This layout is a very versatile one and will work with many of the smaller stamps.

Thank you for stopping by,
Wanda

Sunday, July 08, 2007

Touch of Nature

I'm taking a break from the "Year After Year" set. But only a short break!! I liked the layout of the pumpkin card and wanted to put a flower in the oval. The flower from the "Year After Year" set would work but it would be a tight fit and I've already made a card using that stamp. Not that I can't use it on another card but I need to get through the whole set before I begin playing with my very favorite ones. The snake is not near the top of the list!!! LOL


I like the "Touch of Nature" set and have not used it very much. This flower is such a stunning one and I wanted to add it to this card. I used the new decorative papers and added a piece of black card stock to hide where they meet. I used the scalloped oval punch and I'm still toying with the notion of adding some white on each scallop like I did with the pumpkin card. This was an easy card to make but I do have one regret. I should have used watercolor paper. It seems that the blender pen soaked into this paper too much. It didn't allow me to work with the colors as much as I wanted to. And I used Staz-on Black to stamp the flower. I am starting to use it a lot more. I always use it when I am going to use a blender pen but now I'm starting to use it when I'm coloring with markers too. I know the black won't run.


Thank you for stopping by,
Wanda

Saturday, July 07, 2007

Thankful!

Here's a Thanksgiving card made using the "Year After Year" set. Still working my way through the set. I'm actually going to make it through the whole set!!! Now that the snake is behind me!!! LOL


For this card I used Always Artichoke for the main card color. On top of that is Apricot Appeal and the scalloped oval is done using Pumpkin Pie. The apricot background was done using the "Leaves Awash" wheel and Apricot Appeal ink. I tied the organza ribbon around the ovals and then added the know. I used the white gel pen and added dots to the scallops in the oval and then added some on the dots on the background just to tie it all together. This would also make a nice masculine fall birthday card.


Thank you for stopping by,
Wanda

I've Been Tagged

I got tagged today by Kristina at Balance. And by Aimee. Another version of Blog Tag. Here goes!
List Seven Random things about yourself:
1. I have an older sister, a younger sister and a younger brother.
2. I LOVE snow!
3. I LOVE movies! Almost all kinds except satanistic ones.
4. I am allergic to Penicillin
5. Cats are my favorite animal.
6. I like laundry day because I get to stamp while the clothes are washing.
7. I accidentally ate a piece of hard cat food ONCE!!! Ate, not consumed, there is a difference!!! LOL


Post Rules & the bloggers I tagged here:
1. Frances at Stamp Owl
2. Michelle at Painted Desert Serenade
3. Melissa at Simply Pink
4. Sara at Sara's Studio
5. Lauri at I Lie, Cheat and CASE
6. Trish at Tah Dah!
7. Susan at Susan's Blue Robot

Thursday, July 05, 2007

I See A Pink Elephant

I see a pink elephant and it's not hiding in a tree! LOL This card is fairly easy but it is time consuming when it comes to making the background. The ribbon was dyed by holding the white organza ribbon down on the ink pad with a sponge and pulling the ribbon between the pad and sponge. I then pull it through a paper towel to get any excess ink off. Set it aside to dry and in the meantime work on the card. This is a nice simple layout that works well with smaller stamps. The bow could be removed and a sentiment could be added there. Lots of room to be creative on this layout!

Thank you for stopping by!
Wanda

Yikes It's A Snake!!!

Do you see a theme here? I have challenged myself!!! I want to use every stamp in the "Year After Year" set by Stampin' Up! I tend to buy a stamp set and only use one or two of the stamps in it. So I'm on a quest to use (and make a card) with each stamp in this set. So far so good. I looked the set over and I saw the snake. Ok, it's a rubber stamp and it's a cartoony snake but it's still a snake. I don't like snakes. Not even cute rubber stamp ones!!! And I figured since I was half way through this set I should do the snake and just get it over with. Here's my snake card. Now I do have to admit I do like the card!! Shocker, huh? It was actually fun to make.

Now to change this card for those of you who don't have the Cuddlebug folders I would recommend using the "Rough Texture" wheel with Versa Mark and clear embossing powder. And instead of the scalloped oval you could substitute plain ovals. The words are from the "Eat Cake" set.


Even though it was a snake, it was a fun and simple card to make!!!

Thank you for stopping by!
Wanda

Wednesday, July 04, 2007

Black & White & Red All Over!!!

I just love the look of the black, white and red cards. I also like the look of the white craft ink on black card stock. This was a fun card to make and I'm REALLY liking the new Stampin' Up! wheel "See You Around.


The measurements for this card are as follows:


Real Red card stock:
cut one piece 5 1/2" x 8 1/2" and cut another 2 1/8" x 2 1/4" and punch out one 1 1/4" circle.


Basic Black card stock:
cut one 5 1/4" x 2", cut one 5" x 1 3/4", one 2 1/2" x 2 3/8" and one 1 3/8" circle.


Whisper White card stock:
cut one 5 1/8" x 1 3/4", one 2" x 2 1/8" and one 1" circle (be sure to stamp the image first, turn the stamp upside down, line up the stamp inside the circle and then punch it out.


Stamp the white craft ink first and set it aside to dry. Craft ink takes a little longer to dry than regular dye based ink. Half way through making this card sponge the edges in white and set it aside so by the time you are ready to assemble your card the white will be dry. Tie the bow on before you assemble the card. I used Real Red ink on the background of the red piece. I felt it would stand out better than using Versa Mark.


It's a fun card to make and a layout that works well with smaller stamps.

Thank you for stopping by!
Wanda

Tuesday, July 03, 2007

Something Sweet

I wanted to make a card that was very delicate, feminine and sweet. I really like the Stampin' Up! set "Sassy Stems" and I thought I would work in the new decorative papers with it. Don't you love it that you can order just one color in a package??? I like this because I tend to lean towards a favorite color and have a lot of the other colors just sitting there.

For this card I used Staz-on Black ink for the flower. I colored it in with markers, Almost Amethyst, a little Lovely Lilac and the leaf and stems were colored in with Sage Shadow. I stamped the flower and then trimmed it down on the paper cutter. I sponged the edges in Almost Amethyst and then added the other layers. I used Dimensionals to affix it to the front of the card. I tied an organza bow around it before affixing it to the card front. The front was done using two different prints of the new designer paper. The white scallop was made by using the Slit punch. I saw a tutorial on this somewhere and have loved using it! There is not a lot of coloring to this card at all, just the flower and a little bit of sponging. Decorative papers make card making a quicker process!


Thank you for stopping by and
have a safe and Happy 4th!
Wanda

Blog Candy Winner!

Again it was a fun time with the Blog Candy puzzle.

The lucky winner is scrappintrish and here's what her comment was...
lol. I would have to say 1 to 2.

Congratulations scrappintrish, please email me with your snail mail address and I will get the Blog Candy out in the mail to you. I've added a few things to the package as I ran across them. No, I wasn't cleaning! I should be but I wasn't!!!!

Thanks everyone for playing along. It's been fun and I enjoy your humorous comments on these puzzles!

Have a safe and Happy 4th!
Wanda

Monday, July 02, 2007

Zoofari Circle Window With Frame Card

Here's the card I made using the Circle Window With Frame tutorial by Kristina Werner. I just posted a tutorial on how to save the lining up/pencil step. These are very quick and cute cards to make. And to top it off with, there are TONS of small stamps out there!! I also used the new wheel stamp "See You Around." It makes an adorable background, let alone a quick one to make!! If you need a quick children's card this one is it!
Last chance for Blog Candy! The drawing is later today so don't miss your chance to work on that difficult puzzle. I'll post the winner Tuesday night! Have fun!

Thank you for stopping by!
Wanda

Improving on the Circle Window with Frame Technique

I have used this tutorial before. I found it here at Kristina Werner's Blog. I didn't design this tutorial, I just improved on it a little. A couple of months ago one of my stampers (Linda!!) was making a card with this layout and she tried to save a step by stamping the decorative paper and card stock together and then punching the decorative paper with the larger punch so she didn't have to do the pencil part of the tutorial. The paper didn't want to punch nicely. Well, with a little work I improved on that thought. If you put a piece of copier paper under the decorative paper and punch them both together the decorative paper will punch cleanly. Thank you Linda for inspiring me to pursue that thought!

The next post is of the finished card using this tutorial. You will need to go to Kristina's Blog to find the measurements. Her tutorial is located on the left of her screen. Click on "Tutorials" and then scroll down about half way. You'll come up to the "Very Punny" pig card and you're there!