Pin It

Monday, July 31, 2023

Cheerful Daisies, Countryside Inn, Birthday Card, Stampin' Up!

Hello and welcome to my blog. Today I'm going to share a card with you that I found on Pinterest. It was posted by one of my favorite card makers (I have so many) Claire Daly. You can see her card here. I was looking for a card to make using the "Countryside Inn" Designer Series Paper and her card popped up on Pinterest. So I clicked on the card and was directed to her blog. I was thrilled to find this card and started right in making it.

Here's how I made the card. The base of the card is a folded half-sheet of Night of Navy card stock. The card opens on the right and the fold is on the left.

My DSP was cut at 3-3/4" wide so I had to make the length 5".  I taped it in place on the front of the card. I also cut a 4" x 5-1/4" piece of Basic White card stock and taped it to the inside. 

I didn't have the die that was used for the vellum piece, so I just took the largest circle die from the "Layering Circles" set and cut my piece. I glued it on top of the DSP, not quite centered, there's more on the upper part of the card than the bottom.

Now came time to die cut the flowers. They are from the "Cheerful Daisies" bundle and were die cut from Basic White card stock. I took the flower center stamp and colored the centers of the flowers using Crushed Curry ink. Then the top detailed layers of the flowers were glued in place. The flowers are all joined together and they are left joined but the leaves that were attached were snipped off and discarded. 

The branch ferny images were die cut using Balmy Blue card stock. I needed 4 of them.

The words are from the same "Cheerful Daisies" set and were stamped on a scrap piece of Basic White card stock using Night of Navy ink. They were die cut using the die from the same bundle.

Now it's time to assemble the card. The flowers were set in place using Dimensionals. I didn't press down on them right away in case I needed to lift one up to slip the ferny things under it. I did dip the ends of the ferny pieces in glue before I slipped them under the flowers.

The words were set in place using Dimensionals and crystal rhinestones were added and the card was done.

This was a fun card to make and I was thrilled to have been able to use the DSP that I was gifted with.

Thank you SO much for taking your time to stop in and see today's birthday card,
Wanda

Sunday, July 30, 2023

Textured Floral, Layering Leaves, Friendship Card, Stampin' Up!

Hello and welcome to my blog. Today I have a quick and easy friendship card. Though you could easily make this into a card for other occasions. Please read on to see how I made today's card.

The base of the card is a folded half-sheet of Balmy Blue card stock. This card opens in the right and the fold is on the left.

I cut two 4" x 5-1/4" pieces of Basic White card stock. I taped one to the inside and the other was textured using the "Painted Texture" embossing folder. I glued that one to the front of the card base.

Using the dies from the "Textured Floral" bundle, I die cut three leaf clusters. I used Balmy Blue, Boho Blue, and Fresh Freesia card stock. Locating what is somewhat center (by eyeing) I added some glue to that area and I pressed the leaf clusters in place. I began with the Boho Blue, then the Balmy Blue, and finally the Fresh Freesia.  

The words are from the "Layering Leaves" and were stamped using Balmy Blue ink on a piece of scrap Basic White card stock. I die cut them using the 3rd largest stitched circle die from the "Stylish Shapes" set. And using the "Layering Circles" die set I die cut the scalloped circle that was just a little larger than the stitched circle using Balmy Blue card stock. I taped the two layers together. Dimensionals were added to the back, the piece was set in place and the card was done.

Super quick, huh? And fun, right? Oh and don't forget easy. There's lots of dies out there that would work with this card. Some leaf sets you may have to trim down. These leaves stick out about 2-3/4" beyond the circle (not including what is hidden under the circle).  I thought this was a fun card to make and I can see myself making more.

Thank you SO very much for stopping in to see today's friendship card,
Wanda

Saturday, July 29, 2023

Petal Park, Go To Greetings. Basic Borders, Friendship Card, Stampin' Up!

Hello and welcome to my blog. Today I have a card to share with you using a fun border die. Please read on to see how I made today's card.

The base of my card is a folded half-sheet of Basic White card stock. This card opens on the bottom and the fold is on the top.

I cut the "V" or envelope looking tip using the die from the "Basic Borders" die set. I marked my card front lightly with a pencil down the center and then I lightly marked the card on each side about 1-3/4" from the fold.

Next I took a quarter sheet of Shaded Spruce card stock and found the center I cut the piece so it measured 2-1/8". 

Then I took piece of Designer Series Paper (DSP) from the "Inked Botanicals" 6" x 6" stack and I cut it at 5-1/2" x 3".  I figured I could make two cards from the same piece. And yes, I actually made two matching cards. Once the DSP was cut I taped it to a piece of Basic White card stock that was cut a hair smaller than 4-1/4" x 5-1/2".  I wanted to have it a bit smaller so the card would still close nicely but not too much smaller so things would show on the inside flap. Once the DSP was taped to the piece I set it aside.

The flowers were stamped using Shaded Spruce ink. I stamped off on the solid parts and used the ink full strength on the details. I used my Wink of Stella pen and picked up a little bit of Shaded Spruce ink and colored in the flower centers. Then I fussy cut the flowers. I did not order the matching punch but that's okay, the flowers are quick and easy to fussy cut. I laid the pieces out to see where I was going to place the words.

The words are from the "Go to Greetings" set and were stamped using Shaded Spruce ink.

Then the Shaded Spruce "V" shaped piece was added to the back of the Basic White "V" shape. I left about 3/8" of the Shaded Spruce piece showing. I added glue to the back of the "V" pieces and affixed them to the piece with the DSP attached.

Now it was time to add the flowers. The largest flower was added using a Dimensional. The other pieces were added using a dot of glue.

This was a very fun, quick and easy card to make. I do like the "V" layout. I have lots of fun DSP and could make more using them. I am looking forward to see what the Christmas papers will be like and hope that maybe they'd work with this layout. It would make for a pretty quick Christmas card.

Thank you SO very much for taking your time to stop in and see today's friendship card,
Wanda

Friday, July 28, 2023

Darling Details, Birthday Card, Stampin' Up!

Hello and welcome to my blog. Today I have a card to share with you that I found on YouTube. The link can be found here but there's no instructions for this card. The video is for a different card but this card was seen at the end. I liked it so I thought I'd make it. Please read on to see how I made this card.

The base of the card is a folded half-sheet of Basic White card stock. I cut a 4" x 5-1/4" piece of Basic White card stock for the focal piece. I also cut another piece of Basic White card stock that measured 3-7/8" x 5-1/8" for the images to go.

I die cut the pretty dotted floral edged piece using the die that is in the "Darling Details" bundle. There's a lot of fun pieces in that die set that I have hardly played with. 

Next I took a scrap piece of Basic White card stock and stamped the flowers using Bubble Bath ink for the solid part and Berry Burst for the outline. For the leaves I stamped them using Lemon Lime Twist for the solid part and Granny Apple Green for the details. I used the matching dies to cut them out. 

The words are from the same set and were stamped using Berry Burst ink on the 3-7/8" x 5-1/8" piece. I had laid out the images to where I thought they should go and then lined up the words so they fit in that floral framed area. 

I glued the edges of the 3-7/8" x 5-1/8" piece of Basic White card stock and affixed it to the die cut floral edged piece.

The leaves were taped down first. The flower was added using Dimensionals and then the other flower was taped down. For that smaller flower I had used my Wink of Stella pen and picked up a little Berry Burst ink to give it a bit darker color than the Bubble Bath color.

I set the whole piece in place on the front of the card using Dimensionals and the card was done.

I was thrilled to have run across this card and it was great to use dies from the bundle. Especially ones I rarely use. 

This was a fun card to make and pretty too!

Thank you SO very much for taking your time to stop in and see today's birthday card,
Wanda

Thursday, July 27, 2023

Dainty Delight, Lasting Joy, Thinking of You Card, Stampin' Up!

Hello and welcome to my blog. Today I have an interesting card to share with you. I had gotten a sample of the holographic paper and thought I'd play with it. I do regret using it here. I think a piece of Smoky Slate might have been better. But it is what it is and I'll share with you how I made the card. You can fine tune your card.

The base of my card is a folded half-sheet of Basic White card stock. The textured layer measures 3-7/8" x 5-1/8" and was textured using the "Painted Texture" embossing folder. I glued this piece to the front of the card base.

Next I cut a 4-1/4" x 1-3/4" piece of Basic Gray card stock. I glued that on top of the textured piece about 1/2" from the bottom, left side and top of that piece. 

I die cut 3 floral images from the "Dainty Delight" bundle using Basic White card stock. I set them aside.

Then I cut the holographic piece about 1/4" x 3" and a 3/8" x 2-5/8" piece of Basic White card stock for the words. I actually cut three strips because I don't always get the words straight and I have to cut more, so today I was prepared. I stamped the words from the "Lasting Joy" set using Smoky Slate ink. I got them straight the first time. Doesn't that figure? I cut the extra card stock strips and didn't need them. Murphy's Law??? But at least I didn't have to keep stamping them, right? One and done! I snipped the right end to look like a ribbon end. Then I glued the bottom edge of that piece and affixed it to the upper part of the holographic piece. I set it aside to dry for a bit.

In the meantime I took some silver thread I had and wrapped it around an embossing powder container about 6 times and added a tiny glue dot to hold all the strands in place. 

Dimensionals were added to the back of the glued word piece and it was set in place on the Basic Gray piece after I set the circle of silver thread down. I made sure that the glue dot part is hidden under the word piece.

I added tiny pieces of Dimensionals to the part of the floral piece where the stem ends and then I set all three in place. I did add a little dot of glue to parts of the stems that touch the word piece.

Tiny pearls were added to the piece and the card was done.

This was a fun card to make. Not quite what I had in mind but close!

Thank you SO very much for taking your time to stop in and see today's thinking of you card,
Wanda

Wednesday, July 26, 2023

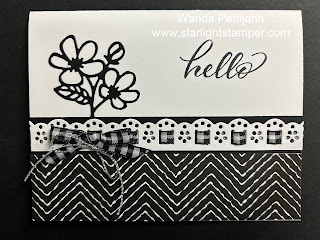
Darling Details, Layering Leaves, Friendship Card, Stampin' Up!

Hello and welcome to my blog. Today I have a card for you that I found on Pinterest. I was looking for a pair of wired earrings and when I opened up Pinterest this card was there. Well so much for the earring hunt, I had to make this card.  And I had all of the stuff to do it too. Ya gotta love that! You can see the original card here.  And please read on to see how I made mine. I did make a few little changes.

The base of my card is a folded half-sheet of Basic White card stock. This card opens on the bottom and the fold is on the top.

I cut a 1-3/8" x 5-1/2" piece of Designer Series Paper (DSP) from the "Zoo Crew" 12" x 12" package. I cut it that size because the piece I was going to use had a cute fox on a motor scooter on the other side and I didn't want to cut into that. Then I cut a 3/4" x 5-1/2" piece of Basic Black for the strip. I was going to leave the card like that when I noticed that I did have the cute border die. It's from the "Darling Details" bundle. I die cut it from a piece of Basic White card stock. I trimmed it to 5-1/2" making it symmetrical. I threaded the gingham ribbon through the piece. Had I paid better attention, I would have pulled the ribbon until the white squared inside were centered on the opening. Not that it makes a big difference because I didn't notice it until I saw the photo of the card. I still like it the way it is.

After gluing the ribbon in place, I glued the strip to the Basic Black strip on the front of the card. I centered it on that strip. A bow was tied and glued down and then a silver cord bow was tied and a glue dot holds it in place. I didn't add those until after the words were stamped.

Next I die cut the flower outline from the "Darling Details" set using Basic Black card stock. I had used a double sided sticky sheet on the back of the card stock so it would be a sticker and easier to put on the front of the card. I lifted the black strip up just a bit so the ends of the flower could be tucked in ever so slightly because I didn't want to lose any height of that flower cluster.

The words are from the "Layering Leaves" set and were stamped using black Memento ink on the right side.

I secured my bows and the card was done. Change the words and this card can be used for a number of other occasions. 

This was a very fun, quick, and easy card to make. It was also an eyeopener for me. I didn't know I had that border die. I have seen it used on other cards and wondered where it came from and here I had it all along.  Sounds SO typical of my workroom. I have stuff here I didn't remember I had. It's like Christmas when I start cleaning a drawer. New fun stuff to play with! LOL

Thank you SO very much for taking your time to stop in and see today's friendship card,
Wanda

Tuesday, July 25, 2023

Artistically Inked, Anniversary Card, Stampin' Up!

Hello and welcome to my blog. Today I have a pretty find to share with you. I ran across this card on Pinterest and just had to make it. I'm still kind of stuck on white on white cards.  You can see the original card here. Please read on to see how the card was made.

The base of the card is a folded half-sheet of Basic White card stock. This card opens on the right and the fold is on the left.

A 4" x 5-1/4" piece of Basic White card stock was cut for the layer. It was textured using the "Painted Texture" embossing folder and then it was glued to the front of the card. I prefer to use glue because I have found that tape doesn't always hold well because of the texture. There just doesn't seem to be enough contact surface to make it stick well. Glue doesn't leave me with any questions of not staying in place. 

The next thing I did was to die cut the floral image from the "Artistically Inked" bundle using Basic White card stock. I cut tiny pieces of Dimensionals and set them in the wider areas on the back side. The upper part of the piece does not have any Dimensionals because the lines up there are just too thin. But the ones I added on the bottom area seemed to be enough to support the piece and help the top stay raised a bit.

Next I tied a white ribbon (retired) bow and set it in place on the front of the card using a glue dot.

The words were added next. I do not recall what set they are from, I had stamped them a while ago and they were in my stash. They were punched out using the "Double Oval" punch and set in place using Dimensionals. And the card was done.

This was a fun card to make and such a pretty one too!

Thank you SO very much for taking your time to stop in and see today's anniversary card,
Wanda

Monday, July 24, 2023

Lasting Joy, Dainty Delight, Timeless Arrangements, Sympathy Card, Stampin' Up!

Hello and welcome to my blog. Today I have a white on white card to share with you. Please read on to see how I made it.

The base of my card is a folded half-sheet of Basic White card stock. The card opens on the right and the fold is on the left.

I took a 4" x 5-1/4" piece of Basic White card stock for the layer and for the focal layer I cut a piece of Basic White card stock to measure 3-3/4" x 5".  I took this smaller layer and flipped it over on my scoring board and scored 5 lines. I scored them at 2-1/8", 2-1/4", 2-3/4", 2-1/2", and 2-5/8".  I turned it over and taped it to the 4" x 5-1/4" piece of Basic White.  Then that was set in place on the front of the card using Dimensionals.

Using the "Timeless Arrangements" bundle, I die cut some leaves and flowers using Basic White card stock. I set them aside.

I die cut two daisies from the "Dainty Delights" bundle. I glued them together at the center and I had die cut a circle for the center. I had thought about adding some embossing powder on a scrap piece of Basic White card stock and heat setting it and then die cutting the circle for the flower center. I thought it could use some color. Maybe if I ever make another one I'll consider it (if I remember!!!).

Next I cut two strips of Basic White card stock that measures 3/4" x 2-3/8" and another one that measures 3/4" x 3".  I took the 3" piece and textured it using the "Painted Texture" embossing folder.  I glued this piece down on the front of the card about 1-7/8" from the bottom of the top layer and 1/8" from the right edge on the top layer. 

The words are from the "Lasting Joy" set, they were stamped using Versa Mark ink and silver embossing powder.  Dimensionals were added to the back of this piece and it was set in place on the front of the card about 3/8" from the bottom edge of the glued textured strip and 1/8" over from the right edge of the textured strip.

Next the die cut flowers and leaves pieces were set in place with a little liquid glue, I used the Tombow Mono glue. Once all the little pieces were set in place where I thought they looked nice, I added the daisy to the upper left corner of the word piece and the card was done.

This was a very fun and easy card to make. I really like how it turned out. I think it would make a nice wedding card too!

Thank you SO very much for taking your time to stop in and see today's sympathy card,
Wanda

Sunday, July 23, 2023

Layering Leaves, Masterfully Made, Friendship Card, Stampin' Up!

Hello and welcome to my blog. Today I have a card using a layout I found at "Kards by Kadie". I liked how hers looked and thought I would make one myself to share with you. Please read on to see how I made today's card.

The base of the card is a folded half-sheet of Basic White card stock. This card opens on the bottom and the fold is on the top. 

The first thing I did was I cut the horizontal panels. The Mossy Meadow piece was cut at 5-1/2" x 2-1/4" and the Berry Burst layer was cut at 5-1/2" x 2". I textured the Berry Burst layer using the "Painted Texture" embossing folder. I glued the two pieces together and then taped that to the front of the card base.

Next I cut the vertical layers. The Mossy Meadow piece was cut at 4-1/4" x 2-1/4" and the Designer Series Paper (DSP) from the Masterfully Made 12" x 12" package was cut at 4-1/4" x 2".  I taped the two layers together.

I didn't have any fun ribbons, just some white so I took my light Granny Apple Green Blends pen and I colored in the ribbon. I set it aside to day. I was kind of surprised at how stiff the marker made the ribbon. But it colored it and that was what I wanted it to do.  I wrapped a 3" piece around the panels and taped the ends down on the back. I slipped a little piece of ribbon under the ribbon in the front and tied a knot. What I like about these knots is that you can move it across the taped piece of ribbon and place the knot anywhere you'd like it to go. Once the ribbon was added I glued the panels to the front of the card about 1" from the left edge. 

The words are from the "Layering Leaves" set and were stamped using Mossy Meadow ink on a 2-3/4" x 1-1/2" piece of Basic White card stock. I taped that to a 2-7/8" x 1-5/8" piece of Berry Burst and then that was taped to a 3" x 1-3/4" piece of Mossy Meadow card stock. Dimensionals were added to the back and the piece was set in place.

I didn't add any other embellishments, I am going to be mailing this card and I didn't want to pay for any extra postage.

This was a very fun, quick and easy card to make. This could also be used as a sympathy card using these same words. By changing the words it could be used for a number of other occasions. 

Thank you SO very much for taking your time to stop in and see today's friendship card,
Wanda

Saturday, July 22, 2023

Dainty Delight, Layering Leaves, Sympathy Card, Stampin' Up!

Hello and welcome to my blog. Today I have a fun layout to share with you. I found the card on Pinterest and I copied a lot of it but changed the colors. You can see the original card here.

The base of my card is a folded half-sheet of Balmy Blue card stock. This card opens on the right and the fold is on the left.

I cut two pieces of Basic White card stock to measure 4" x 5-1/4", one for the inside and one for the front. I taped them both in place.

The Designer Series Paper (DSP) is from the "Fresh as a Daisy" 12" x 12" package. I cut it to measure 4-3/4" x 1-1/2". I taped that in place on the left side of the card. I lined up the top, left, and bottom edges so they were equal around as much as I could by eyeing it.

A piece of Basic Black card stock was cut for the top layer. It measures 5-1/8" x 2-1/2". I taped that to the front of the card. I lined up the top, right, and bottom edges so they were equal around as much as I could by eyeing that piece too.

The stem and leaves were die cut next. The die is from the "Dainty Delight" bundle. I used Granny Apple Green to cut them. I also die cut a few leaves at the same time. I added a dot of glue to each leaf and set the piece in place on top of the Basic Black panel.

The die from the flowers is from the same set. I used a scrap piece of the same DSP that was used on the left side of the card. I added a dot of glue to the flowers and set them in place.  I'd recommend not adding the flowers until after the words were done. That way you will make sure you have room for the flowers. I glued the flower centers in place and colored over them with my Wink of Stella pen.

Then the words were done next. I had stamped them a while ago and I don't recall what set they came from, so if you know please let me know so I can include that in my post.  The original card used the thank you from the "Dainty Delight" set. The words I used were stamped using Basic Gray ink. I tied a bow using some linen thread and affixed it to the back of the word piece with a Dimensional. I added more Dimensionals to the piece and set it in place on the front of the card. That word piece measures 1" x 2-1/2". 

I added two leaves to the upper left on the word piece and a flower embellishments from the "Loose Daisy" package. I also added a leaf by the upper flower and one on the lower right side. And the card was done.

This was a fun layout to play with. I like the two different sizes and one being DSP. 

Thank you SO very much for taking your time to stop in and see today's sympathy card,
Wanda

Friday, July 21, 2023

Dainty Delight, Days To Remember, Birthday Card, Stampin' Up!

Hello and welcome to my blog. Today I have a wonderful find from Pinterest to share with you. You can see the original card here. There is no link to the card to see how it was made so I had to wing it. It's a pretty simple card and easy enough to figure out. Please read on to see how I made this card.

The base of the card is a folded half-sheet of Basic White card stock. I cut a 4" x 5-1/4" piece of Fresh Freesia card stock for the layer. And the top Basic White layer was cut at 3-3/4" x 5". I textured that layer using the "Painted Texture" embossing folder. Then I glued it to the Fresh Freesia piece.

Next I die cut the curved vine, flowers and flower centers from Basic White card stock. The pieces were colored in using Blends pens. I used dark Lemon Lolly for the flowers. I also colored some dark Daffodil Delight on the flowers. The flower centers were colored in using the light Pecan Pie pen. The leaves and stems were colored in using the light Granny Apple Green Blends pen. I colored a little bit of dark Granny Apple Green on the stems and leaves to give them some depth. And the flower tips were colored in using both light and dark Fresh Freesia Blends pens. These pieces were from the "Dainty Delight" bundle. 

To put the piece together, I set the Fresh Freesia flowers where they needed to go. I used a little bit of glue to hold them. Then I added a little dot of glue to all of the leaves and set the piece in place on the front of the card.

The flowers were added next and then the flower centers.

The words are from the "Days to Remember" set and were stamped using Fresh Freesia on a scrap piece of Basic White card stock. I punched them out using the "Double Oval" punch. I also punched out the scalloped circle using the same punch. It's really hard to punch that scalloped oval from the layer you're going to use on your card because on the punch it's so close to the oval and you could nick the edge of the layer. I just used a scrap of Fresh Freesia for that. I taped the ovals together. Dimensionals were added to the back and the piece was set in place on the front of the card.

Dimensionals were added to the back of the two layers and they were set in place on the card base and the card was done.

This was a fun, quick and easy card to make. I really like coloring with the Blends pens on the Basic White card stock. It gives the pieces some variegation on the pieces. This card has such a soft sweet look to it. The original card was pretty but I like the Fresh Freesia colors better.

Thank you SO very much for taking your time to stop in and see today's birthday card,
Wanda

Thursday, July 20, 2023

Dainty Delight, Thank You Card, Stampin' Up!

Hello and welcome to my blog. Today I have a pretty card to share with you that I found on Pinterest. I was unable to find a link to the card so I had to wing it. You can see the original card here. Please read on to see how I made this card. 

The base of the card is a folded half-sheet of Basic White card stock. There are two layers on the front. One is a 4" x 5-1/4" and the other is 3-3/4" x 5".  

The branch, leaves, flowers, and flower centers were die cut using the dies from the "Dainty Delight" bundle. I die cut the branch and leaves using Granny Apple Green card stock. The flowers and centers were die cut using Basic White card stock. I colored the flower centers using my dark Daffodil Delight Blends pen. 

I laid the long branch piece on top of the smallest Basic White piece so I could see where the words would need to go.  The words are from the same "Dainty Delight" set and were stamped using black Memento in,

Once the words were stamped I textured the piece using the "Painted Texture" embossing folder.

The branch was then glued in place on the front of the piece. I added a dot of glue on the back of each leaf and I set the piece in place. 

Then I used a small dot of glue and set the flowers in place. The flower centers were added next. Oh and don't forget to add the four little leaves floating around. They sure do add a lot, don't they?

I glued that piece to the other Basic White piece. Dimensionals were added to the back and it was set in place on the card base.  And the card was done!

This was a fun and quick card to make. I did enjoy making it and I could see myself making more.

Thank you SO very much for taking your time to stop in and see today's thank you card,
Wanda

Wednesday, July 19, 2023

Timeless Arrangements, Layering Leaves, Thinking of You Card, Stampin' Up!

Hello and welcome to my blog. Today I have a pretty card to share with you that I found on Pinterest. When I saw it I just knew I had to give it a try. You can see the original card here. I made a few minor changes.

The base of my card is a folded half-sheet of Basic White card stock. This card opens on the right and the fold is on the left.

I cut a 4" x 5-1/4" piece of Bubble Bath card stock. Before taping it to the card base, I stamped the words from the "Layering Leaves" set using black Memento ink and then I die cut it with a die from the "Timeless Arrangements" bundle. I stamped and cut from the center of the Bubble Bath piece. No one is going to know that it's not a solid piece of card stock under the layers.

Next I cut a 3-3/4" x 5" piece of Basic white card stock and textured it using the "Painted Texture" embossing folder. I didn't have the folder (yet) that was used on the original card, so I used what I had. I glued this piece to the Bubble Bath piece.

Then I took a quarter piece of Basic White card stock and I die cut the pieces from the "Timeless Arrangements" bundle. I die cut two of each of the images.  When I read how the card was made I was amazed that these pieces were colored using Blends pens. I was in the mood to color so I grabbed my light and dark Lost Lagoon and Bubble Bath Blends pend.

Using the dark Lost Lagoon I colored in the pieces with the leaves only. One is for the upper part of the word piece and one for the bottom.

Then the stems on the remaining 4 pieces were colored in using the light Lost Lagoon Blends pen. I colored the stems before coloring the flowers, even though the flowers are a lighter color. I figured that if the ink is not dry enough it will bleed and I'd rather have the pink bleed into the green than vice versa. Once the stems were colored I picked up the first one I colored, thinking it would be the driest and I colored in the solid flowers using my dark Bubble Bath Blends pen. And the last pieces were colored in using the light Bubble Bath Blends pen. 

Now it's time to assemble. I added glue to the lighter Bubble Bath piece and put one on the upper left corner and one on the bottom right corner. Then the darker Bubble Bath pieces were added and finally the leaves. These were all added to the word piece. I glued the word piece in place and the card was done.

Isn't it pretty? Such a good idea using Blends pens to color in the flowers and stems. It added a lot. It's just SO pretty!!!

Thank you SO very much for taking your time to stop in and see today's thinking of you card,
Wanda

Tuesday, July 18, 2023

Textured Floral, Birthday Card, Stampin' Up!

Hello and welcome to my blog. I have another card using the "Textured Floral" bundle.  It's a quick and simple card to make and it's one you could make a bunch of at a low cost. Please read on to see how I made this card.

The base of my card is a folded half-sheet of Basic White card stock. This card opens on the right and the fold is on the left.

I cut a 4" x 5-1/4" piece of Mossy Meadow card stock for the layer. Before I glued it to the front of the card base, I die cut the leaf cluster from the "Textured Floral" bundle.

A 3-7/8" x 5-1/8" piece of Basic White card stock was cut for the front focal piece. I textured it using one of the folders in the "Stripes & Splatters" set. These folders are smaller than the standard ones but they are great for doing an upper or lower part of a card. Plus if you plan it right you can cover a quarter sheet nicely too. Once the texture was added I looked for a fun piece of Designer Series Paper (DSP).

The DSP is from the "Masterfully Made" 12" x 12" package. I cut it at 3-7/8" x 1-1/2" and that was taped to a 3-7/8" x 1-3/4" piece of Mossy Meadow.  Before I glued that to the front of the card I took a piece of white ribbon I had and wrapped the ends around the sides and taped them down. I slipped the die cut leaf cluster under the strip.

The words are from the "Textured Floral" set and were stamped using Mossy Meadow ink.

I thought the card could use some type of elements so I took some small pearls and colored them using the dark Mossy Meadow Blends pen and I set them in place on the front of the card. I debated whether to use Mossy Meadow or to color them using Berry Burst. I think Berry Burst would have been prettier.

This was a fun, quick, and easy to make.

Thank you SO very much for taking your time to stop in and see today's birthday card,
Wanda

Monday, July 17, 2023

Textured Floral, Birthday Card, Stampin' Up!

Hello and welcome to my blog. Today I have a fun card to share with you that I found on Pinterest.  There's a link there to take you to a video to make the card. I find videos a bit difficult to follow because I don't have the time to watch the whole thing first before I start in with my card. There's too much chit chat on them for me. I prefer to get right down to making the card, but that's just me. I would have done things a bit differently had I had the time to watch first.  I will share with you what I would do and did do differently. You can see the original card here. Please read on to see how the card was made.

The base of the card is a folded half-sheet of Basic White card stock. The Daffodil Delight layer was cut at 4" x 5-1/4".  Before I began my card I had cut my focal piece at 4" x 5-1/4" and cut it down to 3-7/8" x 5-1/8" after I was done stamping.

The first thing we did was we stamped the Old Olive greens in the middle left flower cluster. Then the cluster was stamped using Crushed Curry.  My ink was pretty wet so the flowers are pretty dark. In the video there's a part where she shows how to move the ink in the pad to one side so you have a bit dryer area to stamp on. I used a plastic spoon to move my ink. The ink does go back after the pad sits (more like overnight). 

Next the largest flower was stamped using Wild Wheat ink. The center of that flower was stamped using an image in the set (I forgot to mention the set is "Textured Flowers") and it used the same Wild Wheat ink. Then the greens were stamped at the bottom part of that flower using Mossy Meadow ink. 

The Lemon Lolly flowers were stamped next. She had us stamp two of them, one on the left and one on the bottom right. Someone suggested that a green be stamped in the center of those flowers. I didn't like it and I stamped over it using Daffodil Delight. If I had watched the video first I would have omitted the Old Olive and added Daffodil Delight instead, it would be just enough brightness to show the flower center. Covering it helped a bit but it's still too dark. The leaves were stamped using Mossy Meadow ink on two sides of that Lemon Lolly flower.

There was one more flower in the set and that was used on the center right edge using Crushed Curry ink that was stamped off once. 

The words were stamped next and are from the same "Textured Floral" set using Pecan Pie ink. She was saying something about the open area between the largest flower, the cluster, and the Daffodil Delight flower. I didn't like that open area so I stamped another Lemon Lolly flower there.

The splatters were added using Pecan Pie ink that was stamped off once. 

For the bling, I added some Old Olive rhinestones I had from the "Noble Peacock" (retired) rhinestones.

The layers were taped together and the card was done. It was a fun card to make and I was glad I ran across it because I had been struggling with this set.

Thank you SO very much for taking your time to stop in and see today's birthday card,
Wanda

Sunday, July 16, 2023

Dainty Delight, Layering Leaves, Friendship Card, Book Card Technique, Stampin' Up!

Hello and welcome to my blog. Today I have a friendship card to share with you. I had a lot of fun making it and was thrilled that it turned out they way I imagined it! Please read on to see how I made todays card.

The base of my card is a folded half-sheet of Basic White card stock. I cut it in half on the short side so once cut it measured 4-1/4" x 11". The fold is on the left and it opens on the right. I scored it at 4-1/2", 5-1/2", and 6-1/2".  Fold the piece in half on the 5-1/2" score.  I added glue to the area between the 5-1/2" score line and 6-1/2" score line. Then I closed the card. Now you have a "Book Card". Super simple technique. Now you just decorate as you would like.

I wanted to make a ring of flower so I die cut 22 flowers from the "Dainty Delight" bundle. I glued two together so I ended up with 11 flowers. I also die cut 9 leaves using Mossy Meadow card stock.

A 4-1/4" x 4" piece of Basic White card stock and a 3/4" x 4" piece of Basic White card stock for the left side of the "book".  

The Designer Series Paper (DSP) is from the "Fresh As A Daisy" 12" x 12" package. I cut one at 4" x 3-3/4" and a 1/2" x 3-3/4".  I taped the DSP strip to the Basic White strip and then taped that to the left side of the card. 

I lined up the two larger pieces and used some post it tape to hold them together. Then I took the second and third largest circle dies from the "Layering Dies" set and cut my circles. First I used the smaller one, centering it as much as I could on the taped pieces. After cutting them together, I took the larger one and lined it up on the piece of DSP. I did tape this down too, I didn't want it moving on me while I was cutting it. I didn't save the ring of DSP cutting it created.  I set the Basic White piece on top of the card front and I lightly traced around it onto the card base. I needed to see where I could stamp the words. The words are from the "Layering Leaves" set using black Memento ink. I let the ink dry a bit before I erased the lines. I have a kneadable eraser, it removes the graphite with out pilling your paper. It's one of the best erasers you can use. I highly recommend you getting one. You can get them at your local craft store where you'd find drawing pencils. I taped the DSP circle piece to the Basic White circle piece. I added Dimensionals to the back and set it in place on the top of the card base.

Now for the flowers. I added a dot of glue to the back of the flowers and place them around the ring. I forgot to mention the flower centers. I had die cut them when I die cut the flowers and I colored them in with my light Lolly Lemon Blends pen. You can also use Lemon Lolly card stock but I didn't have any scrap. I glued the centers on each flower.

Next the leaves were added by adding a little bit of glue and tucking them under the flowers. And the card was done.

I am pleased with the way the card turned out and I can't wait to mail it out.

Thank you SO very much for stopping in and seeing today's friendship card,
Wanda

Saturday, July 15, 2023

Dainty Delight, Art Gallery, Sympathy Card, Stampin' Up!

Hello and welcome to my blog. Today I'm going to share with you a simple and quick sympathy card. It could be sent out for other reasons but I made it with a sympathy card in mind. Please read on to see how I made this card.

The base of the card is a folded half-sheet of Basic White card stock. The card opens on the right and the fold is on the left.

A 4" x 5-1/4" piece of Basic White card stock was cut for the top layer. I took this piece and set it on my scoring board and scored the lines that go around the flower. I scored the long lines at 2-1/4" and 3-1/2".  I started them about 7/8" from the top and the score line is 3-3/8" long. I turned the piece and scored the top short lines at 7/8" and4-1/4". These are the easy ones because you just stop when you meet up with the long lines. Turn it over and the lines are now raised! Magic!

The words were stamped next. They are from the "Art Gallery" set and were stamped using Mossy Meadow ink.

The flower is from the "Dainty Delight" bundle. I die cut two flowers and glued them together, offsetting them a bit. I also die cut the center along with the flower and I colored it in using my light Lemon Lolly Blends pen.

The stems and leaves were die cut using Mossy Meadow card stock. The stem piece has six flower buds behind it. I was just going to cut them off but instead I kept them and added my little dots of glue on it to hold the flower in place. I used Mono glue for that. Once the flower was glued on, I used a tiny dot of glue for the flower center.

Then the leaves were added. I just added a tiny dot of glue to the end of the leaf and set the stem on top. It seemed to work the best for me.

A Dimensional was added to the back of the flower and the piece was set in place inside the scored area.

Dimensionals were added to the back of this piece and it was set in place on the front of the card.  And the card was done.

This was a very quick and simple card to make. A little tip here, you can use a pencil to draw little dots where to start and stop the scoring, it's going to be on the back and no one will see it. That should make your scoring easier if you are hesitant about it.

Thank you SO very much for taking your time to stop in and see today's sympathy card,
Wanda

Friday, July 14, 2023

Dainty Delight, Go To Greetings, Thank You Card, Stampin' Up!

Hello and welcome to my blog. Today I have a fun card to share with you that I found on Pinterest. You can see the original card here. There is no link to where it came from so there are no instructions to follow. Please read on to see how I made the card. I did make a few little changes.

The base of my card is a folded half-sheet of Lemon Lolly card stock. This card opens on the right and the fold is on the left.

I cut a 4" x 5-1/4" piece of Basic White card stock and taped it to the inside of the card.

On the front I cut a 4" x 5-1/4" piece of Mossy Meadow card stock and a 3-7/8" x 5-1/8" piece of Basic White card stock. I took that Basic White card stock piece and textured it using the "Painted Texture" embossing folder. I glued the Basic White piece to the Mossy Meadow piece and then I taped that to the front of the card.

Next I die cut the stitched circle using the largest die from the "Stylish Shapes" die set.

The stems were die cut next. They are from the "Dainty Delight" bundle. I used Mossy Meadow for them. I had actually cut two but found out that once the piece on the left was cut the piece on the right is the rest of that long stem. Do you smell a future card using that stem?  LOL I glued the stems to the circle. I added a dot of glue to each leaf and hoped for the best!  It worked!

Then the flowers were die cut. I used Lemon Lolly card stock for the flowers. On my card I doubled up on the daisies so they looked fuller. I glued the daisies together and then using another dot of glue I set them in place on the stems. The double flowers were not cut apart and were set in place with a dot of glue under each one.

The center of the daisies were colored in using my light Pumpkin Pie Blends pen and the smaller daisies were colored using the dark Mossy Meadow pen. I had die cut those pieces at the same time I die cut the flowers. After gluing the Mossy Meadow pieces in on the half daisies, I used the finer point of the Blends pen and let it bleed a little above the piece to give it a fuzzy more real look.

And for the flowers that are connected, I took the light Pumpkin Pie Blends pen and just dew in dots on each one and that was it for the flowers. Dimensionals were added to the back and the circle was set in place on the front of the card.

A white ribbon (retired) bow was tied and glued to the bottom of the circle and it covered the ends of the flower stems. 

The words are from the "Go To Greetings" set and were stamped using black Memento ink on a scrap piece of Basic White card stock.. I punched them out using the "Double Oval" punch and the Basic White scalloped oval was made using the same punch. The two pieces were taped together, Dimensionals were added to the back and the piece was set in place on the front of the card.  And the card was done.

Isn't it pretty? I had a lot of fun making this card, even though there was a lot of die cutting.  But SO worth it!

Thank you SO very much for stopping in to see today's thank you card,
Wanda

Thursday, July 13, 2023

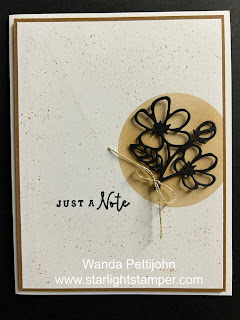
Darling Details, Note Card, Stampin' Up!

Hello and welcome to my blog. Today I'm going to share a card with you that looked SO much better in my head. But you all know I share them all with you. The good, the bad, and the ugly.  This one just doesn't seem to have any umph to it! I even speckled the background to help improve it but it didn't help! Please read on to see how I made this card and maybe you can improve on it.

The base of my card is a folded half-sheet of Basic White card stock. The card opens on the right and the fold is on the left.

I cut a 4" x 5-1/4" piece of Pecan Pie card stock. And I cut a 3-7/8" x 5-1/8" piece of Basic White card stock. I actually cut two so I could use one as a template.

I took the 2-1/8" circle die from the "Layering Circles" die set and I die cut one of the pieces of Basic White card stock. I made sure I cut off some of the edge. The two pieces of Basic White card stock were taped together with some painters tape so they wouldn't move. I took my blending brush and inked it up using Pecan Pie ink and scrubbed it over the die cut circle area. The top piece was removed and I had the stenciled Pecan Pie circle on my top layer.

The flowers were die cut from the "Darling Details" bundle using Basic Black card stock. I tied a piece of linen thread to the bottom. I laid the piece on the circle and then thought it would look better popped up. So I cut up some pieces of Dimensionals and added them to the more solid areas of the piece. I laid it on top of the circle and thought it looked better that way. Before setting it in place, I stamped the words from the same "Darling Details" bundle using black Memento ink. 

Once the words were done I took my Pecan Pie marker and flicked on some splats all over the piece. The piece was then taped to the Pecan Pie layer. Dimensionals were added to the back and set in place on the front of the card base.

The flower piece was added the card was done.

It was fun to make but not what I had in mind.

Thank you SO very much for taking your time to see today's note card,
Wanda

Wednesday, July 12, 2023

Sentimental Park, Thinking of You Card, Stampin' Up!

Hello and welcome to my blog. Today's post is a thinking of you card I made using the "Sentimental Park" bundle. Please read on to see how the card was made.

The base of my card is a folded half-sheet of Night of Navy card stock. This card opens on the bottom and the fold is on the top. 

I cut a 4" x 5-1/4" piece of Basic White card stock and textured it using the "Painted Texture" embossing folder. I glued to this to the Night of Navy card base.

Next I took a piece of Designer Series Paper (DSP) from the "Countryside Inn" 12" x 12" package. I cut it at 1-1/4" x 5-1/4" and I cut a Night of Navy layer that measured 1-1/2" x 5-1/4".  I taped the two pieces together and then glued them to the front of the card about 3/4" from the Night of Navy bottom edge. 

The pretty floral tag piece is from a die in the "Sentimental Park" bundle. I die cut it using Night of Navy card stock. I also die cut the Basic White piece from another die in that set. I stamped the words from the "Sentimental Park" set using Night of Navy ink on the "thinking of YOU" words and Boho Blue for the flower. This piece slips in the sides of that floral piece. So fun! I added Dimensionals to the back and set it in place on the front of the card.

Crystal rhinestones were added to the Night of Navy flowers plus the stamped Boho Blue one. 

A 4" x 5-1/4" piece of Basic White card stock was added to the inside and the card was done.

After adding the photo to my blog, I thought that stamped flower looked pretty blah so I took my Wink of Stella pen and the Boho Blue ink pad and colored the flower in. It's now a soft blue and it has a bit of sparkle to it too!

Thank you SO very much for taking your time to stop in and see today's thinking of you card,
Wanda

Tuesday, July 11, 2023

Petal Park, Go to Greetings, Birthday Card, Stampin' Up!

Hello and welcome to my blog. Today I have a fun, quick, and easy card to share with you. Please read on to see how I made this card. 

The base of my card is a folded half-sheet of Basic White card stock. This card opens on the right and the fold is on the left.

I cut a 3-3/4" x 5" piece of Basic White card stock and I textured it using the "Painted Texture" embossing folder.

A 1-1/4" x 5" piece of Berry Burst Designer Series Paper (DSP) from the "Gorgeous Gingham" 6" x 6" stack. I glued that strip to the left side of the textured piece of DSP. Then I set this piece in place on the card base using Dimensionals. 

Next I die cut the scalloped rectangle Basic White piece using the die from the "Color & Contour" bundle. 

The leaves were stamped by using Granny Apple Green ink on the outline leaves image. It was set up in my Stamparatus and stamped that image twice to get a darker print. Then I stamped the leaves by stamping off once and then on the card stock. Again I had set that up in the Stamparatus.

The outline of the flowers were stamped using Cherry Cobbler ink and the flowers were stamped using Berry Burst ink. I fussy cut the flowers out. I set them aside.

The words were stamped next. They came from the "Go to Greetings" set using Berry Burst ink.

Dimensionals were added to the scalloped rectangle piece and it was set in place on top of the textured piece.

The flowers were added next using Dimensionals and the card was done.

This was such a quick card to make. I love this layout, it's a great way to use up some of those scraps of DSP.

Thank you SO very much for taking your time to stop in and see today's birthday card,
Wanda

Monday, July 10, 2023

Petal Park, Days To Remember, Birthday Card, Stampin' Up!

Hello and welcome to my blog. Today I have a birthday card to share with you using the "Petal Park" stamp set. I haven't played with that set much. It's an easy set to work with so I have no excuse other than I have too many stamp sets!  It's time to clean out some of my sets and put them up for sale in my web store. I'll keep you posted on that. But for today I will be sharing how I made this card. Please read on.

The base of my card is a folded half-sheet of Basic White card stock. This card opens on the right and the fold is on the left.

I cut a 4" x 5-1/4" piece of Lemon Lolly card stock and textured it using the "Painted Texture" embossing folder. I glued it to the front of the card base.

Next I die cut the scalloped piece from the "Color & Contour" bundle using Basic White card stock. I stamped the outline of the leaves image using Granny Apple Green. I set it up in my Stamparatus because I new I needed to stamp it twice to make it dark enough. I did not want to use a different color of green for this.  Once that was stamped I took the solid leaves image and inked it up using Granny Apple Green ink and I stamped off once before stamping on the outline leaves image. I added Dimensionals to the back and set the piece aside.

Then the flowers were stamped. I set the stamp up in the Stamparatus so I could line up the flowers the same way I did the leaves. I used Daffodil Delight for the outline of the leaves and I used Lemon Lolly for the solid part. I did stamp the Daffodil Delight image twice but I did not stamp off with the Lemon Lolly. I repeated the stamping of the flowers on a scrap piece of Basic White and I fussy cut them out. I don't remember if there is a die cut for this or a punch but I didn't get it, I figured the flowers were simple enough to fussy cut without the extra purchase. I added a Dimensional behind each one and I set them in place over the stamped flowers. In hindsight I realized I didn't need to stamp the flowers with the leaves, they don't show at all. Just the fussy cutting of them would have been enough. (note to self!)

The words are from the "Days to Remember" set and were stamped using black Memento ink on a scrap piece of Basic White card stock. I punched them out using the "Double Oval" punch. I also punched out a Granny Apple Green scalloped oval using the same punch. I taped the words to the scalloped oval and added Dimensionals to the back.

To assemble the card I set the scalloped rectangle in place and then the flowers were added either her or before the assembly, it's your call there, it doesn't matter.

The words were added next. I only added Dimensionals on the upper half of the oval.

I gotten some cute "Fine Sparkle" adhesive gems (retired) as a gift and thought I'd use them on the center of the flowers. They were just perfect for that!  And the card was done.

This was a fun and quick card to make. I like the colors too, they have a calm feel to them.

Thank you SO very much for taking your time to stop in and see today's birthday card, 
Wanda
Sunday, July 09, 2023

Sentimental Park, Countryside Inn, Birthday Card, Fun Fold, Stampin' Up!

Hello and welcome to my blog. Today I'm going to share with you how to make this double point fun fold. I'm not a big fan of fancy folds because some of them need to have instructions for the one who receives them. For example, like the ones that stand up. Not everyone knows it's a stand-up card.  Today's card doesn't need any instructions, it's pretty straight forward. It's different and it was fun to make. You may want to check out a YouTube video on how to make this card. I will do my best to explain.

The base of the card is a 4-1/4" x 5-1/2" piece of Boho Blue card stock.

The Basic White inside piece on my card measures 8" x 5-1/4", this piece needs to be folded in half. On the front of it, in the center I stamped "You". The inside is blank for you to write whatever you'd like.

The points were made by taking two pieces of Designer Series Paper (DSP) from the "Countryside Inn" 12" x 12" package and cut them at 3" x 4" each.  Then score at 2" on the short side, you will be making a 4" score line. With the side of the DSP you like facing down, fold that scored piece up. Then take the upper left corner of the piece to the center of the whole piece and repeat for the other side. It's kind of like when you start making a paper sail boat (remember those? does anyone make them anymore? I'm old!! LOL).  You will repeat this for the other piece. I glued the points of my pieces down so they wouldn't come open. 

Next you are going to take those folded points and glue that 2" part to the backside of the Basic White folded piece. Do this on the top and the bottom. There, your points are now made. This piece is then taped or glued to the Boho Blue piece.

Now you can decorate the front as you will. The Basic White piece in the center of the layer was textured using the "Timber" embossing folder. The piece was then glued to the Boho Blue piece behind it. 

The cute flowers are from the "Sentimental Park" bundle and were die cut using Basic White, Boho Blue, and Night of Navy card stock. I randomly put them together and then added them to the layered panel. Once they were where I thought they looked the best, I added pearls to the centers.

The words are from the "Sentimental Park" bundle and were stamped using Night of Navy ink on a scrap piece of Basic White card stock. I trimmed it to measure 2-1/8" x 7/16".  And the Night of Navy layer behind it measures 2-1/4" x 9/16". I taped the two pieces together and set it in place on top of the panel. 

Then the panel was set in place on the front of the card, centering it as best as I could. I used three Dimensionals at the top to hold the panel in place.

On the bottom I had die cut a Basic White flower and a Night of Navy detailed piece that was glued on top. I added a small Dimensional to the bottom part of the flower and before sticking it to the bottom part of the point, I put the panel down flat to see where this flower would catch it to hold it shut.  I added a pearl to that bottom flower and the card was done.

This was a fun card but like I said, I'm not big on fancy folds so I doubt I'd be making another one any time soon.

Thank you SO very much for taking your time to stop in and see today's fun fold birthday card,
Wanda

Saturday, July 08, 2023

Sentimental Park, Countryside Inn, Birthday Card, Stampin' Up!

 Hello and welcome to my blog. Today I have a fun and easy birthday card to share with you. Please read on to see how I made this card.

The base of the card is a folded half-sheet of Basic White card stock. This card opens on the bottom and the fold is on the top.

I cut a 4" x 5-1/4" piece of Boho Blue card stock and on top of that I taped a 3-7/8" x 5-1/8" piece of  Designer Series Paper (DSP) from the "Countryside Inn" 12" x 12" package. 

Next I took a 1" x 7" piece of Boho Blue card stock and taped it to a 1-1/8" x 7" piece of Basic White card stock. I taped it diagonally across the DSP layered piece and then trimmed the ends with a scissor. I then set this piece on the card base using Dimensionals.

The words are from "Sentimental Park" set and were stamped using Night of Navy ink. I die cut them with the stitched hexagon die from the "Sentimental Park" bundle.  

The back layer behind the word piece is from the same bundle and I die cut it using Night of Navy card stock. 

I picked up several of the flower dies and die cut them using Basic White, Night of Navy, and Boho Blue card stock. I glued them to the Night of Navy piece. Then the Night of Navy piece was set in place on the front of the card using Dimensionals.

The two larger open flowers were added using glue. Pearls were added to the flowers and a few to the Boho Blue strip and the card was done.

This was a very fun card to make. I loved playing with all of the flower pieces!

Thank you SO very much for taking your time to stop in and see today's birthday card,
Wanda

Friday, July 07, 2023

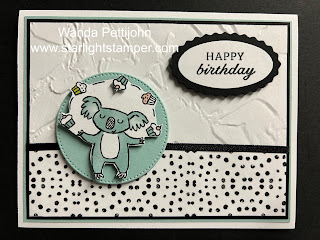
Zoo Crew, Days To Remember, Children's Birthday Card, Stampin' Up!

Hello and welcome to my blog. Today I have a fun, quick, and easy children's card to share with you. Please read on to see how this card was made.

The base of the card is a folded half-sheet of Basic White card stock. I cut a 4" x 5-1/4" piece of Pool Party card stock. Then a 3-7/8" x 5-1/8" piece of Basic Black card stock was cut, and the top layer is a 3-3/4" x 5" piece of Basic White card stock was cut.

I took the top Basic White layer and textured it using the "Painted Texture" embossing folder.  A 1-1/4" x 5" strip of Designer Series Paper (DSP) was cut from a sheet in the "Zoo Crew" 12" x 12" package. I glued that to the bottom of the Basic White piece. Then that piece was glued to the Basic Black piece. I took some Basic Black (retired) ribbon and taped the ends onto the back of the piece.

Before attaching the Basic Black layered piece to the Pool Party piece, I die cut the stitched circle from the center of it. I used the 3rd largest one. Once the Basic Black piece was attached to the Pool Party piece, I taped it all to the Basic White card base.

The cute little koala bear was fussy cut from a different sheet in the "Zoo Crew" package.  I had a cupcake that was chopped off from the factory cutting so I fussy cut it out and used a piece of Dimensional and attached it to the cupcake and matched it up with one in the juggling circle! It's too bad there was only one, it would have been fun if all of them could have had one pop up.  But I'll take the one because I had already cut it and it was fun!  The koala bear was set in place on the Pool Party circle using Dimensionals and the circle was set in place on the front of the card using Dimensionals.

The words are from the "Days to Remember" set and were stamped using black Memento ink on a scrap piece of Basic White card stock. I punched them out using the "Double Oval" punch. I also punched out a scalloped Basic Black circle using the same punch. I taped the words to the scalloped oval and added Dimensionals to the back and the piece was set in place on the upper right of the card and the card was done.

This was a quick and fun card to make. Such a cute koala bear, huh?

Thank you SO much for taking your time to stop in and see today's children's birthday card,
Wanda

Thursday, July 06, 2023

Let's Go Fishing, Go To Greetings, Masculine Birthday Card, Stampin' Up!

Hello and welcome to my blog. Today I had a lot of fun making this card and I'm excited to share it with you. Please read on to see how I made it.

The base of my card is a folded half-sheet of Basic White card stock. I cut a 4" x 5-1/4" piece of Basic White card stock and textured it using the folder from the "Stripes & Splatters" set. These are not as wide as a regular folder so I had to run it through twice to get it to cover the whole piece. I added Dimensionals to the back and set it in place on the front of the card base.

Next I took some Designer Series Paper (DSP) from the "Let's Go Fishing" 12" x 12" package and I die cut four circles using the second smallest circle die from the "Stylish Shapes" set. I also die cut a Basic White circle using the third smallest circle die from the same set.

I lined up the circles across the front of the card. I glued the four smaller circles in place and I set the Basic White circle in place using Dimensionals. 

I fussy cut a fish from a sheet of DSP from the same package. I set it in place on the center circle using Dimensionals.

The words are from the "Go To Greetings" set and were stamped using Mossy Meadow ink on a scrap piece of Basic White card stock. I die cut them using the ribbon die in the same "Stylish Shapes" die set. I set them in place using Dimensionals and the card was done.

This was such a fun card to make. I love every minute of creating it. My masculine card stash is very low and this will be a nice addition to it.

Thank you SO very much for taking your time to stop in and see today's masculine card,
Wanda

Wednesday, July 05, 2023

Zoo Crew, Layering Leaves, Friendship Card, Stampin' Up!

Hello and welcome to my blog. Today I have an "interesting" card to share with you today. I say "interesting" because it didn't turn out the way I was hoping it would. The card in my head was SO much better. LOL I always share with you how I make my cards and this one is no different (luck you!!!  LOL).

The base of the card is a folded half-sheet of Basic Black card stock. This card opens on the bottom and the fold is on the top.

I cut a 4-1/2" x 3-1/4" piece of Basic White card stock. I cut a 4" x 1-7/8" piece of Designer Series Paper (DSP) from the "Zoo Crew" 12" x 12" package. I colored in the flower using my Daffodil Delight, Highland Heather, Balmy Blue, Granny Apple Green, and Bubble Bath markers. Then I taped it to a 4-1/4" x 2-1/8" piece of Basic Black card stock. I taped that to the bottom of the Basic White piece and then I centered that on the card base.

Next I fussy cut two bunnies from the "Zoo Crew" DSP. I set them in place with Dimensionals on a Basic Black stitched circle that I die cut using the third smallest die from the "Stylish Shapes" set. I added Dimensionals behind the circles and set them in place on the front of the card.

Then the words.  Yup, the words.  UGH. They were supposed to go down on the left bottom area but they got lost in the DSP. SO, with the glue on the back and all, I peeled it up and stuck it to the upper part of the card. Oh, the words are from the "Layering Leaves" set. I had stamped them using black Memento ink and fussy cut them out. Had I knew the words were going to be going there, I would have just stamped them directly to the Basic White piece. 

A 4" x 5-1/4" piece of Basic White card stock was added to the inside and the card was done.

I didn't mind the fussy cutting and I thought the bunnies looked cute on the circles. And it was kind of fun to color in the flowers on the DSP but the words just look odd being fussy cut and then glued in place. It's just an interesting card!

Thank you SO very much for taking your time to stop in and see today's card,
Wanda

Tuesday, July 04, 2023

Petal Park, True Beauty, Friendship Card, Stampin' Up!

Hello and welcome to my blog. I found a fun card on Pinterest using the "Petal Park" set and I thought I'd give a try.  You can see the original card here. I did change the colors. Please read on to see how the card was made.

The base of the card is a folded half-sheet of Basic White card stock. This card opens on the right and the fold is on the left.

I cut a 3-3/4" x 5-1/8" piece of Boho Blue for the layer and I textured it with the "Painted Texture" embossing folder. I glued that to the card base.

Next I cut a 2-3/4" x 4" and stamped the leaves from the "Petal Park" set. I stamped the outline piece first, I stamped it twice to get it nice and dark using Granny Apple Green. Then I stamped the leaves but I stamped off first, I wanted them to be light.

Then I stamped the flowers on a scrap piece of Basic White card stock using Boho Blue ink. I stamped the outlines first, like I did with the leaves. I did stamp them twice, I wanted them dark. And the petals were stamped the same way by stamping off once. I didn't like how light they turned out so I added a drop of Boho Blue ink on my clear block and I squeezed out a bit of fluid from the "Wink of Stella" pen. I mixed the two well and just colored over the flower petals.

The centers of the flowers were colored in using my Lemon Lolly marker. 

The words are from the "True Beauty" set and were stamped using Boho Blue on a scrap piece of Basic White card stock. I die cut them using the ribbon die from the "Stylish Shapes" set.

I added Dimensionals behind the Basic White panel, all the flowers, and the word piece. I set the panel on the front of the card first. Then I added the flowers, and then the word piece.  And that was it, the card was finished.

This was a fun card to make and I really do like the blue sparkle on the flowers.

Thank you SO very much for stopping in to see today's friendship card,
Wanda