Pin It

Monday, November 30, 2009

One Man's Junk....

Actually this was beyond junk, it was really garbage!!! Recycling garbage of course. And I punched up the recycling part of it.

Some months ago I had gotten a garden flag holder from my dear friend Ann. And a cute kitten flag that read "welcome to my garden." Well when I was out shopping I had found a fall one on clearance and hung that one up. Then I was out shopping with hubby and found this cute snowman one. Well.... you know me and snowmen!!! I just HAD to have it and it really wasn't all that expensive. Plus there was only one left and that alone tells me that I just HAD to buy it!!! SO I got home with this cute flag and I proceeded outside to the flag holder and put it on. It's just TOO darn cute!!! I just LOVE looking at it and in putting it up I was REALLY hoping that it would help make it snow here. I even wore my snowflake socks!!! But alas, no snow. Though we did get some last night and it's almost all gone today. That was just a tease.

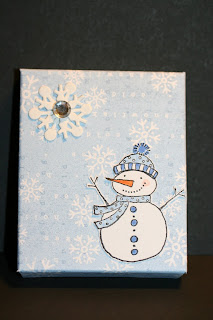
Anyway, I came back indoors and was in the process of tossing the plastic part of the packaging and was going to put the cardboard part in the recycling bin when I got a brilliant idea that I could make a card with it.

I headed to my workroom (only to look at the BIG mess I had left from my last little project!!!) and I set the cardboard piece down and walked out!!! I cleaned up my mess later and then worked on the card.

I took out my album of SplitCoastStampers Sketch Challenges that I print out every week and I paged through it looking for a layout that would work with this little image! I found one close enough and I just worked a bit with the sizes and it turned out like this! I kept it simple. It didn't need words because it already had them in the picture. Adding anything else to it didn't make it as sweet looking as it is without any other embellishments. I like the simplicity of it plus I like that I made a card and didn't touch an ink pad. Something that doesn't happen very often at all.

The background matched the Almost Amethyst card stock perfectly! You can't ask for more than that when doing something like this!!!

So now you need to keep an eye on what you toss in the garbage or recycling bin!!!

Thank you SO much for visiting today,
Wanda

Sunday, November 29, 2009

Santa Theme Gift Card Holder

Adding yet another item to the growing list of "Santa Themed" items! Here I created a gift card holder. There are over a dozen "Santa Theme" items on my blog. Just click here to view them.

These don't take long to make either. Well, that all depends on you and how much decoration you want to add to it. You can use real fur, flocking, liquid applique or other textures on the white area. You can add on real buttons or paper ones. A real buckle or a paper one.

And here is how to make it!

Cut your card stock 4-1/2" x 7-1/2"
Score at 1-3/4" and 4-3/4"

Fold in all score lines.

The 1-3/4" part is the pocket. Fold that piece up and glue the edges. Don't use a lot of glue, you do want to have room to slide the gift card in. Glue works better here than tape because tape has a tendency to pull apart from the card stock when the gift card is inserted. So to keep the item looking it's best I just used glue.

I took clothespins to hold the edges down while I got the rest of my elements ready for the front.

I used a scallop punch and made the bottom part of Santa's coat. I have a GREAT Sizzix buckle die so I cut out my buckle. You can do yours by using a square piece of More Mustard card stock and then either using the "Double Rectangle" punch or a craft knife to make the opening for the ribbon. You can also just use a square piece of More Mustard and cut a small square piece of black card stock the width of the ribbon and glue or tape it on top of the More Mustard piece. It will give the illusion of a buckle. So regardless if you have the fun die cuts or not you can still make this gift card holder!

It's as simple and as quick as that. I think the part that took the longest to make was the white "fluffy" stuff at the bottom. Had I had any of that fun fur stuff I would have used that since this gift card holder wasn't going to be going through the mail.

Have fun making these! They are a nice way to dress up your gift cards!

Thank you SO much for visiting today,
Wanda

Saturday, November 28, 2009

Blog Candy, I Almost Forgot Again!!!

I bet you thought I forgot about this weeks Blog Candy item! Well, you know me all too well!!! LOL I almost did!

This week I am adding the C-Thru "Daja Views "Templates & Edger Journaling #1 package. Most of the items I have for the New Year's Day Blog Candy are for mostly card making so I thought I would add something in for the scrapbookers too!! These would work on cards too but are a BIG help in the journaling part of your scrapbook if you like to write by hand. I myself chose to have the computer do my writing for me since my writing starts out nice about the first line or two and then gets rushed and the lettering somehow gets smaller!! The computer doesn't do that the more you ramble on at the keyboard!! See, proof right here!!! LOL

So on New Year's Day I will have the "Official Blog Candy" post where you can leave your comment or maybe an answer to a question!!!

Stay Tuned!
(To view the other items in the GREAT give away just click here.)

Have a great day,
Wanda

Bulb Card Money Holder

While blog hopping I ran across this most adorable money holder. I was at Carolina's Creative Pad and this "Bulb Money Holder" caught my eye.

It's easy enough to make too. You just need a 4" x 8" piece of decorative paper. The paper I used here is from the Stampin' Up! "Merry Moments" package. Her instructions show you how to cut and fold the decorative paper. How to add the ribbon to make it look like a package and how to make the bulb that holds the money.

You do need the Nestabilities to make the scallop. The circle can be done using the "Circle Scissor." I bought one and have yet to use it. I think I will get some use out of it when I start scrapbooking. Those 12" x 12" pages need a LOT of filling up!!!

Anyway back to the bulb. There was one part of the bulb I thought could use a little improvement on in the construction of it. It is the part where you thread/cording the cord through the bulb top with is made using the "Tab" punch. If you cut your thread/cording first and tie the knot in it you can add it to the bulb top when you glue the bulb top in place instead of trying to thread it through later. Once it's in the bulb top you just slide it so the knot is inside and no longer visible. Other than the thread/cording thing everything else was easy enough to do.

Hop on over to her site to get the instructions to make this adorable "Bulb Money Holder."

Thank you SO much for visiting today, Wanda

Friday, November 27, 2009

Silvery "Gifts of Christmas"

The day that Kay brought over her Stampin' Up! "Gifts of Christmas" set I also made this card with it.

I don't like this card as much as I liked the other one but this one didn't really take as long to make.

I LOVE embossing with silver. It melts so nice and smooth.

Embossing seems to give the card a very elegant look to it.

I also used the Stampin' Up! "Serene Snowflakes" set. I hadn't used that one yet and was SO looking forward to it. You all know how much I LOVE snow. I'm still waiting for snow here. It was 50 degrees here today, not great weather for snow. But as the week progresses the temps are suppose to drop and we've got rain in the forecast and hopefully turning to snow midweek!!! I'm digging out the mittens and boots and having the camera ready. I'm making a snowman!!! And of course I will post a picture of it here too!!

Ok, back to the card (I'm SO easily distracted LOL). When embossing the snowflakes I found it difficult to tell where I put them on the brushed silver card stock so I did have to do a couple of embossings. I embossed the area and then inked up the stamp and filled in the empty spots and embossed them. It took a couple of tries but I did get the snowflakes in the areas I needed them to be in.

The base of this card is white and the silver is layered on top of that. It's an easy card to assemble and it's actually an easy card to do too. It really didn't take long at all even with having to emboss it a couple of times.

Does it look like it's missing something? It seems a bit blah to me but then again I'm such a layers person. It maybe could have stood to have a scallop in white with a silver layer on top and a white "Merry Christmas" round layer on top of that and set in the bottom right or left corner. Well, it's too late for that now. I sent the card home with Kay!! If she reads my blog she will know what to do to maybe dress it up a bit. It just needs "something."

It was fun to play with that set. I also have a couple of other images I made from the stamps the gals brought with last week and hopefully I will have time to play with them this week.

Thank you SO much for visiting my blog today,
Wanda

Thursday, November 26, 2009

Happy Thanksgiving!

I received this card from a fellow stamping DIVA Sue! It's such a FABULOUS card, isn't it? It's simple enough to make and yet it has a lot of movement to it.

The Stampin' Up! "Autumn Meadows" decorative paper was used here. It was just cut into pieces and taped in place on Soft Suede card stock. I love how the ribbon is just wrapped around the orange piece and the sponging on the orange piece tones it down just enough too.

I am SO loving this layout and I'm going to have to use it on a future card. And one of the great things about this card is, even with the ribbon it won't cost any extra postage to mail it!! Gotta LOVE that!

I hope you all have a WONDERFUL Thanksgiving and thank you for visiting my blog today, Wanda

Wednesday, November 25, 2009

Wednesday Sketch Challenge

I found this sketch to be a BIG challenge for me. This is totally stepping out of the box. I tried to do the wave with the Stampin' Up! Cutter Kit but I didn't have much luck with that. So what I ended up doing was printing out the sketch (I always print one out for my album) and I cut the wave out and used it as a pattern.

I'm not real thrilled with the card. I don't really care much for all the snowflakes on the wave. I think I over did it there!

The background was done using the "Ho Ho Ho" wheel. I just kept running it over the page until it was filled. Then I cut it to size and sponged the edges in Real Red.

The "Merry Christmas" was done on the computer.

Santa is from the "A Holly Jolly Christmas" set. I just love him and the snowman in that set, they are my favorite!

The snowflakes were made using the Martha Stewart snowflake punch. And I added some rhinestones to the centers of the snowflakes because they looked worse without them.

I'm not real great outside the box. WAY out of my comfort zone and it shows!!!

I am not sure I will be posting on Thanksgiving day. It all depends on if I get my work done right away in the morning. We are not having our dinner until 5 or 6 pm. SO that may give me some time to play. I wish you all a very WONDERFUL Thanksgiving!

Thank you SO much for visiting today,
Wanda

Tuesday, November 24, 2009

Faux Fresco Technique Page

I hope you are sitting down for this. It's Tuesday and I have made another technique page!!! Maybe I will be able to do one EVERY Tuesday and get caught up on them! I know there are a lot of you waiting for these! This one is a very fun technique. I am not one for "watching paint dry" so this technique didn't thrill me as much as some of the other ones did. I did use my heat embossing tool to speed up the drying process. But even with that it did take a while for it to dry. I would recommend having another project to do while you are making something with this one. While the ink is drying you can work on something else. Because I made several technique pages I needed to do more than one piece of Faux Fresco. SO what I did was inked up my card stock and set it aside to dry. Then I inked it up again and left it over night. Today I will finish up the texture and sanding part. Then I will be cutting them into the size I need them for the pages. But for the page you see here I did ink and heat it to dry because I REALLY wanted to have a page for my Technique Tuesday! And TA DA! I did it!!! There are now over 50 technique pages. Click here to view them. You can purchase the CD's of the first two sets of pages for use in your technique clubs or classes by going to my web store. Just click here to enter the store.
This is such a cool looking background. It has an old world look to it.    
Thank you SO much for visiting my blog today, Wanda

Monday, November 23, 2009

Snowflake Bath Salts Weekend Project

For this project you will need the Stampin' Up! "Bag with Scallop" die cut. I cut mine out using Almost Amethyst card stock. I used Almost Amethyst ink and the "Sparkles" jumbo wheel after I cut the pieces out.

I took my white gel pen and dotted in the parts that had a small circle. It took a few minutes to do it but it really added a lot to the design.

Next I punched out the snowflake. First I punched one out of scrap so I knew where I wanted to punch out the final piece. I did get it a bit of center but it's not too bad. Before you tape or glue the box together you may want to make sure the pieces you glue to the front don't show through the snowflake window. I had to trim one side just a little. And I used glue on mine. I didn't want it coming apart. I also added a piece of acetate behind the snowflake. The front of the box wasn't laying nice without it. I think the snowflake make that part of the box very weak and adding the acetate reinforced it.

I added some bath salts to two 3" x 2" zip baggies. I did fold the tops of the zip baggies down because I didn't want them to get punched when I made the holes for the ribbon. You can find the recipe for the bath salts here.

I did take a scrap piece of white card stock and ran it through the Sizzix die to make a scallop to layer behind the one on the flap. I also glued that in place.

I used my Crop-a-Dial to punch the holes. It went through all the layers at one time with ease. That is a "Must Have" tool!!!

I threaded my ribbon through the holes and tied a bow. My neighbor LOVES purple and this is for her. I still need to add the instructions to the box. If you are making these to sell you will need to add the ingredients list as well.

These are very fun to make and quick to make too depending on how much time you want to put into decorating them. There are LOTS of wheels out there to play with and using different color inks will save you time from adding white dots! It's all in how much time you want to spend on the decorating! Decorative paper will work but it is thinner than card stock and not quite as sturdy.

These make great Gifts, Hostess Gifts, Customer Appreciation Gifts, a fun Make n Take, they are great for Craft Fairs and even a fun Stamp Camp project. I LOVE making these things. Plus I love how my workroom smells when I have a bunch of them sitting out!!

An added note here: The instructions for the bath salts do state that plastic and bath salts do not go together. For short term use it will be fine. It's the essential oils that will eat through plastic. If using other items to scent your bath salts plastic should be fine.

Have fun with these!!

Thank you for visiting my blog today,
Wanda

Sunday, November 22, 2009

Does it Look Like a Letter to You?

My friend Katie was over last week making her Christmas cards. She had picked out the color for the card (Real Red) and then decided to add a white layer. The white layer was run though the Big Kick using the Snowflake Cuttlebug folder. One of my favorite Cuttlebug folders, if I may add!

She had stamped the words and layered them on the red card stock.

Now this is the part you are not going to believe. That adorable snowman (click on the photo to see it closer) is done by simply cutting a piece of ribbon. UNREAL! I would have made a bow with it myself! Never in a million years would I have thought to cut it as a focal point for my card. Oh and no layering either, it came with the checkerboard already around it! Just cut and tape!!! Gotta give Katie a BIG high five on that one!!! Isn't it just adorable and doesn't it look like the front of a letter?

See, I told you I get to stamp with some very talented people!!!

Thank you SO much for visiting today,
Wanda

Saturday, November 21, 2009

A VERY Masculine "Autumn Days"

I know I do not make masculine cards very often and it seems to be one of the more difficult ones to make. I am not sure why that is. Perhaps there are not enough masculine images out there to use for our cards. The entire stamping market could use a few more!!

I thought the Stampin' Up! "Autumn Days" could be used to make a masculine card. Actually this set can be used to make quite a variety of masculine cards. There's the pheasant in there too plus other masculine type elements! And this decorative paper..... well, it just added SO much to this card. It's from the "Autumn Meadows" package.

And a really nice thing about this card is it was very easy to make too! Oh and did I mention quick? I think it took me longer to clean up and put my stuff away than it did to do the card. Yes, you read that right. I actually put EVERYTHING away before I sat down to do this post!!! I think it's a first for me! Normally I just stack it at the end of the table in hopes that I may be going in the direction it belongs and then even more hope that I remember to grab it as I go by!!! LOL Such a nasty habit I have of not putting stuff away right after I'm finished with it. I do have to say that it is a strange feeling to see a clean spot on my worktable were there normally would have been scrap papers, scissors, pieces of ribbon ends, the stamp sets and ink pads I've used and the tape. It's all put away!! I hope I can do this every time I stamp. I wouldn't have to scramble when someone comes over to stamp!!!

Ok, back to the card. The words were done using the "Sincere Salutations" set. That poor set has been used SO much I thought the rubber would be smooth on it by now!!! LOL It is such a great to own! Like I said, I use it a LOT!

The assembly of this card went quick as well. I used a half sheet of Chocolate Chip card stock cut on the 8-1/2" side and I folded it in half. Then I cut a piece of white card stock 5-3/8" x 4-1/8". I sponged the edges using Dusty Durango. Then I cut a piece of the decorative paper 4-1/8" x 2-1/2" and taped it on the white piece. I layered the Chocolate Chip and More Mustard ribbon over the area where the two papers meet. I stamped the leaf using Dusty Durango, I punched it out using the 1-1/4" punch and sponged the edges. I punched out a piece of More Mustard using the 1-3/8" circle punch and I used the scallop punch on a piece of Chocolate Chip card stock. I layered them together and affixed them to the card over the ribbon using Dimensionals.

The "Birthday Wishes" was stamped using Chocolate Chip ink. And that was pretty much it to making this card! It would not only make a great masculine birthday card but a get well card too. Even a sympathy would work with this. And of course the fall Harvest/Thanksgiving card!

I LOVE stamp sets that I can use for more than just one occasion!

Thank you SO much for visiting today,
Wanda

Blog Candy, I Almost Forgot It!

Can you believe it, I almost forgot this weeks Blog Candy? This is another addition to the growing items that will be offered on New Year's Day. Nothing like ringing in the New Year on a VERY happy note!!

This is a fun word set. I took a photo of the back of it too so you can see all the great words in the box! It even comes with an ink pad!!! Not that it's a big deal. We all seem to have a favorite ink pad we love to use. Personally mine is black StazOn. I use it on almost all of my cards. It stamps the images so nice and dark and I can use my blender pen and watercolors with it and not have to worry about the smearing.

Back to this set. I will be adding this to the New Year's Day Blog Candy give away. If you would like to see the other two items just click here and read the posts!

I have not come up with what I am going to ask you to comment on in the post on New Year's Day but I'm sure I will come up with something unusual!!! LOL

Have a wonderful weekend,
Wanda

Friday, November 20, 2009

SO Much Talent!

I am totally surrounded by talent when the gals come to my home to stamp. Their talent never ceases to amaze me! Thursday evening Leah was working on her Christmas cards. Oh and did I ever tell you how smart these gals are too? Starting their Christmas cards now!!!! VERY smart!!! She used the Stampin' Up! "Petals-A-Plenty" folder on the white background and the "Ornament Punch" on her bulbs. I do not know where the decorative paper came from but I think she said it was from one of those big packages of paper at Michaels. It's SO pretty and absolutely perfect for the card! She wasn't real thrilled with the bulbs so Ann told her to try adding the bulb cut card stock behind them and that was exactly what the card needed. She had two different pieces of decorative paper and used the other one to make the same card. I think both of them are great.

The words were done using the Merry Christmas from the "Teeny Tiny Wishes" set. After stamping the words she punched it out with an oval punch and then used the oval scallop punch on red card stock and layered it.

I wish I would have taken a picture of the envelopes she did. She used the red and green ink and a bulb from the "Delightful Decorations" set. It was just stunning! I told you I am with some pretty talented gals, didn't I? Aren't these just wonderful Christmas cards? I always feel so fortunate to be amongst such wonderfully talented people!

Thank you Leah for allowing me to share your wonderful creations.

And thank you all for visiting my blog today,
Wanda

Thursday, November 19, 2009

Flowers for a Friend

My wonderful neighbor came over the other day with this most adorable snowman light. You plug it in, turn it on and it changes colors. I caught it at the blue when I took the photo. Isn't it just TOO cute??? SO I thought I would make her a thank you card.

I had seen these flower cards all over the place and thought it would be perfect for her. I don't know what the flowers are called but they are those fall flowers that look kind of like sunflowers. Anyway mine is an M & M card!! LOL

I know my neighbor is going to LOVE it!

These are very easy to a make too. I think those Stampin' Up! "Sweet Treat" cups are such a fun thing to play with. I punched ovals using some retired decorative paper and cut them in half. I taped them around the cup as I went, starting at the top then the bottom. Then from the right to the left. Then I filled in gaps with more pieces until it was all full. I punched out two more ovals in Garden Green and I clipped the pieces to form leaves. I then taped them in place behind the flower. I stuck it on the card front. I added the ribbon before I taped the card front to the card base.

Now the next step is to get it to her!!! LOL

Thank you for stopping by today,
Wanda

Wednesday, November 18, 2009

Wednesday Sketch Challenge Crazy for Cupcakes

I just love the Stampin' Up! "Crazy for Cupcakes" set. I have sure gotten a lot of use out of it. After making a card with it I think that I should bake cupcakes but I never do!!

This is my card for the Wednesday Sketch Challenge over at SplitCoastStampers. I was fortunate enough once again to have a little time to play with the new sketch!

This card was actually pretty easy to do in spite of all the layers. But as you all know I LOVE playing with layers. Perhaps that is why I enjoy the Wednesday Sketch Challenge SO much!

The decorative paper here is from one of those BIG packs you get at Michael's or Joann's. It's called "Sweet". And it is exactly that. There are a LOT of pretty and fun papers in that pack. I have used some of those papers from that pack on other cards. I think they were birthday cards using the same set!!! LOL

The "Happy Birthday" was done on the computer and punched out. I did find a piece of Pink Pirouette paper and used it on the background of the card. I ran it through the Cuttlebug "Dotted Swiss" folder. That has to be one of my favorite folders.

After I stamped the cupcakes and colored them in I noticed that they looked a little blah. SO I punched it up by adding some crystal lacquer and glitter to the cherries and just crystal lacquer to the cupcake stand. And then I touched it when I went to pick the card up. Why is it that I do that? I knew I put that wet stuff on the card. I set it aside to dry in a spot that it wouldn't be touch ed by anything and then I proceed to pick it up right on the wet spots!!! Is it just me that does stuff like that almost EVERY time??? LOL

And now I have a birthday card ready (early) for a friend of mine. And if I can get it in the mail on time it will be the first time in a long time that she doesn't get it late!!!

Thank you SO much for visiting today,
Wanda

Tuesday, November 17, 2009

Friends With Toys!

I had a small group of gals over today stamping and they brought some stamps with them. I LOVE playing with new "stuff!" One brought with her the Stampin' Up! "Gifts of Christmas" set. I loved this set since the first day I laid my eyes on it but I didn't buy it. I had others that I wanted instead. Today Kay brought hers with her and I played with it. First I tried the VersaMark and chalks like the one in the Stampin' Up! catalog was done with. Let's just say you need a LOT of patience, a steady hand and a very tiny applicator to get the chalk on there without a lot of residue left behind. So it was put in the circular file awaiting the recycling truck on Friday!!!

Then I thought I would play with some brushed silver card stock and embossing powder. I embossed the image on white card stock using silver embossing powder. I used the "Merry Moments" decorative paper on the small panels in the background. The flower was punched out from one of the retired punches and a silver brad was added to the middle. Such an easy card to make and it had enough layers for me to be happy with!!! LOL

It was actually a fun card to make and something I would consider doing for the yearly Christmas card (if I were looking). I have our cards going and will show you once I finish. The goal is to have them done before Thanksgiving. Wish me luck on that one!!

Click on the photo to view it closer. You will be able to see the silver embossing and the shimmer of the silver card stock. It's SO pretty!

Thank you SO much for visiting today,
Wanda

Monday, November 16, 2009

Herringbone Technique Page

I know, it's about time I get going on those technique pages again!! Well, tonight I did! It's not so much that they are difficult to do, they are actually pretty easy. It's just very time consuming when you have to make 30 of the same one! I try to tape them together when I'm riding in the car but lately I've been driving and I don't think I can tape and drive at the same time. Don't care to find out either!!! LOL

But anyway here is the next page in this third set. I will try harder to make more pages and post them sooner. I really want to dedicate one day each week to do this. I was trying to do a "Technique Tuesday" but that only lasted for two weeks and I got busy with Halloween. SO all I can say is I'm going to give it a try.

This technique is a very easy one and depending on the papers you use you can really get a great herringbone look to it. The technique is just all about making "V's"! Pretty simple!

If you are thinking of doing technique page classes the CD's for the first two sets are available in my web store. Click here to enter. You can also access it at the top right on my blog.

Thank you for visiting today,
Wanda


Sunday, November 15, 2009

I Went in my Workroom to Chew Gum and Stamp and.....

... I'm all out of gum!!! SO I took the gum wrapper and opened it up, took out the foil stuff on the inside and traced it onto some decorative paper.

I made my Luminary out of this same Stampin' Up! "Four Seasons" paper and the "Snow Buddies" set. I must like both of them. Well, we all know how much I LOVE that paper. I hoarded it for the longest time and now I'm using it up. I'm going to be sad to see it all used up but hey, at least I used it! What was I saving it for? I guess if I really liked it so much that I didn't want to use it I should just frame it!!! Can you see that on your wall? A frame with some paper in the middle?? LOL Ok, so I'm using it!!

I LOVE it when I use up a pack of gum that has a fun wrapper to cover. I did try once to make a pattern using the wrapper but the card stock and the decorative papers are just not firm enough. The only paper that worked with that was the glossy stuff.

After I traced the package on the paper I cut it out and glued it on the box with a glue stick. Then I stamped the snowman, cut him out and then colored him. I use to color it after I stamped it and then cut it out but I would often smear the ink from holding it and it transferring from my fingers to other parts of the piece where I didn't want it. SO now I cut first and then color. And actually it makes more sense. What if I got it all colored and as I was cutting I cut an arm off or something else important? But then again there is that other side. What if I got it all cut out and I was coloring it and the table got bumped and messed up the coloring? I guess what it all comes down to here is do what works best for you!!!

I have this adorable snowflake die cut and I ran a piece of thin white chipboard through it and punched out 3 of these snowflakes. I put two of them together to form one and added a rhinestone in the center. I thought it could use a little something more in that corner. Now if this was something that was going to go back in a purse or pocket I don't think I would have added the snowflake. The edges can get caught on things and bend or tear off. But I'm filling mine with some fun bath salts (in a baggie of course) and using it as a stocking stuffer.

These make great little hostess gifts, customer appreciation gifts, Make N Takes, Craft Fairs and a fun Stamp Camp item. If you need to make a lot and can't chew enough gum you'll have to trace the pattern and work with it that way. Though for a Stamp Camp or Make n Take item the receiver can cut the pattern out themselves!!

I try to make something with my gum package every time I empty one! It's a fun way to recycle too!

Thank you SO much for visiting today,
Wanda

Saturday, November 14, 2009

Delightful Decorations Bulb With A Fun Fold!

Sometimes I step out of my box of the "normal" folds. Not very often but today this one looked fun. Plus with this type of fold you can use smaller stamps and make them work on your card! I have LOTS of smaller stamps and I'm going to have to try this layout on them and see what I come up with.

For this card the back layer is just a quarter sheet of card stock. I used Garden Green on mine. The Real Red piece is cut at 4" x 10-1/2". I then folded that piece in half. Then I took the top part of that piece and folded that in half but I folded it upward. I added a piece of decorative card stock on the top folded flap and also on the inside of that red piece. For the inside of the card I used a piece of Very Vanilla card stock. I didn't like the idea of having to stamp my greetings on the red background. SO I added the vanilla card stock and then taped the decorative paper on top of that. The decorative paper I used is from the Stampin' Up "Merry Moments" pack.

For the top of the flap I cut a piece of Garden Green card stock 3" x 3". On top of that is a piece of vanilla card stock cut 2-1/2" x 2-1/2". I sponged the edges with Garden Green ink.

The bulb was stamped using the "Delightful Decorations" set. I stamped it using Real Red Craft ink and then embossed it using clear embossing powder. I punched it out with the new bulb punch. Gotta LOVE that punch, it sure saves a LOT of time!!! On the bulb I added some small rhinestones around the design and a larger one in the center. I taped the bulb to the center of the vanilla piece.

I had just gotten this cute holly leaves punch at JoAnn's. I thought the corner could use a little "something" and it worked. I was hoping I had some red rhinestones for the berries but I didn't so I left it as is.

Now for the ribbon, I wrapped it around the top flap of the card and I taped it in the front. Then I tied a bow separately and used a glue dot to hold it in place. But before I set it in place I added a small piece of gold cord from the bulb to the ribbon. I wanted to give the illusion that the bulb was hanging from the ribbon.

I laid the card on it's side and took a picture of it open so you can see the actual layout. It's a bit difficult to see that in the first photo.

I actually enjoyed playing with this layout/fold and like I said, I'm going to have to use it again sometime!

Thank you SO much for visiting today,
Wanda

Friday, November 13, 2009

Luminary Weekend Project

WOW, this was a very fun and impressive "Weekend Project!" And get this, it won't take you the weekend to make it!

I got the instructions at SplitCoastStampers but I will tell you them here as well. But be sure to check out their website to see what was made using these measurements!

You start out with a piece of 5-1/2" x 10-3/8" piece of decorative paper. I found a piece of my most favorite decorative paper of all times. It's the snowflake paper from the Stampin' Up! "Four Seasons" pack. I hoarded this paper. I was saving it. For what?? I don't know. I do that SO much and now I have a room full of saved decorative paper. It's time to start using it. I know I will be using it a lot after Christmas using my new toy!!! I'm not telling you what it is but I am SO excited to play with it!! I do need to get it wrapped up so I can quit looking at it and having it tempt me! I mean, hubby is at work after all. He would never know if I played with it or not. But I turn my head away and try to forget it's there. If I wrap it I'm sure not to be tempted!! Better get a move on that endeavor and SOON!! LOL

Ok, after I cut the paper it was scored on the long side at 2-1/2", 5", 7-1/2" and 10". Turn
the paper to the shorter side and score at 1-1/2"

Fold all the score lines in. The 1-1/2" scored part is the bottom of the box. You will be cutting those score lines 1-1/2" up to meet that score line. When you are done cutting you will see that little rectangle that is 1-1/2" x 3/8" cut it off, you don't need it.

I used the Red Line tape to hold the Luminary together. Plus I liked it that I could add my tape and have it be ready for me to remove the protective backing than to just tape away and have to be careful not to touch it. When folding your box together you want to have the front be the part that is the furthest from the side seams. And you also want to have that front bottom flap fold back to give a rounded edge to the front and not a raw edge. Seeing this folded in you will know where to add the tape on the bottom. I went a bit crazy and added tape on all of the bottom flap pieces and I had to cut a piece of decorative paper and stick it on the bottom. The problem was solved and it does look just fine there. SO something like that can be easily fixed (if you have enough decorative paper left. Or you can always add a piece of felt to the bottom, that is totally acceptable too!

Once I got all the tape on I moved on to the vellum openings. You will need to cut the holes in your Luminary. I used an oval Nestability but you can use any form of oval cutter you have, including tracing an oval and cutting it out by hand. Next you will four pieces of vellum cut at 2-3/8" x 3-7/8". You can tape them in place now or you can stamp on them, color them and then tape them in place.

Now you can tape the box together and decorate as desired. I used the snowman from the Stampin' Up Hostess set "Snow Buddies". The snowflake is punched out using the Stampin' Up! "Snowflake" punch. I added a rhinestone to the center. I just taped them all in place with regular Snail tape. Inside mine is a battery operated tea light candle. I'm too chicken to add a real lit candle in a paper candle holder. I don't throw caution to the wind like that!! Besides I'm one to leave the room with the candle burning. I like to have a room to come back to and when these battery operated candles came out I couldn't wait to buy them!

All in all it was a pretty quick project to do. What took the longest for me was coloring and cutting out the snowman. The rest of it was quick and VERY easy!

Have fun making them. I'd LOVE to see what yours looks like and I'd be happy to post it here too!

Thank you SO much for visiting today,
Wanda


Blog Candy

Here's week two of Blog Candy. Last week it was the Stampin' Up! "Scary Skeleton" set. Click here to see that post. This week it is a Sizzix Die Cut, Gift#2. When cut out the image is roughly 3" x 4", a nice size for cards and scrapbooks. Both items are new/unused.

On January 1st I will be adding the final piece of Blog Candy and you will be able to leave your comments there to win all of them! I will be posting a new one each Friday until January 1st. What a nice way to ring in the New Year!

I will probably ask you some silly question or give you a quiz!! LOL Remember nothing is ever really free!!! LOL

Have a great day,
Wanda

Thursday, November 12, 2009

Fast Falling Leaves

The title isn't too far off here either. This card went together so fast I almost felt guilty! I don't recall making a card so quickly in a very long time and have it be a card I actually like too!

This card is very simple and clean looking. Something I like in a card. On and it has a layer to it to. And we ALL know how much I LOVE doing cards with layers!!! I would think, for me the greatest challenge in a card would be to make one that is square (those are just SO difficult) and to make one with no layers. I panic at the very thought!!! And my mind goes instantly blank for an idea or theme! LOL There was one time that the Wednesday SplitCoast sketch challenge was a square card and I wasn't going to participate. But as the day went on I decided to challenge myself. Now that was a tough day for me!!! LOL I do shy away from the non-traditional size cards.

Anyway, this one is not non-traditional but it is layer limited!!! And the main thing here is that even with limited layers, it worked!!

It's a sweet looking card. I do like how neat and clean it looks. And with the other assortment of leaves in this set you could easily change this into a masculine card. There are three other leaves in the Stampin' Up! "Falling Leaves" set that do not have words on the leaves, just other little designs. Oh and other than being a very quick card the other nice thing about this card is it won't cost you any extra postage to mail it!!!

Thank you SO much for visiting today,
Wanda


Wednesday, November 11, 2009

Wednesday Sketch Challenge

I can not believe it's Wednesday already. The time is just flying lately! I didn't even get through all of the Halloween stuff I wanted to and now Thanksgiving is just a little over 2 weeks away! I can't believe that either.

Anyway, this is the card I made for the Wednesday Sketch Challenge at SplitCoastStampers. I bought this "Too Much Snow" stamp from Plum Purdy Stamps last year and I used it once. I ran across it when I was looking for a snowman to use on this sketch. I always thought he was cute.

For my card I actually cut out the hat, nose and scarf and layered them on using Dimensionals. I was a bit upset with myself for touching the branch under the bird. I smudged the ink. I suppose you didn't notice it until I pointed it out to you, right? LOL

This card was fun to do and not to bad to put together. I LOVE the background paper. It came in a BIG pack from Michael's called "Wonderful Winter." It's glitter paper and there are SO many beautiful papers in that pack. I'll be playing with more of them later this month!

I did use the Stampin' Up! "Simple Snowflake" stamp and the snowflake punch. And I stamped the snowflake image in Chocolate Chip. Such a traditional snowflake color, isn't it?

I had to laugh. As I was getting my card ready to post on here I thought the snowman looked odd. Something was missing but I just couldn't place it. Then I looked over at my worktable and there were these two stick arms sitting there. I forgot to add the arms to the poor guy!! The arms came from a snowman punch by Martha Stewart. It's SO darn cute. You get all the pieces to it too!! I'll make a snowman with it soon and show you how cute it really is!

This was a very fun sketch. There aren't too many I don't find fun. The square ones I find VERY challenging because the require me to step outside my box of traditional size cards.

I was so glad I got to play with this set again. Now back to work on the "things" I was working on before the email came in telling me the sketch was posted!
Justify Full
Thank you SO much for visiting today,
Wanda

Tuesday, November 10, 2009

Christmas Greetings Simple Snowflake

I wanted to make some cards this week and I wanted to make them a bit simpler than the cards I had been making. The gals who come over to stamp like my cards but don't always want to do all those layers. And you know me, I LOVE layers!!!

So for this card I thought I would try to keep it a bit simpler. I used the Movers and Shapers Sizzix die and cut out my window and card at the same time. I like that die because it also scores your card for you!!! I also cut out just a window piece using Garden Green card stock. I used an x-acto knife and cut around the perforated area so I could get a little green frame. I glued it in place using the two way glue pen.

Then I found some fun decorative paper from the "Merry Moment's" pack and cut a strip of it to fit on the left side of the card. I added a piece of Real Red grosgrain ribbon and taped it on. Then I thought I would add a greeting. I first thought of the "Merry Christmas" in the "Teeny Tiny Wishes" set but I found the "Christmas Greetings" in the new "Grateful Greetings" set. I stamped the words in Real Red.

I got out my snowflake punch because I thought a snowflake would be cut eon the card. But it ended up being on cute on the inside of the card! I used the "Simple Snowflake" stamp and I stamped it in Real Red and then punched it out. I glued it on top of a 2-1/8" circle and then I took a piece of Brushed Silver card stock and cut out a piece for the top of the bulb. I taped it all in place and I thought the snowflake looked like it needed something so I added a rhinestone and that did it. A touch of bling can always brighten up a card, can't it?

To finish it off I tied a red bow and stuck it in place using a glue dot. And that was it. A pretty quick and pretty simple card. Well, except for the green around the frame. It was simple enough but it did take a few minutes to cut around it. I don't think I would like to cut out 100 of them for my Christmas cards though!

I do like quick and simple cards and hopefully I can get a few more of them done before the gals come to stamp this month!

Thanks SO much for visiting today,
Wanda

Monday, November 09, 2009

Socks & Dots!

What a strange title for this post, isn't it? Well, the title explains it all!! There is a box of Dots and around that box is a sock! I got these adorable snowflake socks at Target's Dollar Spot. I put the box of theater size Dots in one of the socks and then I slid the other sock inside the first sock so they are together. Then I pinned the toe part to the back of the box. I thought it was a fun way to give boxed candy as a stocking stuffer this Christmas!

I wanted to dress up the stocking just a bit more so I got out some punches and punched 6 circles per body part! I used a 1-3/4" punch on the bottom, a 1-1/4" punch for the center and a 1" punch for the head. The hat was made by taking a strip of black card stock, scoring it and forming a hollow back box. I cut a 1-1/4" black circle and cut that in half. I taped the top part of the hat to it. Inside the hollow part I added several pieces of Pop Up glue dots and stuck it to the stocking. The body parts were stuck on with double sided tape. I wanted to affix the snowman with something that is removable but yet won't ruin the socks. Oh, I almost forgot the arms. They are made using one of my Sizzix dies. I'll be sharing what I make with that die with you later in the week.

These are very fun and quick to make too. After you punch out the circles you just fold them in half and glue them in place on a single circle. Isn't this a fun way to dress up the front of a gift. This would work well too on a wrapped gift. You know, one done with regular wrapping paper and not socks!!! But not as cute!!! LOL

You can also make your own box to fit inside the sock and add your own special gift instead of candy.

Thank you SO much for visiting today,
Wanda

Sunday, November 08, 2009

From Flowers to Shiny Snowflakes!

I am having such fun with my die cuts and the piece of aluminum I found in the garage. I laugh every time I make something with that aluminum. Last spring we were cleaning out the garage and I found a roll of aluminum and we decided to put it in the spring garage sale as a free item. No one took it. Shocking, I know. But meant to be! After all it was aluminum and it could be recycled for cash. I wasn't aware it was aluminum at the time, I just thought it was sheet metal but yet knew we didn't want it in the garage anymore. SO after the garage sale it was still there so we put it on a shelf in the garage and thought we'd find another way to get rid of it. And we didn't!!! Another "meant to be!"

When I was thinking of what to make with the aluminum, I thought of the snowflake die cut so I cut one out. Then I thought I would affix two together so I cut out another one. I used glue dots so stick them together but I thought I could do something more with it. You can read how to make that snowflake candle holder here. So after making the candle holder I went on to make a couple more things with the die cuts. Click here to see what can be made with die cuts, including the aluminum ones! But I wasn't done creating nor was I out of aluminum! LOL

SO I got out the Stampin' Up! "Flower Daisies" die cut and cut out two of each piece. I stuck them all together with glue dots and added a jumbo brad to each side. I added a hanging cord and then stuck the two sides together. It looks like a snow burst ornament.

This ornament can be covered with Dazzling Diamonds or micro beads. The edges could be sponged with blue StazOn and it can even be heat embossed or spray painted!!! Use your imagination on decorating this or just leave it as it is. The tree lights reflecting on it will be pretty too!

I've had several people ask me about selling kits for the snowflake candle holder. If you are interested please email me here.

These are great for Hostess Gifts, Customer Appreciation Gifts, Make N Takes, Craft Fairs and even a fun Stamp Camp Items.

Thank you SO much for visiting my blog today,
Wanda


Saturday, November 07, 2009

Biscotti Gift Box/Tote! Weekend Project

I made this box for a friend of mine. I KNOW she LOVES coffee but I'm not sure about the Biscotti!! Not too many people don't like Biscotti so the odds are in my favor. Click on the photo for a closer view.

I made the box using the Stampin' Up! "Bags with Scallops" Sizzix die cut. I cut out two of them. Before I put them together I cut off 1-1/2" on the sides and front piece. When I folded the sides in to glue them I made sure the score marks were on the inside of the bag.

I cut the box from Rich Razzleberry card stock. The sides were decorated using the Rich Razzleberry Paper Patterns package. I taped a piece of Rich Razzleberry ribbon around the box and affixed the oval to it.

The oval was done using a Scalloped Oval Punch and a regular oval punch. I used the set "Oval All" for the flower part and the words came from the "All Holidays" set. I set these on top of the ribbon using Dimensionals.

The flowers near the handle were from the "Three Flowers" punch. I did cut a strip of card stock to fit in the center. It covered the scallops. My scallops got cut off at the top because I used 8-1/2" x 11" card stock and I didn't make sure it covered the die all the way. But that's ok, the scallops wouldn't show anyway because the Biscotti was too tall. SO I cut card stock to fit both sides. I punched them out with the oval punch before I glued them onto the scallop piece. I did have to trim the scallop a bit because it stuck out further than the piece I was inserting. Can't tell, can you?

I filled my little double box with Biscotti and wet wipes on one side and coffee, creamer and sugar on the other side. I need to add a napkin and it's all set to give!!

This was a fun little project to do and these little totes sure do come in handy!! Aren't they fun?


Thanks SO much for visiting today and be sure to stop back to see this cute tote!
Wanda

Apparently my issues with posting pictures on my blog was not the fault of Blogger. I needed to resize some pictures for my bracelet instructions and I tried to email them all to myself. The email program resizes the picture and they can be used in the software program I have. I guess you can't send them all at one time, even though it asks you if you want to resize them (I said yes) and it did it's thing. But in the process it got stuck along the way and bogged down my computer. I realized it very late last night when I went to shut down the computer and I'm getting messages telling me there is unsent emails and do I want to shut down anyway? Of course I said yes, it was 2 am and I was done with the computer. But would it shut down? NO, it was bogged down. I guess I just gave it too much to think about. But today it's working fine and the picture is now on here (obviously)!!! LOL Didn't I tell you it was a cute tote? Make one, they don't take long at all! Have a fun day and thanks for "listening" to me whine! I'm SO good at it, just ask my hubby!!! LOL
Justify FullL

Blog Candy

Here is the first of the Blog Candy I will be giving out to celebrate my Blogoversary and to ring in the New Year! Each week I will be adding a new item and on New Year's Day you can leave a comment and your name will be entered in a random drawing. I will use the Random Number selector to pick the winner.

This is the first item! Pay attention, there may be a quiz!! LOL


Have a great day!
Wanda


Friday, November 06, 2009

Baby's First Christmas Ornament! Weekend Project

It's never too early to start making Christmas gifts! A friend of mine became a grandma this year. I'm SO jealous! She brought over photos of her new grand-baby. He's SO cute. I want one of those!!! But first I'd like our son to propose to his girlfriend, then get married and then have a baby. And at the rate he's going with the proposal it could be years! Good thing he doesn't read my blog, huh??? LOL

Anyway, my wonderful friend has a grand baby so I thought I would make her an ornament for the baby. I used the Stampin' Up! "Train & Teddy" set. I just LOVE the teddy bear in that set. It's SO cute and sweet looking.

First I had to tape some tissue paper to a piece of copier paper. I only taped one end and both sides. The end that was taped was the one that feeds into the computer. I typed up the wording on the computer and printed it out on a laser printer. Printing it in a regular ink jet printer may cause the words to bleed when affixed to the bulb. I didn't even try it on the bubble jet printer, I think I did that one other time and learned the hard way it bled. SO I just thought I would print it out on the laser right away to save time and avoid any hassle.

I lined everything up to fit in the circle of the bulb. It took a couple of practice printings on copier paper to get it right and then I printed it out on the taped tissue paper. After that I stamped the image with Black StazOn and then colored it. After I got it all colored I began cutting around the image and words and realized I needed to cut them all off individually. Silly me. I could have just printed out all the words and not had to take into consideration placement!!! Oh well, silly me! SO, I cut everything out and set them on the bulb where I thought they would look good and fit nicely.

I took the pieces off the bulb and poured out some Crystal Effects directly onto the bulb. Aleen's makes a glaze that is just like the Crystal Effects except it's a bit more clear. It works exactly the same and it's available at Michael's and JoAnn's. These bulbs can be found at Michael's now in the Christmas area. I don't know if they carry them all year long, but I kind of doubt it.

Ok, once you have some of the glaze poured on the bulb take a paint brush and spread it around. Set your tissue pieces in place and gently go over them with the brush getting them "wet" and stuck to the bulb. Make sure the glaze is evenly distributed. It will dry the way you leave it.

I set mine aside to dry and then I added a bit more glaze to the edges and sprinkled the light blue glitter on it. I tied a ribbon to the top and a bow was tide onto that.

After the little glitch of making sure all was lined up on the copier paper the rest went very smoothly and quickly.

I did heat set the glaze but saw that it was starting to form little bubbles so I stopped. Perhaps I was too close to it. I had other things to tend to so I just set it aside and came back alter.

I think she's going to LOVE this! I just love that little teddy bear! For a closer view click on the photo.

Thank you SO much for visiting today,
Wanda

Blogoversary!

Today is my "Blogoversary!" I wasn't even paying attention to the counter! I began this blog on November 6, 2006. WOW it really doesn't seem like it's been that long. I am still loving every minute of it and still have LOTS more to share with you all!
Now for a what to do to celebrate. I gave this some thought and I'm going to post a stamp set tomorrow but this is going to be a "progressive" gift! In the past I have always added more "stuff" to the package before I send it out to the winner. But this year I'm going to post the new items every week until New Year's Day. Then on New Year's Day you can leave your comments there for the drawing! And of course I'll have some silly little question for you to comment on!!
So starting tomorrow and then every Friday after that I will post the items up for grabs including the new one I add on New Year's Day!! It will be fun and it will give me time to find a box for all this fun stuff someone is going to be starting the New Year off with!!! SO be sure to stay tuned!
Have a fun day! It's sunny and in the upper 50's right now in Minnesota. The wind is blowing but that's ok it's too beautiful out to complain about that! I have a few windows left to clean in my fall cleaning routine so it's a good day for that! SO I'm off to do that, not so fun but when I'm done I get to spend my afternoon in my workroom (I LOVE being in there)! I have been asked by many of you to see photos of my workroom. Well.... it's been such a mess lately that I don't like anyone seeing it. But I am in the process of organizing and cleaning up things. I got new counters for the cubes I ordered from Oriental Trading and it's WONDERFUL. It's nice to have solid work surfaces! They look fabulous too! Oh and they sure do hold a lot of junk. I dumped a lot of "stuff" in them that needs sorting too. SO much to do but I'd rather stamp. And thus you have the reason why the room is so disorganized!! I mean, be real. Which would you rather do? Clean or stamp? LOL

Have a wonderful day and stay tuned for the BIG Blog Candy!
Wanda

Thursday, November 05, 2009

Button Button!

A friend of mine (Joann!) showed me a card she had made using the most adorable button punch by Martha Stewart. She told me she got it at Michael's. Well, after I left her house I headed for Michael's to purchase this adorable punch!

This punch not only punches out the button and button holes but it also embosses it so it's got raised and lowered parts. Click on the photo for a closer view to see what I'm talking about.

After I punched my buttons I took some linen thread and tied it on the buttons. I found some cute decorative paper in a pack I had gotten at Archiver's and I put it on the top of a piece of Apricot Appeal card stock. I stuck the buttons on over the area where the edge of the decorative paper is. It took 7 buttons to cover that area.

I needed a "thank you" card so I stamped the words on the bottom part of the card and it's ready to go! What is really great about these buttons is when they go through the mail they won't cost me any extra in postage!!! Gotta LOVE that!!! Aren't they adorable? They are SO quick to make too. As much as I LOVE die cuts I LOVE punches a bit more because they are quicker!

This card can be used for SO many different occasions too. I can see myself using this punch on a lot of cards!

Thank you SO much for visiting today,
Wanda

Wednesday, November 04, 2009

Wednesday Sketch Challenge

Here is my card for this weeks Sketch Challenge over at SplitCoastStampers. This one was very different with those little triangles on the sides. I wasn't sure what I was going to do with those. They were the biggest challenge on the card for me. I first had them just white and empty but I sure could tell they needed something. I was just going to add a red brad on each one but they were too small. Then as I was walking by my counter I saw the branch punch and thought I'd give it a try. I punched out two for each side and liked it and then thought I'd try one more for each side. I liked that much better. But the triangles still needed a little something more. I was going to add 3 brads on each one like berries but the red was just not matching so I went with the buttons. Fortunately I had two of them left!!! Meant to be, huh?? LOL

I used the Stampin' Up! "Teeny Tiny Wishes" set for the "Merry Christmas." The "Modern Label" punch was used under the words.

The cardinal came from the "A Christmas Cardinal" set.

I colored the bird in with a marker. No blender pen was used on here at all! How unusual for me!

But the card did have LOTS of layers which is something that I REALLY love!!!

I actually like this card! Not too many times I can say that without hesitation. I think it's those branch things that are giving this card that "thing" I was looking for in it!

And the most amazing thing about this card is that it didn't take all that long to do. I think it had a lot to do with using decorative paper, an embossing folder and coloring directly from the marker! All of those help things to move along quicker!

If you have time give the sketch a try! I LOVE getting new layouts to play with! Another one for my album!!

Thank you SO much for visiting to day,
Wanda