Pin It

Monday, February 28, 2022

Driving By, Wildflower Path, Birthday Card, 2022 Stampin' Up! Spring Mini Catalog

I found a fun layout on Pinterest and I thought I'd give it a try. I didn't have the Designer Series Paper (DSP) that was used on the original card so I made the card with what I had.  You can see the original card here

The base of my card is a folded half-sheet of Basic White card stock. This card opens on the bottom and the fold is on the top.

I cut a 1-3/8" x 5-1/2" strip of DSP from the "Friendly Hello" 12" x 12" package.  I also cut a 3" x 3" square of DSP from the same package. I centered the striped DSP on the front of the card and for the 3" x 3" piece, I lined up the left point to the center of the card and made sure the top and bottom points touched the edges. 

I stamped the card from the "Driving By" set using black Memento ink. I colored the car in using my light Pumpkin Pie Blends pen. The wheels were colored in using my light Smoky Slate Blends pen. I colored the two outer parts of the wheel with it. Then I colored the outer part of the wheel with my Light Gray Granite Blends pen. I wanted the outer part to be bit darker but not black. I had colored them black on another card and if you don't color perfectly the tires don't looks so round! I also colored in the bumpers with my light Smoky Slate Blends pen.

The balloons were colored in using my dark Pool Party Blends pen and the windshield was colored in using my light Pool Party Blends pen.  

I used the third smallest die from the "Rectangle Stitched" Framelets die set. It's the third one in the grouping of 8 dies in the package. I added Dimensionals to the back and set it aside.

The words are from the "Wildflower Path" set and were stamped using black Memento ink.

The car was set in place and the card was done. I didn't add any additional bling, I liked the simplicity of the card.

This was a fun and easy card to make and I REALLY like the layout. It's that 3" x 3" square that caught my attention. 

Thank you SO very much for taking your time to stop by and see today's birthday card,
Wanda

Sunday, February 27, 2022

Special Moments, Friendship Card, 2022 Stampin' Up! Sale-a-Bration

I was looking on Pinterest to find a card that used a lot of Designer Series Paper (DSP) and I ran across this one.  It was perfect. Quick and easy, plus it used quite the DSP covers quite a bit of the card base. 

The base of the card is a folded half-sheet of Basic White card stock. This card opens on the right and the fold is on the left.

I cut 4" x 5-1/4" piece of DSP from the "Flowering Fields" 12" x 12" package. I taped it to the card base.

Then I cut a 1-1/2" x 4" strip. The flowers in the strip are actually the backside of the larger piece of DSP.  I cut a 1-3/4" x 4" piece of Pumpkin Pie card stock for the layer and I taped the two pieces together. 

A Daffodil Delight piece of ribbon was cut at 6" and the ends were taped to the back using scotch tape. My ribbon is retired and I just ended up using what I had on hand. Whatever works, right? Then the piece was taped down on top of the large DSP piece about 1-1/4" from the bottom edge of the card base. 

The words are from the "Special Moments" set and were stamped using black Memento ink. I die cut them using the 1-7/8" die from the "Layering Circles" die set. And a Pumpkin Pie scalloped die from the same set. I taped those two pieces together and set them in place on top of the card using Dimensionals.

I tied a knot of ribbon off to the side and the card was done.

This was a super quick and easy card to make. Plus it used a nice chunk of DSP, which was my goal!  And I also needed a card for a friend! This card can be used for many other occasions too. I may whip up a Mother's Day or Easter card using this layout and DSP.

Thank you SO very much for taking your time to stop by and see today's friendship card,
Wanda

Saturday, February 26, 2022

Special Moments, Let's Set Sail, Thinking of You Card, 2022 Stampin' Up! Spring Mini Catalog

Here's a fun card I found on the internet. I liked the panels and it was easy to make too. You can see the original card here. I made a few minor changes but for the most part it looks a lot like the original card. There was no link to any instructions, so here's how I made it.

The base of the card is a folded half-sheet of Basic White card stock. I cut a 4" x 5-1/4" piece for the top piece.

I took a piece of Designer Series Paper (DSP) from the "New Horizons" 6" x 6" stack and I die cut three stitched rectangles from it using the "Rectangle Stitched" framelet dies set. I used the smallest one in the grouping of 8 dies. I die cut three pieces from the DSP for the front of the card. I taped along the edge of the middle piece and stuck it to the back piece. This was done on my worksurface, not on the front of the card.  Dimensionals were added to the top piece and I remove the backing all except for the bottom ones and stuck it to the other two rectangles. 

I set the rectangles on top of the 4" x 5-1/4" piece of card stock to see where to stamp the words and birds. The words are from the "Special Moments" Sale-a-Bration set and the birds are form the "Let's Set Sail" set. I stamped both at the same time. I did add few more birds to the top and I masked off the top two before stamping them. I had used black Memento ink to stamp the birds and words.

I textured the piece using the "Tasteful Textiles" embossing folder.

The die cut strips were set in place using glue on the back two and I removed the backing from the Dimensionals and set the piece in place lining up the top and bottom equally and the sides equally.

Dimensionals were added to the back of the 4" x 5-1/4" textured piece and set it in place on the front of the card base.  And the card was done.

This was a very fun, quick, and easy card to make. I was very pleased at how it turned out and even more pleased at how quick and easy it was to make.  It was a fun find!

Thank you SO very much for taking your time to stop by and see today's thinking of you card,
Wanda

Friday, February 25, 2022

Celebrating You, Friendly Hello, Mother's Day Card, 2022 Stampin' Up! Spring Mini Catalog

One more card using the "Friendly Hello" set before I set it aside to play with something else. I saw a card like this so I thought I'd make it. My layout is a little different but it's pretty close to the original card. 

The base of my card is a folded half-sheet of Basic White card stock. This card opens on the right and the fold is on the left.

I cut a 4" x 5-1/4" piece of Basic Black for the large layer. On top of that is a 3-7/8" x 5-1/8" piece of Pool Party that was textured using the "Ornate Floral" embossing folder. After these were taped together, they were then taped to the card base.

I cut a piece of Designer Series Paper (DSP) from the "Friendly Hello" 12" x 12" package at 4-5/8" x 1-7/8" and the Basic Black layer behind it is cut at 4-3/4" x 2". I taped these two pieces together and then taped to the left side of the card. I glued mine. Anytime I have a lot of texture on a piece, I tend to use glue to make sure I have good contact.

The bird was stamped on a 1-7/8" x 3-1/4" piece of Basic White card stock. And the layer behind it was cut at 2" x 3-5/8".

The words are from the "Celebrating You" set using black Memento ink on a scrap piece of Basic White card stock. I die cut them with the hexagon shaped die from the "Tasteful Labels" die set. 

I colored the bird using the light Pool Party Blends pen on the upper part of the bird. I used my Blender pen for the belly of the bird. Pale Papaya ink was used there. The flowers were colored in using Fresh Freesia.  For the leaves I used the dark Mint Macaron Blends pen. The flower center was colored in using the dark Daffodil Delight Blends pen. And the branch was colored in using the light Crumb Cake Blends pen. And that was it for the coloring. The piece was taped to the Basic Black layer. 

The bird piece was glued in place. The words were added with Dimensionals and the card was done.

This was a very quick and easy card to make. And there was no fussy cutting (that's what made it quick!).  I do like how it turned out and I can see myself making more.  I do like this layout. And it's a very versatile card too!

Thank you SO very much for taking your time to stop in and see today's Mother's Day card,
Wanda


Thursday, February 24, 2022

Friendly Hello, Celebrating You, Mother's Day Card, 2022 Stampin' Up! Spring Catalog

Today's card was a lot of fun to make. I'm not a fan of fussy cutting, but there was something good on tv so I stamped what I needed and cut while I watched (mostly listened to) what was on tv. 

The base of my card is a folded half-sheet of Basic White card stock. This card opens on the right and the fold is on the left.

I cut two 2" x 5-1/4" piece of  Designer Series Paper (DSP) from the "Friendly Hello" 12" x 12" package. I also cut a piece of Basic White card stock that was just a hair smaller than 4" x 5-1/4" and I taped the DSP to it and then I taped that piece to the front of the card base. You can omit that Basic White piece behind the DSP if you want. I just like it for some extra stability.

I die cut a Basic White lacy circle using one of the "Encircled in Beauty" dies. These are fun dies, it's like making your own paper lace doilies.  Remember those?  I love playing with those on my cards.

Next I stamped the flower from the "Hello Friend" set using black Memento ink on Basic White card stock. I stamped two sets. I fussy cut one set and then I fussy cut one flower from the other set. I colored them with Fresh Freesia using my Blender pen. The centers were colored in using my light Daffodil Delight Blends pen.

The leaves were stamped using Granny Apple Green ink and they were fussy cut out.  And don't forget that little cluster of three flowers. I stamped them using black Memento ink, fussy cut them out and then they were colored in using Fresh Freesia ink and a Blender pen.

I set the two attached flowers on the circle using Dimensionals. The lone flower was set in place using a couple of Dimensionals on the bottom petals and tape on the upper ones where they would go over the two attached flowers. 

I used a dot of glue on the leaves and tucked them in around the flower. And a dot of glue was added to the tiny flower cluster and it was slipped in over the upper left leaf. 

The words are from the "Celebrating You" set and were stamped using black Memento ink. I chose "Mother's Day" from that wonderful set because I really like that font. It's pretty and when you stamp it, it's SO rich looking.  

This card can be used for quite a number of occasions such as Birthday, Get Well, Thinking of You, Sympathy, Wedding, Anniversary and of course, Mother's Day.  I love versatile sets. You can't go wrong with them.

I like the way this card turned out and I wouldn't change a thing!

Thank you SO very much for taking your time to stop by and see today's card,
Wanda

Wednesday, February 23, 2022

Celebrating You, Daffodil Afternoon, Wedding Card, 2022 Stampin' Up! Spring Mini Catalog

I found today's card here at "Heartwarmer's from Vicki".  I thought this was such a sweet looking card. You can see it by clicking here. I only changed the word piece, the rest is the same (mostly because I had the right stuff!!!).

The base of the card is a folded half-sheet of Basic Black card stock.  This card opens on the right and the fold is on the left. 

I cut a 4-1/2" x 3-1/2" piece of Basic White card stock for the layer.  Then I cut a 3-1/8" x 4-1/8" piece of Designer Series Paper (DSP) from the "Daffodil Afternoon" 12" x 12" package. The DSP was cut at 2-7/8" and the bottom piece was flipped over. I taped the two pieces of DSP to the Basic White piece.  

The Petal Pink Organdy Striped ribbon was cut 4-1/2" and the ends were taped to the back of the Basic White piece. Then the piece was taped to the front of the card. I cut a 5" piece of ribbon and folded it in half and I added a glue dot between the fold and then another glue dot was added to hold it onto the card.

The words are from the "Celebrating You" set and were stamped on a scrap piece of Basic White card stock using black Memento ink. Then I die cut them using the stitched circle die from the "Tasteful Labels" die set. Dimensionals were added to the back and set in place over the folded ribbon piece. 

A 4" x 5-1/4" piece of Basic White card stock was added to the inside of the card and the card was done. Isn't it pretty?  

I really like this layout and I especially like the colors of this DSP. I thought the daffodil sheet was a bit busy and both sheets were still in the package, unused. But adding it to a card like this, it makes the design not so busy.  

Thank you SO very much for taking your time to stop by and see today's wedding card,
Wanda

Tuesday, February 22, 2022

Catch You Later, Friendship Card, 2022 Stampin' Up! Spring Catalog

I am such a cat lover and I have to admit that I did buy this set because of the cat image!  It was just too cute to pass up. I like the monkeys in it too but it's the cat that got my attention.  I had it in my head to play with this set today, specifically the cat image and I had a layout in mind too! You can see the card I made a couple of years ago using this layout by clicking here. And the instructions can be found on YouTube here

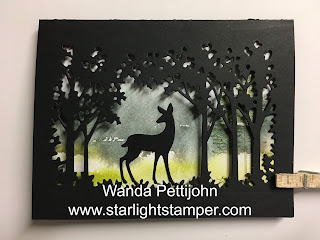
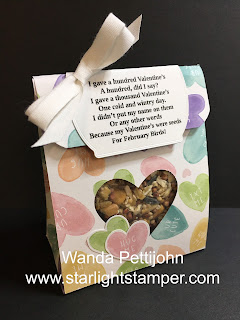
I had to use a clothespin to keep the card closed so I could take a picture of it.  

The pieces are cut as follows. The card base is different from most. I cut a 5-1/2" x 8-1/2" piece of Granny Apple Green card stock. This part of the card opens on the left and the fold is on the right.  Then a 5" x 5-1/2" piece of Granny Apple Green card stock was cut and scored at 3/4".  This flap will be glued to the back of the card later.

That front flap piece was tapered by measuring 2-1/4" on the top and bottom (including the scored area). It was marked with a pencil. And then on the right, center was found. The piece was set on the paper trimmer so the pencil mark and the center of the right side lined up. The piece was cut off. The same was done for the bottom part of that front flap piece. 

For my circles, I used the third largest circle die from the "Layering Circles" framelets set. That circle measured 2-7/16" for those of you who don't have the dies. This one is on the flap piece. The original card used a different size circle. I found one to fit my image. The 4th largest circle die was used for the one that was around the image. (it measures 2-1/8"). I also die cut the scalloped piece by using a scalloped die and a circle one that nestled inside it so I could cut them at the same time. My accent color here is Evening Evergreen.  

I textured the front of my card using the "Painted Texture" embossing folder. And the scallops on the pointed sides were made using the largest rectangle die from the "Scalloped Contours" dies. I just die cut two of one side so I had two long strips. I didn't need to die cut the whole rectangle, it would have been a waste of card stock.  I trimmed the piece so the solid edge part measured 1/4" (plus the scallops).  I did cut the center scallop that met at the tip, the card wouldn't fit in the envelope with it on.

My Designer Series Paper (DSP) is from the "Friendly Hello" 12" x 12" package.  It was cut at 5" x 3-3/4".  The Evening Evergreen layer behind it was cut at 5-1/4" x 4".  And the inside piece of Basic White card stock was cut at 4" x 5-1/4".  

I stamped the cat from the "Catch You Later" set and colored him in using my Blends pens. I used Gray Granite, light and dark. Light Pumpkin pie for the fish. I was going to grab my Balmy Blue pens but grabbed the Seaside Spray (retired) by accident. I guess I need to clean out my retired pens!  So much to do but I'd rather stamp! LOL  I had colored over the glass using the light Gray Granite and then I colored over it with the light Seaside Spray to give it that look of glass with part of the cat body in the background. I did trace a light circle around the image where it would show through the circle window.  For under the bowl area, I colored with both light and dark Granny Apple Green and I colored over it with light Gray Granite.  After coloring in the sky and bottom part of the bowl area, I erased the pencil lines. 

Follow along with the instructions on the video to make the card. 

My circles did line up but not in the photo, but trust me, they are lined up. I just had to clarify that!! LOL

This was a fun card to make but it does take a little time to do the cutting and assembling.  But I thought it was worth it. I do like how it turned out. 

Thank you SO very much for taking your time to stop by and see today's friendship card,
Wanda


Monday, February 21, 2022

Friendly Hello, Friendship Card, 2022 Stampin' Up! Sale-a-Bration

I was looking for a quick and easy friendship card to make and I ran across this one on Pinterest. You can see the original card here.  I liked how the words went over the stamped flowers and how simple this card is yet it has a lot of movement.

The base of the card is a folded half-sheet of Fresh Freesia. This card opens on the right and the fold is on the left. The original card opens on the bottom and the fold is on the top. I changed it only because the piece of card stock I had was already cut in half so I used what was there.

The Designer Series Paper (DSP) is from the "Friendly Hello" 12" x 12" package. I love it that the DSP had the same name as the stamp set. Sometimes with all of these pretty flower papers it's hard to remember what DSP went with what stamp sets.  I hope this is a new trend for Stampin' Up! because I approve!! This piece of DSP was cut at 2-1/2" x 4-3/4".  I taped it to the front of the card making sure that the top, left and bottom of the DSP is spaced the same distance apart.

The Basic Black Strip was cut at 1/2" x 3-1/2". I taped it to the front of the card about 1-3/4" from the top edge of the card.

The Basic White focal piece was cut at 2-3/4" x 2-3/4".  I stamped the flowers first using black Memento ink and then the words were stamped, also using black Memento ink.

The flowers were colored in using a Blender Pen and Fresh Freesia ink. I didn't have the marker or Blends pen so I just used what I had.  I also colored the center of the flowers using my Daffodil Delight marker. And that was it for the coloring.  I added Dimensionals to the back and set the piece in place over the Basic Black strip, trying to center it on top of that strip as much as possible. 

A 4" x 5-1/4" piece of Basic White was added to the inside of the card and the card was done.

This was a fun card to make and oh SO quick. I love the soft subtle look it has. A perfect female friendship card!

Thank you SO much for taking your time to stop in and see today's quick and easy friendship card,
Wanda

Sunday, February 20, 2022

Celebrating You, Daffodil Afternoon, Mother's Day Card, 2022 Stampin' Up! Spring Mini Catalog

Did you ever purchase a package of Designer Series Paper (DSP) because there's a sheet in it that is SO pretty that you felt you needed to buy the pack?  Me either!!  LOL  I do that way too often. The "Daffodil Afternoon" was one of those!  And the image I used on this card was not the one that caught my eye! I made this card because I saw it in an email and I thought it would be fun to make a panel card. I don't make them very often. I was sad that there were no instructions on how to make the card so here's how I made it. You can see the original card here

The base of the card is a folded half-sheet of Crushed Curry card stock. This card was cut on the short side of the sheet and it measured 4-1/4" x 11" after cutting. I scored it at 5-1/2" and folded it in half. This card opens at the bottom and the fold was on the top.

I cut the DSP at 1" x 3-3/4", I needed two of these. And the center piece of DSP was cut at 3-3/4" x 2-5/8". I think these pieces on the original card were a bit narrower, maybe at 3-5/8".  Anyway, mine is at 3-3/4".  The larger piece measured 3-3/4" x 2-1/2".  Old Olive card stock was cut for the layers and it measured 2-7/8" x 1-1/8" for the strips and 2-3/4" x 3-7/8" for the larger layer. I taped the layers together and then they were taped to the front of the card base. I set the small strips on first, trying to make the edges on three sides as equal as I could. 

I opted to make this card a Mother's Day card since I made a Father's Day card yesterday. Why not?  I have a lot of birthday cards in my stash and I really liked the font on this one from the "Celebrating You" set. I stamped them on a piece of scrap Basic White card stock using Old Olive ink. I used the stitched hexagon die from the "Tasteful Labels" dies. The words were cut so they were on the upper part of the die so I could add some bling to it. I didn't have the same die as was used on the original card so I used what I had and what worked with the words I used. 

Linen thread was used for under the word piece. I wrapped it around my fingers 3 times and used glue dots to hold the strands together at the ends. I added a glue dot on each side of the thread. I twisted the thread into a figure 8 and then pressed the glue dot onto the front of the card. I added Dimensionals to the word piece and set it in place. I did have to lift it up and rearrange some of the Dimensionals because they landed on the thread and made a bulge in the word piece.

Three "Genial Gems" were added to the word piece for the needed bling.  And a 4" x 5-1/4" piece of Basic White card stock was added to the inside and the card was done.

This was a fun card to make and I hope I remember this layout because now I have the measurements! 

Thank you SO very much for taking your time to stop in and see today's Mother's Day Card,
Wanda

Saturday, February 19, 2022

Grassy Grove, Father's Day Card, 2022 Stampin' Up! Spring Catalog

Father's Day? Yup, I have SO many birthday cards in my stash but only a few Father's Day cards.  Though this card could be used for a masculine birthday, but also a masculine get well, sympathy or thinking of you cards.  But I opted for Father's Day today. I found this card here but I couldn't find the front of the card but it wasn't difficult to figure out. You can see the original inside of the card here

The base of this card is a folded half-sheet of Basic Black card stock. This card opens on the bottom and the fold is on the top. The original card opens on the right with the fold on the left. I had already cut my card stock before I looked at the construction of it. But either way works, so make it the way you like. Whichever way you make it, it's not going to stay shut. I had to use a small clothespin to hold it shut for the picture. 

I die cut the front with the die from the "Grassy Grove" bundle, the die set is called "Grove Dies". 

Next I cut a 10-1/2" x 4" piece of Basic White card stock. I scored it at 5-1/4" and folded it in half. This piece will open on the left and the fold will be on the right.  

A 3-7/8" x 5-1/8" piece of Designer Series Paper (DSP) from the "New Horizons" 6" x 6" stack was used for the background. Some grass was stamped on the bottom using Old Olive ink and the trees were stamped using Old Olive ink. I did use my Crumb Cake marker and drew up the stem but it wasn't dark enough. But had I used Early Espresso it would have been too dark. So if I were to make this card again, I would just use Old Olive ink on the whole thing. I set this aside.

On the inside I stamped the hills and trees using Old Olive ink. I also stamped the words from the "Celebrating You" set using Mossy Meadow ink. I thought Old Olive would be too light.

Then I taped the DSP to the front and this piece was taped to the inside of the card. 

I closed the card so I could see where the deer would go. I die cut my deer using Basic Black card stock, it was what was left over from the center of the forest scene I cut on the front of the card. I used double sided sticky paper behind the deer because I didn't want to mess around with glue or tape, especially on those thin legs.  And that was it. The card was done.

I thought this card would be a lot more difficult to make than it was. I was surprised at how quickly it went together and how easy it was.  The DSP did most of the work! 

Thank you SO very much for taking your time to stop by and see today's Father's Day card today,
Wanda

Friday, February 18, 2022

Flowering Flowers, Birthday Card, 2022 Stampin' Up! Spring Catalog

I was on the hunt for some card samples using the "Flowering Flowers" stamp set. I liked the set when I bought it but was not seeing many samples to get inspiration or to copy. Today I found this one here

The base of the card is a folded half-sheet of Basic White card stock. The sheet was cut on the short 8-1/2" side. So when I was done cutting, it measured 4-1/4" x 11". This card opens on the bottom and the fold is on the top.

I stamped the large flower from the "Flowering Flower" set  using Calypso Coral ink on a scrap piece of card stock. Then I fussy cut the piece out. I didn't have the pearls for the center so I added 7 dots of Tombow Mono glue and set the piece aside to dry.

In the meantime I stamped the leaves that were on another flower stamp in the set. I read in the post where I found the original card that the gal cut the leaves from the full image. I opted not to cut my stamp, so I was careful about stamping my Granny Apple Green ink pad on the leaves and dots only. I did go over a bit but it didn't matter because the rest would be hidden behind the big flower.

Then I stamped the cluster of three flowers using Misty Moonlight ink. 

The original post stated that some Pool Party ink was added to a clear glass block and an aqua pen was used to pick up some ink. The pen was tapped against another pen to cause drops to flick onto the card stock. I didn't want to do that so I used my Smoky Slate marker and flicked the tip inside the edge of the cover to get some splatter on the card.

The words are from the same set and were stamped using Misty Moonlight ink.

I added my gold foil to the center of the flower and took a stiff brush and removed the excess.  Dimensionals were added to the back and the flower was set in place.  

I used some "Genial Gems" instead of the pearls and the card was done.

This was a very quick and easy card to make. I like the looks of it and it's also very versatile. You can use this for several other occasions.

Thank you SO very much for taking your time to stop by and see today's birthday card,
Wanda

Thursday, February 17, 2022

Eden's Garden, Color & Contour, Sympathy or Friendship Card, 2022 Stampin' Up!

Today I wanted to challenge myself with some busy Designer Series Paper (DSP). I always struggle when I have DSP that is not in my favorites list. SO, I grabbed a piece I thought would answer my challenge. I was not sure where I was going with this card. Here's what I came up with.

The base of my card is a folded half-sheet of Mossy Meadow card stock. A color I don't use much at all. I cut a 4"x 5-1/4" piece of Very Vanilla for the inside and I taped it in.

Then I took a challenging piece of the DSP from the "Daffodil Afternoon" 12" x 12" package and I cut it at 4" x 5-1/4". Then I  put that piece on my cutter so the top right corner and bottom left corner were in the cutting line and I cut the piece at a diagonal. I had to cut two so I could get one to show the front and one to show the back. So lucky me, not only was I challenging myself to try to make a nice card but I now will have to either nice or not! LOL 

I cheat and I line up my pieces on my worksurface and then I take three tiny pieces of scotch tape and tape them down. Then I tape the whole piece to the front of the card.  Still not liking what I'm seeing, but now it's only half busy!

I took a piece of Very Vanilla card stock and stamped the words from the "Eden's Garden" set using Mossy Meadow ink. I die cut them using a die from the "Color & Contour" bundle. This die makes slits on the sides of the piece. I turned them over and ran a little bead of Tombow Mono glue to those slits. I smoothed them out with a toothpick. I set them aside to dry.

I stamped the flower from the "Color & Contour" set using black Memento ink for the outline and Flirty Flamingo for the solid part. 

Two set of leaves were punched out using the "Bough" punch and Pear Pizzazz card stock. 

Dimensionals were added to the word piece and to the back of the flower. The word piece was set in place and then the flower behind it. I cut the last two leaves off the sprig and added a dot of glue to the last leaf and slipped them under the flower. And the card was done.  Though don't you think the center should be colored in using Daffodil Delight?  I think it needs something.

I'm still not a big fan of that sheet of DSP but I was able to use it to make two cards that are okay!

Thank you SO very much for taking your time to stop in and see today's card,
Wanda

Wednesday, February 16, 2022

Calming Camellia, Special Moments, Friendship or Thinking of You Card, 2022 Stampin' Up! Sale-a-Bration

I found this wonderful card on Pinterest. I clicked through the link and didn't get a lot of information, but just enough so I could figure out the rest. You can see the original card here.  There were several colors of cards posted but I chose this one because of the richness.

The base of this card is a half-sheet of Crumb Cake card stock. I did not fold it in half right away because the stamping went on the backside too. I stamped the flower image on the back and then added the swirl image and the leaves image, all using Crumb Cake ink. See the photo below. I didn't get all the images the way they were on the original card, but I really don't think it matters. It's pretty however you get them on there!

Next I die cut the scalloped rectangle. It's from the "Scalloped Contours" set. I used the second one in the set. 

Then I cut a 3-3/8" x 4-3/4" piece of Blackberry Bliss card stock for the layer. And I also cut a 4" x 5-1/4" piece of Basic White for the inside.

I stamped the flower from the "Calming Camellia" set using Blackberry Bliss ink. I added a swirl using Crumb Cake ink. And the words are from the "Special Moments" set and were stamped using Blackberry Bliss ink. 

Now here comes the fun part. I was a bit apprehensive to try this. I don't like ruining my cards.  But it's SO easy. I took my Blender pen and refilled it. I wanted it very juicy.  If you don't have the recipe for the refill, just click here. I posted it many years ago. There's even instructions on how to take your pen apart.  I took a clear stamping block and added a drop of White ink. The drop was about the size of half a pea. You don't need much. Dip the tip of your Blender pen in the ink and then color the flowers in. Start on the top where they are the whitest a color towards the center of the flower.  And that's all you do. The Blackberry Bliss ink bleeds and does it's own thing.  You can go over the tips again later if you want them whiter. It takes a little while for this to dry but it's SO worth it.  I would recommend die cutting the scalloped piece first and then stamping the flower, swirl, words, and then color it. Then you can take care of the rest of the elements of the card while the ink is drying. 

I did color in the leaves with my Old Olive light Blends pen. They turned more purple but it's pretty too! I don't think you can ruin this card. I thought I was going to have problems with it but once I started coloring I saw the beauty and loved the technique.

After the ink dried I taped the scalloped piece to the Blackberry Bliss piece and that was taped to the front of the folded card. My card opens on the right and the fold is on the left.

I added the piece of Basic White inside and the card was done.  Isn't it pretty?  I think I want to make another one using Pacific Point or Evening Evergreen. 

Thank you SO very much for taking your time to stop by and see today's friendship card,
Wanda


Tuesday, February 15, 2022

Artistic Dies, Special Moments, 2022 Stampin' Up! Sale-a-Bration

Today I found this fun card at "Heartwarmers from Vicki". I thought it was a great card because when you are done, you have two cards! I love monochromatic cards. You can see Vicki's cards here. She posted both of them.  Take a look at her blog, she's got a lot of fun cards posted there!

The base of the card is a folded half-sheet of Basic White card stock. This card was cut on the short side so it measured 4-1/4" x 11". It opens at the bottom and the fold is at the top.

I cut a 4" x 5-1/4" piece of Basic Black card stock for the layer.

The top piece is a 2-5/8" x 3-7/8" piece of Basic White card stock.

I die cut the flowers using the "Artistic" dies that are a part of the "Artistically Inked" bundle. I die cut one using Basic Black card stock and the other using Basic White card stock. I did use the double sided sticky paper for these. I wanted to make it as quick and simple as possible.  

The flowers were cut in half. Make sure you cut them both on the same line so you can match them up easily.  I set the Basic Black part of the flower on top of the Basic White rectangle piece so I could see where the wording would go. The words are from the "Special Moments" Sale-a-Bration set and were stamped using black Memento ink.

Once the words were stamped I taped the Basic White rectangle piece in place on the upper part of the card. Then the Basic Black flower half was set in place. And the Basic White flower half was lined up and pressed in place.  And that was it. One down and one to go. 

This was a very quick card to make but it did take a few minutes to get all the pieces out of the flowers and leaves. But it wasn't bad, I didn't whine at all! LOL

Thank you SO very much for taking your time to stop in and see today's sympathy card,
Wanda

Monday, February 14, 2022

Friendly Hello, Sweet Ice Cream, Birthday Card, 2022 Stampin' Up! Sale-a-Bration

Today thought I'd play around with texture and my scoring board. I really had no idea where I was going with this card, I only knew I wanted the scored background.

The base of my card is a folded half-sheet of Basic White card stock. This card opens on the right and the fold is on the left.

I cut a 4" x 5-1/4" piece of Daffodil Delight for the layer and for the focal piece I cut a 3-7/8" x 5-1/8" piece of Basic White. I thought the score lines on the top were a bit tricky.  But I managed to work around it. On the short side I scored the right score line first at 2-5/8" and then I flipped the card 180 degrees and scored the piece again at the same 2-5/8".  This is as about as equal as I could get top lines. For the long side, I scored it at 1-3/4" and 3-1/2".  I now had my nice scored background grid.

Next I took my blending brush and scrubbed in some Daffodil Delight.  I also added some Daffodil Delight dots to the area around the and on the edges of the scrubbed area.

The flowers are from the "Friendly Hello" set and were stamped using black Memento ink on a piece of Basic White card stock. I stamped that image twice and I stamped 5 leaves. I fussy cut them all out.  I colored the flowers using both light and dark Flirty Flamingo Blends pens. And the center was colored in using Daffodil Delight Blends, light first and then I dotted on some dark.  For the leaves I colored them in using both light and dark Granny Apple Green Blends pens. I colored over the flowers with my Wink of Stella pen. I thought it could use a bit of sparkle.

The words are from the "Sweet Ice Cream" set and were stamped on a 1" x 3-1/4" piece of Basic White card stock using black Memento ink. I cut a 1-1/8" x 3-3/8" piece of Daffodil Delight card stock for the layer. I taped the two layers together and added Dimensionals to the back. Without removing the backing on the Dimensionals, I set the piece in place so I could see where the flowers needed to go. I taped the flowers and leaves in place and then added some linen thread to the center area. 

The taped the focal layer to the Daffodil Delight layer and that was then taped to the card base. The words were set in place and the card was done.

I do like how this card turned out. A lot better than what was in my head. Usually it's the other way around! LOL

Thank you SO very much for taking your time to stop by and see today's birthday card,
Wanda

Sunday, February 13, 2022

Friendly Hello, Birthday Card, 20211 Stampin' Up! Sale-a-Bration

I was looking for a card that used the "Friendly Hello" set from the Stampin' Up! 2022 Sale-a-Bration set. I was actually looking for one that had the bird image on it but when I saw this one I decided to give it a try, even though I don't have all of the items used on the original card

The base of my card is a folded half-sheet of Basic White card stock. I cut the card stock in half on the short side of the full sheet so measured 4-1/4" x 11".  I folded it in half. This card opens at the bottom and the fold is at the top.

I cut a 4-1/8" x 5-3/8" piece of Basic Black card stock. You can die cut the Basic Black layer behind the word piece if you want to from this piece. No one will see the piece missing in the middle. I cut that piece in half and set it aside. Then I cut a 4" x 5-1/4" piece of Designer Series Paper (DSP) From the "Friendly Hello" 12" x 12" package. I taped the DSP to the Basic Black and then I taped that to the card base.

I stamped the double flowers, the small flower and three leaves using black Memento ink on Basic White card stock. I fussy cut them out.

I colored the flowers using my Blender Pen and a drop of Fresh Freesia ink. I didn't have matching markers or Blends Pens so I used what I had. I colored the leaves in using my Granny Apple Green Blends Pen. I colored them all in but the original card only colored the center areas like the flowers. I didn't pay attention when I started coloring. I could have stamped and cut new leaves but I just thought I'd leave them as they were.

I punched out some Granny Apple Green leaves from the new "Bough" punch and some Basic Black buds from the same punch. I punched one more of each than on the original card. 

The words are from the same "Friendly Hello" set and were stamped using black Memento ink on a piece of Basic White card stock. I die cut them using the die from the "Tasteful Labels" set. I cut the words a little higher on the piece, not quite center. Then I took the Basic Black piece I had die cut and cut it in half. Half for the upper part of the word piece and the other half for the bottom. I taped those two pieces to the Basic White piece.  I set that piece in place on the front of the card using Dimensionals.

Then I added the large flowers and tucked leaves in and around them. The top flower was set in place with a Dimensional. I added a leaf set behind it.

On the right side is where I added the extra leaf and bud piece. I needed to hide the pace where the black layered pieces didn't meet. 

I tied a black piece of Baker's Twine into a bow and used a glue dot to hold it in place. Then I tied a Fresh Freesia ribbon bow and set it in place over the black bow. I few rhinestones were added to the Basic White piece and the card was done.

This was a fun card to make. I love the colors. When I first saw it I thought the DSP was stamped with the flower image from the "Friendly Hello" set but it was already printed on it. YAY!!   This would make a great card for many occasions, it's so versatile.

Thank you SO very much for taking your time to stop in and see today's birthday card,
Wanda


Saturday, February 12, 2022

Calming Camellia, Birthday Card, 2022 Stampin' Up! Sale-a-Bration Catalog

I found this fun and interesting card on Pinterest. There is a link to a video for this colored flower but I did like the brighter pink one better. I followed along with the video so I could figure out how to make it but next time I play with the "Calming Camellia" set I will probably do the pink one. I think the color is Melon Mambo. Not sure, but mine will be! You can see the original card here

The base of the card is a folded half-sheet of Smoky Slate card stock. This card opens on the right and the fold is on the left.

I didn't have the same Designer Series Paper (DSP) that was used on the original card so I found some that looked like it would blend in. It's some type of nautical card stock. I'm not sure where it came from. I don't think it's a retired Stampin' Up! DSP. But it looked good and it's what I had to work with. I'm sure I could have come up with something for the background that would work but I didn't have time and I really wanted to get going on this card. SO if you have that pretty wood look paper, you're fortunate and you can copy the original card. But I am using what I have and this is going to have to be for today. The DSP was cut at 3-5/8" x 4-7/8".  I cut a Basic Black layer it that measures 3-3/4" x 5".  I taped the two pieces together.

Then I die cut the scalloped rectangle from the "Scalloped Contours" Die set. I used the middle die in that set. I cut a 1-7/8" x 3-1/4" piece of Smoky Slate card stock for inside that scalloped piece.

The flower from the "Calming Camellia" set was stamped on a piece of Basic White card stock using black Memento ink. I also stamped the image on the Smoky Slate piece.  I fussy cut the flower that was stamped on the Basic White piece. Then I colored the leaves in using my Blends pens. Granny Apple Green light and dark. The flowers were colored in using the dark So Saffron and light Mango Melody pens. And that was it for the coloring.  The flower piece was then taped to the Smoky Slate piece, matching up the image. Then the piece was taped to the scalloped rectangle piece.

The words are from the "Calming Camellia" set and were stamped using Versa Mark and heat set with white embossing powder. I die cut them using the die from the  "Ornate Frames" die set. I set the piece in place on top of the scalloped piece, adding Dimensionals on the bottom edge and one on the right side.

I tied a white ribbon and affixed it to the flower.  A 4" x 5-1/4" piece of Basic White was added to the inside and the card was done.

This was a very fun card to make, even with the fussy cutting. I do like the look of it but I think I would like it better if it were more colorful.

Thank you SO very much for taking your time to stop by and see today's birthday card,
Wanda


Friday, February 11, 2022

Catching Butterflies, Friendship Card, 2022 Stampin' Up! Sale-a-Bration Catalog

Today I wanted to play with the "Catching Butterflies" set but I needed some inspiration. I found this card on Pinterest. You can see the original card here. I clicked through the link to the blog where it was posted but there wasn't a lot of info on how the card was made, so here's how I made it. 

The base of my card is a folded half-sheet of basic White card stock. This card opens on the right and the fold is on the left.

I cut a 3-7/8" x 5-1/8" piece of Designer Series Paper (DSP) from the "Sunshine & Rainbows" 6" x 6" stack in the Sale-a-Bration catalog. 

Next I die cut a Basic White piece using the third largest "Stitched Rectangles" dies. I think the original card used the second largest but I found that because of they way I had to cut my DSP that I needed to try to work with the third die. I saved the end of the DSP that I had cut off and I flipped it over and die cut it with the same die. This piece is going to be taped to the top of my stitched rectangle later. 

Then I stamped the girl from the "Catching Butterflies" set. I used black Memento ink. I colored her in using my Blends pens. I used light Smoky Slate for the net and the shadow under her foot. The dress was colored in both light and dark Pool Party. Her face, hands and legs were colored in using light Petal Pink and the cheeks were colored in using the dark Petal Pink pen. I colored her hair in using the Bronze pen. The butterflies were colored in using yellow for the outer edges and yellow for the tiny butterflies. And light Flirty Flamingo for the insides of the butterflies and a little bit of dark Flirty Flamingo for the highlights on the wings.  I fussy cut two butterflies because part of them were stamped and cut off on the edge. So I thought I'd just cut them, color them and set them in place with the tiniest dot of glue. 

Now it was time to tape that Pool Party heart printed piece at the top. I wrapped a piece of linen thread around it twice and tied a bow. Then I set the piece in place on the front of the card using Dimensionals. I made sure I got a bit of a Dimensional under each butterfly that I fussy cut out. 

The words are from the same "Catching Butterflies" set and were stamped on a 5/8" x 2-1/4" piece of Pale Papaya card stock. This piece was set in place with Dimensionals. I made sure I staggered them on the back so they didn't land on the linen thread. 

I put a dot of glue (not Tombow Mono glue) on the bow to hold it. The Mono glue stays sticky and I didn't want it sticking to the inside of the envelope or anything else. I used some tacky glue and that did the trick.  I just felt that the thread seemed like it would come untied easily and I wanted to make sure it wasn't going to be going anywhere.  And the card was done.

This was a very fun card to make. It's got such a happy feel to it. It's a nice friendship card or it could also be used as a thank you card. 

Thank you SO very much for taking your time to stop by and see today's Friendship card,
Wanda

Thursday, February 10, 2022

Sweet Talk, Valentine's Day Bag, Weekend Project, 2022 Stampin' Up! Spring Catalog

I don't often make many cards or gifty items for Valentine's Day. It's a one day thing and it's over. It's not like you decorate all month for it or prepare for weeks for it. You give a card, maybe some candy or a token of your love and that's it. Done. So I usually make one or two cards and sometimes a 3-D item. In my email today I got a "Treat Box" tutorial from Split Coast Stampers.  It was called a "Shaped Window Treat Box". Though it seems more of a bag to me than a box.  But I played along because I thought it was cute and would be fun.

The Designer Series Paper (DSP) is from the "Sweet Talk" 12" x 12" package and it was cut at 6-3/4" x 11-1/4".  The instructions for scoring and cutting on their site. I gave the size so you know what size piece of DSP you would need should you decide to make one. So if you've the a piece of DSP large enough, head on over there and take a look at the instructions. There's also a video. I just used the written instructions. Here's a link to the instructions, though I think you need to sign up to get them. They don't bug you or sell your info so your email won't be bombarded by a ton of junk mail.  I signed up many years ago and was a member for quite a few years but quit when the shop I worked at closed and I no longer had a job to help pay for fun things. There's a lot of techniques on their site plus TONS of card sketches (card layouts).  Every week there's something new. 

I added some birdseed to the bag and stapled the bag shut. I didn't like the squeezing of the sides to get the bag to close. If I were to make this again, I would add some score lines at the side pieces about 1" down from the top edge to make that "pinch" a bit easier and crisper.

I opted to do my bird Valentine's.  I hadn't done them in a few years. I think they are fun and school kids should give these out instead of cards and candy or whatever they give out now a days!  

The words are as follows:

I gave a hundred Valentine’s

A hundred, did I say?

I gave a thousand Valentine’s

One cold and wintry day.

I didn’t put my name on them

Or any other words

Because my Valentine’s were seeds

For February Birds!


I just printed them out and die cut them with a "Tasteful Labels" die. I lined up the die so the words were close to the bottom and folded the top edge over the top edge of the bag. I had stapled the bag shut and I glued the words on top. I added a bow and the bag was done. I can see making these for Easter!! Probably with candy this time!  LOL

This was a fun project and there's going to be some happy birds out there!

Thank you SO very much for taking your time to stop by and see today's Valentine's Day gift bag,
Wanda

Wednesday, February 09, 2022

Flowering Flowers, Friendly Hello, Eden's Garden, Sympathy Card, 2022 Stampin' Up! Spring Mini Catalog

After I finished this card I actually said, "I pulled it off".  I struggled with this flower. I wasn't sure where I was going with it. But after I figured out some elements of it I moved forward.

The base of the card is a folded half-sheet of Basic White card stock.  I cut a 4" x 5-1/4" piece for the top layer, the focal piece.

I took a scrap piece of Basic White card stock and stamped the flower using Melon Mambo ink. I fussy cut the flower out.  I didn't like how there was so much white showing on the flower but I remembered that if I used Wink of Stella it would pull off some of the ink and spread it around. And that's exactly what it did. I now liked the flower.

Then there were the leaves. I wanted to use some smaller leave and I found these in the "Eden's Garden" bundle. I die cut three of them using Pear Pizzazz card stock. I thought these leaves looked so pretty. There's texture lines plus open areas.

I set the flower and the leaves on the focal piece and wasn't happy with the background. I thought the card could use some dots.  I stamped the dots from the "Friendly Hello" set and Crushed Curry ink. It was such a tiny stamp, so I had to stamp it a lot around the left and bottom area of the card.  

Once I felt I had enough dots, I set the flower back on the piece so I could see where the words could go. The words are from the "Eden's Garden" set and were stamped using black Memento ink. 

Now I was ready to assemble the card.

I added Dimensionals to the back of the flower and then set the leaves in place. I struggled with the two on the right side. One stuck to a Dimensional and the other didn't have one near it. So I just added some double-sided tape to the one that was stuck and affixed the other one across it. Now I had all three leaves stuck to the flower. I set the flower in place on the front of the card.  I thought the center of the flower needed something, so I added some crystal rhinestones and the card was done.

Once I got the flower figured out, the rest of the card went a lot more smoothly.

Thank you SO very much for taking your time to stop by and see today's sympathy/friendship card,
Wanda

Tuesday, February 08, 2022

Calming Camellia, Special Moments, Sympathy Card, 2022 Stampin' Up! Spring Mini Catalog

What drew my attention to this card was the Designer Series Paper (DSP). At first I thought it was sponged on but then I read the post and it's from the "Simply Marbelous" 6" x 6" stack. So I got out what I needed and I began the card.

The base of the card is a folded half-sheet of Basic Gray card stock. This card opens on the right and the fold is on the left.

I die cut the DSP using the largest stitched rectangle die. If you don't have this die set you can cut the DSP at 3-3/4" x 5-1/8". Then I cut a 3-7/8" x 5-1/4" piece of Basic Black card stock for the layer. I taped the DSP to the Basic Black layer and then I taped that to the front of the card base.

I cut a 3" x 3-1/2" piece of Basic White card stock and I stamped the flower from the "Calming Camellia" set using Basic Gray ink. I cut a 3-1/8" x 3-5/8" piece of Basic Black card stock for the layer. I taped the two pieces together and then I taped them on top of the DSP towards the right side of the card.

The words are from the "Special Moments" set and were stamped using Basic Gray ink on Basic White card stock. I die cut them from the "Ornate Frames" die set. I also die cut two Basic Black pieces for the layer behind the words. I added Dimensionals behind the words and set them in place on the front of the card.

I tied a triple bow and set it over the upper corner of the word piece. I glued it. I am not thrilled with the placement of the ribbon. And I had to look on YouTube to see how to tie a triple bow.  Found it and did it. My ribbon is Basic Gray Taffeta, it's retired but it's all I had. 

I had some small black enamel dots and I added them to the bottom right of the card. A 4" x 5-1/4" piece of Basic White card stock was added to the inside of the card and it was done!

This was a super quick and easy card to make. Should I ever make another one, I may change the bow or omit it all together and move the words down. It's the bow that is what I am not liking about this card.  

Thank you SO very much for taking your time to stop by and see today's Sympathy card,
Wanda

Monday, February 07, 2022

Love & Happiness, Wedding Card, Shaker Card, 2022 Stampin' Up! Spring Mini Catalog

I ran across this beauty on Pinterest. I pretty much copied it as it was because I had all the items to make it! You can see the original card here

The base of the card is a folded half-sheet of Basic Black card stock. This card opens at the bottom and the fold is at the top.

I cut three pieces of Basic White card stock that measured 4" x 5-1/4".  I took one of them and taped it to the inside of the card. The other two I die cut a heart using the die from the "Bouquet of Love" die set. I cut them both out at the same time, making sure to keep the edges lined up. If they get a little off kilter, you can always trim up the one on the back.

Once the pieces were die cut, I then textured them with the beautiful "Bouquet of Love" embossing folder.  Then I glued the two pieces together. I set them under my mat to dry flat while I get what I need for the next step. I used Tombow Mono glue. It doesn't warp like other glues do. I use the glue on textured pieces because I don't feel that tape makes enough contact to stick well. 

A window sheet was cut at 3-3/4" x 3-3/4" and glued over the heart. Then I took a 3-3/4" x 3-3/4" piece of Basic White card stock and stamped the words from the "Love & Happiness" set using black Memento ink. You can make your card stock a bit bigger if you want to make sure you have room to move the heart opening over it to center it. What I did was I took my 3-3/4" x 3-3/4" piece and placed it on the back of the heart. Then I set the two pieces in my Stamparatus, lining up one side and bottom against the side and bottom of the Stamparatus.  Then I removed the textured heart piece. I placed magnets to the piece to hold it in place and I stamped my words. I was glad I did that because my black Memento ink pad was a bit dry so I had to stamp a couple of times to get a nice dark image. 

After the words were done, I took my foam adhesive strips and went around the heart on the backside. I had to cut my strip because it didn't want to bend well.  As long as you make the ends touch you can cut it into as many pieces as you want. 

Next I set the word piece on my worksurface and added my sequins. They are from the "Subtle Shimmers" sequins container. They were leftover from the holiday catalog items. I always have stuff like that left over. And this time I was glad I did! I took a couple of pinches of sequins and placed them over the center of the words. You can add as many pinches as you want. I felt the two that I added were enough. Don't pile them high or the window sheet will bulge over them and make slack in your opening. Tape them down a bit. Remove the backing on the foam strips, hover over the words (watch the sequins start to cling to the window sheet, grrr) and set the heart piece on the word piece.  I forgot to take a dryer sheet over my window sheet to avoid that static cling. It's very cold and dry here in Minnesota and my house is no exception! But I did get the two pieces attached with not problems, a few sequins on the window sheet won't hurt anything. But if they get under the foam tape area then you will have some problems. 

I took some ribbon from the "Black & White" gingham ribbon that was a carry over from the holiday catalog. Again, I was happy that I could use it since I didn't use much of it last fall. I cut a 7" piece and taped the ends behind the Basic White pieces. Then I turned it over and took the ribbon (still on the spool) and tied a bow. Then I clipped the ends. 

Dimensionals were added to the back and the piece was set in place on top of the Basic Black card base.

I took some enamel dots I had and a black permanent marker and colored them. They were set in place on the front of the card and the card was done.

I really like how this card turned out. I would love to make this in other colors and maybe even make a Valentine's Day card using this set too!  There's a lot of words in the "Love & Happiness" set.  This is a very nice and versatile bundle.

Thank you SO very much for taking your time to stop by and see today's wedding card,
Wanda

Sunday, February 06, 2022

Let's Set Sail, Catch You Later, Masculine Birthday Card, 2022 Stampin' Up! Spring Mini Catalog

I thought I would bring out the "Let's Set Sail" set again and make a masculine birthday card. Here's what I came up with. Oh, and it was exactly what was in my head when I was thinking about how to make it!  Once in a while things work out! LOL

The base of my card is a folded half-sheet of Basic White card stock. This card opens at the bottom and the fold is at the top.

I cut two pieces of Real Red card stock measuring 2-1/2" x 3-5/8" for the back layers.

A 3-5/8" x 4-7/8" piece of Basic White card stock was cut and then textured with the "Painted Texture" embossing folder. I glued the Real Red pieces to the upper left and lower right corners of this piece of card stock and I set it aside to dry.

I die cut the second largest circle from the "Layering Circles" dies using Basic White card stock. I used my blending brush and scrubbed in some Soft Sea Foam at the bottom. Then I added some Mossy Meadow. I wanted a greener looking ocean because I needed a blue sky. I used Pacific Point ink for the sky and I also moved a bit of that color into the sea too. 

The sail boat was stamped using Basic Gray ink for the boat and Pacific Point for the sails. I punched them out using the "Sailboat Builder" punch. I set the pieces on the circle so I could see where to place the birds. I stamped the birds using Basic Gray ink. Then the boat was set in place on the circle using glue. I added the sails using Dimensionals. 

Next I punched out the largest scalloped circle using Real Red card stock. I taped the Basic White circle to the scalloped circle. Dimensionals were added to the back and the piece was set aside. I wanted to make sure I had room for the words.

The words are from the "Catch You Later" set and were stamped using Basic Gray ink on a piece of Basic White card stock that measured 1/2" x 1-7/8".  I cut a 5/8" x 2" piece of Real Red card stock for the layer. I taped the two pieces together and then glued them to the bottom right side of the card.

Then the large circle was set in place on the textured piece. This was then glued to the card base and the card was done.

This card could be made into a masculine get well card, thinking of you card, and even a sympathy card.

Thank you SO very much for stopping by to see today's masculine birthday card,
Wanda


Saturday, February 05, 2022

Flowering Flowers, Special Moments, Birthday Card, 2022 Stampin' Up! Spring Mini Catalog

I found today's card to be a quick and easy one. And a perfect one to use little strips of Designer Series Paper (DSP) that's sitting in your stash!  I had to laugh when I saw the picture of this card after posting it. It's crooked.  It's really not crooked, it's the angle of the card. But it did make me laugh!

The base of my card is a folded half-sheet of Basic White card stock. This card opens on the right and the fold is on the left. 

I cut a 4" x 5-1/4" piece of Mango Melody. A color of card stock I don't use very often. It's kind of fun when you can use colors that are just sitting there.

Next I cut a 2-3/5" x 5" piece of Basic White card stock and a 5" x 2" piece of the DSP.  You can make the DSP as narrow as 1-1/2", my piece was in my stash already cut and since the left side was going to be under the Basic White piece, it didn't matter how wide the piece was. I taped the DSP to the Mango Melody piece.

Then I stamped the flower from the "Flowering Flowers" set using Mango Melody ink for the flower and Old Olive for the greenery. I taped that piece on top of the Mango Melody card stock, covering up some of the DSP.  When I stamped my flowers, I did mask them so I could color in the leaved without making a mess on the flowers. 

The Old Olive grid paper is DSP from the same "Flowering Fields" 12" x 12" DSP package.

The words are from the "Special Moments" and were stamped on a piece of Basic White card stock using Old Olive ink. I trimmed the Basic White piece to measure 3/4" x 2-3/4".  I taped it to the grid piece of DSP that measures 1-1/4" x 3-1/4".  I added Dimensionals to the back and set it aside.

I took some linen thread and wrapped it around my fingers three times. I used glued dots to hold the loops together in a circle. Then I twisted the circle to form a figure 8. I pressed the glue dot to the front of the card and pulled on some of the loops until I liked how they looked. The words were added on top of the loops.

I added two "Polished Dots" to the front of the card and the card was done.

This was a very fun, quick and easy card to make. I do like the color too. The "Flowering Fields" is a fun set to play with. I can see making this card into a Mother's Day, Sympathy, Thinking of You, Wedding, Anniversary or Get Well card. SO versatile. 

Thank you SO very much for stopping by today,
Wanda

Friday, February 04, 2022

Special Moments, Flowering Fields DSP, Birthday Card, 2022 Stampin' Up! Spring Mini Catalog

WOW! If you are looking for a way to use up some of the Designer Series Paper (DSP) you have in your stash, this is a perfect card to do it with.  You can make quick birthday, thinking of you, get well, Mother's Day and sympathy cards using this layout.  It's quick and easy too!

The base of the card is a folded half-sheet of Basic White card stock. This card opens on the bottom and the fold is on the top. 

I cut a 5-1/2" x 2-1/2" piece of DSP from the "Flowering Fields" 12" x 12" package. Then I cut a 1" x 5-1/2" piece of Poppy Parade card stock and taped it to the upper edge leaving about 1/8" showing. 

The bottom edge was done using the stitched scalloped die from the "Scalloped Contours" die set that goes with the "Color & Contour" stamp set.  I die it from a 2" x 5-1/2" strip of Poppy Parade card stock. You can make that strip not quite that wide if you want, there's a little room to work with. I just had it that wide because I was actually using some scraps of Poppy Parade I had. As long as the piece is wide enough to cut the scallops and a bit left over to attach to the DSP.  Once I was done die cutting, I taped the card stock to the DSP.

I set the taped pieces on top of the card base to see where the wording would go. I think I should have moved my words down just a little bit more so they weren't so close to the scallop.  But it still looks nice the way it is. The words are from the "Special Moments" set and were stamped using Mossy Meadow ink. Then I colored in the birthday because they were just an outline and I wanted something solid.  

Then I taped the DSP piece to the front of the card and the card was done.

I told you it was quick and easy. I'm thinking about digging out some retried DSP and making more.  Even some retired Christmas DSP and get a jump on my Christmas cards plus getting rid of the retired DSP!!! Win/win!!.

Thank you SO very much for taking your time to stop in and see today's quick and easy birthday card,
Wanda

Thursday, February 03, 2022

Let's Set Sail, Masculine Birthday or Father's Day Card, 2022 Stampin' Up! Spring Mini Catalog

I found this fun and adorable card at "Claire Daly Creates". I have followed her blog for several years and have enjoyed her posts. She's very talented.

The base of the card is a folded half-sheet of Basic White card stock. The card stock was cut in half on the short side so once cut it measured 4-1/4" x 11".  This card opens at the bottom and the fold is at the top.

A 4" x 5-1/4" piece of Basic White card stock was cut and then die cut with the circle die. The second largest circle die from the "Layering Circles" die set. I should have cut the circle up a bit higher because I could hardly get the word piece in place.  

Next the piece was textured using the "Tasteful Textile" embossing folder. 

I took a 3-1/4" x 3-1/4" piece of Basic White card stock and used my Blending Brush to scrub on some Pacific Point ink for the sky.  That is such a pretty color. I set this piece in my Stamparatus and I set the birds stamp where I thought they were going to be placed. Then I stamped the birds using Pacific Point ink. Then this piece was glued to the back of the circle.

Two strands of white Baker's Twine was tied around the top of the piece but it should have been tied around the piece after it was set in place on the front of the card with Dimensionals. OOPS!!!  I think it would have made it easier to tie!  Live and learn, right.  Or just pay better attention!  LOL

The sail boat was then made. The boat was stamped using Basic Gray ink and the sails were stamped using Real Red ink. There's a matching punch too!  Made it easy to cut the pieces!  I love matching punches and dies. I set these pieces aside.

The words are from the same "Let's Set Sail" set and were stamped using Basic Gray ink. They were cut out using the smallest "Stitched Rectangle" die in the grouping of 8 dies. I added Dimensionals behind it and set it in place on the bottom left corner. 

Then I was able to add the boat. I glued the base of the boat in place. The sails were added using Dimenisonals. And the card was done.

It's a very quick and easy card to make and I would love to make a couple more with a "Father's Day" message and adding the Baker's Twine around the whole card front and not just the textured piece. 

Thank you SO very much for taking your time to stop by and see today's masculine card,
Wanda