Pin It

Thursday, June 30, 2022

Sweet Songbirds, Thank You Card, 2022-2023 Stampin' Up! Catalog

I found this cute card on Pinterest. But mind didn't turn out the same because I flipped my Designer Series Paper (DSP). I didn't intend to do that and the moment the tape went on the DSP I realized I didn't want that side. But oh well, it is what it is and it's still cute!

The base of my card is a folded half-sheet of Basic White card stock. This card opens on the right and the fold is on the left.

I cut a 5-3/8" x 4-1/8" piece of Tahitian Tide card stock. On top of that was taped the DSP from the 6" x 6" In-colors stack. 

Next I cut a 2-7/8" x 4-1/8" piece of Basic White card stock for the focal piece. The first thing I stamped was the bottom branch. Then I stamped the bird and punched it out. The bird was stamped using Tahitian Tide ink on a scrap piece of Basic White card stock. I set the bird near the branch for placement of the next branch. I stamped the next branch. Both were stamped using Soft Suede card stock.

Parakeet Party ink was used to stamp the leaves. The little Tahitian Tide flowers were stamped around the leaves.

The birds feet were stamped using Mango Melody ink. And then the musical notes were added using black Memento ink. And the eyes were stamped at this time too.

I taped the wing on the bird and I glued the beak in place. The beak was punched using a scrap piece of Mango Melody. 

Dimensionals were added to the back of the bird and it was set in place on the focal piece. Then the focal piece as taped to a 3" x 4-1/4" piece of Tahitian Tide card stock. Then Dimensionals were added to the back of that and set in place on the front of the card.

The little sign was stamped using the image from the "Sweet Songbirds" set with Soft Suede ink that was stamped off once. The words were stamped on top of that using black Memento ink.

This was a very fun and quick card to make. I REALLY like the Tahitian Tide color!

Thank you SO very much for taking your time to stop by and see today's thank you card,
Wanda

Wednesday, June 29, 2022

Lovely & Lasting, Happiness Abounds, Hues of Happiness, Birthday Card, Stampin' Up!

I found this beauty on Pinterest and thought I'd give it a try. I just can't seem to get enough of those flowers.  Mostly because I don't have to fussy cut them, there's dies for that!  Gotta love it!  I know I do!

The base of the card is a folded half-sheet of Starry Sky card stock. This is such a pretty color. The card opens on the bottom and the fold is on the top.

I cut two 4" x 5-1/4" pieces of Basic White card stock. One piece was taped to the inside and the other was for the front. I took the front piece and the fun die from the "Happiness Abounds" bundle. It is an interesting die. It cuts out some parts and them just mostly cuts others. You could pull them up a bit so they curl a little. I just left them, there was too many to do that to. I taped this piece to the front of the card base.

Next I die cut the two flowers and the leaves. The one leaf was a double leaf that was cut in half. The flowers were set in place with Dimensionals and the leaves were slipped under them.

The words are from the "Lovely & Lasting" set and were stamped using Starry Sky ink on a scrap piece of Basic White card stock.  I used the "Double Oval" punch on the words and on the Starry Sky layer. It's a fun sort of scallopy layer. I taped the layers together and set them in place using Dimensionals.  And the card was done!

This was a very fun, quick, and easy card to make. I didn't add any embellishments, I thought with all of the openings on it, it didn't need anything else. 

Thank you SO very much for taking your time to stop by and see today's birthday card,
Wanda

Tuesday, June 28, 2022

True Beauty, Awash in Beauty, Friendship Card, Stampin' Up!

Today I found a group of cards on Pinterest and in that group one stood out and I thought I'd give it a try. You can see the group of cards here

The base of the card is a folded half-sheet of Basic White card stock. This card opens on the right and the fold is on the left.

I cut a 4" x 5-1/4" piece of Basic White card stock and taped it to the front of the card.

The Designer Series Paper (DSP) is from the "Awash in Beauty" 12" x 12"package. I cut it at 2-7/8" x 2-7/8".  The layer behind it is a 3" x 3" piece of Balmy Blue card stock. I taped the DSP to the card stock. I added Dimensionals to the back and set it in place on the front of the card.

The strip with the words on it were cut as follows. I took a 1" x 4" piece of Basic White card stock and textured it using the "Pretty Flowers" embossing folder. I glued a 3/4" piece of DSP from the same "Awash in Beauty" package. Then I took some white Baker's Twine and tied it around the strip and made a bow.

The words are from the "True Beauty" set and were stamped on a scrap piece of Basic White card stock using black Memento ink. I used the die from the "Stylish Shapes" die set on the words and added Dimensionals behind it. I set the words in place on the strip and then I glued the strip in place on the front of the card.

This was a very fun, quick, easy, and sweet card to make. I didn't add any embellishments I thought it would stick up too much because of the flower piece already being raised up.

Thank you SO very much for taking your time to stop by and see today's friendship card,
Wanda

Monday, June 27, 2022

Artistically Inked, Friendship Card, Stampin' Up!

One of my favorite places I love to go on the internet is "Claire Daly Creates" website. She is a very talented lady I loved this card she made so I thought I'd give it a try. You can see the original card here.

The base of my card is a folded half-sheet of Basic White card stock. This card opens on the right and the fold is on the left. 

I cut a 4" x 5-1/4" piece of Melon Mambo card stock and I textured it using the "Pretty Flowers" embossing folder. I glued this piece to the front of the card base.

I used the largest stitched square from the "Stylish Shapes" die set on Basic White card stock.

Next I stamped the flower from the "Artistically Inked" set using Melon Mambo ink. I also stamped one using copier paper for a mask. I covered the flower with the copier paper one.

The leaves were stamped using Garden Green card stock. I stamped them twice. I set the square in place using Dimensionals.

The words are from the same set using Garden Green set. I trimmed it to 5/8" x 1-1/2". I set the word piece in place using Dimensionals.

This was a very fun, quick, and easy card to make. I love Claire's cards and anxiously await her next creation!

Thank you SO much for taking your time to stop by and see today's card,
Wanda

Sunday, June 26, 2022

True Beauty, Awash in Beauty, Wedding or Anniversary Card, Stampin' Up!

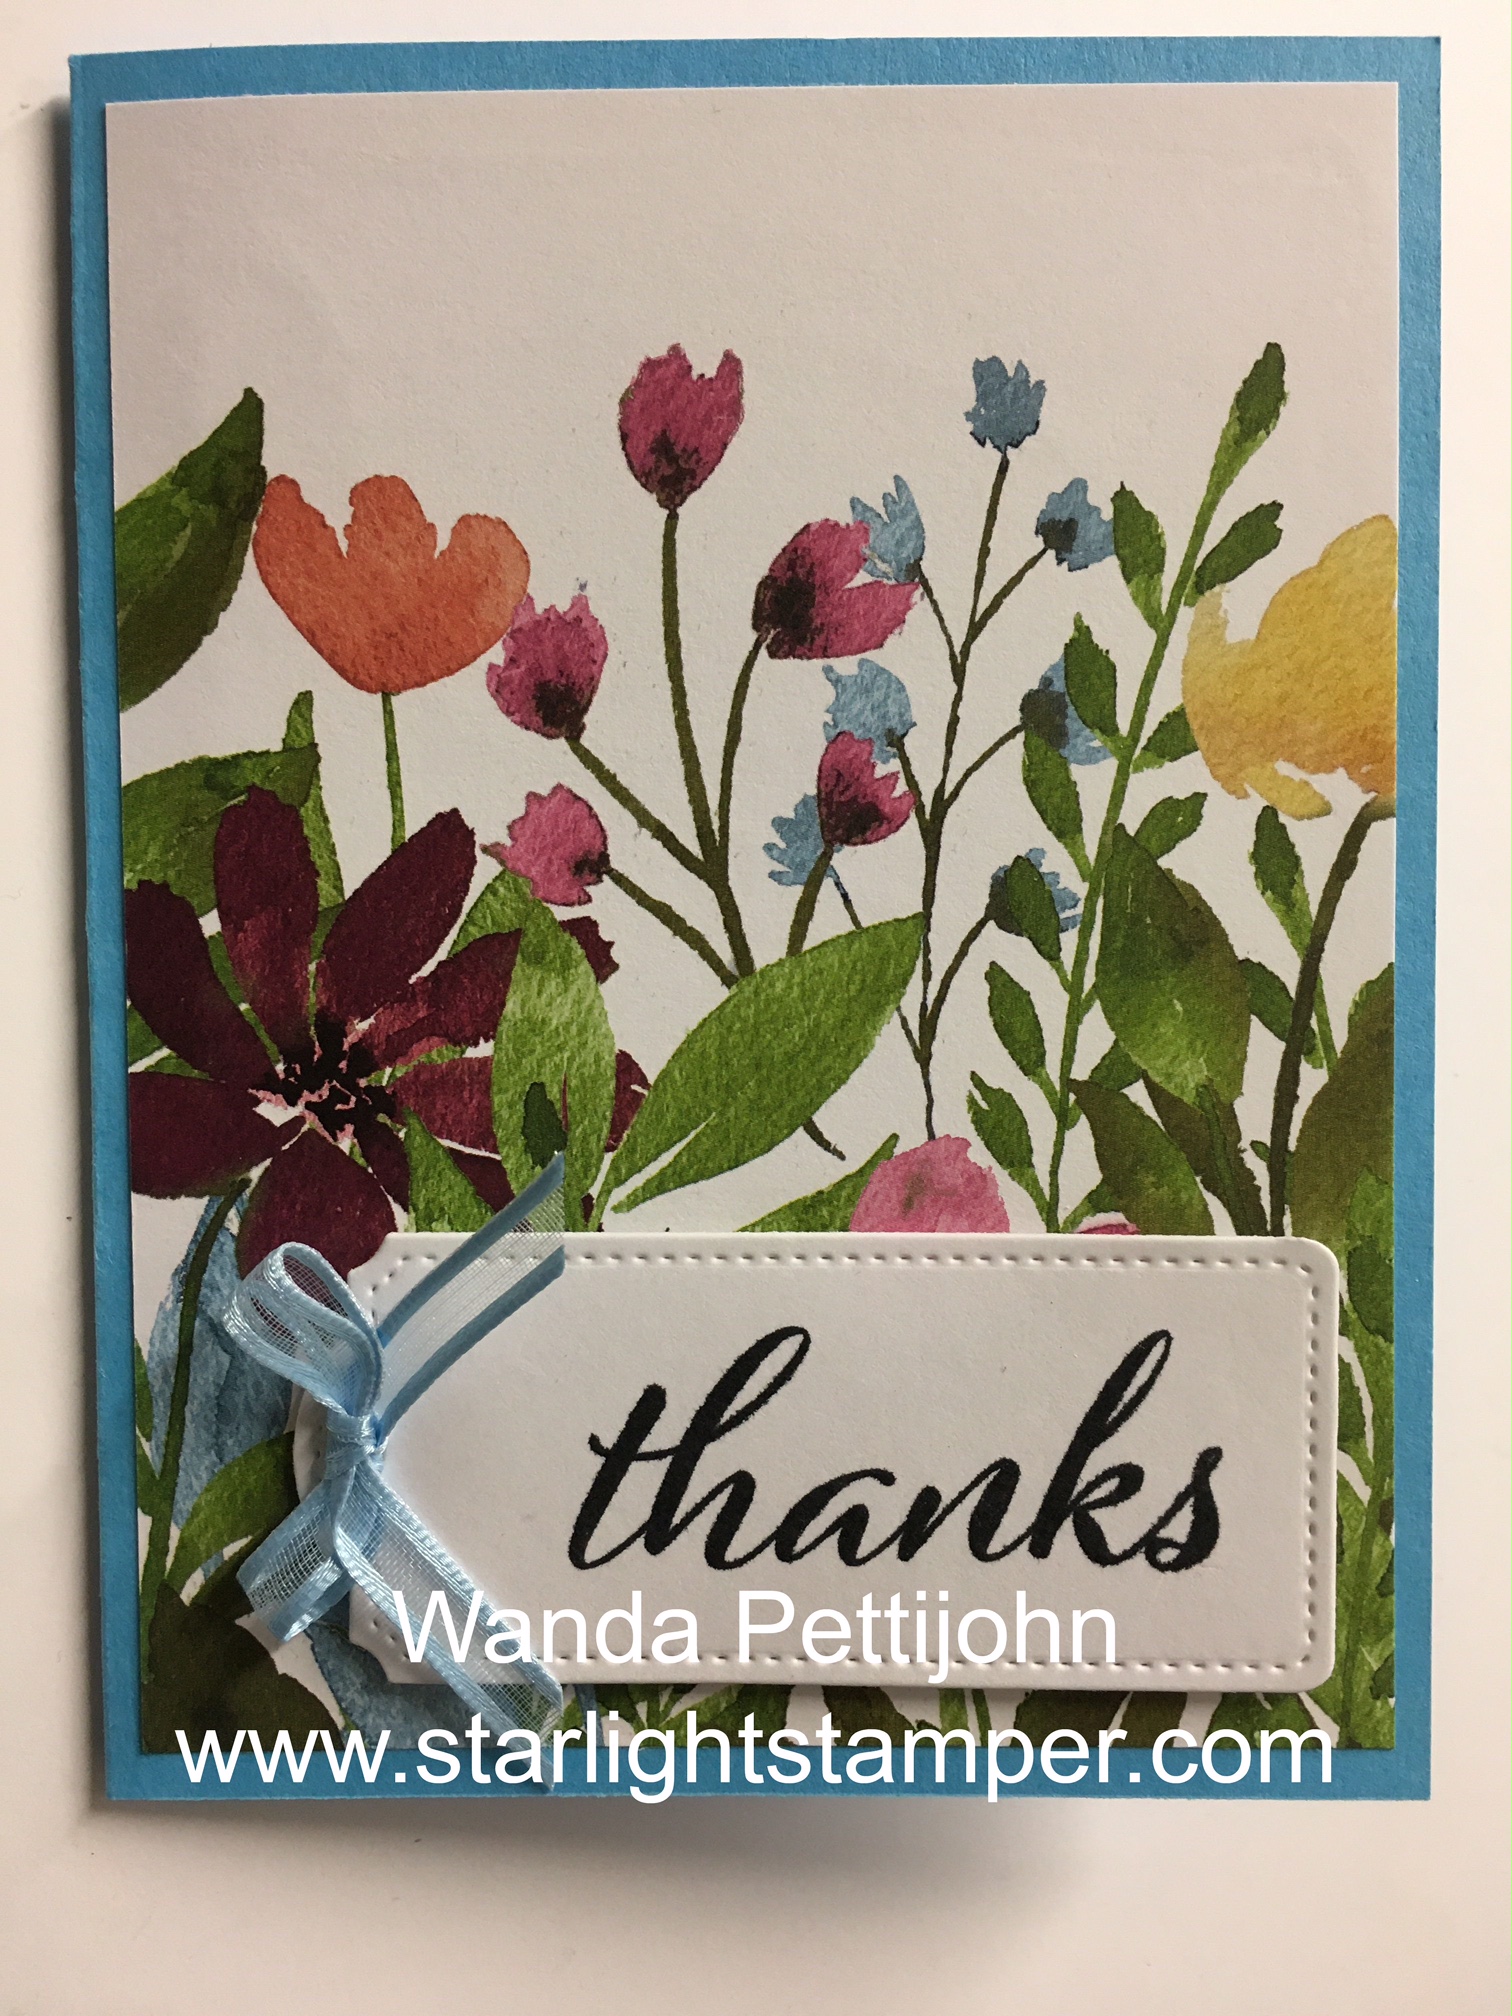
I am not one who does a lot of fancy folds but I thought I'd give this one a try. You have to step out of your comfort zone now and then. I loved the colors and I could have changed it up to be a more standard type layout but I thought I'd just give it a try and hop back in my comfort zone tomorrow!!! LOL  You can see the original card here.  Plus there's instructions and templates. This fold is called a "Double Angled Gatefold" card.

So the first thing I did was I cut a piece of Tahitian Tide card stock at 11" x 5-1/2".  Then I scored each side at 3-3/8".

Next the sides were marked 1-1/4" down from the top. I cut that top area off from the score line to the pencil mark on both sides. 

The bottom was marked at 1" from the side on the bottom edge and that area was cut away from the pencil mark to the upper part of the card at the 1-1/4" mark. 

Next I cut two pieces of Basic White card stock at 5-1/4" x 3-1/8". They are cut like the side flaps of the card base, except they care marked at 1-1/8" on the top and 7/8" on the bottom. 

For the Designer Series Paper (DSP) from the "Awash in Beauty" 12" x 12" package, the pieces were cut at 2-7/8" x 5". They were cut the same way as the card stock but marked at 1-1/8" on the upper part and 7/8" on the lower part. I had struggled with making my pieces, so what I ended up doing was I made one and then used it as a template for my second side. I did hunt for the measurements for the DSP layers but I had no luck, so I am sharing with you the measurements I used. 

Then I taped all of those layers together and taped them to the front of the card. I ended up using glue to put the layers on the card base because I wanted to be able to wiggle them around a bit to make them pleasing to the eye in the event they weren't cut exact. Mine were not cut exact and I did have to move them a bit to make it look like I cut them right! 

I cut a 4" x -5-1/4" piece of Basic White for the inside and I taped it in place.

The original card stays shut using a magnet. I didn't have any thin magnets (and if I do I don't know where I'd find them in my messy workroom!!! LOL), so I made a bellyband. I used Basic White card stock and it measures 1" x 9-3/8".  I scored it at 2-5/8" and 7".  I folded the score lines in and I glued the band shut at the ends. I did this while it was wrapped around the card to make sure I got the size right. You can glue left over right or right over left, it doesn't matter because they will be covered.

I die cut a Tahitian Tide circle using the 3rd largest stitched circle die from the "Stylish Dies" set. And I die cut a piece Basic White card stock using the next size smaller. I taped those two pieces together. I set them in place on top of the belly band using Dimensionals. Be careful to only put the Dimensionals on the bellyband and not on the circles. You could accidently attach the circle to the front of the card and you don't want that.  And no, I didn't do that, I was careful.

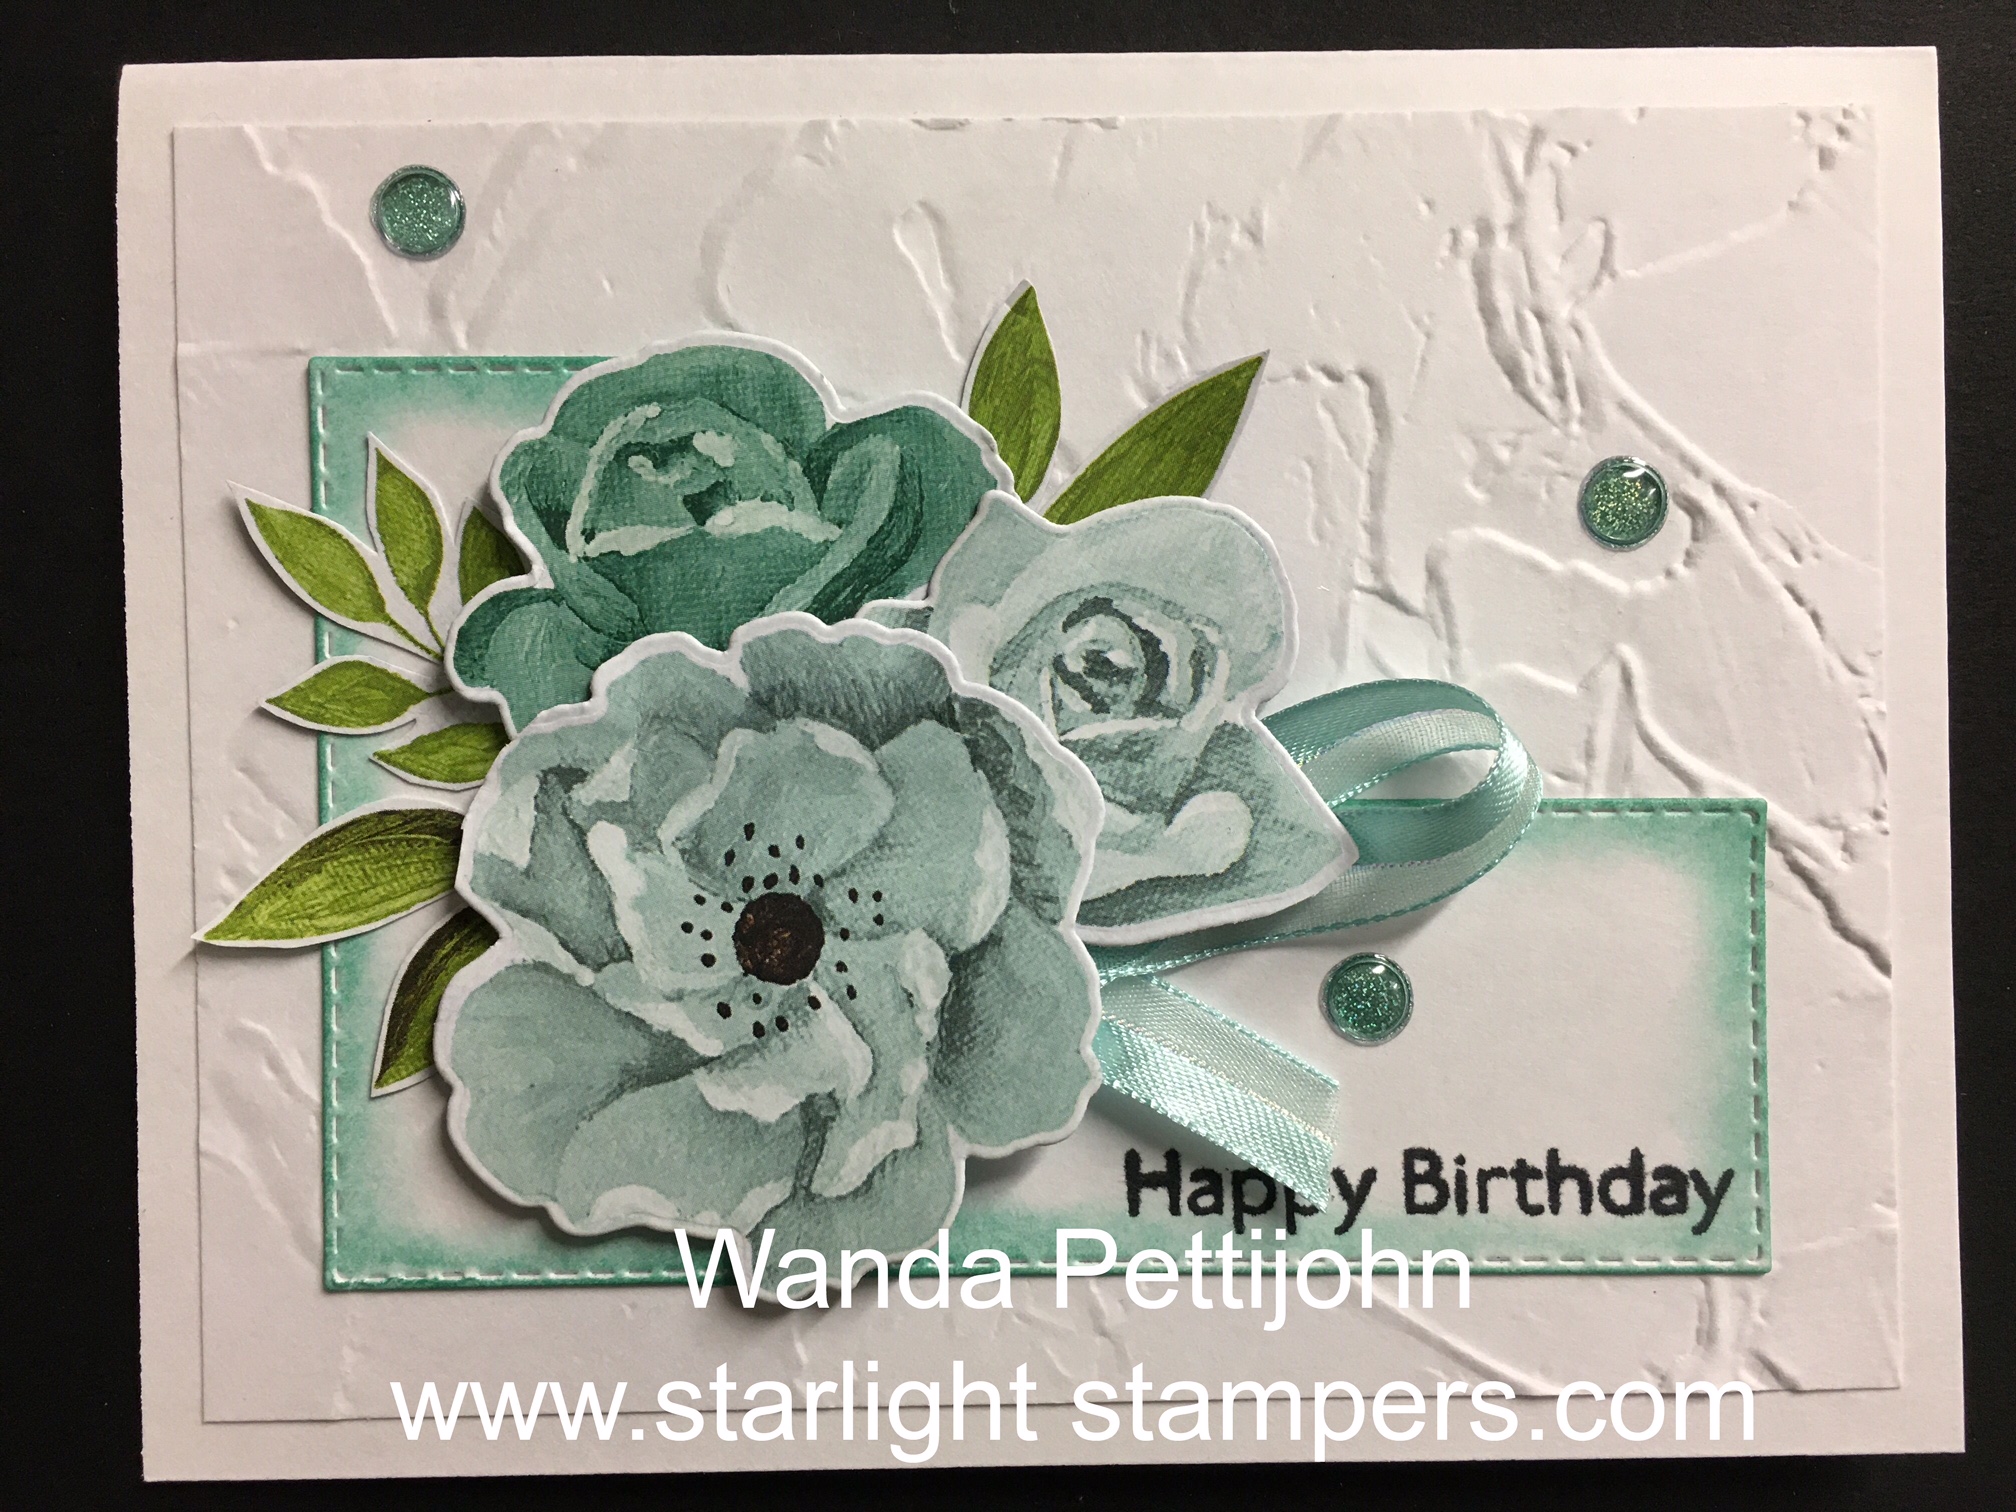
Next I fussy cut the flowers from a piece of DSP. I sut an extra light colored flower so I could pop it up with a Dimensional. I die cut some springs from the "True Beauty" bundle. 

There's no words on the card but it can be used for many occasions, like birthday, anniversary, wedding, thinking of you, get well, and friendship. It's a very versatile card. I'm not sure what I would use it for.  Right now I'm just glad it's finished. I thought it was a bit frustrating trying to figure out that extra top layer. I looked on YouTube and found a how to but it didn't include that extra layer. So that was my biggest struggle and time consumer making this card. I don't know if I'd ever make another one but if I do, I'll follow my instructions!!  LOL I do think it's pretty and I am glad I made it.

Thank you SO very much for taking your time to stop by and see today's fancy fold card,
Wanda


Saturday, June 25, 2022

True Beauty, Artistically Inked, Awash in Beauty, Birthday Card, Stampin' Up!

WOW!!! That's what I have to say about today's card. It was a lot more work than I thought it would be. You can see the original card here

The base of the card is a folded half-sheet of Basic White card stock. It was recommended to use the thicker card stock, so I did.  

I used a double sided sticky sheet behind a 4-1/4" x 5-1/2" piece of Basic White card stock and ran it through the Big Shot with the Trellis die cut from the "True Beauty" bundle. The piece tore when I tried ot remove it. So I tried it with regular card stock and not the thick stuff.  It tore too. So I ended up using just plain Basic White card stock without any sticky on it. Not a fan. I prefer it have things sticky so I can avoid gluing on small areas. 

Next I took a flower from the "Awash in Beauty" Designer Series Paper (DSP)  and it was also die cut using the trellis die.  I did make it sticky on the back.  I tried to keep all of the pieces in place. I even used two different plates on my Big Shot so I could keep everthing together. 

The words are from the "Artistically Inked" set and were stamped using black Memento ink. I cut the piece 1/2" x 2-7/8" after stamping. I added Dimensionals to the back and set it aside.

Now to assemble. I added glue to the back of the trellis piece by putting glue down on my silicone mat and spreading it thin. Then I set the piece on top to pick up the glue. I had a difficult time cleaning up the glue that oozed out.  Once I got it cleaned up enough, I moved onto the flower.

I set the flower pieces in place, matching a few that had fallen out when I removed the trellis part. And a couple Basic White pieces were added for fillers. I didn't use as many as the original card because my flower was orientated differently.  Once I got it looking how I'd like it, I added the word piece.

And for a final touch, three pearls were added to the front and the card was done.

It's a pretty card but it was a lot of work.

Thank you SO very much for taking your time to stop by and see today's birthday card,
Wanda

Friday, June 24, 2022

Celebrating You, Hues of Happiness, Happiness Abounds, Anniversary Card, Stampin' Up!

I saw this card on the internet today and thought I would give it a try. What caught my eye was the color and the use of those flowers. I found that sheet of Designer Series Paper a bit too busy but here it worked! You can see the original card here

The base of my card is a folded half-sheet of Basic White card stock. I just couldn't see using a half-sheet of Melon Mambo for the base, it would have gotten lost. The Basic White made the Melon Mambo and DSP pop!

The Melon Mambo piece measures 4" x 5-1/4" and was textured using the "Painted Texture" embossing folder. That is such a fun folder to play with. It's especially great with masculine cards. No flowers involved at all there!!! 

I cut 6" of some white crinkled seam binding ribbon that is probably retired and I taped it to the back of the Melon Mambo piece. I marked my Melon Mambo piece up from the bottom 1-1/2" on the back for reference. That way I knew I would be getting my ribbon on straight. I did use a glue dot on the ends of the ribbon to hold it down and after I got both ends on I used scotch tape to tape them in place. Then I glued the Melon Mambo piece on top of the card base. I use glue on my textured pieces because I don't feel that the tape makes enough surface contact to hold it in place. With glue, I know it's not going anywhere. I also made sure I got some glue over any ribbon showing. 

The DSP is from the "Hues of Happiness" 12" x 12" package. I cut a 2" strip from the busy flower sheet. I glued that piece in place about 1/4" from the left edge. 

The words are from the "Celebrating You" set and were stamped using black Memento ink. I used the die from the "Happiness Abounds" bundle to cut that fun edge. I couldn't wrap it around my head which way to turn it and I cut it wrong three times!!!  Glad I wasn't making a bunch for a swap!!!  My words may have been as colorful as the flowers!!! LOL  So I decided to die cut the piece first and then stamp it.  No colorful words needed!! LOL  The word piece measures 1-1/4" x 2-3/4". But you can make it whatever size you need for the words you use. I set the word piece in place using Dimensionals.

I took that same ribbon and cut two 7" pieces and tied a bow. Before I pulled the bow type, I slipped in a 4" piece of silver cord and a tiny glue dot to hold the cord in place. I used glue to hold the ribbon in place on the front of the card. The orientation of my bow is different than on the original card. I did that because I wanted it to fit in the envelope without being crunched or pinched. 

I had some enamel embellishments that matched close enough so I added them to the card and the card was done.

This was a fun card to make and I was thrilled that I was able to use that busy DSP!! I think it would be a great birthday, get well, thinking of you, birthday, Mother's Day, friendship, or Wedding card. Very versatile!!

Thank you SO very much for taking your time to stop by and see today's anniversary card,
Wanda

Thursday, June 23, 2022

True Beauty, Eden's Garden, Sympathy or Get Well Card, Stampin' Up!

Our internet is working at the moment, so I'm going to go ahead and make a quick post. It was out for over 2 hours yesterday. The city is putting in all new curbing and road in our neighborhood and the company they hired to do "thing" are breaking things. This is the second time the internet was down and they haven't even begun to start on the street. They dug a hole in our yard for who knows what. The guy filling the hold had extra grass clumps left so he flung them under our bush. UNREAL.  Have to remember to be careful when mowing under it.  The hubby is going to have a talk with them the next time he sees them outside. 

Enough ranting (LOL) so, onto my card. Now which would you say this card is, a sympathy or a get well card?  I am planning on using it as a sympathy card. Maybe I need to save it as a get well card and make a new sympathy card that actually reads "sympathy"???  I don't think I have any current stamp sets with sympathy words so I'll have to find something that's retired.  I got my inspiration for this card from here

The base of my card is a folded half-sheet of Basic White card stock. This card opens from the bottom and the fold is on the top. I cut the sheet in half on the short side so before it was folded it measured 4-1/4" x 11".

I cut a 4" x 5-1/4" piece of Tahitian Tide card stock. Before I taped it in place on the front of the card base, I punched out the piece from the "Lasting Labels" punch.  

Next I cut a 3-7/8" x 5-1/8" piece of Basic White card stock for the focal piece. Before I stamped the flower from the "True Beauty" set, I cut a 1" x 3-7/8" piece of Tahitian Tide Designer Series Paper (DSP) from the in-colors 6" x 6" stack. 

The DSP will be taped about 3/4" from the bottom. I didn't tape it yet, I needed to stamp the flower image first. This was my second attempt because my first flower was too low and it got lost in the label. So I moved my flower up so it was a 1/2" from the top edge of the focal piece. I stamped it using Tahitian Tide ink. Then I taped the DSP in place.

I stamped the words from the "Eden's Garden" set using black Memento ink. I die cut them with the 1-5/8" circle die from the Layering Circles set. 

I took some white Baker's Twine and wrapped it around my fingers a few times and set it in place using a couple of small glue dots. Then I set the Tahitian Tide punched piece on top using Dimensionals. Then the word piece was added using Dimensionals.

I rhinestones that were close in color to the Tahitian Tide, I'm not sure what color they are, I had colored them a long time ago and it was what was left from a previous card. But they were there, they matched close enough so I used them!!  I'm just thinking of how much "stuff" I've been using and trying to use up. I still have SO much!! UGH! But I'm aware of it and trying to use it more.  I will get there!

This was a very fun, quick, simple, and easy card to make. I think it would be fun making another one using the same image but die cutting it.  Maybe!

Thank you SO very much for taking your time to stop by and see today's sympathy/get well card,
Wanda

Wednesday, June 22, 2022

Sweet Songbirds, Birthday Card, Stampin’ Up!


OK, today I’m trying something new. Our Internet is down so I am using my phone to post on my blog. Wish me luck.

I did find today’s card on the Internet, on Pinterest but I am not able to put the link on here because this is all new and foreign to me. I will try to remember to add it later when our Internet is up and running. We are having streets redone in our neighborhood and the people are city hired to take care of some of the electrical things have ruined the Internet twice now and taking her electricity out once. So far. We have a whole summer to go. 

So, the base of my card is a folded half-sheet of Basic White card stock. This card opens on the bottom and the fold is on the top. I cut a 4” x5-1/4” piece of Starry Sky card stock and taped it to the front of the card. 

Next I cut a 3-3/4” x 5” piece of Basic White card stock and taped that to the Starry Sky piece. 

The top layer is a 3-5/8” x 4-7/8” piece of Starry Night Designer Series Paper (DSP) from the in colors 6” x 6” stack. I taped that on top of the card front. 

For the circle I used the largest one in the “Stylish Shaped” die set. I first traced the outer edge on my Basic White card stock and die cut after I was done stamping. I used Crumb Cake ink for the branch and Granny Apple Green for the leaves. Black Memento ink was used for the musical notes. Then I die cut the circle. I added Dimensionals  to the back and set it aside. 

The bird is from the “Sweet Songbirds” set and it was stamped using Starry Night ink. I punched it out using the matching punch. I also punched a wing using the DSP and the beak using Crushed Curry card stock. I glued the wing and beak in place. I added Dimensionals to the back and set it aside. 

The words are from the same “Sweet Songbirds” set and were stamped using black Memento ink on a scrap piece of Basic White card stock. I die cut it with the die from the same “Stylish Shapes” set. 

To assemble the card, I added the circle. Then the bird. The words were added using tape on the right side and a couple of Dimensionals on the left. And that was it

This was a fun card to make and I hope there’s not a lot of typos here and I hope it all makes sense. The whole time I was typing this I was thinking of how I was going to add the pic. So here it goes!

I'm editing my post to include the link to where the original card came from. Click here to see that card.

Thank you ever SO much for stopping by today,

Wanda

Tuesday, June 21, 2022

Happiness Abounds, Hues of Happiness, Birthday Card, Stampin' Up!

I not only like to make cards with lots of layers but I like to make ones with frames.  I thought it would be fun to try a frame card using the flower from "Hues of Happiness" Designer Series Paper (DSP). 

The base of my card is a folded half-sheet of Basic White card stock. This card opens on the bottom and the folds is on the top. 

A 3-7/8" x 5-1/8" piece of Basic White card stock was cut for the top layer.

I die cut the frame using two dies from the "Rectangle Stitched" framelets die set. I used the third and fourth smallest rectangles in the group of 8 in the set. I taped them using post it tape onto the card stock and then ran it through my Big Shot. I taped them together so they wouldn't shift when cutting. Then I set the frame on top of the Basic White piece for word placement.

The words are from the "Happiness Abounds" set and were stamped using Night of Navy ink. But with as dark as that ink is, black Memento ink would have been just fine too! After the words were stamped I set the frame in place using Dimensionals. I used the foam adhesive strips that are often used for shaker cards. I set it in place on the front of the card.

I die cut the flower from the "Hues of Happiness" DSP and a couple of the leaves for the bottom corner. I did add a few Dimensionals where the flower hung over the frame. I didn't want the flower to sag. I taped the leaves behind the flower and then set the flower in place on the bottom corner of the frame.

I had some candy dots left over for the embellishments. I used my dark Night of Navy Blends pen to color them in. I'm trying to use the stuff I have here before I dare invest in anything else. The embellishments seem to retire too quickly to use them all. But now I'm just adding them so I can use them up.

This was a very fun, quick, and simple card to make. It went together fast and I'm pleased with how it looks. This is a very versatile card. It can be used as a Mother's Day, Get Well, Thinking of You, Wedding or Anniversary card too!

Thank you SO very much for taking your time to stop by and see today's birthday card,
Wanda

Monday, June 20, 2022

Happiness Abounds, Art Gallery, Hues of Happiness, Birthday Card, Stampin' Up!

I'm still playing with the "Happiness Abounds" bundle. Perhaps because it's still sitting out on my worktable. I am loving these flowers and with the matching dies, it makes it a much easier card to make. Plus the flowers on the "Hues of Happiness" Designer Series Paper (DSP) are SO pretty.  And not to mention how quick you can whip up a card.

The base of my card is a folded half-sheet of Basic White card stock. This card opens on the bottom and the fold is on the top.

I cut a 3-7/8" x 5-1/8" piece of Basic White and textured it using the "Painted Texture" embossing folder. I glued that to the card base. 

Next I die cut two stitched rectangles from the "Rectangle Stitched" framelits. I used the second smallest one in the grouping of 8. I sponged the edges using Coastal Cabana ink. It was a tossup between that and Pool Party.  I thought Pool Party might be a bit too light and not stand out as much because of the two flowers that are Pool Party color.  I used my blending brush to "sponge" the edges. On one of them I stamped the "Happy Birthday" from the "Art Gallery" set using black Memento ink. I glued the two rectangles onto the front of the card.

The flowers from the DSP were die cut and the leaves were fussy cut. I had some ribbon that looked like the Pool Party color so I added it to my card. I just made a loop and used a glue dot to hold it down and then I took a 1-1/2" piece of the ribbon and let it stick out the bottom area to give the illusion that a bow was made and the rest of it is hiding behind the flowers. 

The flowers were added using Dimensionals. Lay them out first so you know where you want them. I started with the upper left one and set it in place, then the smaller light one on the upper right and then the large one in the center. I tucked the leaves in around the flowers.

For a final touch I added some enamel dots I had that matched. I don't always have the ribbons and other embellishments that are current, so I have been using what I have. All this stuff needs to be used up!

This was a very fun and easy card to make. I like how it turned out and would consider making more in the near future. Stampin' Up! is offering free shipping tomorrow so I think I'm going to take advantage of that and order some more of this DSP (plus a few other things UGH!!!).

Thank you SO very much for taking your time to stop by and see today's birthday card,
Wanda

Sunday, June 19, 2022

Happiness Abounds, Hues of Happiness, Friendship Card, Stampin' Up!

I found today's card on Pinterest and thought I'd give it a try since I couldn't take my eyes off it! LOL You can see the original card here

The base of my card is a folded half-sheet of Basic White card stock. The card opens on the right and the fold is on the left. 

I cut a 4-1/8" x 5-3/8" piece of Coastal Cabana card stock. Before I taped it to the front of the card, I used the second largest scalloped circle die from the "Layering Circles" die set. 

Then I took a 3-7/8" x 5-1/8" piece of Basic White card stock and textured it using the "Pretty Flowers" embossing folder.

A 2" x 5-1/8" piece of Designer Series Paper (DSP) was cut from the "Hues of Happiness" 12" x 12" package and glued to the left of the Basic White textured piece. Then that was glued to the front of the card on top of the Coastal Cabana card stock.

The stitched circle is from the "Stitched Shapes" die cut set and was cut from a piece of Basic White card stock. Then the words from the "Happiness Abounds" set were stamped using Coastal Cabana ink. The circle was taped to the scalloped Coastal Cabana piece. The circles were then set in place on the front of the card using Dimensionals.

The flowers were die cut from the same DSP package. I did have to fussy cut the leaves though. But I managed to do it without whining!!! LOL  I taped the flowers to the circle and slipped the leaves under them. I did add a few Dimensonals under the flowers where they hung over the circles.

I don't have a Coastal Cabana Blends pen and I keep forgetting to look and see if Stampin' Up! sells them but I took my light Bermuda Bay Blends pen and colored three crystal rhinestones and set then I place on the front of the card. And the card was done.

I do like how it turned out and may keep it for a while because I can't take my eye off this one either!!

Thank you SO very much for taking your time to stop by and see today's friendship card,
Wanda

Saturday, June 18, 2022

True Beauty, Awash in Beauty, Happiness Abounds, Birthday Card, Stampin' Up!

 I have another quick and easy card for you today. I like it when I can create several cards in no time.

The base of my card is a folded half-sheet of Basic White card stock. This card opens on the right and the fold is on the left.

I cut a 5-1/8" x 3-7/8" piece of Basic White card stock for the focal piece.

A 4-1/4" x 3-1/2" piece of scrap paper was cut for a template for the lines drawn on the card. I marked the top of the card 1" from the left edge and the bottom marked at 1" from the right edge. This is so I know where to start and stop drawing the line. I took this piece and lined it up on the left and bottom of the focal piece. Then I drew my line from the 1" mark across the top to the 1" mark on the side. I tried to do it all in one motion because if you stop you can get a funny looking little dot on your line.

I die cut the flower and the stem from the "Awash in Beauty" 12" x 12" Designer Series Paper (DSP) package.  I added Dimensionals to the back of the flower and I set it on top of the focal piece but didn't stick it in place. I needed to see where my words would be going.

The words are from the "Happiness Abounds" set and were stamped using black Memento ink. 

Now I was ready to affix the flower to the focal piece.

Dimensionals were added to the focal piece and it was affixed to the card base.

I had some black enamel dots left from a stamping kit so I added a few of them to the front of the card and the card was done.

This was a very fun, quick, and super easy card to make!

Thank you SO very much for taking your time to stop by and see today's birthday card,
Wanda

Friday, June 17, 2022

Artistically Inked, Awash in Beauty, Thank You Card, Stampin' Up!

I was amazed at how quick this card was to put together. You have to LOVE Designer Series Paper (DSP)!! The sheet in the "Awash in Beauty" 12" x 12" pack has these great flowers on the upper and lower edges with a white space in the middle and it allows you to make a card like this. I found this card on Pinterest and I thought I'd give it a try since I had a piece already cut.

With two sheets of this paper in the package, you can whip up 12 cards in no time. I cut the DSP at 4" x 6" and trimmed it on the 6" side to fit my card. I did trim the bottom a bit to allow a bit more white to show on the top. Once cut my DSP measured 4" x 5-1/4".

The base of my card is a folded half-sheet of Tahitian Tide. This card opens from the right and the fold is on the left. I added a 4" x 5-1/4" piece of Basic White card stock to the inside.

The DSP was taped to the front of the card.  

The words are from the "Artistically Inked" set and were stamped on a scrap piece of Basic White card stock using black Memento ink. I die cut it using one of the stitched tag dies from the "Tailor Made Tags" set.

I had some blue ribbon that coordinated with the Tahitian Tide card stock so I tied it in a bow and used a couple of glue dots to hold it in place on the tag.

The tag was set in place on the front of the card using Dimensionals. And the card was done.

This was a fun and unbelievably quick card to make. Like I said, you can whip up a dozen of them in no time at all.

Thank you SO very much for taking your time to stop by and see today's thank you card,
Wanda

Thursday, June 16, 2022

Lovely & Lasting, Awash in Beauty, Birthday Card, Stampin' Up!

I have to admit it, I don't follow directions very well. I am not fond of fancy fold cards and this one had me a bit confused. I was trying to figure out how this card opens with something hanging down from the top left.  I used some removable tape and added a tag to the top piece. I tried to open the card and it would get stuck. SO I took this card in a different direction. You can see the original card here

So here's how I made this card.

I took a half sheet of Granny Apple Green card stock and I scored it at 2-1/8" and 6-3/8".  These scored panels close inward.

I cut two strips of Designer Series Paper from the "Awash in Beauty" 12" x 12" package. I used the pink striped one for the two panels. They were cut at 5-1/2" x 2".  I taped them in place on the side panels.

Then I cut a 3-1/2" x 5" piece of DSP from the same "Awash in Beauty" package. I cut it in half on the 5" side. It's cut like that because the flowers were supposed to line up when the card is closed, had I made it the way it was intended to be made. Once the DSP was cut I taped them to a 3-3/4"x 2-3/4" piece of Granny Apple Green card stock for the layers, I cut two. I taped the DSP to the pieces and then taped the pieces to the front of the card. I taped them so the top and left side were lined up on the top one and on the bottom I lined up the right and bottom sides.  I liked the look, I was able to see the pink DSP in the back.

I die cut a stitched circle from the "Stylish Shapes" die set using the 3rd largest circle on Basic White card stock. I set it in place on the center of the top panel using Dimensionals.

I die cut a flower from a different piece of DSP from the "Awash in Beauty" package, and I cut a leaf at the same time. I set the flower in place using Dimensionals and I slipped the leaf under it.

For the bottom panel, I added a word piece. I used the same "Stylish Shapes" die set. I stamped the words from the "Lovely & Lasting" set using Mossy Meadow ink. Then I die cut the piece. I set it in place on the front of the card, centering it on the panel. 

A 4" x 5-1/4" piece of Basic White was added to the inside and the card was done.

I probably could have been more creative with the card but when you are working on something you are not real fond of it makes it difficult to go above and beyond.

It was fun to step outside the box (once in a while) but tomorrow I'm back in the box!!! LOL

Thank you SO very much for taking your time to see today's interesting fold birthday card,
Wanda

Wednesday, June 15, 2022

A Million Thanks, True Beauty, Awash in Beauty, Thank You Card, Stampin' Up!

 I was at my worktable today wondering what I could do with no electricity and no internet.  Oh my how spoiled I realized I am.  I was lost without both of those luxuries.  I ended up grabbing the box that has the "A Million Thanks" kit in it and decided to make up the remaining 8 cards.  This kit is like a Paper Pumpkin kit.  Everything you need is in the kit.

Today's card is an alternative card from the kit. I didn't like the way the one in the kit was laid out so I decided to be creative with it.  This card opens on the right and the fold is on the left. The original card had the fold on the top and the opening on the bottom.  

It doesn't show up in the photo but the card front area where it's darker is actually clear embossed. It's very pretty.  

The black ribbon looking piece is actually paper that was in the kit. I taped it down on the center of the card.

The word piece and words came with the kit too. It already had the flowers stamped on it.  I just stamped the words using the Evening Evergreen ink that came with the kit in the form of a little ink spot.  Those are always fun to have. I set the words piece in place using the Dimensionals that also came with the kit.

The blue flowers, pink flower, and leaf are from the "Awash in Beauty" 12" x 12" Designer Series Paper (DSP) package. I die cut them with the matching dies from the "True Beauty" bundle.  I slipped the blue piece under the words. It went between the Dimensionals so I added a couple glue dots that came with the kit to hold it down.

The pink flower was set in place with a Dimensional and a leaf was set in place under it using a Dimensional. 

The dark dots came with the kit. I think they are Evening Evergreen color. They are very dark and could pass for black, it's difficult to tell. I set them in place on the front of the card but I thought the card could use something more. SO I added some crystal rhinestones where the dots are on the word piece. Except for the dot between "is" because it wouldn't fit and I thought it would look funny there.  And that was it. The original card was kind of plain but I dressed it up with a few images from the DSP and now I REALLY like it!!!  I think I'm going to try this layout with some other word sets and the same DSP in a day or two.  I hope our internet is working by then. I'm using my cell phone as a hot spot and burning through our data so I must stop and post this.  Hope things get back to what they were soon (I'd say "normal" but I don't know what normal is anymore!)  LOL

Thank you SO very much for taking your time to stop by and see today's card,
Wanda

Tuesday, June 14, 2022

Eden's Garden, Hues of Happiness, Thinking of You or Sympathy Card, Stampin' Up!

The look of today's card was going to be a white on white one but I decided to drag some color into it.

The base of my card is a folded half-sheet of Basic White card stock. This card opens on the right and the fold is on the left.

I cut a 3-3/4" x 5" piece of Basic White card stock.

Next I cut a 2" x 4-3/4" piece of of Basic White that I textured with using the "Painted Texture" embossing folder. I glued this piece to the 3-3/4" x 5" piece.  Then I set that piece in place using Dimensionals.

I cut a 2" x 3" piece of Basic White card stock for the focal layer. I added Dimensionals to the back and set it in place on the front of the card. Depending on the words you use, you may want to wait until they are stamped before you affix that piece. 

Next I cut a 1-1/8" x 3-3/4" piece of Basic White card stock for the word layer. The words are from the "Eden's Garden" set. I mostly bought that set because of the Designer Series Paper (DSP) that sold me on the set. But when I finally got around to getting the set the DSP wasn't available because it was part of an offer.  UGH. So I'm struggling with the set. But I'm hoping by now that there's a lot more samples for inspiration on Pinterest for me to look at or copy!!!  LOL  Anyway, the words were stamped to the left of the piece using black Memento ink.  I taped them in the area where it touches the focal piece and added Dimensionals at the ends. 

The flower is from the "Hues of Happiness" DSP 12" x 12" package. I die cut it and fussy cut the leaves. I set the flower in place using Dimensionals. I moved it around so the words weren't covered. I taped the end of the leaves and set them in place under the flower.

I added a few crystal rhinestones and the card was done.

I am SO pleased with the way this card turned out.  Minimal stamping. An ample amount of layers.  And pretty too!

Thank you SO very much for taking your time to stop by and see today's card,
Wanda

Monday, June 13, 2022

Art Gallery, True Beauty, Color & Contour, Birthday Card, Stampin' Up!

I got my inspiration for today's card from one I saw on the internet but I didn't mark it to remember where. Sorry. I liked the layout but I did change a few things. 

The base of my card is a folded half-sheet of Basic White card stock. I cut a 4-1/8" x 5-3/8" piece of  Balmy Blue card stock and taped it to the front of the card.  Then I cut a 4" x 5-1/4" piece of Basic White card stock and textured it using the "Painted Texture" embossing folder. I glued that piece on top of the Balmy Blue piece. 

Then I die cut the scalloped rectangle from the "Color & Contour" bundle using Basic White card stock. The words are from the "Art Gallery" set and were stamped using black Memento ink. I had just added ink to my pad and it was a bit too juicy. I should have inked it the night before but I forgot!  Or I could have just used less ink.  But it is what it is!  Anyway, I taped the scalloped piece to a piece of Balmy Blue card stock that measured 2-5/8" x 3-15/16".  I set this piece in place using Dimensionals.

I die cut the flowers from the "Awash in Beauty" Designer Series Paper (DSP).  There's SO many fun flowers on a sheet and so many great matching dies!!! I taped the blue piece down first and then the peach colored one. The blush piece was taped next and the pink flower was set in place using Dimensionals. I added some tape to the leaves and slipped them in behind the flowers and the card was done.

This was a very fun card to make. I LOVE all the flowers and the colors, plus it's a fun layout!

Thank you SO very much for taking your time to stop by and see today's birthday card,
Wanda

Sunday, June 12, 2022

Lovely & Lasting, Awash with Beauty, Thinking of You Card, Stampin' Up!

Today's card was a fun one to make. I love cards with layers and this one had a few.  Just enough to meet my minimum standards for layers!  LOL It's also a very easy card to make too.  Get out some scrap Designer Series Paper (DSP) and play along.

The base of my card is a folded half-sheet of Basic White card stock. I cut a 4-1/8" x 5-3/8" piece of Polished Pink card stock. 

Next I cut a 4" x 5-1/4" piece of Basic White card stock for the top large layer. 

The two smaller pieces were cut at 1-3/4" x 4" for the long DSP piece and 2" x 2" for the smaller one. I also cut a 1-7/8" x 4-1/8" piece of Polished pink for the layer and a 2-1/8" x 2-1/8" for the square layer. I taped those layers together.  I set them on top of the card for word placement but I didn't tape them down.

The words are from the "Lovely & Lasting" stamp set and were stamped using Polished Pink ink. Then I textured that piece using the "Painted Texture" embossing folder. I glued that piece on top of the large Polished Pink piece.

Then the two DSP layered pieces were set in place. I used Dimensionals on the long one and Dimensionals on the left side of the smaller one and tape on the right side. I colored the flowers over in Wink of Stella (this time I made sure the Wink of Stella pen was clean!).

I thought the card could use a little something else so I fussy cut some circles out of the scrap that was left from making the panels.  I glued them in place and added some Wink of Stella to them too.  And the card was done.

This was a fun and quick card to make. I love how colorful it is and the fun layers. 

Thank you SO very much for taking your time to stop by and see today's thinking of you card,
Wanda

Saturday, June 11, 2022

True Beauty, Awash in Beauty, Friendship Card, Stampin' Up!

I love finding new layouts. I found this one here. I thought it would be fun to give it a try. It's got some fun layers. I LOVE layers and yet it can be made pretty quick. Here's what I came up with. 

The base of my card is a folded half-sheet of Basic White card stock. This card opens on the right and the fold is on the left.

I cut a 3-1/4" x 5" piece of Designer Series Paper (DSP) from the "Awash in Beauty" 12" x 12" package. The layer behind it is a 3-1/2" x 5-1/4" piece of Old Olive. I taped the DSP to the Old Olive piece and then I taped that to the left side of the card.

Next I cut a 1-1/2" x 3-1/4" piece of Old Olive and textured it using the "Pretty Flowers" embossing folder. I glued that to the front of the card about 3/4"" up from the bottom of the card.

Then I cut a 1-3/4" x 3-1/4" piece of Basic White card stock and I set it in place on the front of the card using Dimensionals. I placed it about 5/8" from the fold and about 1-1/8" from the top and the bottom edges.

I die cut the flowers and leaves from a sheet of DSP in the "Awash with Flowers" package. I taped the blue flowers in place and the center flower was set on top using Dimensionals. Then the leaves were tucked under the flower.

The words are from the "True Beauty" set on a 1/2" x 2-1/2" piece of Basic White card stock using Old Olive ink. I taped it to a 3/4" x 2-3/4" piece of  Old Olive card stock. The Basic White was taped to the Old Olive piece and the piece was set in place on the card. I used tape on the left and Dimensionals were it would be attached to the textured Old Olive piece. 

I had some enamel dots that I colored with my dark Mossy Meadow Blends pen. I set them in place on the upper right part of the card.

I thought the flower could use some sparkle so I colored it in with Wink of Stella. My pen was not clean so the flower got a little dirty. It had some blue on it from a card or something I made a while ago. UGH! After cleaning it off I colored the rest of the flower, the blue flowers and the leaves. And the card was done.

This was a fun card to make and I really liked all the layers.

Thank you SO much for taking your time to stop in and see today's friendship card,
Wanda

Friday, June 10, 2022

Color & Contour, Thank You Card, Stampin' Up!

Many times I get to playing with all of the new stuff and I forget about the stuff that I have that is still current. I really like the "Color & Contour" set (bundle). It's got great words, fun images, and FABULOUS dies. Today I used the scalloped one. 

The base of my card is a folded half-sheet of Basic White card stock. I took a 4-1/4" x 5-1/2" piece of scrap copier paper and folded it on the long side at 1-1/8".  I used this as a guide for the die. I slid the copier paper over the front of the card with the folded edge on the open edge of my card. Then I slipped the scalloped die under it and lined it up. I used a couple of strips of post it note to hold it down and then die cut the edge.

Next I stamped the flowers from the "Colors & Contour" set using black Memento ink. I stamped two. I colored them using my Blends pens. I used the light Daffodil Delight one for the yellow flowers and the light Calypso Coral for the highlights.  For the left flowers I used the light Calypso Coral pen and the dark one for the highlights. I didn't have the Blushing Bride color and I don't think they make it. I'll have to check. If they do, I'll have to get it and if they do, I'll have to find a place for it since the "thing" I keep my pens in is full!   Anyway, I colored the leaves using both the light and dark Old Olive pens. Then I die cut the piece.  I'm SO spoiled by die cuts that I rarely buy a set that doesn't have them.

I cut a 1-1/4" x 5-1/2" strip of Designer Series Paper (DSP) from the "Awash in Beauty" 12" x 12" package and taped it to the inside right of the card.

I set the flowers on top for placement of the words. The words are from the "Color & Contour" set and were stamped using black Memento ink.

The next thing I did was set the flowers where I liked them and added a little tape behind them to hold them together.  Then I turned it over and added Dimensionals all over the back, making sure to add them where the two pieces meet so they were more secure. I set the flowers in place on the front of the card.

A linen thread bow was tied and set on the stem using a small amount of Tombow multi glue. And the card was done.  I thought about adding some bling and I might still do it but I need to give it more thought.

This is a very versatile card. It can be used for a number of occasions.

Thank you SO very much for taking your time to stop by and see today's thank you card,
Wanda

Thursday, June 09, 2022

Happiness Abounds, Awash in Beauty, Birthday Card, Stampin' Up!

Today's card is a fairly simple one. It's got a few layers but easy to do.  Here's how I made this card.

The base of the card is a folded half-sheet of Basic White card stock. This card opens on the right and the fold is on the left. 

A 4" x 5-1/4" piece of Basic White card stock was cut and textured using the "Painted Texture" embossing folder. I glued this piece to the front of the card.

Next I cut a strip of Designer Series Paper (DSP) from the "Awash in Beauty" 12" x 12" package. It measured 1-3/4" x 4-1/4" and the other piece of DSP was cut at 3" x 1". The Mossy Meadow card stock was cut at 2" x 4-3/4" and the other piece was cut at 3-1/4" x 1-1/4".  I taped the DSP to the card stock strips.

I lined the two pieces up so the smaller one was about 1" from the edge of the other strip and about 3/8" from the top and bottom. I taped the two pieces together. Then I glued them to the front of the card.

The words are from the "Happiness Abounds" set and were stamped using Mossy Meadow ink on a 1/2" x 3-3/8" piece of Basic White card stock. I snipped the corners. Then I cut a 3/4" x 3-5/8" piece of Mossy Meadow card stock and taped the word piece to it. I snipped the corners to match the Basic White corners. Dimensionals were added to the back and the piece was set in place.

I colored a few crystal rhinestones using my dark Mossy Meadow Blends pen and set them in place on the front of the card and the card was done.

This was a very fun, quick, and easy card to make. I LOVE layers on cards and this one had them!!

Thank you SO much for taking your time to stop by and see today's birthday card,
Wanda

Pansy Patch, Hues of Happiness, Thinking of You Card, Stampin' Up!

I just love the words on this card. It's such a pretty way of saying that you're thinking of someone. I can't wait to send it off in the mail. I had made two because it's such a quick and easy card to make. So I have one for my stash and one to send.

The base of the card is a folded half-sheet of Highland Heather card stock. This card opens on the bottom and the fold is on the top. When I cut the card stock I cut it in half on the short side so when I was done it measured 4-1/4" x 11".  

I cut two 4" x 5-1/4" pieces of Basic White card stock. I taped one to the inside and the other I die cut using one of the "Basic Borders" dies. I marked my piece at 3" on the right and 2-3/4" on the right and that is where I set the die. You can set it anywhere in that area, longer or shorter depending on the piece of Designer Series Paper (DSP) you have.

My DSP is from the "Hues of Happiness" 12" x 12" package and it measured 4-1/4" x 3". I taped the DSP to the front of the card at he bottom. Then I taped the die cut Basic White piece.

The words are from the "Pansy Patch" set and were stamped using Gorgeous Grape card stock. I die cut them using the 2-1/8" circle die. Then I die cut a Highland Heather scalloped circle from the same "Layering Circles" die set.  I taped the two circles together and added Dimensionals to the back. I set the piece in place on the front of the card and a little to the left.

I had some rhinestones from the retired "Noble Peacock" set and thought I'd use them since the package was almost full and then I found another full one behind it.  Now if you don't have that set you can always color crystal rhinestones using your Blends pens.  I'm trying to use up things I have so I went with these.  After adding the rhinestones, the card was done.

This was a very quick and easy card to make. I like this layout too. Oh and it's a good way to use up some of that busy DSP. I found those flowers to be a very busy background but on this card it looks like it was meant to be.

Thank you SO very much for taking your time to stop by and see today's thinking of you card,
Wanda

Wednesday, June 08, 2022

True Beauty, Lovely & Lasting, Thinking of You Card, Stampin' Up!

Today I took out a piece of Designer Series Paper (DSP) from the "Awash in Beauty" 12" x 12" package. It dawned on me that there's a couple of sheets in that package that go with the dies from the "True Beauty" bundle.

The base of my card is a folded half-sheet of Basic White card stock. This card opens on the right and the fold is on the left. 

I cut a 4" x 5-1/4" piece of Basic White card stock and textured it using the "Painted Texture" embossing folder. I glued that to the front of the card.

Next I die cut the scalloped rectangle from the "Color & Contour" bundle die set using Granny Apple Green card stock. I cut a 2" x 3-5/16" piece of Basic White card stock for the inside of the rectangle. I taped the Basic White piece in place and added Dimensionals to the back.

The words are from the "True Beauty" set and were stamped using Polished Pink ink on a piece of Basic White card stock. I die cut it using the 1-5/8" circle die. Then I die cut a Granny Apple Green scalloped circle a bit larger than the Basic White circle.  I taped the words to the scalloped circle.

I die cut the flower and stem from the "Awash in Beauty" DSP. I added a tiny dot of glue to the top of the flower stem and set the flower on top. I set it aside to set up a bit.  I turned it over and added Dimensionals to the back.

I set the rectangle in place on top of the card front. Then I added the words. I used Dimensionals on the areas that would touch the textured piece and tape on the upper left area.

The flower was set in place.  I saw where the flower was hanging over the scalloped piece so I added another Dimensional to the one already there, double stacked so it lays nice on the card.  And that was it, the card was done.

This was a very fun, quick, and easy card to make. It can be used for several other occasions as well as thinking of you! 

Thank you SO very much for taking your time to stop by and see today's thinking of you card,
Wanda

Tuesday, June 07, 2022

Happiness Abounds, Hues of Happiness, Birthday Card, Stampin' Up!

When I saw this card, I knew I wanted to make it. I loved the color and the layout. Though I wasn't sure I wanted to use that many of those flowers on once card. After all there's a limited supply of the flowers in the Designer Series Paper (DSP) package.

Again, I'm working with the supplies I have on hand.

The base of my card is a folded half-sheet of Fresh Freesia card stock. This card opens on the right and the fold is on the left. 

I cut two 4" x 5-1/4" pieces of Basic White card stock. One for the outside and one for the inside.

I cut a 3-7/8"x 5-1/8" piece of Basic White card stock that I textured using the "Pretty Flowers" embossing folder. I glued that piece to the other Basic White piece and then I taped it to the front of the card base. I also taped the inside piece down so when I finished the front the entire card would be finished.

I die cut the flowers and leaves from the "Hues of Happiness" DSP. I set the flowers in place using Dimensionals. I didn't press them down because I need to slip the leaves under and I don't want to have a Dimensional in my way. I added a little bit of glue to the leaves and slipped them under the flowers. For the flowers, I had started with the large one on top, then the smaller one on the left, then the larger one towards the middle and the smaller one on the bottom.

The words are from the "Happiness Abounds" set and were stamped on a 1/2" x 3-1/4" piece of Basic White card stock using black Memento ink. I snipped the ends to look like ribbons. I set the words in place using Dimensionals.

I had some enamel dots that I have no idea where they came from. I do know that they are not from Stampin' Up and if I had to guess, I'd say maybe the Dollar Tree.  But they matched my card and it was all I had, so I used them.  And the card was done.

This was a very fun card to make though I still have mixed emotions about using so many flowers for one card. And the more I look at the card, the more I like it!!!

Thank you SO very much for taking your time to stop by and see today's birthday card,
Wanda

Monday, June 06, 2022

Art Gallery, Happiness Abounds, Wedding or Birthday Card, Stampin' Up!

Since I didn't put away my "Art Gallery" set from yesterday (no surprises there!!!), I thought I would make a card with it and here's what I came up with.  I couldn't decide if it's a wedding card or a birthday card. Or could it be an anniversary card?  I guess it's multipurpose. What do you think it is?

The base of the card is a folded half-sheet of Basic White card stock. I cut a 4" x 5-1/4" piece of Highland Heather for the layer.

Then I cut a 3-7/8" x 5-1/8" piece of Basic White for the top piece. I scored the lines on the right by flipping the piece over and scoring at 2-3/4", 3", and 3-1/4".  I turned it back over and then stamped the words from the "Happiness Abounds" set using black Memento ink.

The flowers are from the "Art Gallery" set and were stamped using Highland Heather and Gorgeous Grape ink on the upper flower and Daffodil Delight and Crushed Curry on the large flower. The leaf was stamped using  Mossy Meadow ink. All the stamped pieces were die cut.

I taped the layers together and then added the flowers. I set the large one in place using Dimensionals. I didn't press down on it because I wasn't sure where the other pieces were going to be slipped in. I added tape to the top flower and slipped it in under the large flower. I did the same with the leaf.  I should have added a center to the larger flower, it looks kind of bland. But it's too late now, I don't think I could get the stamp will give me a smooth image with the Dimensionals under it.  So it is what it is.

This was a very fun card to make. I especially like the score lines. It's a nice touch on a smooth background.

Thank you SO very much for taking your time to stop by and see today's card,
Wanda

Sunday, June 05, 2022

Sweet Songbirds, Art Gallery, Birthday Card, Stampin' Up!

I found today's card on the blog "Kards by Kadie". You can see the original card here

The base of the card is a folded half-sheet of Basic White card stock. This card opens on the right and the fold is on the left. 

I cut a 5-1/2" x 2" piece of Designer Series Paper (DSP) from the 2022-2024 in color stack. I used the Starry Sky color. I taped it in place on the front of the card about 1/4" from the fold.

Next I die cut a Starry Sky card stock circle using the new "Stylish Shapes" dies. I used the second largest circle one for this.

I punched the bird using Tahitian Tide card stock. Then I punched the belly part using Basic White card stock and the beak was punched using Crushed Curry card stock.  Now I did not know that piece on the belly was the belly, I though it was a larger wing. Now I know!!!  LOL I sponged the bird using Tahitian Tide ink and the belly was sponged using Daffodil Delight ink. I stamped the eyes using black Memento ink. I taped the pieces to the bird in place. Dimensionals were added to the back of the bird and the bird was set in place on the circle. 

I set the circle on the piece but did not affix it. I needed to see where the words were going to go.  The words are stamped using the "Art Gallery Set" and were stamped using Starry Sky ink. 

I stamped the musical notes from the "Sweet Songbirds" set using black Memento ink.

The circle was set in place using Dimensionals and the card was done.

This was a very fun card to make. This is a fun set to play with.

Thank you SO very much for taking your time to stop  by and see today's birthday card,
Wanda

Saturday, June 04, 2022

Lovely & Lasting, Thinking of You Card, Stampin' Up!

I have been using mostly the words from the "Lovely & Lasting" set. Having second thoughts on why I bought it. I do like the words in the set so I will not be setting it aside anytime soon.  But today I thought I would play with the flower in the set and this is what I came up with.

The base of my card is a folded half-sheet of Basic White card stock. This card opens on the right and the fold is on the left.

I cut a 4" x 5-1/4" piece of Balmy Blue for the layer.  On top of that is a 3-7/8" x 5-1/8" piece of Designer Series Paper (DSP) from the "Awash in Beauty" 12" x 12" package. I taped it to the Balmy Blue piece and then I taped that to the front of the card.

I took a piece of Basic White and stamped the flower image using Balmy Blue ink.  Then I stamped the image using Blushing Bride ink. I did clean the stamp before stamping the next color. I fussy cut the flowers and the flower centers. 

I took a 3-1/42" x 3-1/2" piece of Basic White card stock and stamped the image again using Old Olive. I tried to only stamp on the leaves area. I didn't need to stamp the flowers in this color. 

I taped the smaller flowers on the piece. The two larger flowers were set in place using Dimensionals. The centers were taped in place and then I added Wink in Stella to the flowers and centers. I should have done it before adding them but I didn't think of it until after setting them in place. I added pearls to the center of each flower.

I cut a 3-3/8" x 3-5/8" piece of Balmy Blue card stock for the layer. I taped the flower piece to the Balmy Blue piece. Dimensionals were added to the back of the Balmy Blue piece and set it in place on the front of the card.

The words are from the "Lovely & Lasting" set and were stamped using Balmy Blue ink. I die cut them using the circle from the "Stylish Shapes" die. I also die cut an Old Olive circle using the circle die set. I wanted a scalloped circle but I couldn't find one that looked good with the word circle. I taped the two circles together and added Dimensionals to the bottom and tape to the top part and set it in place on the front of the card.  And the card was done. 

This was a very fun and easy card to make. I didn't mind the fussy cutting either. It's not one of my favorite things to do!

Thank you SO very much for taking your time to stop by and see today's thinking of you card,
Wanda

Friday, June 03, 2022

Happiness Abounds, Hues of Happiness, Wedding or Anniversary Card, Stampin' Up!

I found today's card on Pinterest. I thought it was so pretty and I knew I had most of the stuff to make it.

The base of my card is a folded half-sheet of Basic White card stock. This card opens on the right and the fold is on the left.

I cut a 4" x 5-1/4" piece of Fresh Freesia card stock for the layer. I taped it in place on the front of the card.

Next I cut a 3-7/8" x 5-1/8" piece of Basic White card stock for the front of the card. I used the lacy looking die in the "Happiness Abounds" bundle to make the background cuts. I used it on the top left first and then on the bottom right I only ran it through my Big Shot for about 1-1/2". I didn't want to make a big lacy mess in the middle in case I wouldn't have anywhere to tape or glue it down. I did use glue to set this piece in place.

Then I die cut the flowers and leaves from the printed images on the Designer Series Paper (DSP) from the "Hues of Happiness" 12" x 12" package. I taped all of them in place except for the light blue one, I used Dimensionals on it. I added Wink of Stella to the flowers and leaves. I didn't have the tiny butterfly dies so I just left them off. I thought about taking a couple of the hearts that came off the background die and putting them together to make it look like a butterfly but I decided not to do that either and just leave it plain.

The words are from the "Happiness Abounds" set and were stamped using Fresh Freesia ink. I didn't have the same die cut so I used the ribbon type one from the "Stylish Shapes" die set. I used Fresh Freesia ink on the edges with the blending brush. Dimensionals were added to the back and it was set in place on the upper right part of the card.  And that was it, the card was done.

Isn't it pretty?  See why I had to make one?

Thank you SO very much for taking your time to stop by and see today's card,
Wanda