Pin It

Tuesday, February 14, 2023

Scenic Garden, Framed Florets, Go to Greetings, Thinking of You Card, Stampin' Up!

Good day to you! I'm happy you are here to see today's quick and easy thinking of you card. 

I used the simple side panel layout again. I had some scrap Designer Series Paper (DSP) in the "Dainty Flowers" 12" x 12" package. It measures 2-1/4" x 5-1/2".  The layer behind it is a piece of Mossy Meadow and it measures 2-1/2" x 5-1/2".  I taped it to the left side of the card, about 1/4" from the fold. Oh, the base of the card is a folded half-sheet of Crumb Cake card stock. It opens on the right and the fold is on the left. 

I die cut the oval using the die in the "Framed Florets" bundle. I kept the center for some other project or to use as scrap. 

The image is from the "Scenic Garden" set and was stamped using Mossy Meadow ink on Very Vanilla card stock. I die cut it with the same die. Be sure to let the ink dry or you'll smudge it (like in did on the bottom right corner of the image).  I turned the image over and placed the oval on top. I used scotch tape and taped the two pieces together.  Then I took the "scrap" oval and traced it on a piece of scrap paper and fussy cut around it leaving a 1/4" or so space around it. I added glue to the piece and stuck it to the back of the taped oval. I did this because I felt the piece needed more stability to stay in place. Dimensionals were added to the back and the piece was set in place on top of the DSP strip. 

I took some linen thread and wrapped it around my fingers a few times and tied it in the middle. I added a dot of mono glue to the top of the DSP and set the thread in place.

The words are from the "Go to Greetings" and were stamped using Mossy Meadow ink on a piece of Very Vanilla card stock that measures 2" x 5/8".  I added a Dimensional to the right side and I doubled up on the Dimensionals on the left side. I needed it two thick so it would be level. And the card was done.

This was a very quick and easy card to make. It was fun to use the oval and some scrap DSP.

Thank you SO very much for taking your time to stop in and see today's thinking of you card,
Wanda

Monday, February 13, 2023

Playing in the Rain, Art Gallery, Rain or Shine, Birthday Card, Stampin' Up!

Hello! I'm very glad you are here. I found an adorable turtle card I want to share with you. You can see the original card here. I did change it a little. 

The base of the card is a folded half-sheet of Mossy Meadow card stock. The card opens on the bottom and the fold is on the top.

I cut two pieces of Basic White card stock that measured 4" x 5-1/4" each. One for the inside and one for the top. I taped the one on the inside in place.

For the one on the top I taped a 1-1/4" x 5-1/4" piece of Designer Series Paper from the "Rain or Shine" 12" x 12" package. I also cut a Crushed Curry strip that measured 3/8" x 5-1/4".  I taped the strip just above the DSP. 

Next I die cut a stitched circle from the "Stylish Shapes" set using the 3rd largest circle die on Basic White card stock.

The turtle is from a piece of the DSP in the "Rain or Shine" package. I fussy cut him out. There's quite a few characters in that package to cut out. Oh and there is a matching die but I didn't buy the bundle so I have to fussy cut. It's not too bad and it's SO worth it because these characters are just too cute! 

I used the "Art Gallery" set for the words. I stamped them on a scrap piece of Basic White card stock using Mossy Meadow ink. The piece measured 3/8" x 1-7/8". I also cut a Mossy Meadow layer that measured 5/8" x 2-1/8". I taped the two pieces together. Dimensionals were added to the back and the piece was set in place on the upper right corner of the card. 

Dimensionals were added to the back of the circle and it was set in place on the front of the card. And Dimensionals were added to the back of the turtle and it was set in place on the circle.

The original card used the raindrops embossing folder. I don't have that folder but I could have used the raindrops DSP but I didn't want this to be a get well card, I wanted a birthday card and raindrops didn't seem to work well with the mood. So I left the top part blank. Though I do think it needs something. But it is what it is and should I ever make another one I will do something different on the top. 

This was a fun card to make and I love the turtle in the circle.

Thank you SO very much for taking your time to stop by and see today's birthday card,
Wanda

Sunday, February 12, 2023

Dainty Flowers, Sympathy or Friendship Card, Stampin' Up!

Hello! I'm so happy you stopped in to see today's super quick card. And here's how you can make one too.

The base of the card is a folded half-sheet of Basic White card stock. The card opens on the right and the fold is on the left.

I cut a 4" x 5-1/4" piece of Old Olive card stock and textured it using the "Pretty Flowers" embossing folder.

Next I cut a piece of DSP from the "Dainty Flowers" 12" x 12" package. Actually my piece was sitting in the package because it was leftover from a different card/project. I love it when I can use pieces that are just laying around. It measured 2-3/8" x 5".  I love this layout because you can use up a lot of scraps and make fun, pretty and quick cards! The Mossy Meadow layer behind it was cut at 2-5/8" x 5-1/4". I taped those two layers together. 

I don't remember where the words came from. I had stamped them at a Stamp-a-Stack and didn't use them. I tried to look through the catalogs to see if I could quickly find the stamp set but no luck. I'm sure it's in there somewhere but I didn't have time to page through the whole catalog, I just skimmed. So if you know what set the words came from, please let me know and I'll add it to the post. They were punched out using the "Dual Oval" punch. The Mossy Meadow layer behind it is from the same punch. I taped the two ovals together and added Dimensionals to the back.

To assemble the card I glued the embossed piece in place. I prefer glue because tape doesn't always have full contact on the surface and I've had it lift up easy. So I just glue and know it isn't going to go anywhere.

The DSP layer panel was glued in place too.

I removed the backing from the word piece, set it in place and the card was done. 

See, I told you it was quick. It's also pretty and fun too!

Thank you SO very much for taking your time to stop in and see today's card,
Wanda

Saturday, February 11, 2023

Adorable Owls, Art Gallery, Birthday Card, Stampin' Up!

Hello there! Glad you stopped in to see today's birthday card. I found it on the internet and I just had to make one. You can see the original card here. 

The base of the card is a folded half-sheet of Balmy Blue card stock. Once the piece was cut in half it measured 4-1/4" x 11".  This card opens at the bottom and the fold is on the top. 

I cut a 4" x 5-1/4" piece of Basic White and taped it to the inside.

Then I cut a 4" x 5-1/4" piece of Granny Apple Green card stock for the layer. On top of that is a 3-7/8" x 5-1/8" piece of Basic White card stock. 

The Designer Series Paper (DSP) is from the "Dandy Designs" 12" x 12" package and was cut at 3-3/4" x 5". 

Next I die cut the circles. I took the Granny Apple Green layer and die cut the second largest circle from the "Layering Circles" die set from the center of the piece.

I cut the second largest stitched circle from the center of the Basic White layer using the "Stylish Shapes" die set.  Once the two circles were die cut I taped the Granny Apple Green, Basic White and DSP layers together and taped them to the front of the card.

The strip of DSP is from the same package and was cut at 2" x 5" and taped to the center of the card.

I also die cut a Balmy Blue scalloped circle using the second largest one in the "Layering Circles" die set. 

I took the Basic White circle and my Blending Brush and scrubbed on some Balmy Blue ink, then I taped all of the circles together.

The owl was stamped on a piece of Basic White card stock and fussy cut. Then I colored it in with my Blends pens. I used light and dark Daffodil Delight, light Crumb Cake, Bronze, light Granny Apple Green, light Balmy Blue, and I had to use my Blender pen and Fresh Freesia ink pad for the hat. Dimensionals were added to the back and the owl was set in place on the front of the card.

I wanted to use different words than the on the original card so I found mine in the "Art Gallery" set. I used Versa Mark on a scrap piece of Balmy Blue card stock. I sprinkled white embossing powder on and heat set it.  I die cut it using the second longest ribbon die in the "Stylish Shapes" die set. I added Dimensionals to the ends and saw that it was too short and the word piece sagged. So I cut three small pieces of card stock and taped them together. I stuck them to each Dimensional and added tape to hold them in place on the front of the card. The pieces were cut about the size of a Dimensional. You don't want them very big or they will stick out. It did the trick, the words were as high as the circles.  And the card was done.

I love the green eyes on the owl and it makes a perfect birthday card!!!

Thank you SO very much for taking your time to stop in and see today's birthday card,
Wanda

Friday, February 10, 2023

Playing in the Rain, Rain or Shine, Birthday Card, Stampin' Up!

Hello and welcome! I have a fun card I found on Pinterest that I thought I would make. I thought the blues in it were so pretty and I just had to give it a try. You can see the original card here. 

The base of the card is a folded half-sheet of Balmy Blue card stock.  It was cut in half on the short side so after it was cut it measured 4-1/4" x 11". This card opens at the bottom and the fold is at the top. I cut a 4" x 5-1/4" piece of Basic White card stock for the inside and I taped it in place.

The strip of Designer Series Paper (DSP) is from the "Dandy Designs" 12" x 12" package and was cut at 1-3/4" x 5-1/2". I taped it in place on the left side of the card.

Then I cut a piece of Old Olive card stock to measure 5" x 3-5/8". And the DSP that is on top of that is from the "Rain or Shine" package and was die cut using the second largest stitched rectangle die from the "Rectangle Stitched" framelits set. I taped the DSP to the Old Olive piece. Dimensionals were added to the back and it was set in place on the front of the card.

Then I fussy cut the turtle from another piece of DSP from the same "Rain or Shine" package. There is a matching die for the turtle but I didn't purchase the whole bundle, so I have to fussy cut but it's not bad because there's not a lot of jagged edges to have to cut around. Dimensionals were added to the back of the turtle and it was set in place on the lower part of the card.

There was some scrap left from die cutting the sky and flowers piece and on the backside is the orange checked design. I used the second largest long die in the "Stylish Shapes" die set.  

The words are from the same "Playing in the Rain" set and were stamped using Old Olive ink and then they were die cut using the third smallest die in the "Stylish Shapes" set.  The ribbon looking piece was taped in place (be careful not to add tape to the very end of the right side) and the words were set in place using Dimensionals. 

I added a couple of cute little flower embellishments from the "Loose Daisy" embellishments package. I had set them in place using some mono glue. And the card was done.

This was a fun card to make and I just LOVE the look of it. The turtle on that background just makes the card!

Thank you SO very much for taking your time to stop by and see today's birthday card,
Wanda

Thursday, February 09, 2023

Playing in the Rain, Rain or Shine, Friendship Card, Stampin' Up!

Hello. I'm happy you stopped in today. I have a fun card to share with you. I found it on Pinterest but I changed it up a bit. You can see the original card here. 

The base of the card is a folded half-sheet of Balmy Blue card stock. It opens on the right and the fold is on the left.

I cut a piece of Designer Series Paper (DSP) from the "Rain or Shine" 12" x 12" package. I  used the umbrella sheet and the darker raindrops sheet. Both of these have embossed images. And so does the bunny's shirt. He's from the same package of DSP too. I don't have the dies so I had to fussy cut him out.

The umbrella DSP was cut at 5-1/4" x 2-1/2" and the raindrops DSP was cut at 5-1/4" x 1-1/4".  I taped both to the front of the card.

Next I die cut the circles using the stitched circle dies from the "Stylish Shapes" die set. I used the 3rd and 4th largest ones. They were die cut in Balmy Blue on the large circle and Basic White on the smaller one. And then they were taped together.

The words are from the "Playing in the Rain" set and were stamped using black Memento ink on a scrap piece of Basic White card stock. I die cut them using the ribbon ends die from the "Stylish Shapes" set.

I added Dimensionals to the back of the circle piece, the bunny and the word piece.

The circle piece was set on the front of the card, then the bunny on top and then the word piece. A 4" x 5-1/4" piece of Basic White card stock was added to the inside and the card was done.

This is a very quick, fun and easy card to make. I hope you enjoyed seeing it as much as I did making it.

Thank you SO very much for taking your time to stop in and see today's card,
Wanda


Wednesday, February 08, 2023

Playing in the Rain, Beautifully Happy, Thinking of You Card, Stampin' Up!

Hello! So happy to share today's card with you. I was looking through the "Rain or Shine" 12" x 12"package of Designer Series Paper (DPS) and found these fun rain drops. So I pulled the sheet out. Then I found another fun sheet with a fox, a bunny and a turtle on them. And there's lots of embossing on the sheet. The fox here has his hat and shirt embossed.  So cute! Read on to see how I made this card.

The base of my card is a folded half-sheet of Basic White card stock. It opens on the right and the fold is on the left.

I cut a 4" x 5-1/4" piece of Balmy Blue for the large layer. Then in the center of that piece, I die cut the 4th largest stitched rectangle from the "Rectangle Stitched" framelits set.  Once that was cut I taped the Balmy Blue piece to the front of the card.

A 3-3/4" x 5" piece of DSP was cut for the next layer. Those raindrops are also embossed. I taped that to the Balmy Blue layer.

Next I die cut the Basic White stitched rectangle using the 5th die in the same "Rectangle Stitched" set. I stamped Balmy Blue rain drops on it. They are from the "Playing in the Rain" set. I did stamp off once before I stamped on the rectangle. 

Before I taped the two rectangles together, I took some Balmy Blue ribbon I had and taped two pieces to the Balmy Blue rectangle. I did snip the piece of ribbon because I wanted to make sure it wouldn't be bulky and bulge on the Basic White piece. The Basic White piece was taped on top and then the rectangles were centered on the front of the card using Dimensionals.

The fox was fussy cut out. There's matching dies but I didn't buy the set, so I had to fussy cut. It wasn't too bad. The umbrella handle was a bit touchy and a weak spot but I managed!! LOL Dimensionals were added to the back and the piece was set in place on top of the rectangle.

The words are from the "Beautifully Happy" set and were stamped using black Memento ink on a scrap piece of Basic White card stock. I punched them out using the "Double Oval" punch. I also took a scrap piece of Balmy Blue and punched out the scalloped oval from the same punch. I taped the two pieces together. A Dimensional was added to the bottom left and tape to the upper right and the piece was set in place on the front of the card. And that completed the card. 

This was a fun and pretty quick card to make. Even with the fussy cutting, I can see myself making another one in the near future.

Thank you SO very much for taking your time to stop in and see today's thinking of you card,
Wanda

Tuesday, February 07, 2023

Dainty Flowers, Beautifully Happy, One Sheet Wonder, Birthday Card, Stampin' Up!

Hello. I'm glad to see you made it here today. Remember "One Sheet Wonders"?  I have not done the "One Sheet Wonder" in a long time. I had gotten an email from Terri Gaines and this card was in it. I clicked the link and was taken to her blog where she has a free PDF on how to make this card. You can see that PDF here.  Sign up for her emails! You will see her events too. She has a fun Stamp-a-Stack coming up this month. I LOVE going to them. She's so talented and her cards are always fun to make. She also offers videos on how to stamp and assemble the cards she features and if you watch the videos, give her a thumbs up. 

So for today's card I chose the "One Sheet Wonder" one. I was able to get 10 cards from one 12" x 12" piece of Designer Series Paper (DSP) from the "Dainty Flowers" package. The pieces were cut at 2-3/8" x 5-1/4".  

The base of the card is a folded half-sheet of Mossy Meadow card stock. The card opens on the right and the fold is on the left. 

The DSP was cut at 2-3/8" x 5-1/4" and the Mossy Meadow layer behind it was cut at 2-5/8" x 5-1/2".  I did not make my card the way that Terri had made hers. She has a fancy fold and I'm just making a regular standard card. I taped the DSP to the Mossy Meadow panel.

Old Olive was cut at 4" x 5-1/4" for the top layer. I textured mine using the "Painted Texture" embossing folder. I glued it to the front of the card. Then I glued the panel in place.

The words are from the "Beautifully Happy" set using black Memento ink on a scrap piece of Basic White card stock. I punched them out using the "Double Oval" punch. Then I punched out the scalloped oval from the same punch using a scrap piece of Mossy Meadow. If you don't have a scrap piece you can carefully punch one out using the panel piece before you add the DSP. You need to be careful there because there is not much room between the two ovals on the punch. I've been successful at punching it from the layers many times.

The words were taped to the scalloped oval and that piece was then set in place on the front of the card using Dimensionals.

A 4" x 5-1/4" piece of Basic White card stock was added to the inside and the card was done.

I do like these quick and easy cards. The DSP is SO pretty and you just can't go wrong!

Thank you SO very much for taking your time to stop in and see today's birthday card,
Wanda

Monday, February 06, 2023

Adorable Owls. Candy Bar Holder, Weekend Project, Stampin' Up!

Hello. I'm so happy you could make it here today to see the candy bar holder. I found it on Pinterest (while looking for something else) and I thought I'd give it a try. The problem was it wasn't in English, it was done in metric and they had a larger candy bar! So I had to do math and I figured it out so you can make one (or a bunch) too! You can see the original video here.

This is made for a standard Hershey candy bar. So to start out, I took a piece of Gorgeous Grape card stock that measured 5-3/4" x 6-3/4".  With the 5-3/4" side on the top part of your scoring board, score at 3/8". Then turn the card stock so the 6-3/4" side is on the top part of your scoring board and score at 2-3/8", 2-3/4", 5-1/8" and 5-1/2". Fold all of the score lines in, including the 3/8" one on the sort end. Glue the piece together on the side. Then snip the ends to make flaps that will be folded in. Before folding them in, trim the ends at an angle so the long flaps are easier to close. Glue the end shut. 

For the top piece I used Designer Series Paper (DSP) from the "Dandy Designs" 12" x 12" package. I cut that piece 5-3/4" x 6". You will be scoring this at the same marks as the Gorgeous Grape.

See the photo for cutting the angle on the DSP. You will be measuring 1" and making a slice between the 3/8" score lines that are to be the side of the holder. Then you will be cutting the angle from the top corner to the slice (I marked them with a pencil so you can see where you need to cut. Then the right side in the photo was cut from that center slice to the next score. You will also be scoring the bottom edge at 3/8".  Glue the side shut. There will be a piece that is sticking up that you need to trim. You'll see it once you glue the piece. Then snip and glue the bottom as you did for the Gorgeous Grape piece. There you have it a fun box.

The owl is from the "Adorable Owls" set and was stamped using black Memento ink and then colored in with Blends pens. I used light Crumb Cake, light Soft Suede, light Balmy Blue and light Pumpkin Pie. Once the owl was colored I die cut a 2-1/8" Basic White circle and a Gorgeous Grape scalloped circle that was a bit larger from the "Layering Circles" die set. The circles were taped together and Dimensionals were added to the back.

I took some ribbon (retired) that I had and folded the 6" piece in half. I taped it down and then set the circle piece on top. I didn't press down firmly because I wanted to make sure the word piece could go under it or if it would be stopped by a Dimensional. The words are from the same "Adorable Owls" set and were stamped using Gorgeous Grape ink. Then I die cut them using the smallest stitched rectangle die from the "Rectangle Stitched" framelits set. I added a bit of glue to 3/4 of the back and slipped it under the circle. I was right about the Dimensional being in the way, so I lifted the circle up a bit, slipped the word piece under and then pressed down on the circle.

The owl was set in place with Dimensionals and the piece was finished. The original piece has some butterflies added to the right side. I didn't have any so I just left it as it was. If I were to make another one, I might texture that piece, though I think it could make it weak.  Or maybe stamp some background image on it. Or better yet, find some embellishment that would work!!  Bottom line is that i wouldn't leave plain.

The photo of the candy bar sticking out is for reference. The candy bar actually fits entirely inside the holder. 

This was a very fun candy bar holder to make and I'm going to bookmark it for future reference. 

Thank you SO very much for taking your time to stop in and see today's candy bar holder,
Wanda

Sunday, February 05, 2023

Playing in the Rain, Birthday Card, Celebration Card, Stampin' Up!

Hello. I'm so glad to see you made it here today. I saw this card at a Stamp A Stack I was at last month and I took a picture of it to make at a later date. Today is that day. I changed it a little and I'll explain as I walk you through the card.

The base of my card is a folded half-sheet of Basic White card stock. This card opens on the right and the fold is on the left.

I cut a 3-3/4" x 5" piece of Mint Macaron and textured it using the "Painted Texture" embossing folder. This piece on the original card was left smooth. I glued this piece to the front of the card.

Then I die cut the framed piece. It's from the "Fabulous Frames" die set. I used Basic White card stock to cut it. Save the inside!  I stamped the "Happy Day" words from the same "Playing in the Rain" set using Mint Macaron ink. I glued the frame on top of the Mint Macaron piece and then the inside piece was glued on.

The bunny was stamped on a piece of Crumb Cake card stock using black Memento ink. Then it was fussy cut. The shirt was stamped on a piece of Designer Series Paper (DSP) from the "Subtles" 6" x 6" stack. I didn't have the tiny plaid looking DSP that was used on the original card used what I had. I stamped the shirt using black Memento ink. Then I fussy cut it out. It was glued on top of the rabbit piece.

Dimensionals were added behind the rabbit and it was set in place on the front of the card.

I colored two pearls using my dark Mint Macaron Blends pen. I set them in place on the frame and the card was done.

This was a fun and quick card to make. I never thought of stamping the bunny on anything but Basic White or Very Vanilla card stock. 

I'm not sure if I would call it a birthday card. It's some type of celebration card! 

I do thank you for stopping in to see today's card,
Wanda

Saturday, February 04, 2023

Dainty Delight, Valentines Day Card, Thinking of You Card, Stampin' Up!

Hello! So happy you found your way here today. I have a fun layout to share with you. I found it on Pinterest but I changed it a lot. You can see the original card here. (edited on 2/7, the link is broken and I don't know why)

The base of my card is a folded half-sheet of Poppy Parade card stock. This card opens on the right and thee fold is on the left. I cut a 4" x 5-1/4" piece of Basic White card stock for the inside and one for the outside. I taped them both in place.

Next I cut a 3-3/4" x 5" piece of Designer Series Paper (DSP) from the "Country Floral Lane" 12" x 12" package. I taped that piece to the front of the card.

The circles were what drew me to the card. I loved that layout on the one I saw on Pinterest and thought I'd convert it into something that I had the materials for. The circles are from the "Stylish Shapes" set, I used the second largest and the second smallest. The fun part with this is you get to use the circle you punch out on the same card. No having to hang onto it for a future card. I added Dimensionals behind the larger circle and set it in place on the front of the card. Then I added the smaller circle using a Dimensional on the left side and tape on the right side.

A heart was fussy cut from the same DSP. I added a Dimensional to the back and set it in place on the small heart.

The springs are from the "Dainty Delight" bundle. I die cut three of them and added the little hearts I saved from the "Framed Florets" bundle. I had made a couple of cards a while back and I saved the hearts from the oval die. I save everything!!  You never know when you'll need it.  After die cutting the three  pieces using Basic White card stock, I colored the stems with my light Granny Apple Green Blends pen. Then I took the hearts and glued them to the piece. I moved them down a bit on the flowers that were on the stems so it looked like white hearts behind each flower. Then I slipped the stems into the bottom part of the circle. I had to trim each stem because they were too long. And I used them for the extra leaves in the circle. 

The words are from the "Dainty Delight" set. The whole phrase was "Sending love during the season of growth" but I just wanted the "sending love" part so I masked off the other words. The piece measured 3/8" x 1-1/2". I set the words in place using Dimensionals and the card was done.

This was a fun card to make and I still really like the circles layout!

Thank you SO very much for taking your time to stop in and see today's card,
Wanda


Friday, February 03, 2023

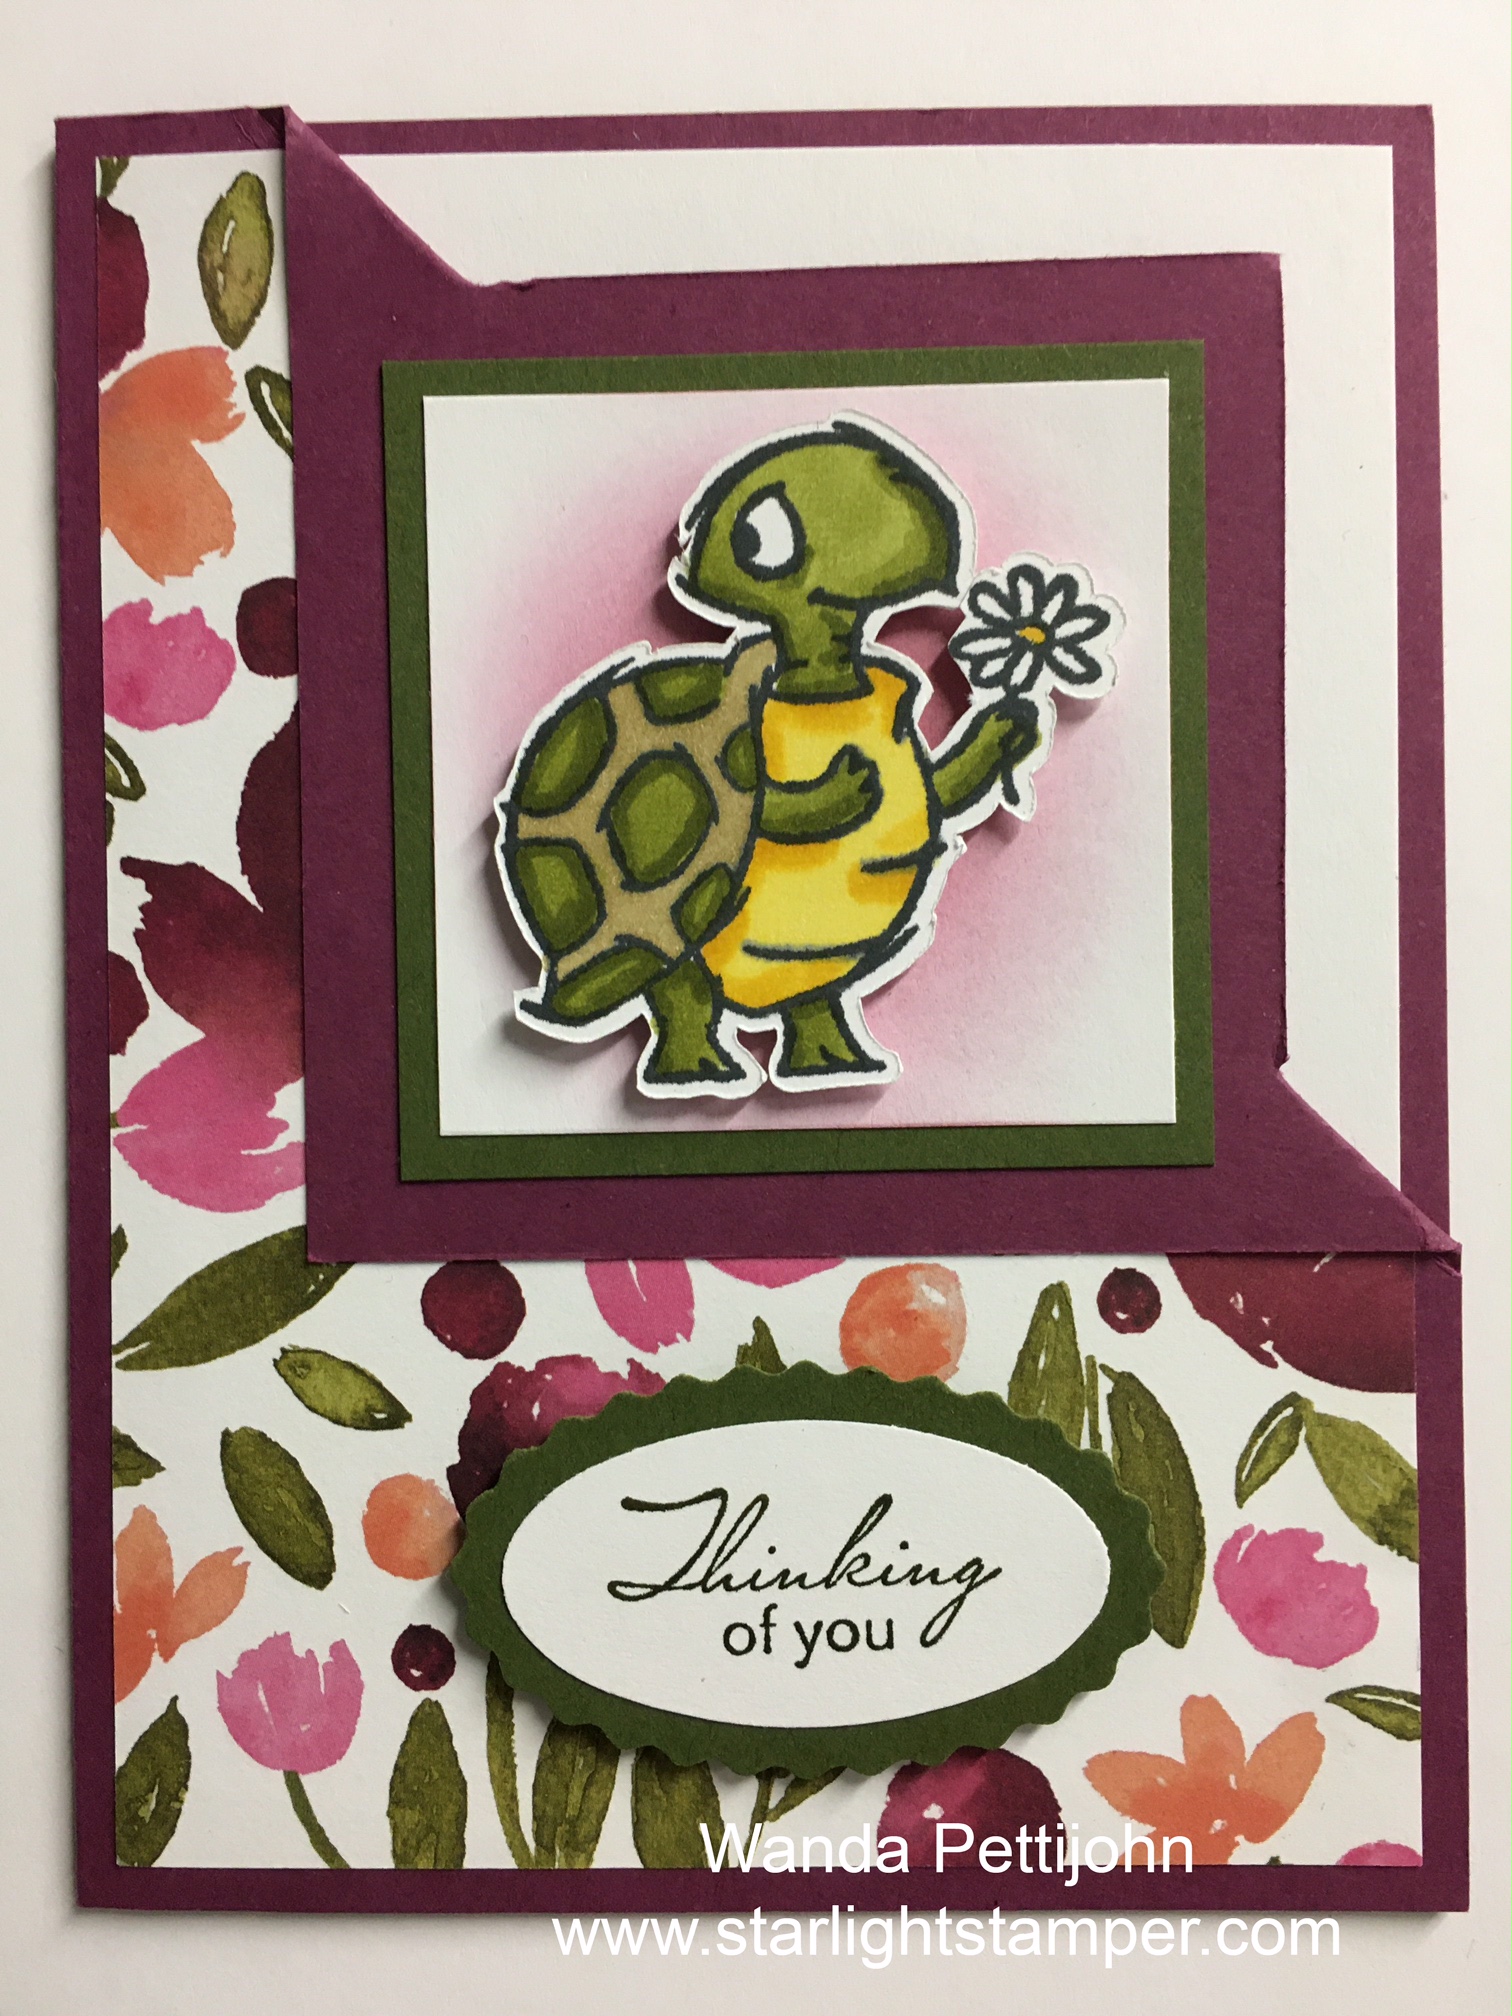
Playing in the Rain, Very Best Occasions, Corner Fold Technique, Thinking of You Card, Stampin' Up!

Hello! I'm so happy to share with you a fun card today. It's was made using the "Corner Fold" technique. And it really is very simple to do. Read on and I will tell you how it's done.

First you will need a half-sheet of Rich Razzleberry card stock. Fold it in half as usual. Then using your paper trimmer (not cutter) and set the long side on the top of the cutter and the left edge at the 3" mark. Set your blade to the the 2-1/2" mark and cut to the 4-1/4" mark. Now turn the card stock so the short end is on the top and the long left edge is on the 3" mark. Set the blade to the 3" mark and cut to the 5/8" mark. Now fold the top right corner down and the inside piece will start to swing out. Carefully bring the piece outward and try to keep it straight as possible. Mine got a little bit off on the upper left part. And I did practice with a half sheet of copier paper first. But copier paper does fold nicer than card stock. 

So with that part out of the way, I took a piece of Designer Series Paper (DSP) from the "Awash in Beauty" 12" x 12" package and cut it at 4" x 5-1/4".  I flipped the front back and set the DSP on top to see where the diagonal fold is. I marked my DSP on the top and right side and cut it so it wouldn't be so bulky under the flipped piece later. I taped the DSP in place.

Next I cut a 4" x 5-1/4" piece of Basic White card stock for the inside and I taped that in place.

The layers in the square were cut next. I took a piece of Mossy Meadow and cut it to 2-1/2" x 2-1/2" and then cut a Basic White piece at 2-1/4" x 2-1/4". I used my Blending Brush and scrubbed on some Merry Merlot ink. Then I taped those two layers together and taped them to the flipped square on the card. I did glue down the flipped part because I didn't like it popping up. That's up to you if you want to do that or not. I just wanted a cleaner more finished look.

The turtle is from the "Playing in the Rain" set and was stamped using black Memento ink. Then it was fussy cut. I colored it in using my Blends pens. I had colored this one in a week or so ago and it was just sitting on my worktable waiting for the day it got to to be put on a card. The colors I used were light and dark Old Olive. Light and dark Daffodil Delight and light Soft Suede. I added Dimensionals to the back and set it in place on the front of the card.

And lastly the word piece was made. I used the "Very Best Occasions" set and Mossy Meadow ink. I punched them out using the "Double Oval" punch. And  Mossy Meadow piece of card stock was punched for the scalloped layer. I taped the two pieces together, added Dimensionals to the back and set the piece in place on the front of the card.  And that was it!  

This was a very fun and fairly quick card to make. It's going out in the mail on Monday. I'm trying to plan ahead this year. I even have plans to make a few Christmas cards each month so come the day after Thanksgiving I can get them out in the mail. I have not been that "on time" in years!!

Thank you SO very much for taking your time to stop in and see today's thinking of you card,
Wanda

Thursday, February 02, 2023

Dainty Flowers, Go To Greetings, Thinking of You Card, Stampin' Up!

Hello. So happy you made it here. Yesterday I had made a card using the "Dainty Flowers" Designer Series Paper (DSP) and the back side of it is this pretty floral image. You can make quick cards using this DSP. There was another pack of DSP that had a sheet of flowers much like this and I think I made one card with it. I find it pretty but yet too simple looking. I guess I like a bit more on the front of my card when making it. I could have added it to a layer but I was seeing what it looked like on it's own. SO this is what it looks like and I thought I'd share it with you anyway!

The base of my card is a folded half-sheet of Basic White card stock. The card opens on the right and the fold is on the left.

I cut the DSP at 4-1/4" x 5-1/2". I cut off 1" on the left side. Then I taped the two pieces to the front of the card. 

I didn't have any ribbon to put where the two pieces of DSP met so I used a 1/4" x 5-1/2" strip of Old Olive card stock. I glued that strip in place.

The words are from the "Go To Greetings" set and were stamped using Rich Razzleberry ink. And that was it.

This was a super quick and easy card to make. And I think cutting the DSP down and adding a layer wouldn't take that much longer. But if you need some quick cards, this is the way to go! The 12" x 12" sheet of DSP would make 4 cards and the second sheet you could get 6 cards, so 10 cards from two sheets is a pretty good deal!

Thank you SO very much for taking your time to stop in and see today's "Thinking of You" card,
Wanda

Wednesday, February 01, 2023

Dainty Delight, Beautifully Happy, Birthday Card, Stampin' Up!

Hello! I'm glad you found your way here. Today I have a new image to show you. I would like to say that I put the other sets away so I could play with this one but we all know I rarely put anything away!! LOL Today's card was made using the "Dainty Delights" set and here's how it was made.

The base of the card is a folded half-sheet of Old Olive card stock. I cut a 4" x 5-1/4" piece of Basic White for the inside and one for the outside.

Then I cut a 3-3/4" x 5" piece of Designer Series Paper (DSP) from the "Dainty Flowers" 12" x 12" package. There's a lot of pretty papers in that package. The one on the backside of this has beautiful flowers on it that can be taped to the front of a card base, add some words and it's done! I may give that one a try later in the week. 

I stamped the flower from the "Dainty Delight" bundle using black Memento ink on a piece of Basic White card stock. I used the matching die to cut it out. Then I colored it using my Blends pens. I used the following in light only, Daffodil Delight, Flirty Flamingo, Balmy Blue, Old Olive, and Highland Heather. I added Dimensionals to the back and set it aside.

Next I cut a 2-3/8" x 4-1/4" piece of Basic White card stock. I took my Blending Brush and scrubbed on some Balmy Blue ink. Then I cut a 2-5/8" x 4-1/2" piece of Old Olive for the layer. I taped the two pieces together. Then I added Dimensionals to the back and I set it in place on the front of the card about 1/2" from the top and bottom edges and 1/2" from the fold. 

The words are from the "Beautifully Happy" set and were stamped using black Memento ink. I punched them out using the "Double Oval" punch. I took a scrap piece of Old Olive and punched the scalloped oval piece from the same punch. I taped the words to the scalloped piece.

Then the flowers were set in place using Dimensionals and the word piece was added using Dimensionals to the right side and a bit of tape to the left side.

The other 4" x 5-1/4" piece of Basic White was added to the inside and the card was done.

I do like how it turned out and it has such a spring feel. It's a whopping 15 degrees (above zero) here and the thought of spring flowers is SO inviting!

Thank you SO very much for taking your time to stop in and see today's birthday card,
Wanda