Pin It

Saturday, March 04, 2023

Petal Park, Days to Remember, Birthday Card, Stampin' Up!

Hello. I'm happy you are here to see today's card.

Back on January 19th I had made a card using the "Petal Park" bundle and you can see that card by clicking here.  Now when I made that card I made 3 of them but I only put the one together. Then on January 26th I thought I'd make another card using what I had started since I knew I wasn't going to make a repeat of the one on the 19th.  You can see that card here.  And today I thought I'd make the last card and get the pieces off my worktable. I did stick them in place with removable tape so the would be with the card but I did manage to loose a couple. I did find one on my sleeve!!! LOL

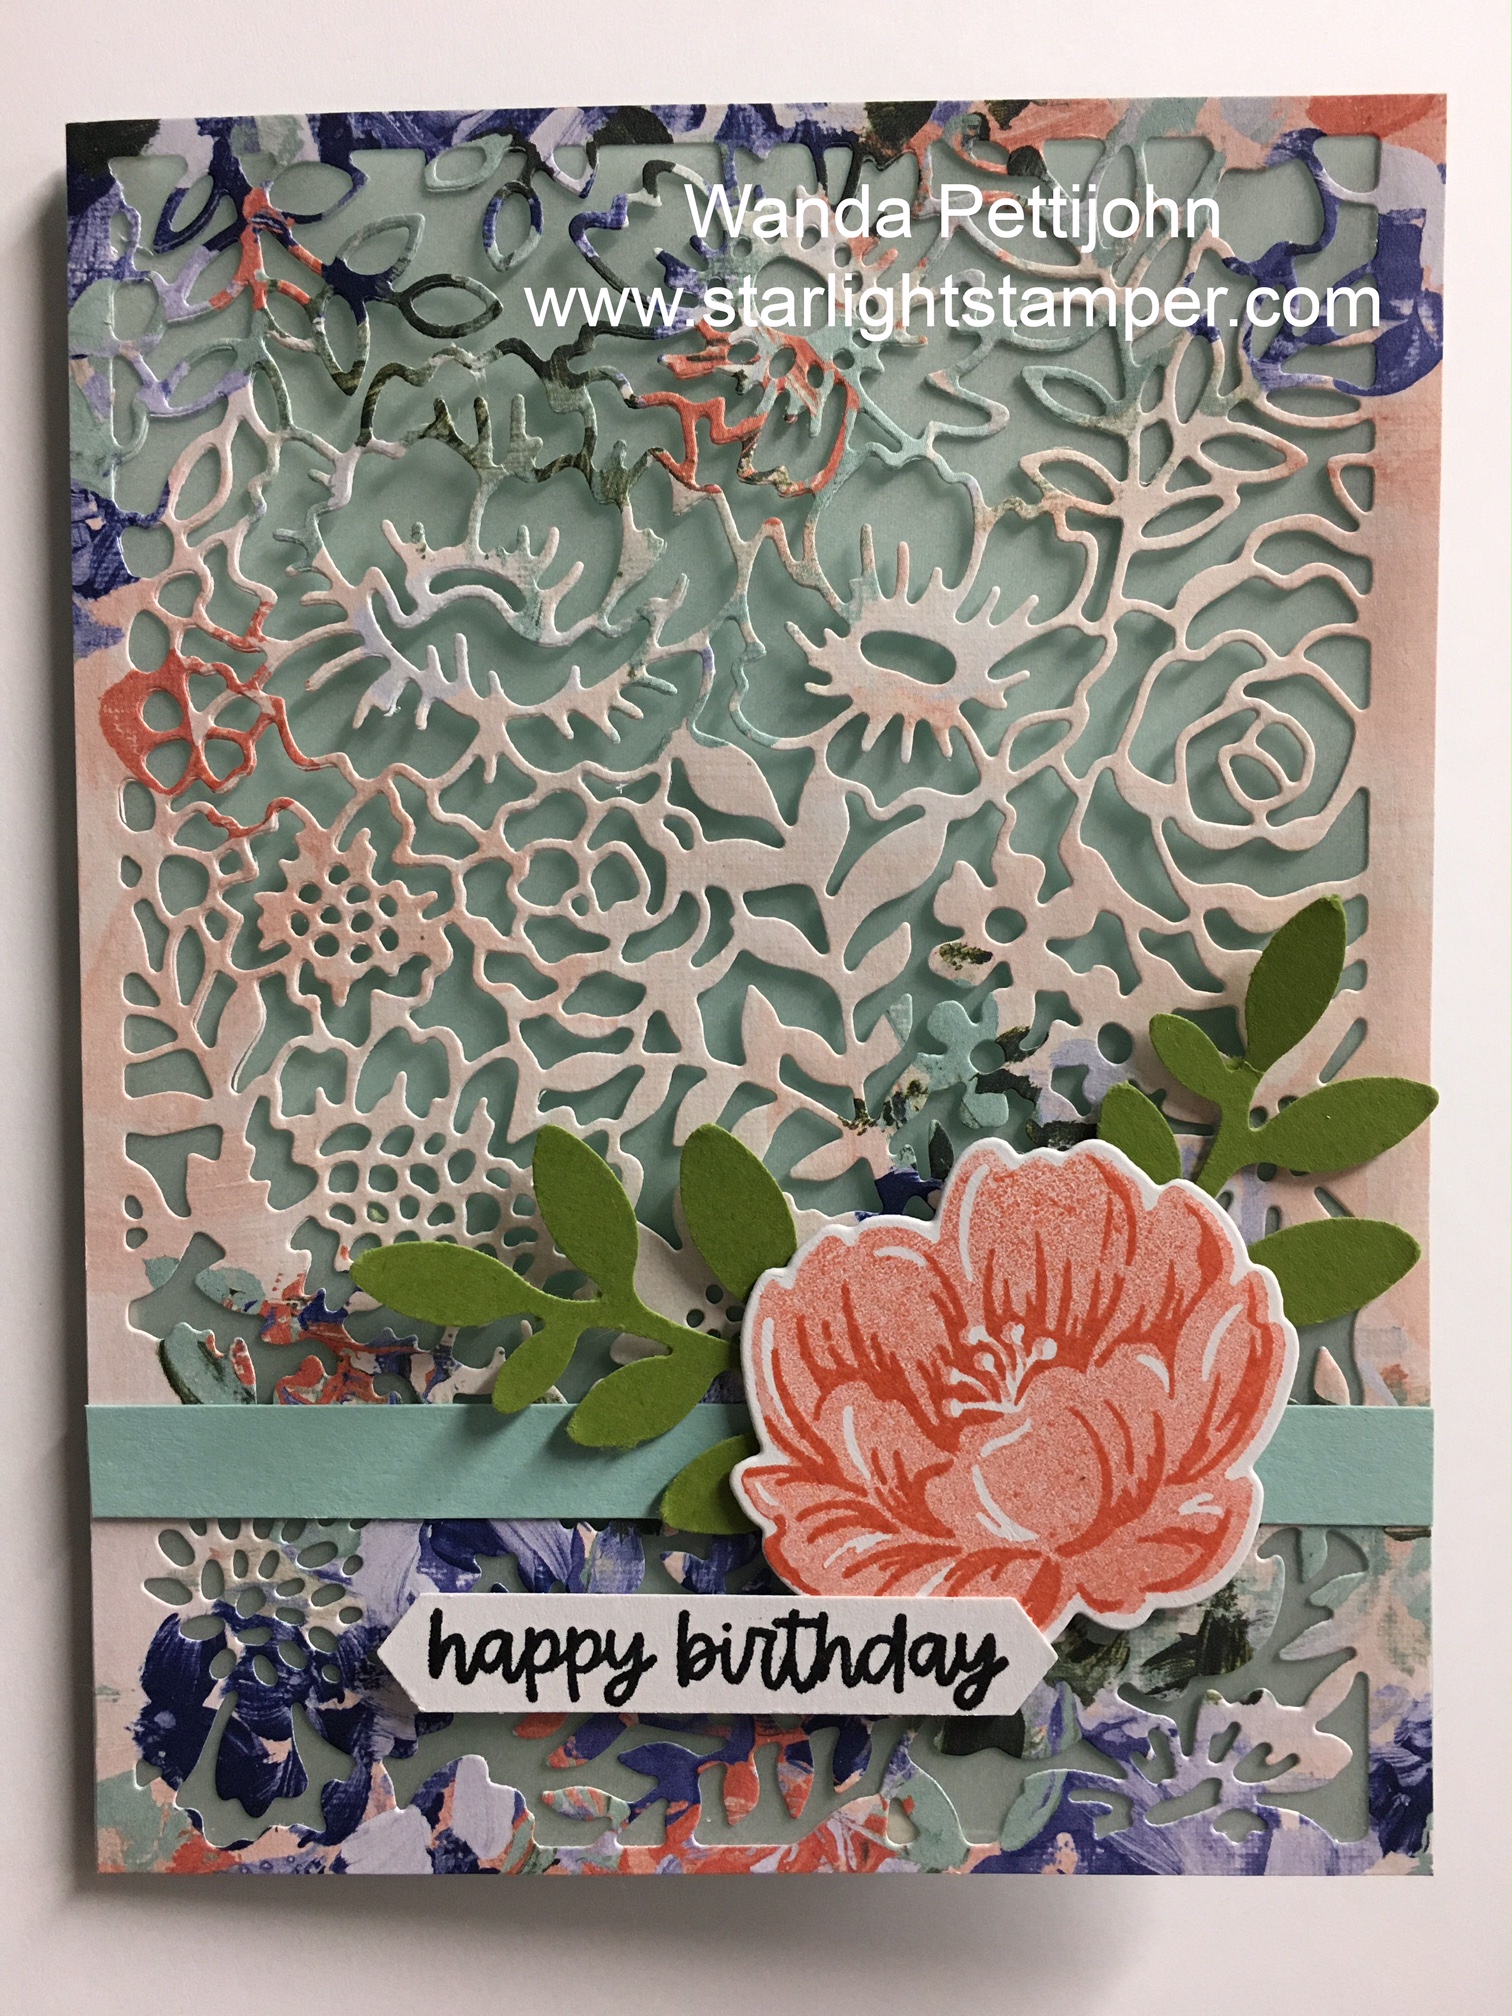
The base of my card is a folded half-sheet of Basic White card stock. This card opens on the right and the fold is on the left. 

I cut a 4-1/8" x 5-3/8" piece of Designer Series Paper (DSP) from the "Country Floral" 12" x 12" package. 

The focal piece is a 4" x 5-1/4" piece of Basic White. The images were stamped  using Granny Apple Green and So Saffron ink. 

For today's card I die cut the squares from the "Stylish Shapes" die set. I used the smallest and second smallest squares in that set. I nestled them into each other and taped them with some post it tape so they wouldn't shift when I die cut them on Balmy Blue card stock. I glued the corner areas together so there was a tiny square opening. Then small Dimensionals were added to the squares. I set the piece in place on the front of the card.

Next I added Dimensionals to the back of the flowers and set them in place. Now at this point it dawned on me that I needed to add some words and I wanted them to be added directly to the front of the card and not layered. I  used the words from the "Days to Remember" set with Granny Apple Green ink. The Basic White piece was taped to the DSP and Dimensionals were added to the back and set in place on the front of the card.

I added some Wink of Stella to the Mango Melody colored centers of all of the flowers and the card was done.

I like when I can use up some of the stuff I have sitting around and hopefully I will be able to get my worktable cleaned off.  I will be surprised to see what is under all the mess!! LOL

Thank you SO very much for taking your time to stop in and see today's birthday card,
Wanda

Friday, March 03, 2023

Color & Contours, Country Floral Lane, Thinking of You Card, Stampin' Up!

Hello! I'm so happy you are here! I have a fun card to share with you today. I found this fun layout here. I was going to make my card the same as in the video but I didn't have the mint colored checked paper so I just took what I had and went with it. I also was not fond of the open area on the card so I added the scalloped rectangle to fill in there and I was much happier with the look. 

The base of the card is a folded half-sheet of Poppy Parade card stock. Take the piece and score it at 5/12".  Then cut the card stock in half on the short 8-1/2" side. Now you have two scored pieces. You're going to be making two cards using this technique. Not so much a standard technique but just cutting the Designer Series Paper (DSP) makes it into two cards. This card will open at the bottom and the fold will be at the top. 

I cut a sheet of Basic White card stock into four 4" x 5-1/4".  Two will go on the insides and two will go on the front.

Cut your DSP (from any design you like, mine is from the "Country Floral Lane" 12" x 12" package). The DSP measures 3-7/8" x 5-1/8". You need two pieces that will compliment each other. Stack them together and turn one over. Cut the bottom right corner off. I measured mine at 2-1/4" on the right side and on the bottom. Save the corner pieces you cut off.

Tape the pieces to the Basic White card stock as you see in the photo. I used some white ribbon I had on hand (probably retired) and I taped the ends to the back on the piece using scotch tape. Then I taped the piece to the Basic White piece.  Dimensionals were added to the back and then the piece was set in place on top of the card base.  I tied a bow for each one and I glued it to the center of the taped ribbon.

The scalloped rectangle panel is from the "Color & Contour" bundle. I don't use it often because the slits in the sides are actually open. I turned the piece over and carefully taped the slits closed using scotch tape. 

Next I stamped the words from the recently retired "Beautifully Happy" set using black Memento ink.

The flower is from the "Colors & Contour" set and was stamped using black memento ink and using the matching stamp, I stamped the petals using Pumpkin Pie ink. The piece was then fussy cut out. The second flower was stamped using Daffodil Delight. I used the light Pumpkin Pie Blends pen for the flower's center and Daffodil Delight Blends for the Pumpkin Pie flower's center. A Dimensional were added to the back of the flower. I punched out the leaves from the "Bough Punch" using Mossy Meadow card stock. I snipped off the bottom leaf and affixed it to part of the Dimensional on the back of the flower and I set it in place on the rectangle. The 4" x 5-1/4" piece of Basic White piece was added to the inside of the card and the card was done. 

The other card doesn't have any words yet. I'm not sure what I want to add to it so I'm going to set it aside and think about what I need or just wait until I need it.

This is a fun layout to play with and you end up with two cards in no time at all.

Thank you SO very much for taking your time to stop in and see today's card,
Wanda

Thursday, March 02, 2023

Beautifully Happy, Thinking of You Card, Stampin' Up!

Hello! I'm so happy you stopped in to see today's card. I want to share with you how to make this easy card. There's not a lot to it so it goes together quickly.

First I took a folded half-sheet of Basic White card stock and using the die from the "Basic Borders" die set I cut the right front side off 2-1/4" on the bottom and top edge and centering the point at 2-3/4" (the center point of the card edge).

I took a 5-1/2" x 2" piece of Granny Apple Green card stock and cut the piece to match the Basic White edge. I used the piece I had cut off as a guide for the die to line up and I cut it on my Big Shot. Now keep in mind here, I had no idea where I was going with this card. I just knew I wanted the right side to have that pointed edge with a pointed edge layer. 

My "Beautifully Happy" set was still sitting out (imagine that! LOL). I stamped the larger flower cluster from that set  using black Memento ink. Then I colored in the flower using both the light and dark Balmy Blue Blends pens. And I colored in the leaves, buds and stems using the Granny Apple Green Blends pen. And for the center of the large flower I used the light Daffodil Delight Blends pen. 

The words are from the same set and were stamped using black Memento ink.

Once the words were stamped I glued the Granny Apple Green piece to the back of the card front.

Next I cut a 4-1/4" x 5-1/2" piece of Designer Series Paper (DSP) from the "Country Floral Lane" 12" x 12" package. I had purchased that DSP for some Valentine's Day cards and thought I would be adding it to the pile of DSP I wouldn't be using again. But I see there's lots I can still do with that DSP that is beyond Valentine's Day! So expect a few more card using some of that DSP.  I also needed a 4-1/4" x 5-1/2" piece of Basic White card stock to support the DSP. I did cut that just a hair shorter all around. To do that I just cut the piece on the inside of the line on my paper cutter. That's a hair in my book. Then I glued the DSP to the Basic White piece. I figured if the DSP hung over too much I'd just trim it but after gluing it to the inside of the card it was just fine. I opted for glue because I knew I'd have some wiggle room to move it around a bit to get it straight. I closed my card the right side was hanging over a little bit so I took it to my paper trimmer and cut it off and that was it. The card was done and for not knowing where I was going with it, I got to a destination I was happy with.

Thank you SO very much for taking your time to stop in and see today's thinking of you card,
Wanda

Wednesday, March 01, 2023

Adorable Owls, Artistically Inked, Friendship Card or Thinking of You Card, Stampin' Up!

I'm happy to see you here today. I have a fun card to share with you. I found it on Pinterest but as usual, I didn't pay attention as I was making it that it ended up different but yet sort of the same. You can see the original card here.  Read on to see how I made the card. The link doesn't give a lot of information so I had to do my own thing.

The base of the card is a folded half-sheet of Basic White card stock. This card opens on the right and the fold is on the left.

I cut a 4-1/4" x 5-1/2" piece of Designer Series Paper (DSP) from the "Dainty Flowers" and along with the "Adorable Owls" set retired at the end of February. I liked playing with both. I taped the DSP to the front of the card base. I just had to make one more because this one was just too beautiful to pass up.

When I saw the oval flower ring on the card I was sold, I wanted to make that card. I didn't like the idea of fussy cutting that ring but if you start on the inside it's easier to hold when cutting the outside. I added small Dimensionals on the back of the flower ring. Before removing the backing on the Dimensionals, I set the piece on the front of the card base and made a pencil mark where the bottom flower would be. Then I removed the backing on the Dimensionals and set the piece in place.

The owl was stamped using black Memento ink and was fussy cut. The bow is from one of the other owls in the set and it was fussy cut from that owl. I read in the original post that the owl was colored in using Smoking Slate Blends pens. I though it was a bit too dark but I went with it anyway. I colored in the eyes using the light So Saffron Blends pen and the light Granny Apple Green Blends pen. And the owl was colored in using the both light and dark Smoky Slate Blends pens. The bow was colored in using Fresh Freesia. I used my Blender pen because I only had the ink pad in that color. The bow was then glued to the head of the owl.

I set the owl in place using glue where it covers the flowers. I tied a Fresh Freesia bow and glued it to the bottom part of the owl.

The words are from the "Artistically Inked" set and were stamped using black Memento ink. Then I die cut it with the ribbon die from the "Stylish Shapes" set. I set it in place on the card using one small Dimensional on the upper left area and two on the right side and a dot of glue on the flowers under the piece. And the card was done.

Now if you look at the original card, there was another two layers that were added under the oval. I wasn't paying attention and forgot about those two layers. The card does look nice as it is and I think it's the fussy cutting of the floral oval that really makes this card!

Thank you SO very much for taking  your time to stop in and see today's friendship card,
Wanda

Tuesday, February 28, 2023

Amazing Owls, Artistically Inked, Friendship Card, Stampin' Up!

Hello. I am glad you're here to see today's fun card. I found it on Pinterest and thought I'd make one. I am going to miss this set. The three owls in it were SO darn cute! I have made quite a few cards using the set so I have to look at it as I did get plenty of use out of it. So here's where you can see the original card and you can see how I made it. 

The base of the card is a folded half-sheet of Basic White card stock. This card opens on the right and the fold is on the left.

The panel on the left was cut as follows. The Balmy Blue piece measures 5-1/2" x 2-1/4" and the Basic White card stock was cut at 5-1/4" x 2" and textures using the "Painted Texture" embossing folder. I glued the textured piece to the Balmy Blue piece and then I taped the two layers in place on the front of the card. I lined up the top, bottom and left side as equally as possible.

Next I cut the square pieces at 3-1/2" x 3-1/2" for the Balmy Blue piece and 3-1/4" x 3-1/4" for the Designer Series Paper (DSP). The DSP is from the "Dandy Designs" 12" x 12" package. I taped the two squares together. Dimensionals were added to the back and the piece was set in place on the front of the card. The right edge of the square piece is about 1/4" from the edge of the card base and about 1/2" down from the top.

The owl from the "Amazing Owls" set was stamped on a piece of Basic White card stock and die cut using the 2-1/8" circle die from the "Layering Circles" die set. And a Balmy Blue scalloped circle was die cut using the 2-9/16" circle die from the same set. 

Blends pens were used to color in the owl. I used the light Crumb Cake for the body. I was going to use the dark one for the highlights but chose to use the other end of the pen. I have found that the writing side seems to color a bit darker. The beak and feet are colored in using the dark Petal Pink pen and the eyes are the light Balmy Blue pen. I added Dimensionals to the back of the own instead of the back of the Balmy Blue piece. Either way looks fine but I think the Dimensionals on the back of the Balmy Blue piece would look a bit better.

The words are from the "Artistically Inked" set using black Memento ink on a scrap piece of Basic White card stock. I die cut it using the second to the smallest stitched circle die from the "Stylish Shapes" die set. I set the piece in pace with a Dimensional at the bottom and a bit of mono glue on the top.  And that was it, the card was done.

Isn't it cute? I love the DSP, the colors in it are so pleasing to the eye. I have SO much of that paper left and it expires at the end of the month too. It was a Sale-a-Bration item. It's heading off to the mail box in a couple of days. Every month I send a card to a friend and I think she would really like to receive this one. So I'll be setting it aside for her.

Thank you SO much for taking your time to stop in and see today's friendship card,
Wanda

Monday, February 27, 2023

Adorable Owls, Beautifully Happy, Thinking of You Card, Stampin' Up!

I'm happy to see you here today! I have a fun, quick and easy card for you to make!

The base of my card is a 4-1/4" x 5-1/2" piece of Fresh Freesia card stock.

Next I cut a 8-1/8" x 5-3/8" piece of Basic White card stock and I folded it in half. I taped that to the Fresh Freesia piece.

Then I took a piece of Designer Series Paper (DSP) from the "Dainty Flowers" 12" x 12" package and cut it at 3-7/8" x 5".  I took the second largest stitched circle from the "Stylish Shapes" die set and die cut the upper part of the DSP. Now I should have used the backside of the DSP for the inside of the circle.  What I did was I took a piece of Basic White card stock and die cut a circle the same size. Then I took the Fresh Freesia ink pad and my Blending Brush and scrubbed on some ink.  Using the other side of the DSP circle would have been a lot quicker and easier!!  So back to the DSP, I added Dimensionals behind it and set it in place on top of the folded Basic White piece. Then I glued down the circle. I chose to use glue because it gives me a little wiggle room to get it moved into the exact place I want it.

The owl is from the "Adorable Owls" set. They were stamped on a scrap piece of Basic White card stock and fussy cut. I colored it in using my dark Petal Pink Blends pen on the body and my light Pumpkin Pie Blends pen on the feet and beak. I colored the eyes in using my light Highland Heather Blends pen and that was it for the coloring! Pretty simple. Dimensionals were added to the back of the owl and it was set in place inside the circle.

The words are from the "Beautifully Happy" set and were stamped using black Memento ink on a scrap piece of Basic White. I punched them out using the "Dual Oval" punch. And I also punched out the scalloped oval from the same punch using a scrap piece of Fresh Freesia card stock. I'm almost out of Fresh Freesia card stock and the dilemma here is, do I order more or just use it till it's gone? It's going to retire in a few months and I really don't want to be stuck with a lot of it. Maybe I should go for the win and just use it up. I don't think I have ever done that before with in-colors!!!  LOL  Back to the ovals. I taped them together and then added Dimensionals to the back and I set it in place on the front of the card. And the card was done.

This was a fun, quick and easy card to make and it would have been quicker and easier had I used the backside of the DSP!!! But you know this so when you make yours you can decide which way you'd like to go with that!

I thank you SO very much for taking your time to stop on and see today's thinking of you card,
Wanda

Sunday, February 26, 2023

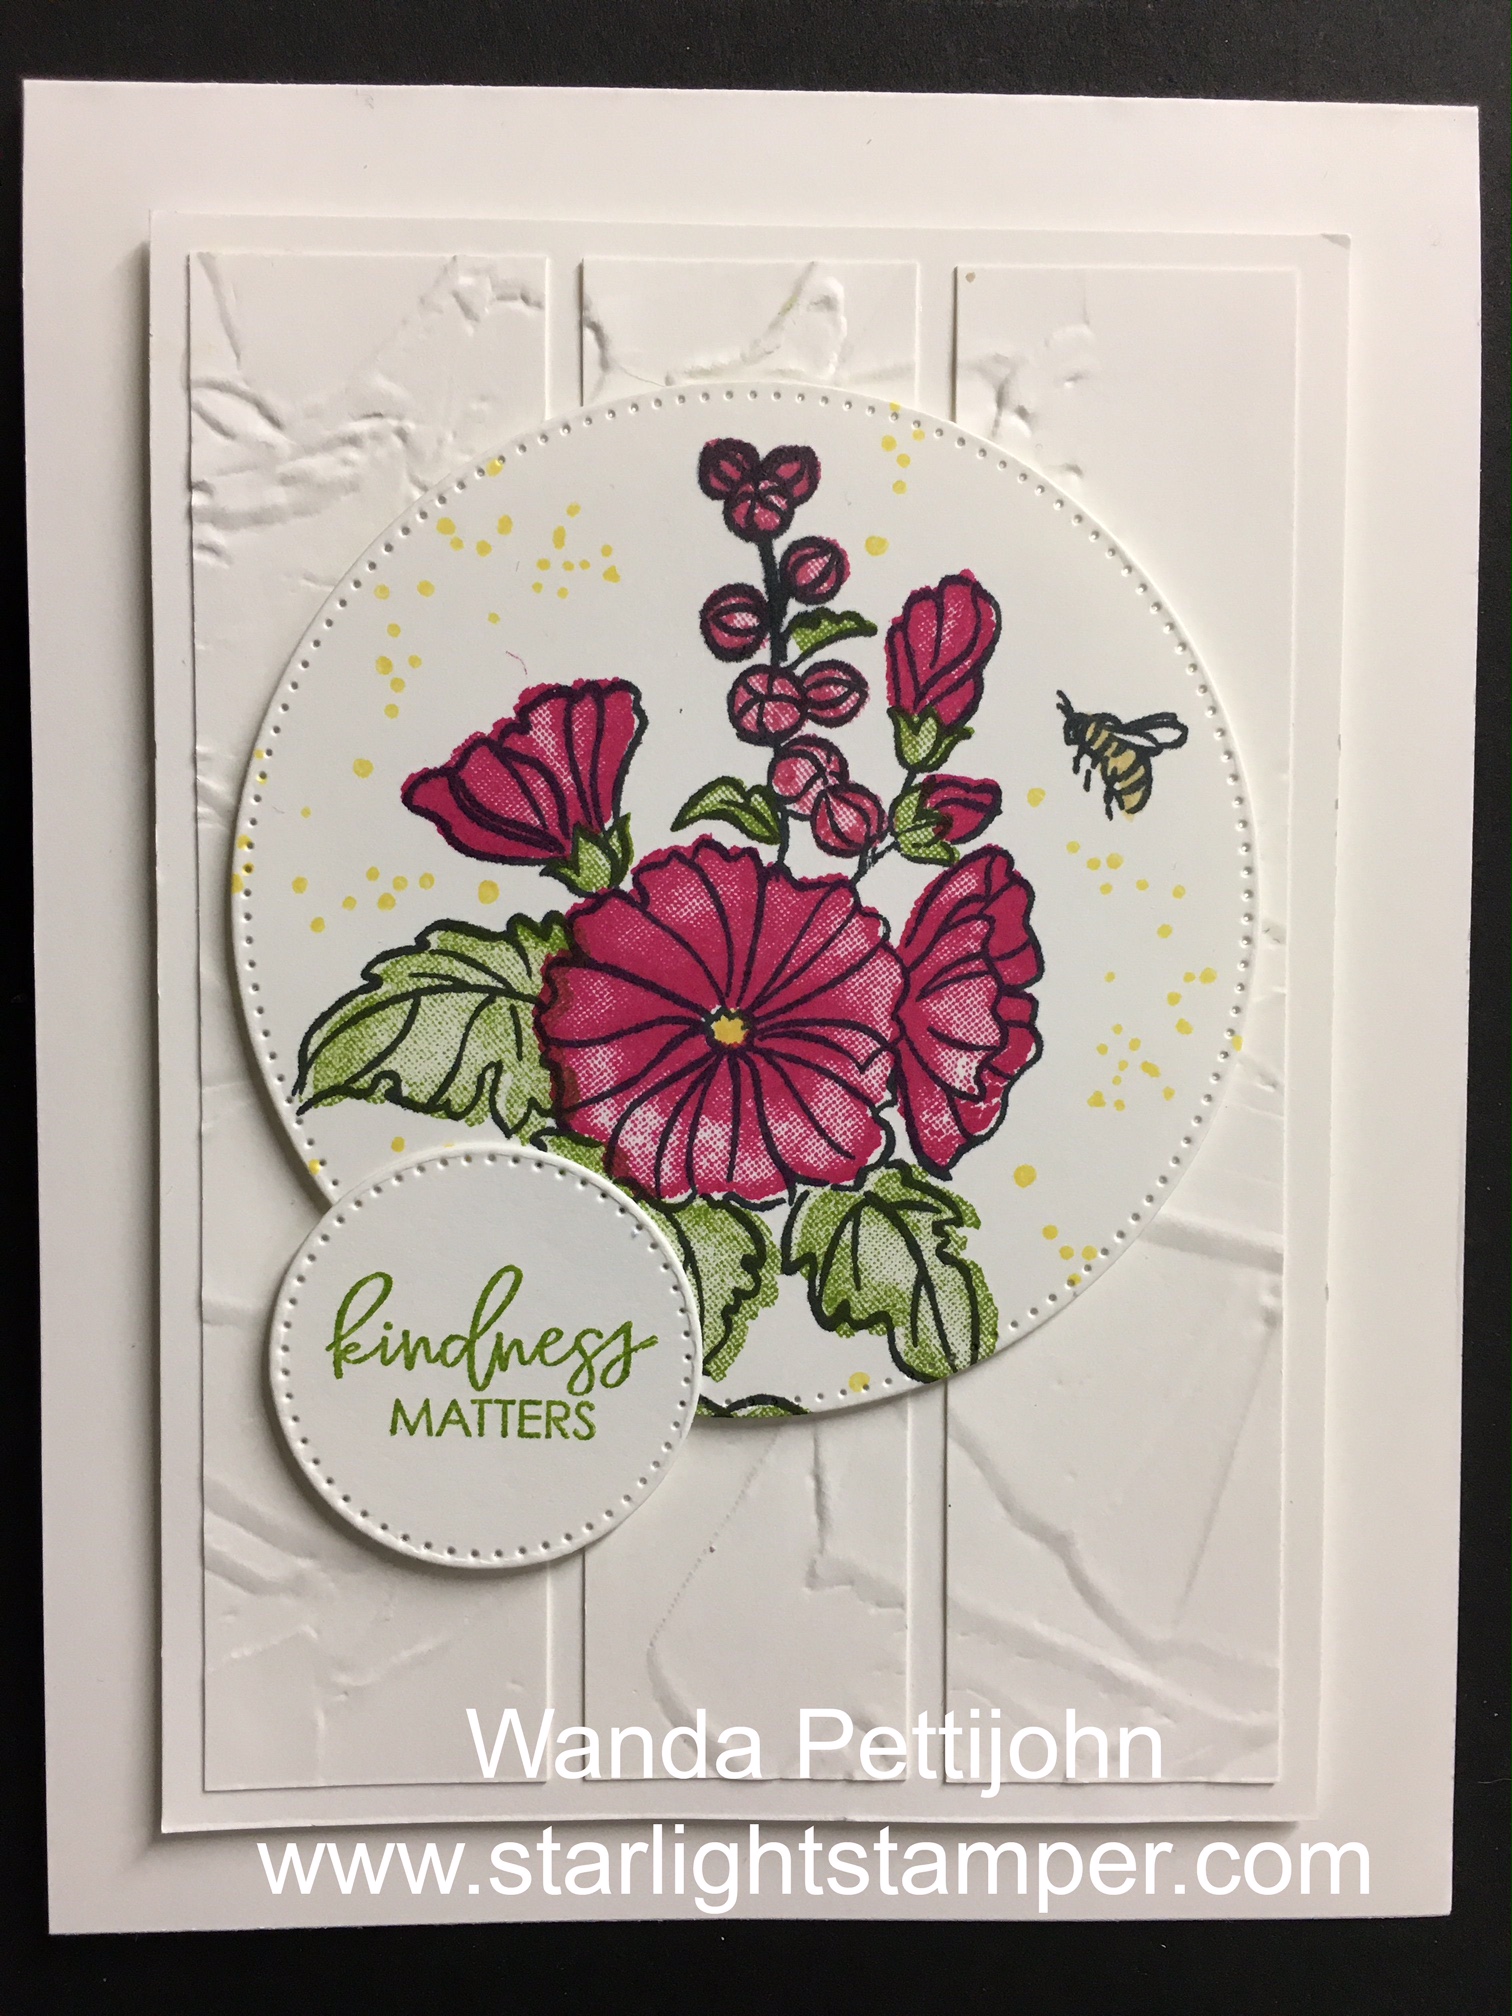
Beautifully Happy, Thank You Card, Stampin' Up!

Hello! I'm glad you found your way here today. I have a pretty card to share with you that I found on Pinterest. I just though it was so pretty that I had to make one. You can see the original card here.

The base of the card is a folded half-sheet of Basic White card stock. The piece measured 4-1/4" x 11" after cutting. The card opens on the bottom and the fold is on the top.

I cut a 3-1/2" x 4-3/4" piece of Basic White card stock for the layer. Then I cut a 3" x 4-1/2" piece of Basic White card stock that I textured using the "Painted Texture" embossing folder. That piece was then cut into three 1" strips. Those strips were affixed to the 3-1/2" x 4-3/4" piece of Basic White card stock. I used glue to set mine in place. Then that piece was set in place on the front of the card using Dimensionals.

The flower is from the "Beautifully Happy" set and was stamped using black Memento ink. I used Granny Apple Green for the leaves and Melon Mambo for the flowers. I used my Daffodil Delight marker for the center of the larger flower and I stamped the dots using the Daffodil Delight ink pad. The cute little bee was added and colored in using my Daffodil Delight marker.  Once the piece was stamped I die cut it using the largest stitched circle die in the "Stylish Shapes" set. Dimensionals were added to the back and the circle was set in place on the front of the card.

The words are from the same "Beautifully Happy" set and were stamped using the Granny Apple Green ink pad and then die cut using the smallest stitched circle die in the "Stylish Shapes" set. I set it in place on the front of the card using a Dimensional and tape. And the card was done. 

I just love that cute little bee!! This was a fun, quick and easy card to make. There's quite a few pieces to it but it went together quickly in spite of that.

Thank you SO very much for taking your time to stop in and see today's thank you card,
Wanda

Saturday, February 25, 2023

Adorable Owls, Go To Greetings, Just a Note Card, Stampin' Up!

Hello! I'm happy you could make it here to see today's "just a note" card!  I thought I would make a card today using the "Adorable Owls" set since it will be retiring at the end of the month.  It's been a fun set to play with.  I did find this card on Pinterest but I didn't have much luck finding the measurements so I guessed and I'll share those measurements with you. You can see the original card here

I just love the colors of this card.  And here's how I made it.

The base of the card is a folded half-sheet of Fresh Freesia card stock. This card opens on the bottom and the fold is on the top.

I cut a 4" x 5-1/4" piece of Basic White card stock for the next layer.

Then I die cut the panels. The Designer Series Paper (DSP) is from the "Dandy Designs" 12" x 12" package. There's lots of sheets in that package and it was free during Sale-a-Brations (that is done at the end of the month). The panels were die cut using the largest stitched rectangle in the set of 4 dies from the "Rectangle Stitched" frameits set. I did find it a bit of a challenge to get those three pieces taped evenly across the Basic White piece and the top and bottom are a bit wider than the sides. Once the panels were taped to the Basic White piece, I taped a 6.5" piece of ribbon to the back of the layers. Then I taped that to the front of the card base.

The words are from the "Go To Greetings" set and were stamped using black Memento ink. I die cut them using the 2-7/16" die from the "Layering Circles" die set. I made sure the words were towards the bottom of the circle. Then I die cut a scalloped Fresh Freesia circle using a die a bit larger from the same set. I taped the two circles together and added Dimensionals on the back. Then I set it in place on the front of the card, centering it as much as I could eying it.

The owl is from the "Adorable Owls" set and I fussy cut it out. Then I colored it using light Crumb Cake and light Pumpkin Pie Blends Pens. I didn't have the Fresh Freesia one so I used my Blender pen and the Fresh Freesia ink pen. I set the owl in place using Dimensionals.

A Fresh Freesia bow was tied and glued in place. I taped a 4" x 5-1/4" piece of Basic White card stock to the inside and the card was done.

Thank you SO very much for taking your time to stop in and see today's note card,
Wanda


Friday, February 24, 2023

Painted Poppies, Beautifully Happy, Thank You Card, Stampin' Up!

Hello!  I'm happy to share this thank you card with you today. Do you ever look through your stamp sets and realize that some are going to be retiring soon?  I was looking for words in my sets and I saw the "Painted Poppies" set and thought about how long I've had it. I am pretty sure this set will be retiring this year. So I thought I'd make a card from it and then get back to my other new sets. Sometimes you need to take a step backwards before you can move forward again!

So to make my card I cut a sheet of Basic White in half so it measured 5-1/2" x 8-1/2". I folded it in half so it open don the bottom and the fold was on the top.

Next I cut a 4-1/8" x 5-3/8" piece of Real Red card stock and a 4" x 5-1/4" piece of Basic White card stock. 

I stamped the flowers from the "Painted Poppies" set using black Memento ink on the Basic White piece. I centered the image and then I stamped on either side of it with the same stamp to fill in the space.

Next I took the third largest stitched circle in the "Stylish Shapes" die set and I die cut the flowers from the stamped Basic White piece. Then I die cut a scalloped Real Red piece from the larger piece I just cut for the layer. I taped the circles together. Then I colored in one flower within the circle. I taped the circle over the opening in the Basic White layer. The Basic White layer was taped to the Real Red layer.

The ribbon was cut and the ends taped to the back of the layers using scotch tape. Dimensionals were added to the back and the piece was set in place on the front of the card base.

The words are from the "Beautifully Happy" set and were stamped using black Memento ink. I took a scrap piece of Real Red card stock and using the "Dual Oval" punch, I punched out the scalloped oval. And the words were punched out using the smaller oval on that same punch. I taped the ovals together and added Dimenisonals to the back. I set the piece in place on the front of the card.

A bow was tied and glued in place and the card was done.

This isn't really what I pictured in my head. I think the background could have used some texture, it's kind of plain looking. 

I thank you ever so much for taking your time to stop in and see today's thank you card,
Wanda

Thursday, February 23, 2023

Beautifully Happy, Thank You Card, Stampin' Up!

Hello! I'm happy you are here to see today's card. It was fun and easy to make and I'm sure you'll find it is too! I saw the card on Pinterest but I did change a couple of things. You can see the original card here

The base of my card is a folded half-sheet of Basic White card stock. The card opens on the right and the fold is on the left.

I cut a 4-1/8" x 5-3/8" piece of Poppy Parade card stock for the layer.  On top of that is a 3-5/8" x 4-7/8" piece of Vellum. Then a 3-1/8" x 4-3/8" piece of Basic Black card stock and the top layer, focal piece was cut at 3" x 4-1/4".  

I stamped the flower from the "Beautifully Happy" set using black Memento ink. I stamped the flowers with Poppy Parade ink and I stamped the leaves with Pear Pizzazz ink. Then I colored over the flower with my Wink of Stella pen.

The piece was textured using the "Painted Texture" embossing folder.

The words are from the same "Beautifully Happy" set and were stamped using black Memento ink on a scrap piece of Basic White card stock. I punched out the words using the "Dual Punch", and I also punched out the scalloped oval from the same punch using a scrap piece of Poppy Parade card stock. I was now ready to assemble the card.

I taped the Poppy Parade piece to the card base.

Next I glued the Basic White piece to the Basic Black piece and then I taped that to the vellum. In doing this I could see where the tape is on the vellum plus where the layer is so I could add Dimensionals so they wouldn't show through the vellum. Once the Dimensionals were added to the back of the vellum I set it in place on the front of the card.

The ovals were taped together and Dimensionals were added to the back. Then the piece was set in place on the lower left and the card was done.

If I were to make this card again I think I would have made the card base Basic Black. It just looks like it needs more black. But it's still pretty as it is! It was fun, quick and easy to make.

Thank you SO very much for taking your time to stop in and see today's thank you card,
Wanda

Wednesday, February 22, 2023

Two-Tone Flora, Artistically Inked, Birthday Card, Stampin' Up!

Hello there! Today I have another card using the "Two-Tone Flora" bundle. It was still sitting out.  Can you believe that?  LOL I never put anything away right away! I wait until I have about a 10" x 10" space to work at and then I start putting stuff back! With that said, let me tell you how I made my card.

The base of my card is a folded half-sheet of Basic White card stock. It opens on the right and the fold is on the left.

I cut a 4-1/4" x 5-1/2" piece of Basic White card stock for the front. I die cut it using the large floral die from the "Two-Tone Flora" bundle. This time I made sure I moved the die so it was equal on both sides and it looked a lot better than yesterday's.  Live and learn, right?  And then pass on what you learned!! I glued this in place using Tombow mono glue. I used a sponge and sponged it on the back. I set it on a piece of waxed paper because I'm too lazy to clean my silicone mat after. It's just easier to toss the waxed paper and the small piece of sponge.

After setting the die cut background in place, I stamped four flowers from the "Two-Tone Flora" bundle using Poppy Parade ink for the color base and Merry Merlot for the details.  I die cut them with the matching die. 

Next I stamped the leaves using Soft Succulent ink and I die cut them using the matching die. 

The pieces were glued in place.

The words are from the "Artistically Inked" set and were stamped using black Memento ink. I die cut them using the second smallest die in the "Rectangle Stitched" die set. Dimensionals were added to the back and the piece was set in place. And the card was done.

This was a fun card to make and I really like the looks of the Poppy Parade ink with the Merry Merlot on top. I did set the flowers up in my Stamparatus so I could stamp them all quickly and easily.  The little tools in life that simplify things and make things quicker too!

I do thank you SO very much for taking your time to stop in and see today's birthday card,
Wanda

Tuesday, February 21, 2023

Two-Tone Flora, Beautifully Happy, Birthday Card, Stampin' Up!

Hello. I found a beautiful card for you to see today. You can see the original card here. I changed it just a little to fit with the supplies I have.

The base of the card is a folded half-piece of Orchid Oasis card stock. The card opens on the right and the fold is on the left.

I took a piece of Designer Series Paper (DSP) from the "Fancy Flora" 6" x 6" package and I cut it at 4-1/4" x 5-1/2" and taped it to the front of the card base.

Next I took the big floral die from the "Two-Tone Flora" bundle and die cut it from a 4-1/4" x 5-1/2" piece of Orchid Oasis card stock. I did have to trim the piece a little to make it more symmetrical. If I would have remembered from yesterday's die cutting I should have moved the die over about 1/8" from the edge of the card stock I wouldn't have had to trim anything. I'll try to keep that in mind the next time. I had lined up the left side and the top side before I die cut it. So moving it that 1/8" should do the trick. Next I took a piece of waxed paper (I could have used my silicone mat but I'm lazy and didn't want to clean it) and I put some glue down on it. I took a sponge and sponged the glue on the back of the die cut piece. Then the piece was set in place on the front of the card.

I stamped the flowers from the "Two-Tone Flora" set using Daffodil Delight ink for the main part of the flower and Calypso Coral for the details. The leaves were stamped using Soft Succulent ink. I stamped and die cut two of these.

The words are from the "Beautifully Happy" set and were stamped using Soft Succulent ink. I die cut them and set them aside.

I cut some Soft Succulent ribbon I had and taped it to the center of the card. Then the top flower was glued in place, slipping the top glued leaf under it.

Next I glued the other leaf down and then set the last flower in place using Dimensionals. 

The word piece was slipped in under the bottom flower with glue on the backside.

I had some Old Olive pearls so I set them in place on the front of the card. Unless you know the difference between the Old Olive and Soft Succulent colors you can't tell it's not the same. Well, now you can because I told you!!! LOL  A 4" x 5-1/4" piece of Basic White was added to the inside and the card was done.

This was a very fun card to make and I thought it was pretty simple too!

Thank you SO very much for taking your time to stop in and see today's birthday card,
Wanda

Monday, February 20, 2023

Two-Tone Flora, Best Family Ever, Fancy Flora, Birthday Card, Stampin' Up!

Hello. Today I have an fun card for you that I found on Pinterest. You can see the original card here. I had been struggling with this die. It's big and it covers the whole 5-1/2" x 4-1/4" card front.  I have plans for another card using this die. I'll share it with you in a few days. But for today I will tell you how I made this one. 

The base of my card is a folded half-sheet of Pool Party card stock. The card opens on the right and the fold is on the left. I cut a 4" x 5-1/4" piece of Basic White card stock and taped it to the inside.

Next I cut a 4-1/4" x 5-1/2" piece of Vellum. I did cut it just a bit shy of those measurements. 

Then I cut the Designer Series Paper (DSP) from the "Fancy Flora" 6" x 6" stack. The die is from the "Two-Tone Flora" bundle.  I glued this piece to the vellum. Dimensionals were added to the back and the piece was careful set in place on the front of the card base.

The flower is from the "Two-Tone Flora" set and was stamped using Calypso Coral ink. I stamped off on the larger flower part and used ink right from the pad on the detailed stamp. Isn't it a pretty flower? The leaves were made using the "Bough" punch on Old Olive card stock. There is a leaf stamp and die in the set but I wanted solid leaves.

I cut a 3/8" x 4-1/4" strip of Pool Party card stock and glued it about 1-1/4" from the bottom of the card. Then the flower was set in place using Dimensionals. I slipped the leaves under the flower with some glue on the ends. 

The words are from the "Best Family Ever" set and were stamped using black Memento ink. I punched them with the "Classic Label" (retired) punch. I was going to trim them on my paper cutter but since they fit inside this punch, I went with the punch. I really wanted them straight. Sometimes I have trouble trimming the smaller pieces. I set the words in place with a Dimensional on the left side and a dot of glue on the right side. And that was it, the card was done.

I am not a big fan of the card, I prefer to use that pretty DSP as is and not die cut. I have big plans for the flowers in the "Two-Tone Flora" set!! It's extremely versatile!

Thank you SO very much for taking your time to stop in and see today's birthday card,
Wanda


Sunday, February 19, 2023

Around the Bend, Fancy Flora, Thank You Card, Stampin' Up!

Good day to you! I'm so happy to share this fun card with you and the big mistake I made along the way. I found this card on Pinterest and you can see the original by clicking here.

The base of the card is a folded half-sheet of Soft Suede card stock. The card opens on the right and the fold is on the left.

I cut a piece of Designer Series Paper (DSP) from the "Fancy Flora" 6" x 6" stack. Here's where I made my big mistake yesterday and only discovered it today when I found this card. I had cut my DSP wrong and I could have gotten two cards from one sheet instead of three cards from two sheets.  So first cut the DSP at 2-1/8" from the left edge and 5-1/4" long, cutting from the bottom. Then the rest of the piece could have been used for the card I had made yesterday. I had just taken that piece and cut the piece up until it was the size I needed. So I wasted half a piece. But after cutting off the part I needed today I saw that whole piece I could have used yesterday. Live and learn!  And I'm ALWAYS learning!!! LOL  I added an Evening Evergreen layer behind the DSP that measured 2-3/8" x 5-1/4". I taped the two pieces together.

Next I took a 4" x 5-1/4" piece of Soft Succulent card stock and cut that in half at 2-1/8".  I textured both pieces using the "Painted Texture" embossing folder. I textured both because I figured I'd be making another one of these cards because I now know how to cut the DSP and also because it's SO pretty! I glued the DSP to the front of the card. I use glue because tape on textured card stock doesn't always stick as well as I'd like it to due to surface contact. Glue stays in place even if there are areas with no glue on them. Once that was glued on the right side of the card I taped the left side in place.

The words are from the "Around the Bend" set and were stamped using Evening Evergreen ink, though I think black Memento ink would have been fine too since the green was SO dark. I die cut the words using the 4th stitched circle in the "Stylish Shapes" die set. And the scalloped layer behind it was die cut using a die from the "Layering Circles" that was just a bit larger than the stitched circle die.  I taped the two circles together. Dimensionals were added to the back and the piece was set in place.

I added five crystal rhinestones that I had colored with my dark Mango Melody Blends pen. A 4" x 5-1/4" piece of Basic White card stock was taped to the inside and the card was done.

It's another very rich looking card. This DSP is fun to play with. There are other fun and brighter colors in the pack and I'll be diving into that to see what I can create or "learn from".  LOL

Thank you SO very much for taking your time to stop in and see today's thank you card,
Wanda